In the past, I’ve done almost all my own captures for my testing. Thanks to my fall in January and the fact that I’m now using a walker and a wheelchair to get around, that’s going to change. I’ve always purchased only gear that I thought I might use in my own (non-testing) photography. I’m still going to be doing that, but now my photographic horizons have been forced to narrow to what I can do in the studio, which is going to mean mostly macro work. That’s so far removed from the photography that most of my readers do that it means I won’t be testing a lot of gear that’s meaningful to them. The new GF lenses — the 30 T/S, 55/1.7, etc — are a case in point. It hasn’t taken much arm twisting to get me to agree to test lenses and cameras with other people making the captures.
I do a lot of slanted edge testing, and I’ll start there. The purpose of this page is to give instructions to those who wish to make slanted edge captures for me to analyze. I’ll try to balance my guidance to those things that are necessary, but I’ve found that there are lots of ways that these instructions can go wrong, so they’ll be fairly detailed.
Let’s start out with a visual. This is the sort of thing I’m looking for.
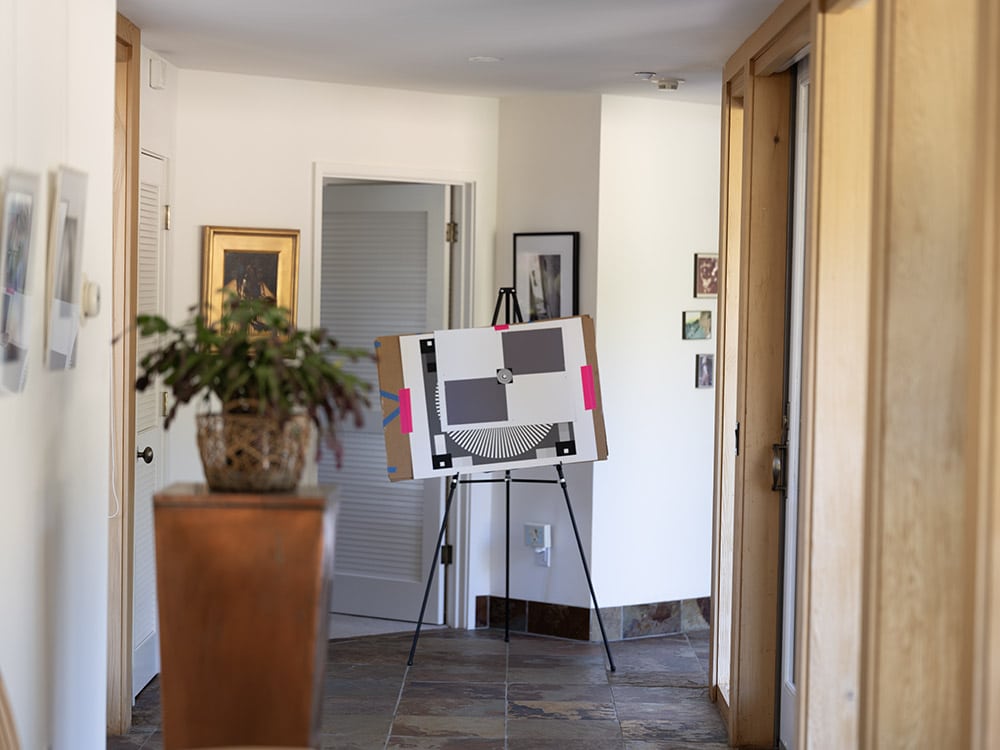
What we have here is a low-contrast slanted edge target with a zone plate for focusing.
- The target is printed on F-finish (Baryta) paper on an inkjet printer. It is rotated between 5 and 12 degrees — clockwise or counterclockwise, the direction doesn’t matter — so that the edges are slanted.
- The target is centered.
- The lighting is diffuse so that there are no specular reflections from the surface of the paper.
- The lighting is not too far from D55.
- The exposure is such that the paper white of the target is a stop or a bit more down from saturation.
- The image is made at base ISO.
- The distance from the subject to the camera is about 100 times the focal length of the lens (with a 50mm lens, that’s 5 meters distance). That’s a good number for 33x44mm sensors. For FF sensors, use around 140 times the focal length (7 meters with that 50 mm lens). For APS-C ones, use about 200 times the focal length (10 meters with a 50 mm lens).
- The camera is on a sturdy tripod and the self-timer was used to trip the shutter.
- The camera was in electronic shutter mode to minimize vibrations (EFCS is OK for all but the longest focal lengths).
- Critical focus was achieved (I did it with focus bracketing. You can do that, or you can make 3 or 4 exposures at each setting and let me pick the sharpest.
- The camera was set to produce a raw file. I want raw files from you all.
- I made images at whole f-stop spacing from wide open to f/11. I’d like you to do the same.
Ideally, I’d like you all to do the same things. But this test can deal with some variations. If you’re having trouble with reflections from the target, use matte paper and get twice as far away. If you’re outside, and you may need to go outside to get the distance you need, put the target in open shade or shoot on a cloudy day.
You can also place the target on the right hand side of the image. That, combined with the centered-target images like the one above, will allow me to do some calculations I can’t do with the target in the center. Here’s what that looks like:

Try to get the target perpendicular to the lens axis, but don’t worry if it’s not lined up perfectly.
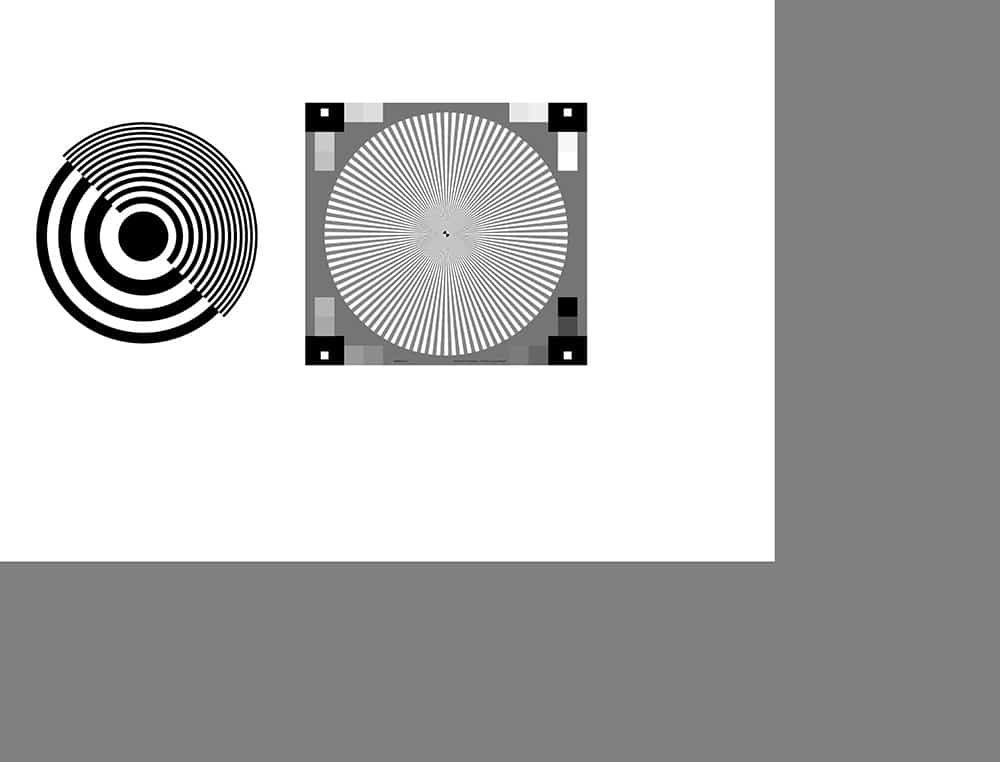
Here’s a low resolution version of the target I’d like you to use:
I’ll try to find a place to host the high-resolution version of the target. For now, send me a PM on DPR.
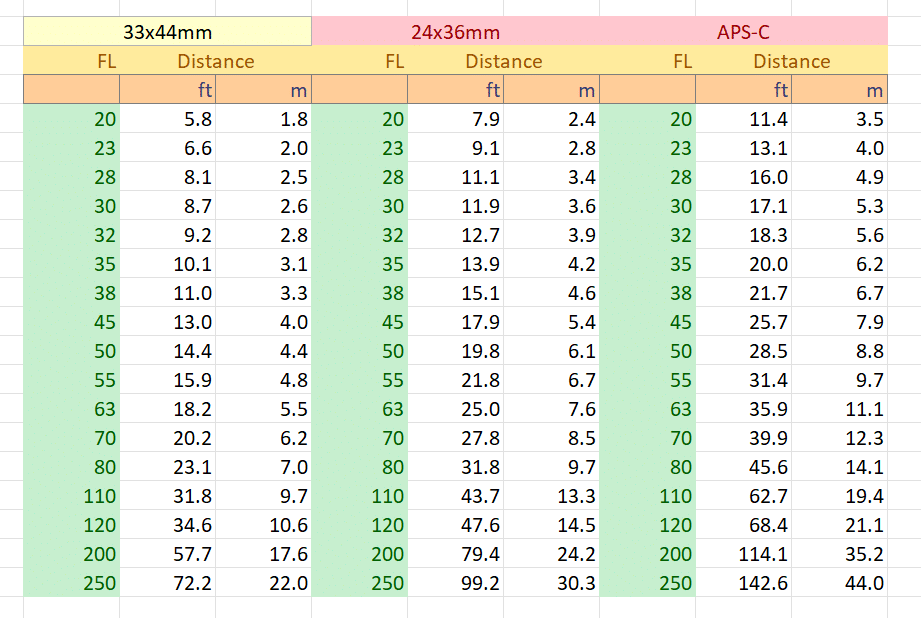
If you want to be precise about the target distances, here’s a table you can use: