This is a continuation of a series of posts on the Sony a7RIII. You should be able to find all the posts about that camera in the Category List on the right sidebar, below the Articles widget. There’s a drop-down menu there that you can use to get to all the posts in this series. You can also click on the “a7RIII” link in the “You are here” line at the top of this post.
Bayer sensors are subject to false color and pixel-level blurring. Most of us just live with that (Betterlight and Fovean users don’t have to). There’s a technology that’s been around for a long time that solves most of the problem: making multiple exposures with small sensor shifts and recombining them in postproduction so that each pixel in the combined image gets information from each color plane of the raw files. Imacon was a pioneer here. They used piezoelectric effects to accomplish the shifting, and you can still buy Hasselblad cameras with that technology. They are very expensive, significantly more so even than the already dear single shot cameras on which they are based, so their market penetration has been minuscule.
With the advent of internal body image stabilization (IBIS) in small inexpensive cameras, there was a mechanism for pixel-shift technology to be made available for near-zero manufacturing cost. These cameras already had the ability to move the sensor in very small increments, albeit with voice-coil actuators (VCAs) instead of piezoelectrical devices. All that was necessary was to design the VCA control system with sufficient precision and to write some firmware to repurpose it to achieve its new function. Olympus was very successful with this technology. A year or so ago Pentax came out with a camera that worked this way. And now Sony has, too.
I had three questions.
- What happens to real color?
- What happens to false color?
- What happens to sharpness?
I took five pictures of a Macbeth ColorChecker chart, one normally, and one with the pixel-shift feature turned on. When you invoke pixel shift, the camera automatically switched to electronic shutter mode, so be sure that your lighting sources don’t have flicker that could cause banding in the images. Once you’ve done that, you can press the shutter release once, and the camera takes four pictures with the sensor slightly shifted in each one.
You then fire up the Viewer component of Sony Imaging Edge, pick the four raw files that compose a pixel-shifted set, and tell the software to make a combined file. The combined file has the suffix ARQ, and, at this writing can only be opened by Imaging Edge. However, that software can export the file as either a TIFF or a JPEG.
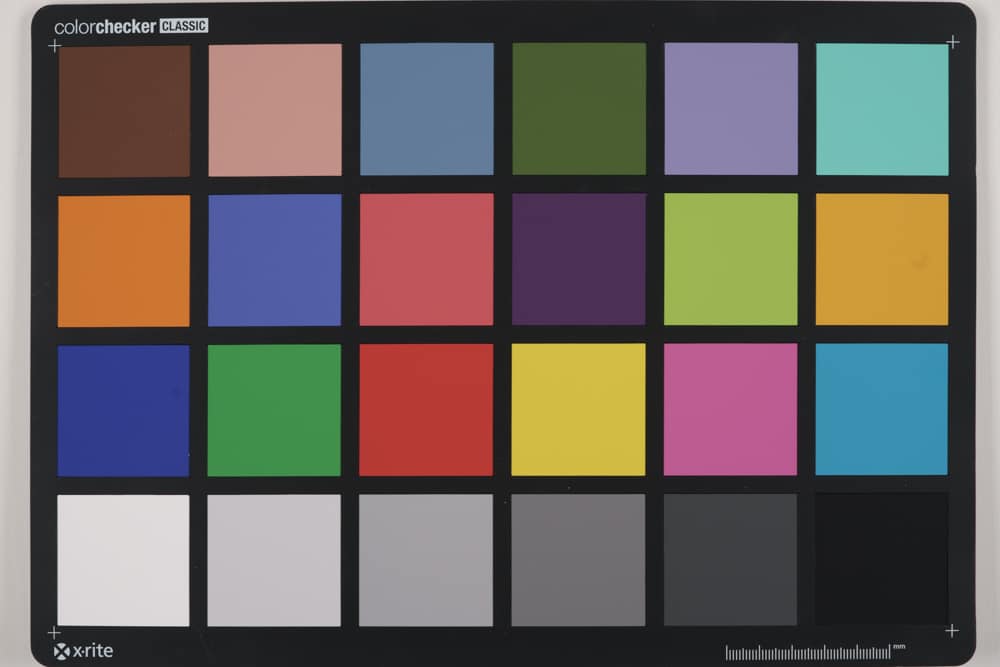
Here is a Macbeth CC shot as demosaiced by Imaging Edge with default settings and exported as a TIFF, then downsized in Lr and converted to a JPEG on export for Lr:
And here is an image made the same way, except that I used the pixel-shift feature, combined the images in Imaging Edge, and exported the combined file:
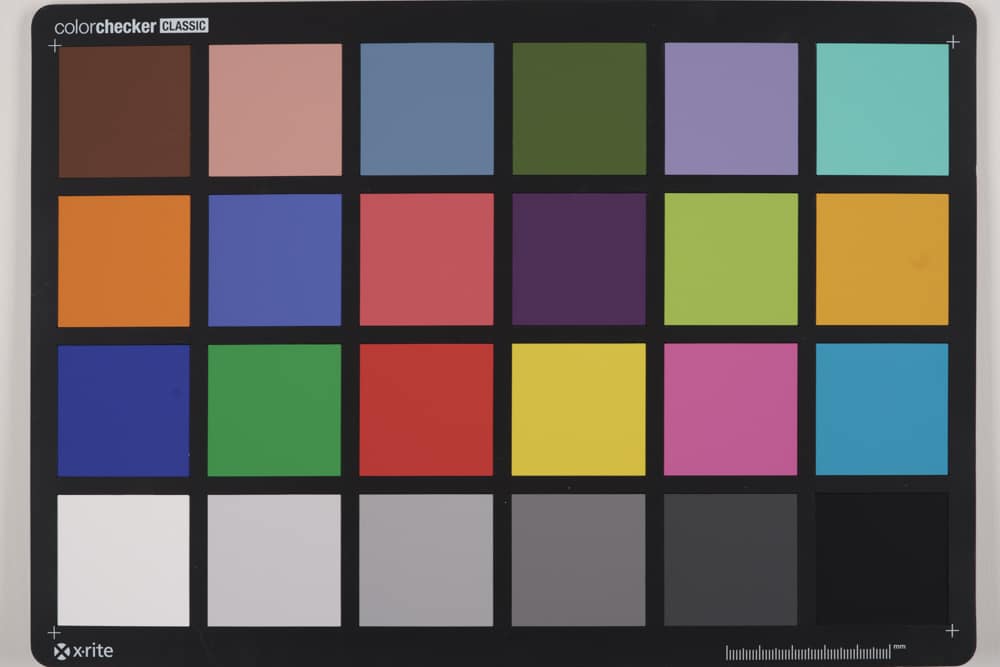
There is not much difference.
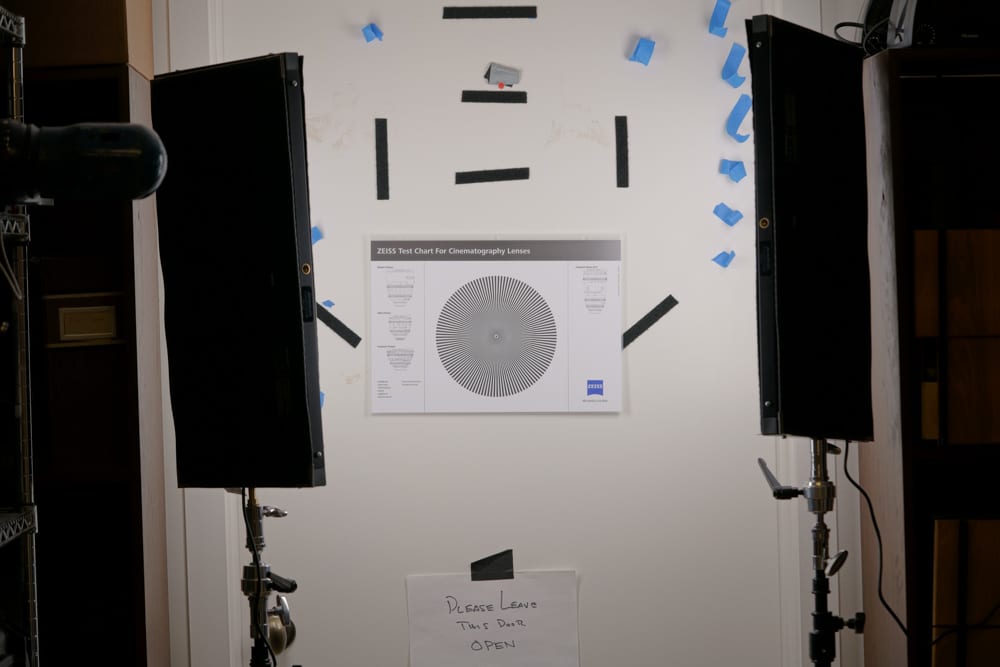
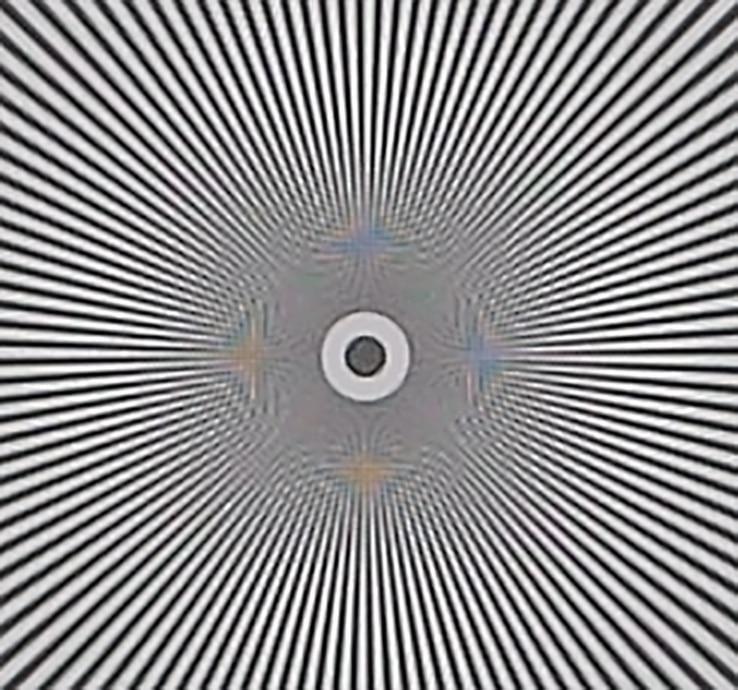
For the sharpness and false color tests, I used a Siemens Star. Here is a single shot from the four-shot series:
And this is four shifted images combined:
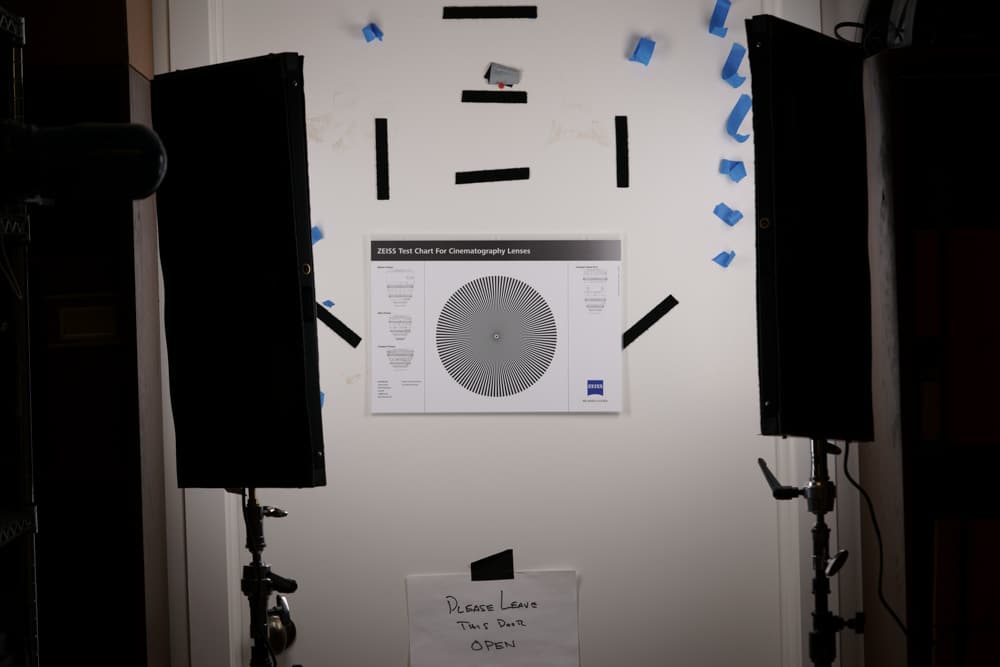
It is apparent that the tone curve has changed, with the four-shot image being darker.
Let’s look at a 300% magnification of the center, first with a single shot:
And now four shots combined:
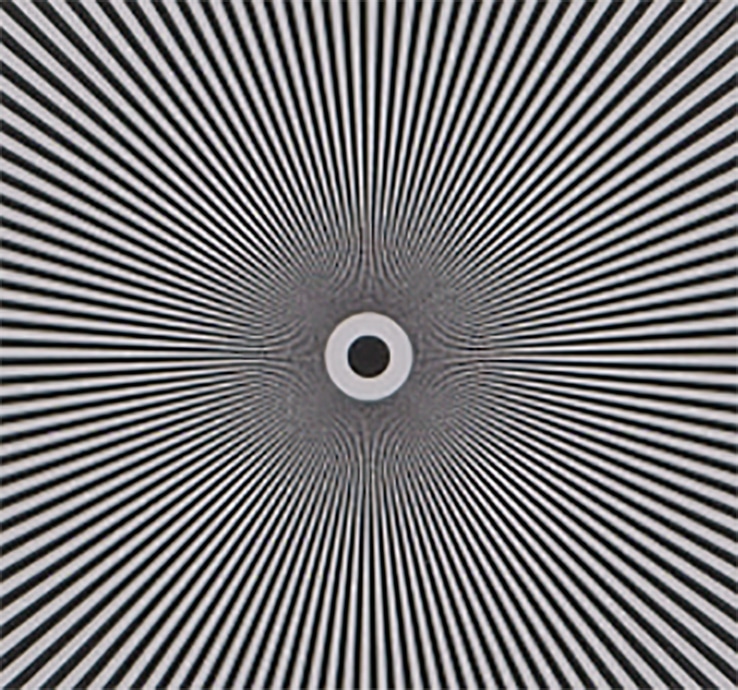
The false color is virtually gone, and the image is indeed sharper, just as advertised. I don’t know why the tone curve is different. I also can’t tell exactly how different is the sharpening that Imaging Edge is applying in the two cases, only that it’s sharpening the stacked image a whole bunch. To get apples-to-apples, you’d have to develop the ARQ stack in Raw Therapee or RawDigger. I’ve done just that in posts subsequent to this one.
I think this is going to be a big win for anyone doing product shots of fabrics, or any other situation where the subject is still and false color is a problem, but I don’t think that the sharpening that Imaging Edge is performing is useful for much other than trying to impress people with how sharp the images are. It reminds be of that terrible print that Fuji used to demonstrate how sharp the Pictrography printers were when they first introduced them.
JimK says
A raw developer software engineer took a look at the Siemens Star files that I used for the above post and demosaiced the ARQ and one of the ARW files using the same demosaicing algorithm (AMAZE) and no sharpening. The false color improvements remain, but the sharpness of the two images is quite similar. That might not be the case with highly-chromatic red and blue subjects, though.
Here’s a link to the pictures:
https://www.dpreview.com/forums/post/60505372
elefo says
The tone curve is different because more inter-tonal gradation is captured by the stacked images, making the image appear darker both to the eye and to to the tone curve.
JimK says
I don’t think so, since the tone curve looks normal with other raw developers that can understand ARQ, like Raw Therapee and RD. Without pixel shift, you can stack images until the cows come home without changing the tone curve.
http://blog.kasson.com/the-last-word/an-mf-camera-in-your-jacket-pocket/
Jim
Phil Service says
You don’t mention whether you were shooting compressed or uncompressed raw. The color checker chart is exactly the subject that I have found problematic for compressed raw with other Sony cameras — blotchy colors for some patches. Pixel shift might fix that even with compressed raw. I rented an A7R3 for a week. I agree strongly that pixel-shift does not add much (or anything) with most subjects. Furthermore, ImagingEdge is hopeless with subject movement — think leaves, grass stems, etc. Artifacts are MUCH less objectionable if the four image-shift frames are simply merged in Photoshop. That, at least, will provide some improvement in noise, but presumably not in false color (moire).
JimK says
Uncompressed.