The X-Rite I1 Basic kit arrived in a box larger than I expected – about 6 x 15 x 24 inches. Inside was a ballistic nylon padded case about the size of a large student backpack. In the case, nestled in individual foam compartments, were the spectrophotometer itself (the I1 Pro), a weighted assembly to drape across the front of an LCD when using the spectrophotometer for monitor calibration, a white ceramic calibration chip in a holder, a USB cable, a jig to help align the spectrophotometer when reading color patched charts, a minimal manual – really just a quick start, and some software.
I opened up a file manager window and pointed it at the software CD. No manual, or at least no standalone manual, just a setup.exe file and an autorun.inf pointing to it. I didn’t install the software, because I was worried about it interfering with I1 Publisher, which was already installed. I plugged the spectrophotometer into an USB port and fired up I1 Publisher. It recognized the spectrophotometer and asked me to calibrate it. I lined up the spectrophotometer with the calibration chip, and pressed the calibrate button on the screen. That made I1 Publisher happy.
Time for test drive. I picked the smallest number of color patches available, 400, and printed them out on Exhibition Fiber paper to an Epson 4900. Oops. Turns out the color patch sheet needs landscape mode, and I1 Publisher isn’t smart enough to select it. A second try gave me 400 patches in a 20 x 20 grid which almost filled the 8 1/2 by 11 sheet of paper. In one dimension the patches were contiguous, and then the other they were separated by narrow white lines.
I put the color patch sheet in the jig, and engaged feet on the spectrophotometer with the corresponding depressions in the slider. Now I could see what the narrow white lines were for; the slider let me move the spectrophotometer across an entire row of patches in the direction that had the white lines between the patches. I figure that the scanning software uses the white lines to tell when one patch ended and another begins.
I went to the I1 Publisher measurements screen, dragged the spectrophotometer to one end of its travel, pressed the little rubber button on its side, and pushed it to the other end of the slider. The software told me that it had read too few patches, and admonished me to move the spectrophotometer more slowly. Learning as I went along, I read all 400 patches. Some rows I got right the first time, some took two or three tries. I had to look over my shoulder at the screen after each pass to see what was happening. It would have been nice if I1 Publisher had given me some auditory feedback after each row.
The whole operation took about 20 minutes. It wasn’t much fun, and I was only measuring 400 patches, not the IT8 target that’s more than four times as big. It’s possible that it will be less frustrating and faster as I learn, but I don’t think it will ever become something I look forward to doing. I think X-Rite expects many people to share my opinion: printed right on the jig, in big letters is, “Need automation? Add an Eye-One Io!”
About paper usage. When you’re reading the patches manually, there are at most 400 patches per 8 1/2 by 11 sheet, and that’s the biggest sheet you can fit in the jig. That means that it will take five pieces of paper to print the IT8 target. When you use the XY table, the patches are much smaller, and you can print them all on two sheets of paper. When you use the I1Sis sheetfed spectrophotometer, I1 Publisher doesn’t cover as much of the page with patches, and it takes three sheets.
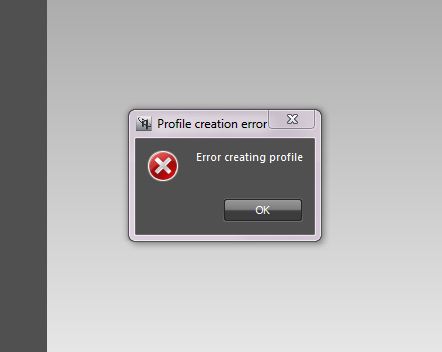
I left the lighting and profile options at the defaults, and pressed the button that said “create and save profile”. Then I saw this:
Saving my work and rebooting the computer didn’t help. Changing the lighting and profile settings didn’t help. There seem to be no support telephone numbers on the X-Rite website. I filled out a web form requesting support. Now I wait.

Leave a Reply