This is a part of series of posts on the Sony a7RIII. You can find all the posts about that camera in the Category List on the right sidebar, below the Articles widget. There’s a drop-down menu there that you can use to get to all the posts in this series; just look for “a7RIII”.
I’ve recently finished a series of posts about the optimal exposure and ISO setting strategy for the Nikon D850. The first one of those is here. Now I’m going to so the same thing for the a7RIII. The cameras are in many ways similar, so I expect the strategies will follow suit. Nevertheless, the differences, if significant, should prove instructive.
The a7RIII uses a sensor that, like many modern Sony full frame and APS-C devices, uses conversion gain changing technology licensed from Aptina (Since acquired by ON Semiconductor). That technology is called DR-Pix, and you can read about it here. This approach lowers the read noise for higher ISO photos. In a sense, the camera can be thought of as having two base ISOs. In the a7RIII, the real base ISO of the camera is 100, and the high conversion gain is applied at ISOs of 640 and above, so you could think of ISO 640 as a kind of “base ISO”.
What does this mean to photographers? I’m going to look at that in this and the next few posts. This one will cover the quantitative implications. If you’re not a fan of numbers and charts, you’re in luck; the next posts will cover the same concepts visually. Then I’ll attempt to develop strategies for taking advantage of the camera’s characteristics.
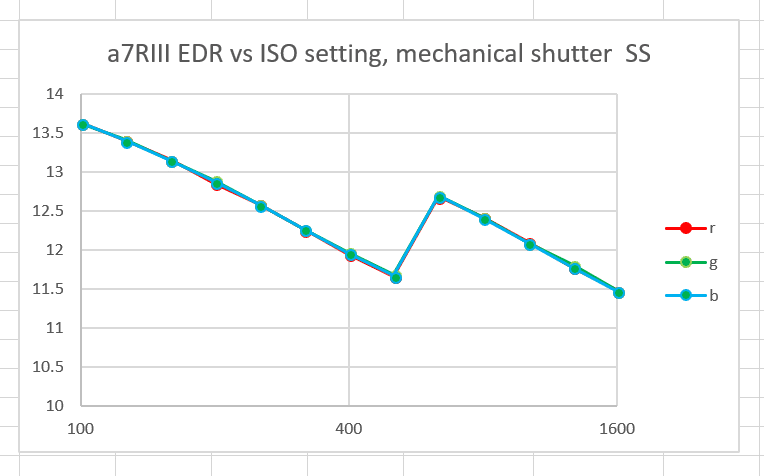
The change in conversion gain causes the a7RIII’s engineering dynamic range (EDR) to take a jump at ISO 640.
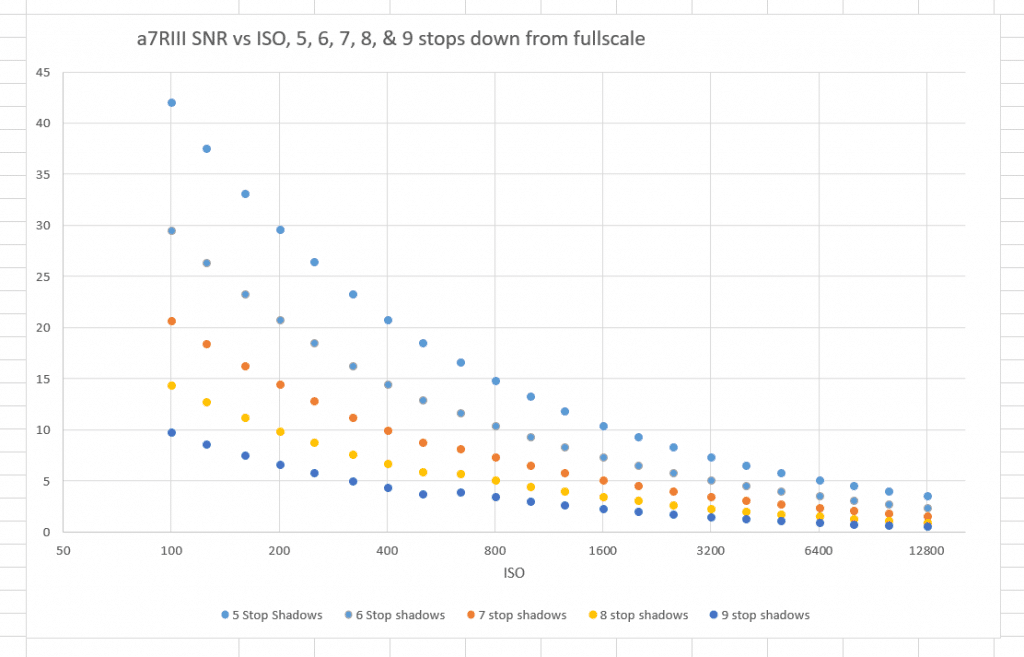
But EDR is not of much use to photographers, at least directly. A more significant metric is the signal-to-noise ratio (SNR) in the shadows. So let’s take a look at that:
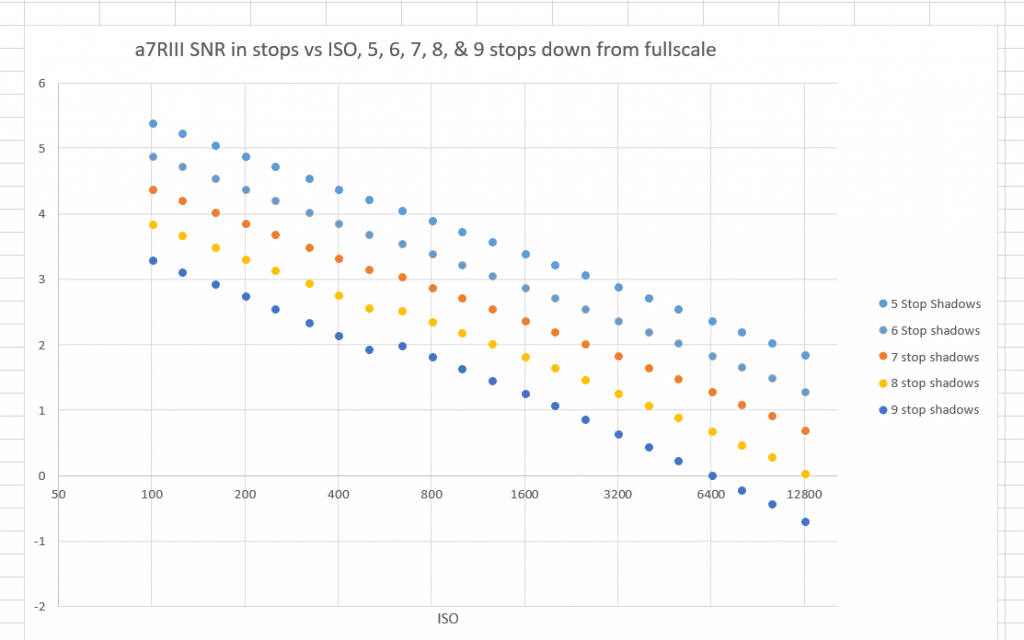
The kink that was so evident in the EDR curve has little effect away from the very deepest shadows. If we measure the SNR in stops, it’s a bit easier to see:
You’ll notice that the SNR, when measured in stops, rolls off fairly close to linearly. When the SNR drops by half a stop every time the ISO setting is doubled, that’s called “ISO-less” behavior. The noise is entirely determined by the photon noise, which is in turn entirely determined by the exposure. The ISO setting has, per se, nothing to do with it. The ISO setting does affect the SNR since we’re measuring it in stops down from full scale, and raising ISO lowers full scale.
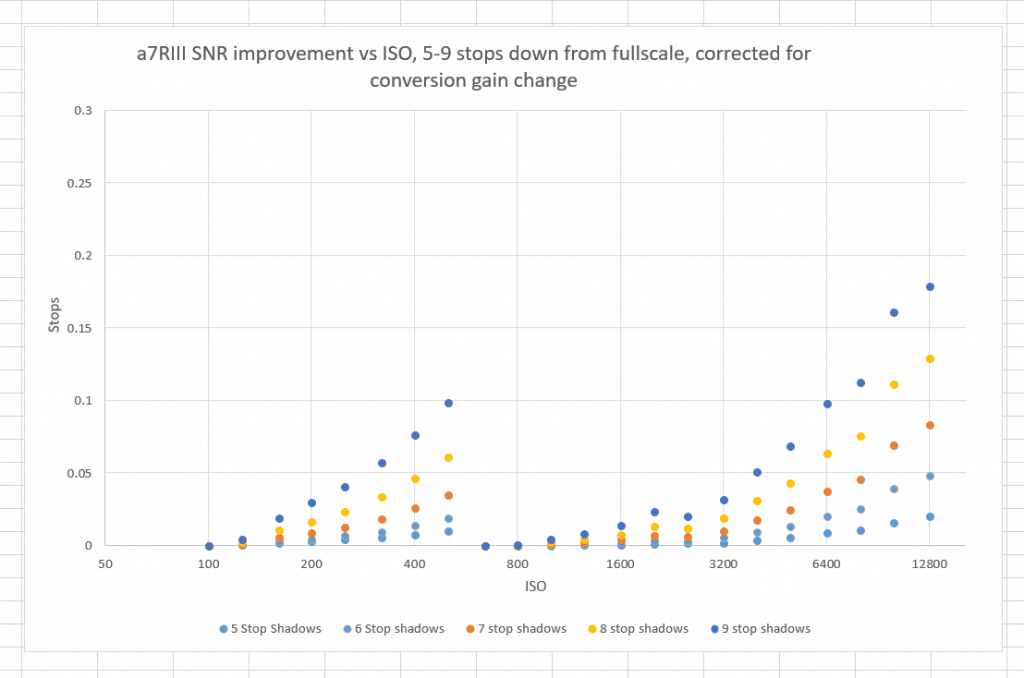
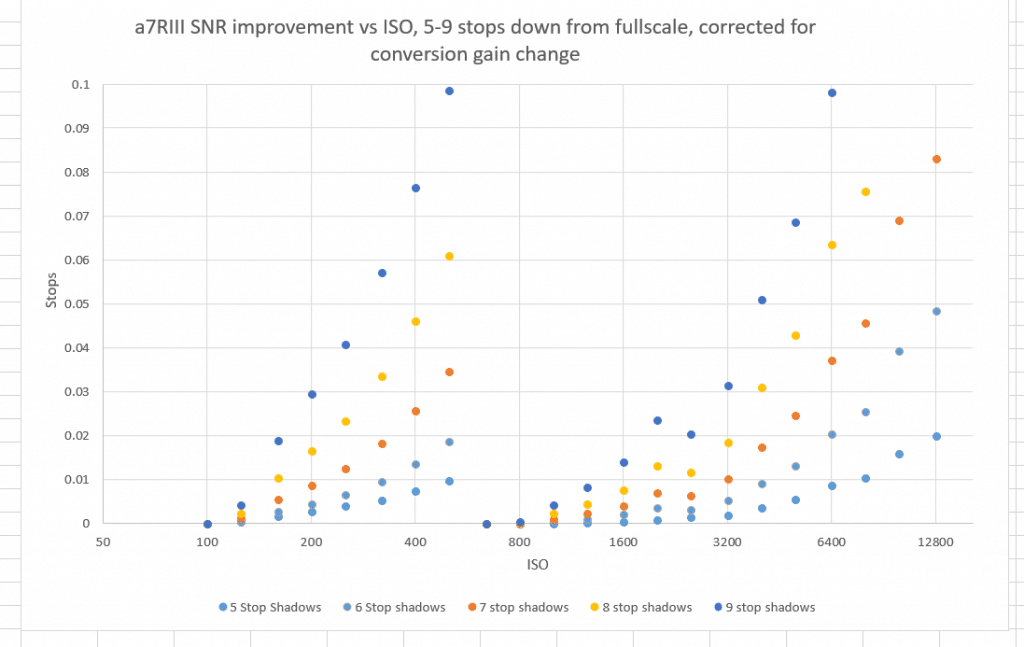
How close to ISO-less is the a7RIII? Let’s look at the improvement in SNR that is created by turning up the ISO as opposed to leaving it at 100, and then switching it to 640.
Note the vertical scale; less than a third of a stop from top to bottom. Even with the shadows 9 stops down from fullscale, the a7RIII is pretty close to ISOless, once you correct for the conversion gain increase as ISO 640 and above.
Let’s zoom in on the above set of curves:
Now the whole vertical span is only a tenth of a stop. If you’re shooting raw and care only about shadows that are 5 or six stops down from full scale, it’s pretty clear that the ISO knob is not helping. You might just as well leave it at 100 or 640 and push the brightness in post-production. Even if you’re concerned about deeper shadows, the ISO knob doesn’t make much difference except for that 500-640 step. There is slightly more reason to use the ISO control in the 100-500 region than in the 640-6400 one.
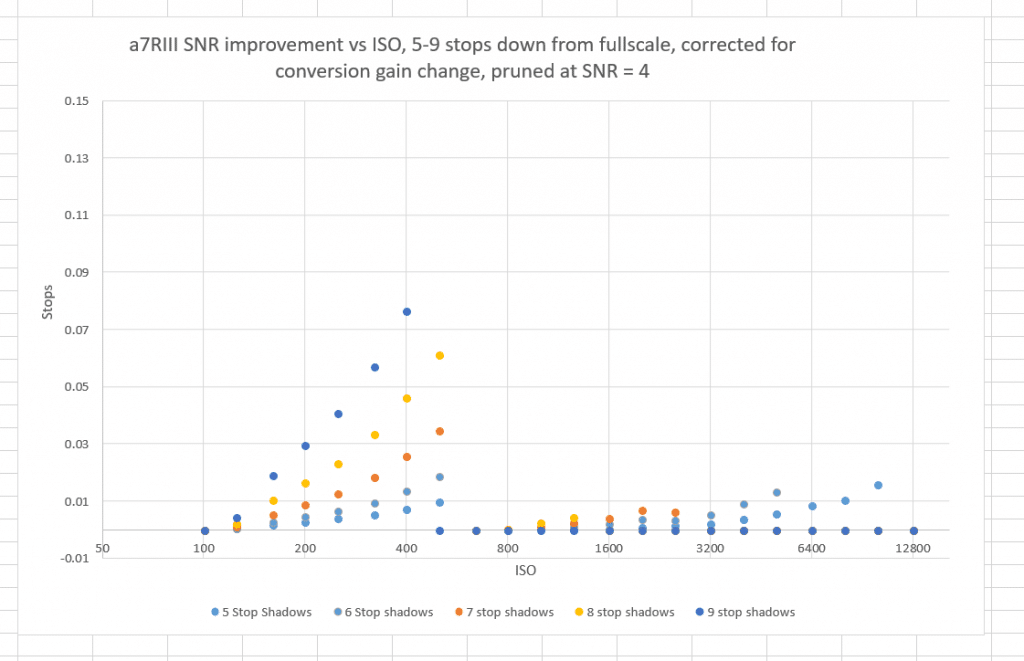
Now let’s take the above set of curves and prune out all the data with an SNR of under 4. Many people would argue that such noisy information is not photographically useful in many circumstances.
Now the case is even stronger that, above ISO 640, you’re at least as well off to set the camera at 640 and push in post.
These curves are similar to what the D850 ones would look like with the ISO settings advanced by 2/3 of a stop. The base ISO of the D850 is 2/3 of a stop lower than the a7RIII, and the switch in conversion gain occurs at an ISO setting 2/3 of a stop lower in the D850. There are practical considerations, and I’ll get to them in a later post in this set.
I think it is horses for courses. The purpose of the original advice to expose to the right was ensure landscape photographers got as much shadow detail as possible. It worked for them.
I am mostly making portraits. I get burned out highlights if I expose to the right. That ruins portraits.
My general rule with my A7r2 is to underexpose one stop having ISO set ot 100 or 640. If the light is very harsh I underexpose by two stops.
I did some testing with the “Zebra” function but found it too cumbersome and not too helpful for somebody who grew up with the Zone System.