This is one in a series of posts on the Fujifilm GFX 100. You should be able to find all the posts about that camera in the Category List on the right sidebar, below the Articles widget. There’s a drop-down menu there that you can use to get to all the posts in this series; just look for “GFX 100”.
I’ve been using the IBIS in the GFX 100 from time to time, but until this morning, I’d not gotten around to quantitative testing. Part of the reason is that I hate to perform this test, which I usually do in AF-S mode, taking time between each exposure to carefully compose, think calm thoughts, breath out, hold the camera in the Pete Souza position with my right foot at right angles to the target, and behaving as closely as I can in the way I imagine a sniper shooter or biathlete does. In order to get a statistically valid sample, I need to do that over and over, taking breaks from time to time if I start to get dizzy.
In hopes of reducing the pain, I have modified my regime. For this test, I used AF-C, and continuous-low drive mode, and held the shutter release down as I exposed each series of 16 or so images for each test condition. I couldn’t use the whole Souza grip for fear of touching the focusing ring, so I resorted to the left hand supporting the camera and the near end of the lens barrel approach. I expect that absolutely better numbers could be obtained with my previous method, but I think the relative results will be substantially the same.
In the interests of saving time, I also told the camera to make super-fine JPEGs instead of raws. I left the standard GFX 100 in-camera sharpening on. This produced mild overshoot on the slanted edge target, and made the modulation transfer functions at 50% (MTF50) higher than they would have otherwise have been.
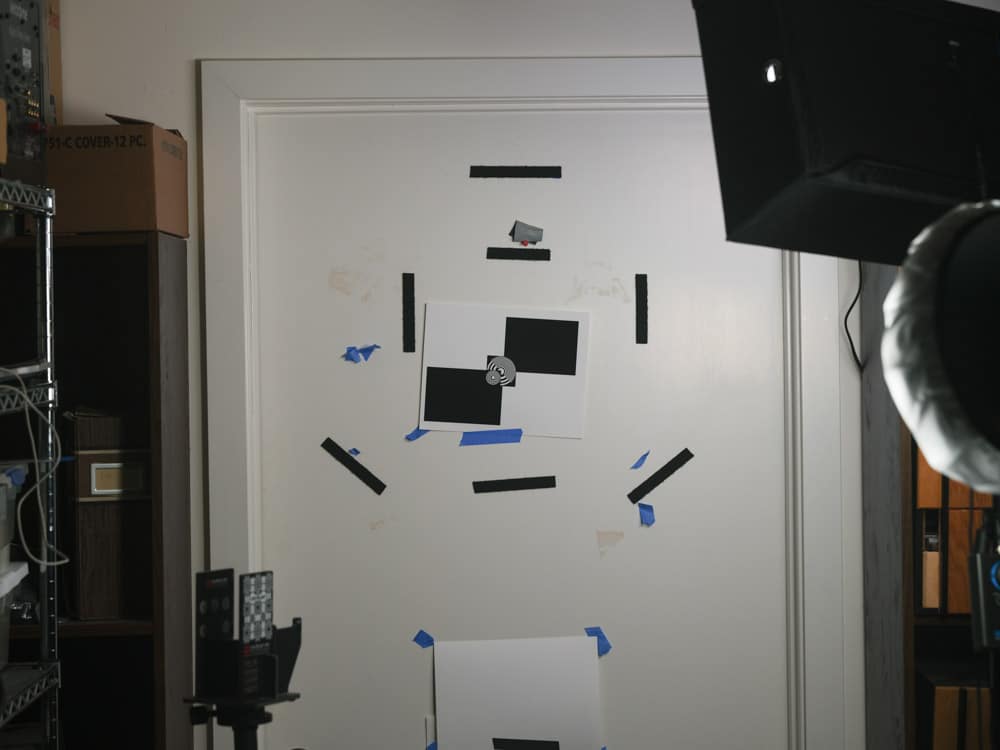
Here’s what a typical shot looked like to the camera:
I kept the ISO setting constant at 400, and the f-stop at f/5.6. I used a Heliopan variable neutral density filter to vary the shutter speed between about 1/250 second and 1/15 second. At each shutter speed, I made about 16 exposures.
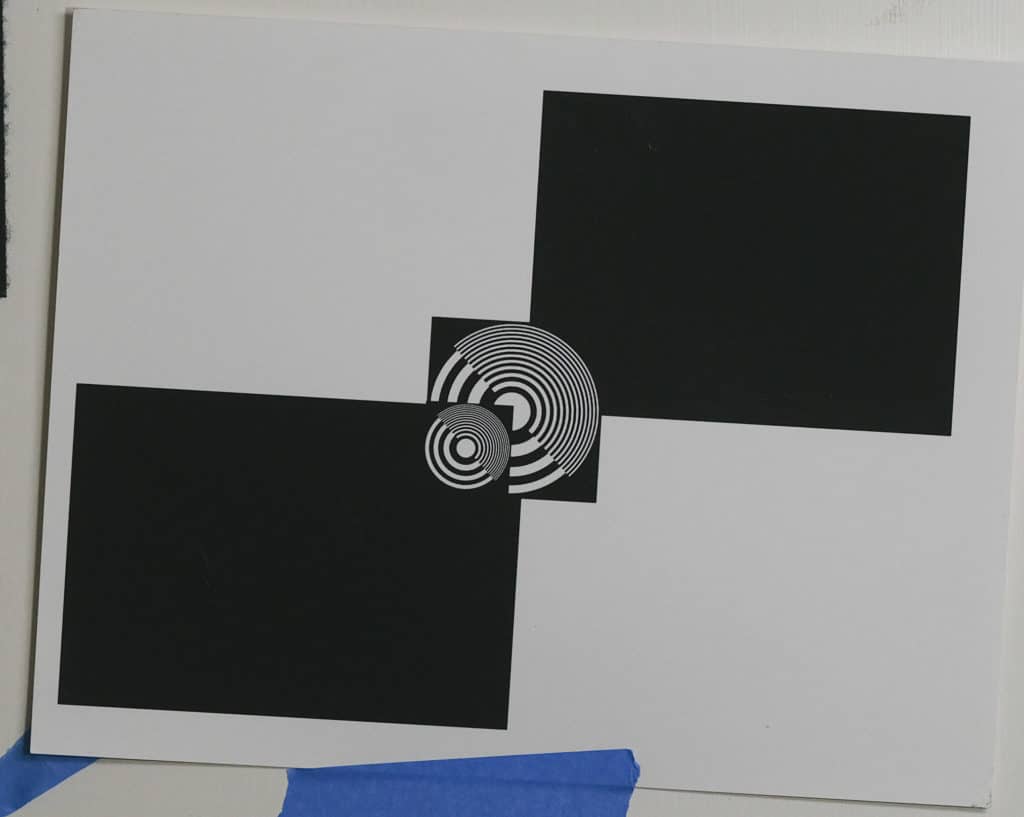
Here’s a typical sharp crop (shown here at about 200%) as sent to the slanted edge analysis program:
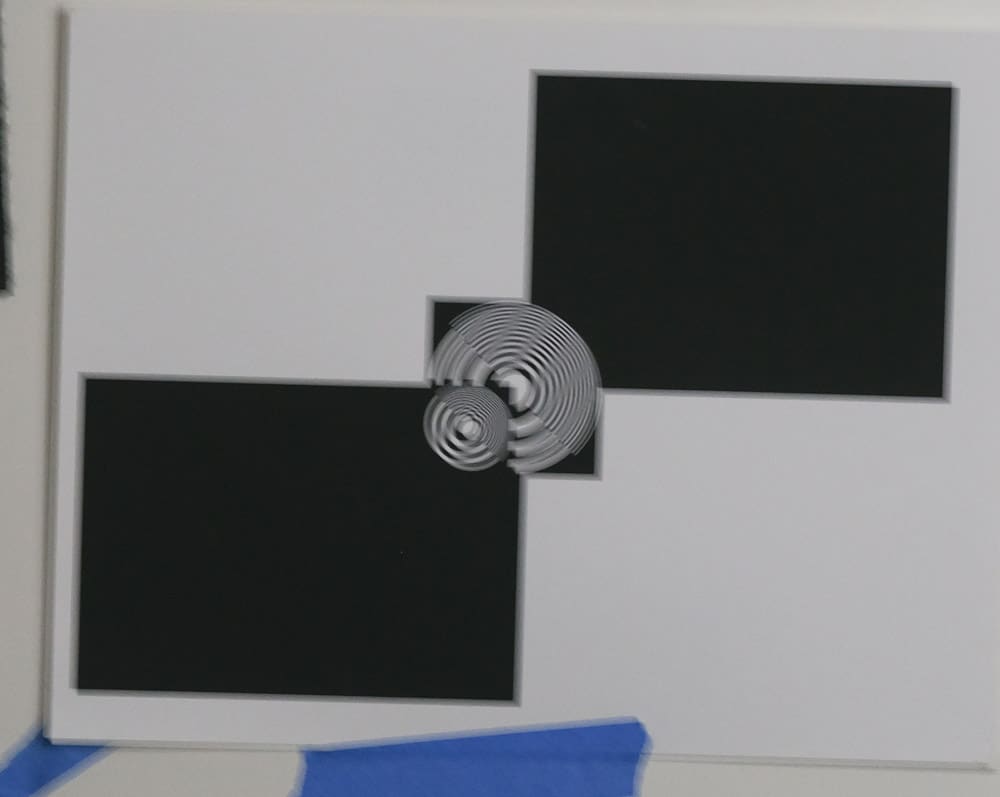
Want to see a blurry crop? Glad to oblige:
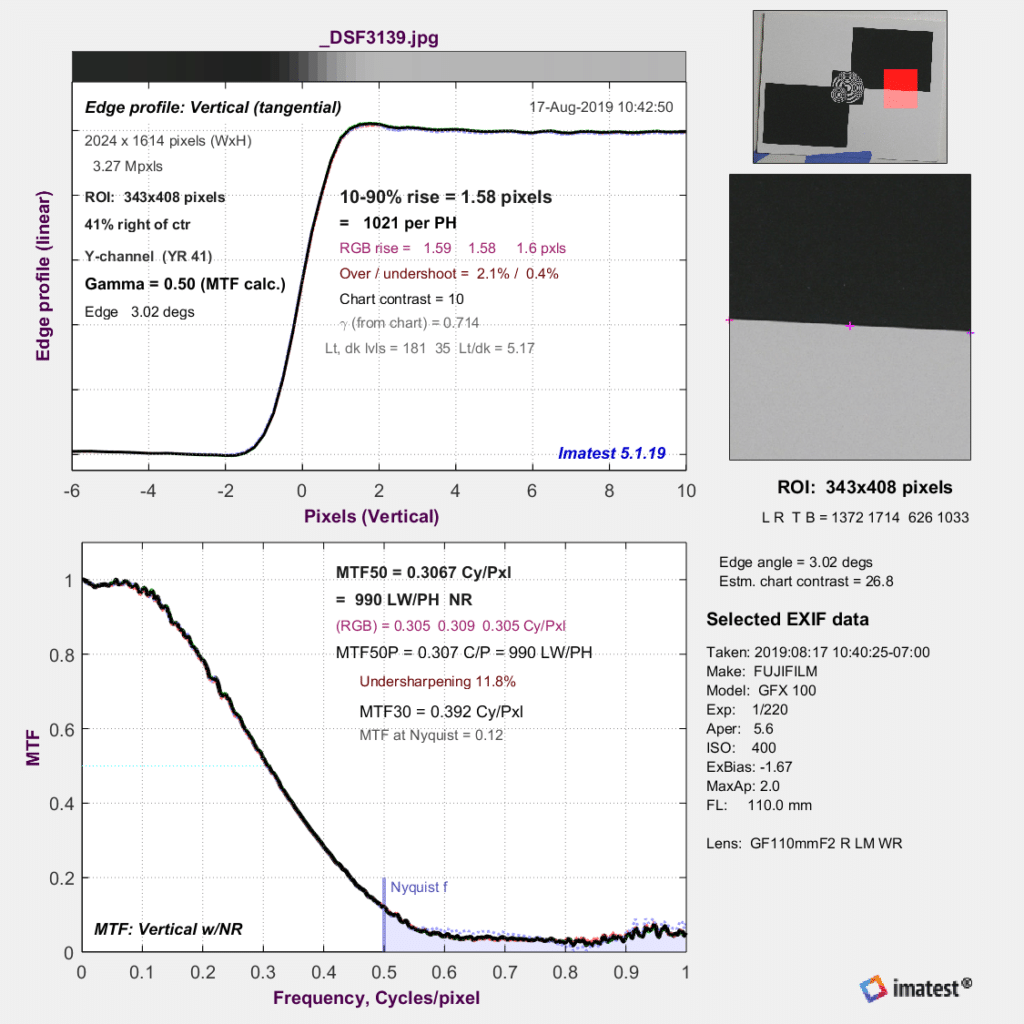
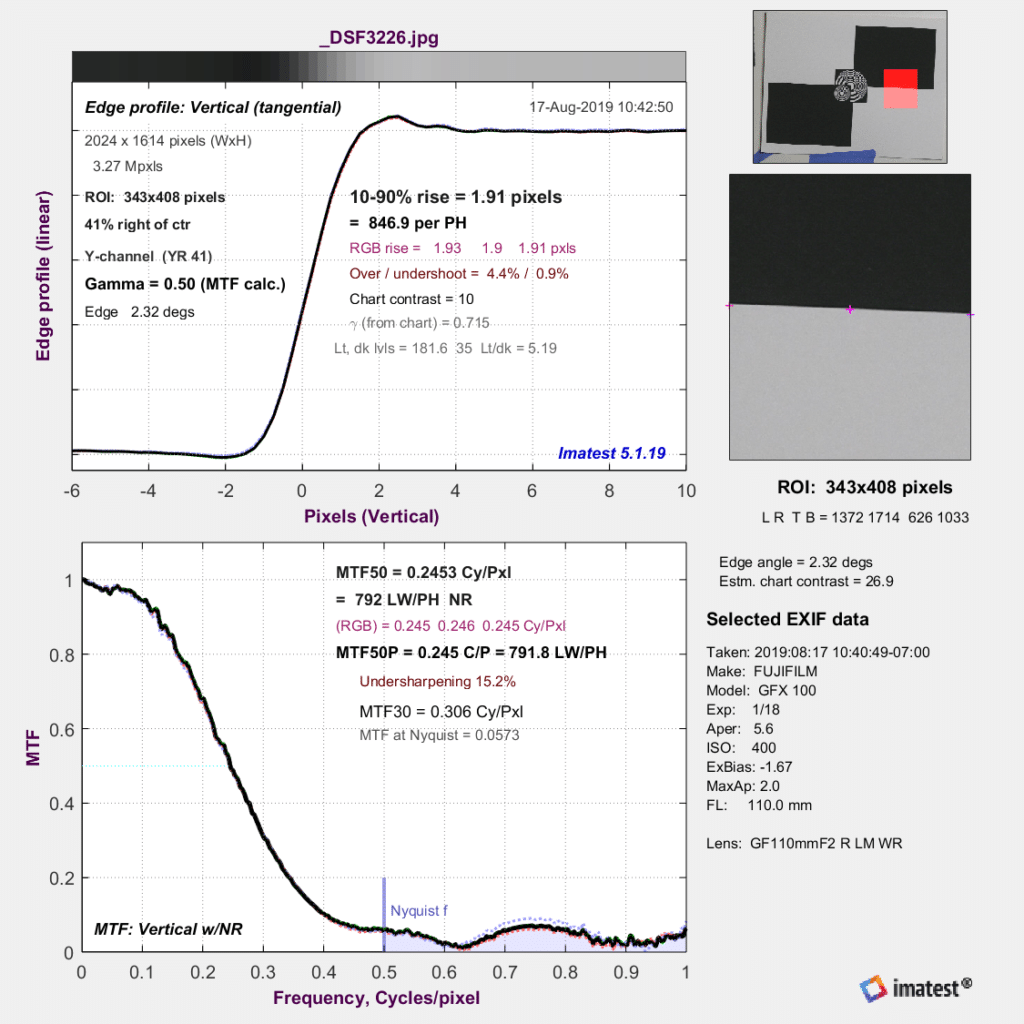
I analysed the lower right horizontal slanted edge with Imatest. Here’s the MTF of a fairly sharp shot:
And here’s one that’s not so hot, but not terrible:
I looked at how the MFT50, which is my go-to proxy for sharpness, varied with shutter speed with the IBIS on and with it off.
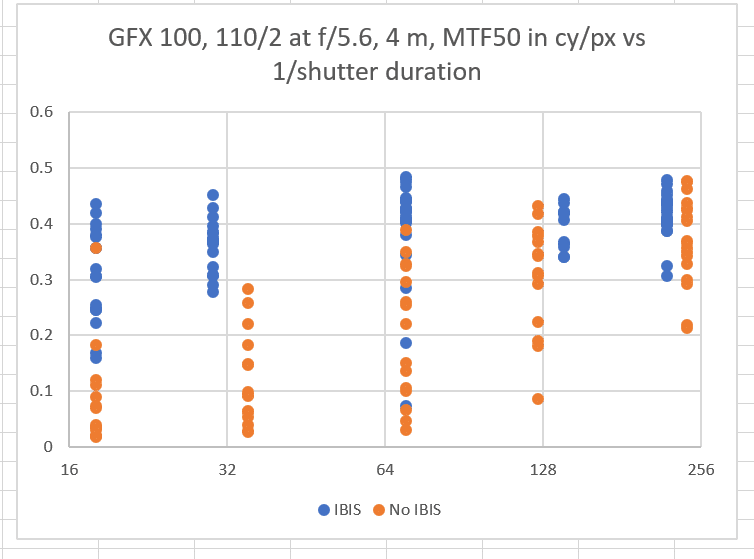
Here are all the data points:
The vertical axis is MTF50 (the 50% contrast point of the modulation transfer function curve) in cycles per pixel. You’re probably not used to seeing this measure. I’ll show you a more familiar one next. But for now, just concentrate not on the numbers themselves, but that dots near the top of the graph are sharper. The horizontal axis is one over the shutter duration: 128 is 1/128 of a second. You can see that the no-IBIS situation is in general worse than the result using IBIS even at shutter speeds near 1/250 second.
Here are the takeaways from the above graph:
- If you fire away for long enough, you can get sharpish images with or without the IBIS on
- Turning the IBIS on greatly improves your chance of getting a sharp image starting at about 1/125 second and the improvement increases as the shutter speed drops.
- IBIS even helps your odds of getting a sharp image at 1/250 second
- There is not a huge change in the statistics for the IBIS case from 1/30 to 1/250 second.
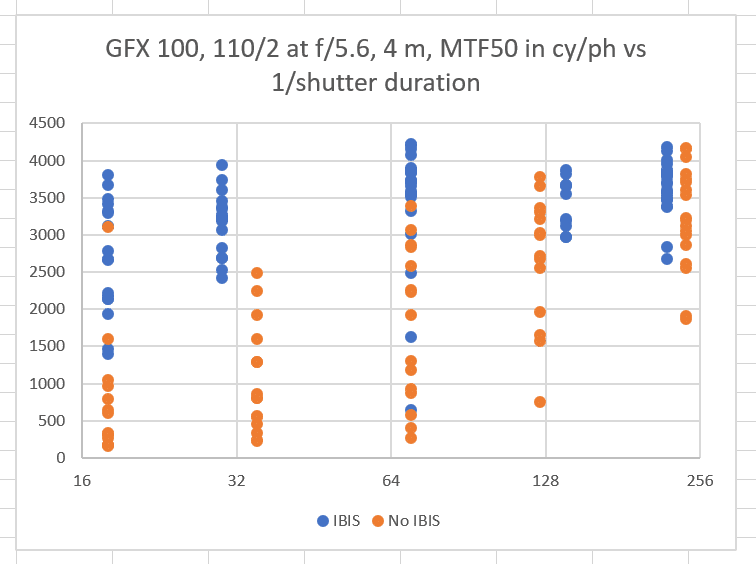
Now I’ll convert the vertical axis to something you’re more used to seeing, MTF50 in cycles per picture height:
Those are some pretty big numbers! There are two reasons for that. The large number of pixels in the GFX 100 plays a part, but so does the sharpening introduced by the camera with its default JPEG settings.
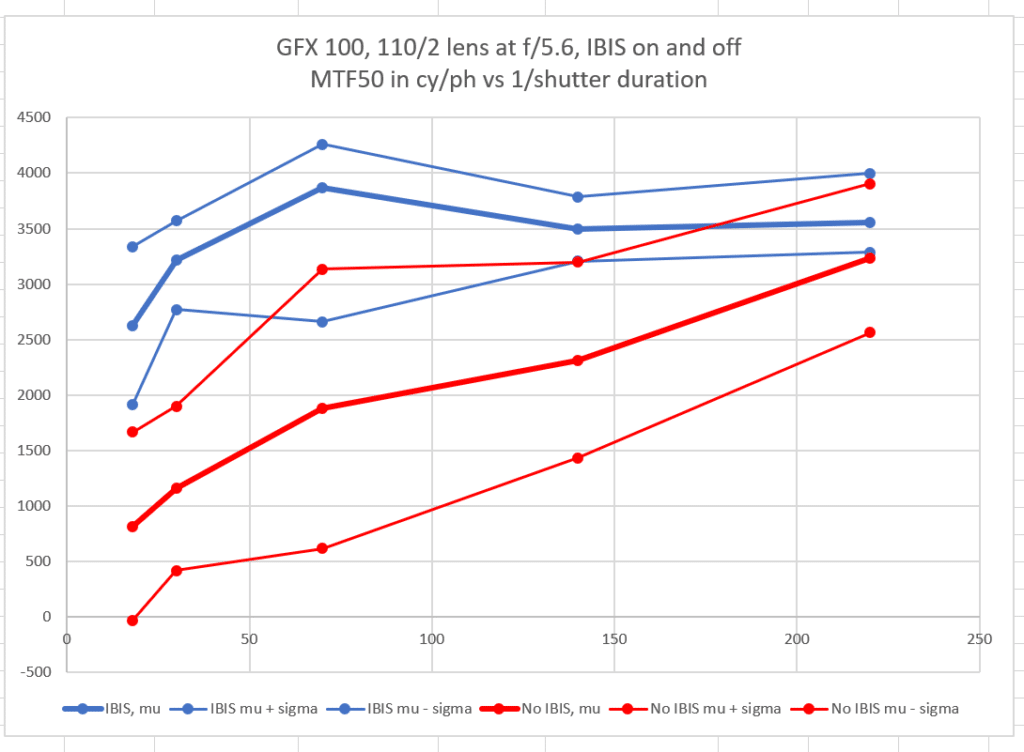
Here is an analysis of the statistics of the above data set:
The vertical and horizontal axes are the same as the previous graph. The thick blue line is the mean (aka mu) of the IBIS samples. The thick red line is the mean of the non-IBIS samples.This quantifies the loss in mean sharpness as the shutter speed gets longer without IBIS, and shows that IBIS provides roughly a three-stop advantage for mean sharpness over non-IBIS usage. The difference is about the same — maybe a bit better — for mean minus one standard deviation. This is consistent with previous IBIS tests that I’ve performed.
No surprises here. All good.
Thanks for your efforts!
Impressive testing, and shows that the image stabilizer is really quite impressive.