[Added after the original post. Eric Chan has informed me that there are two image-processing pipelines in Lightroom: output-referred, and scene-referred. Raw files get the scene-referred pipeline. Integer TIFFs get the output-referred pipeline. Therefore, the TIFF test images are getting a different set of processing than LR applies to raw files.]
In the previous post, I reported that the Exposure controls in Lightroom and Photoshop work differently, and I showed some of the differences in tonality. Today, I’d like to consider color in all three dimensions. The question that I’m trying to resolve is, what are the characteristics of each app’s exposure control when used to develop images that are deliberately underexposed according to the precepts of either Unity Gain ISO, or the Signal-to-Noise (SNR) driven method that I’ve talked about in the last few months.
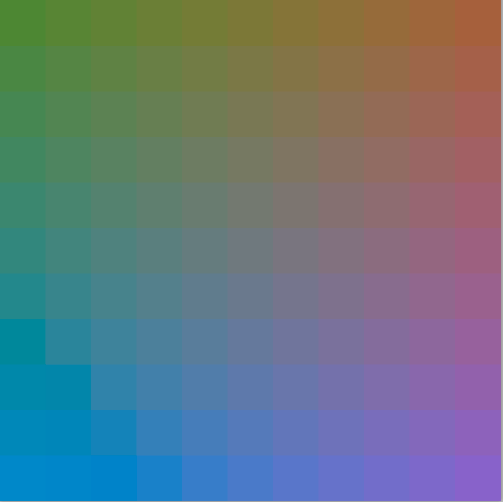
In order to get an appropriate test, I created a test chart consisting of a 11×11 array of squares, with lab values from -50 to +40 in both a* and b*, and a constant L* value of 50 (a middle gray tonality). Here’s the chart, in ProPhoto RGB:
Then I went to my camera simulator program, and created a new camera. It’s in all respects like a Nikon D4, except that it has no noise except for electron and ADC quantizing noise, and a Fovean-like sensor that directly encodes the light into the ProPhoto RGB color space. I know, I know; you could never build a camera like that, especially since two of the PP RGB primaries aren’t physically realizable, but I wanted to minimize color space conversions and errors due to demosaicing.
With my simulated camera, I made five exposures of the target, one at the exposure that replicated the target tonality, and one each at – 1EV, -2 EV, – 3EV, and -4 EV from the first exposure.
I opened each exposure in Lightroom, and used the exposure control to compensate the four underexposed images to about the same RGB values (in the middle of the image) as the normally exposed image. To my surprise, it didn’t take exactly one EV of correction for each EV of underexposure; it took somewhat less.
I exported all the images from Lightroom in ProPhoto RGB, brought them into Photoshop and converted them to CIELab, then brought those images into Matlab and analyzed them.
First, I looked at the chromaticity — only the a* and b* values. Here’s the normally exposed image:
The one-stop underexposed image:
The two-stop underexposed image:
The three-stop underexposed image:
and the four-stop underexposed image:
As you can see, there is a loss of chroma in the blues and magentas.
Then I performed the analogous (but not equivalent) operations in Photoshop, using the Exposure adjustment layer. Like the exposure control in Lightroom, I didn’t have to slide the slider as far to the right as I would have thought. It was much easier to match the levels of the five images, since the Info tool in Photoshop can read out in Lab, something that you can’t do in Lightroom — yet.
Here’s the normal image with no adjustment.
The one-stop underexposed image:
The two-stop underexposed image:
The three-stop underexposed image:
The four-stop underexposed image:
As you can see, Photoshop has exemplary performance when used to boost underexposed images; much better performance than Lightroom. On the other hand, it doesn’t have the lovely soft clipping that you get with the Exposure control in Lightroom.
Next up: three dimensional results.

Leave a Reply