• site home
  • blog home
  • galleries
  • contact
  • underwater
  • the bleeding edge

the last word

Photography meets digital computer technology. Photography wins -- most of the time.

You are here: Home / The Last Word / Color photography without demosaicing

Color photography without demosaicing

April 17, 2014 JimK Leave a Comment

In the beginning, digital photography sensors were monochromatic. If you wanted color, you made three successive exposures through different filters, which were usually mounted on a wheel for rapid sequencing. A variant of this approach was to use a series of prisms and half-silvered mirrors to split the imaging light into three beams which were filtered independently and simultaneously imaged on three monochromatic sensors. This approach is still used in some video cameras.

In the early 1970s, before digital photography even got off the ground,  Bryce Bayer invented his color filter array (CFA) pattern, which exposed different sensels through different color filters, all in a single exposure.

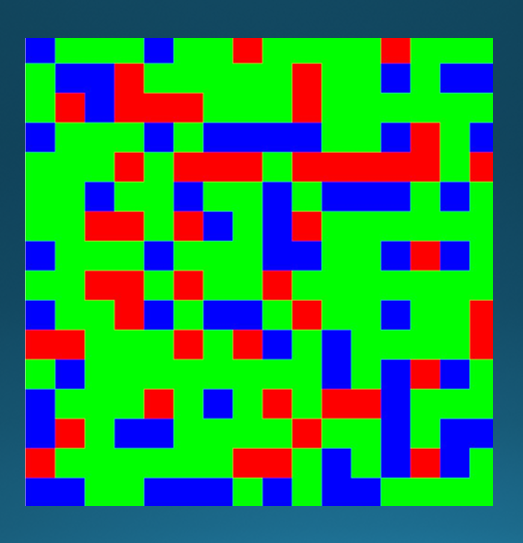
Here’s what a Bayer CFA looks like:

Bayer pattern

As an aside, I’ve always thought that having some techie thing named after you was neat. To that end, last year I proposed the Kasson pattern, which was — and still is — available for license at no charge, providing my name is displayed prominently on any camera using it.

Kasson pattern

Amazingly, no one has taken me up on my generous offer.

OK, back to Bayer. His array has been very successful, and the vast majority of contemporary digital cameras use it. There have been variants with different patterns and different colors in the filters, but they haven’t caught on. There is a totally different approach, Foveon, invented by Carver Mead, that uses the fact that different wavelengths of light penetrate silicon to different depths and stacks the various wavelength (they’re not red, green, and blue, but more like white, yellow, and red) sensels vertically. It remains a niche technology.

So the Bayer array is the big kahuna of photographic capture, making possible the marvelous cameras that we have today. It’s not all good, though. Images captured using a Bayer CFA are missing some information. In the production of a standard RGB image from a raw file from a Bayer CFA camera, half the green pixels, and three-quarters of the red and blue pixels, have to be created in software. The process is called demosaicing, and there are many algorithms. Not surprisingly, with two thirds of the data in the demosaiced image produced by sophisticated guesswork, there are problems in some demosaiced images. They include false colors and weird patterns. It’s amazing that it works as well as it does.

It occurs to me, with cameras like the Pentax 645Z, that there is now a practical alternative to demosaicing of Bayer-mosaiced files. If the raw developer took each block of two green, one red, and one blue raw pixel and used that to compute the output pixel, say by averaging the greens, passing on the reds and blues, and then doing the usual color space conversion, we’d have an image untouched by the hand of demosaicing. With 50 megapixels in the 645Z sensor, we’d have a 12.5 megapixel output file, which is plenty for many purposes. Because two green raw pixels are averaged to produce one processed pixel, we’ll have about 0.7 as much photon luminance noise, which sounds like an advantage until you realize that, using conventional demosaicing and res’ing the result down to 12.5 MP we’d get half the noise.

Is this a practical approach? Only experimentation can answer that. At best, it will not replace demosacing in all circumstances, but it may prove useful for some purposes.

PS. If you sometimes look at the photo boards and want a chuckle, take a look here: http://www.lensrentals.com/blog/2012/03/hammerforum-com

The Last Word

← The Pentax 645Z Color photography without demosaicing in practice →

Leave a Reply Cancel reply

Your email address will not be published. Required fields are marked *

May 2025
S M T W T F S
 123
45678910
11121314151617
18192021222324
25262728293031
« Apr    

Articles

  • About
    • Patents and papers about color
    • Who am I?
  • How to…
    • Backing up photographic images
    • How to change email providers
    • How to shoot slanted edge images for me
  • Lens screening testing
    • Equipment and Software
    • Examples
      • Bad and OK 200-600 at 600
      • Excellent 180-400 zoom
      • Fair 14-30mm zoom
      • Good 100-200 mm MF zoom
      • Good 100-400 zoom
      • Good 100mm lens on P1 P45+
      • Good 120mm MF lens
      • Good 18mm FF lens
      • Good 24-105 mm FF lens
      • Good 24-70 FF zoom
      • Good 35 mm FF lens
      • Good 35-70 MF lens
      • Good 60 mm lens on IQ3-100
      • Good 63 mm MF lens
      • Good 65 mm FF lens
      • Good 85 mm FF lens
      • Good and bad 25mm FF lenses
      • Good zoom at 24 mm
      • Marginal 18mm lens
      • Marginal 35mm FF lens
      • Mildly problematic 55 mm FF lens
      • OK 16-35mm zoom
      • OK 60mm lens on P1 P45+
      • OK Sony 600mm f/4
      • Pretty good 16-35 FF zoom
      • Pretty good 90mm FF lens
      • Problematic 400 mm FF lens
      • Tilted 20 mm f/1.8 FF lens
      • Tilted 30 mm MF lens
      • Tilted 50 mm FF lens
      • Two 15mm FF lenses
    • Found a problem – now what?
    • Goals for this test
    • Minimum target distances
      • MFT
      • APS-C
      • Full frame
      • Small medium format
    • Printable Siemens Star targets
    • Target size on sensor
      • MFT
      • APS-C
      • Full frame
      • Small medium format
    • Test instructions — postproduction
    • Test instructions — reading the images
    • Test instructions – capture
    • Theory of the test
    • What’s wrong with conventional lens screening?
  • Previsualization heresy
  • Privacy Policy
  • Recommended photographic web sites
  • Using in-camera histograms for ETTR
    • Acknowledgments
    • Why ETTR?
    • Normal in-camera histograms
    • Image processing for in-camera histograms
    • Making the in-camera histogram closely represent the raw histogram
    • Shortcuts to UniWB
    • Preparing for monitor-based UniWB
    • A one-step UniWB procedure
    • The math behind the one-step method
    • Iteration using Newton’s Method

Category List

Recent Comments

  • JimK on How Sensor Noise Scales with Exposure Time
  • Štěpán Kaňa on Calculating reach for wildlife photography
  • Štěpán Kaňa on How Sensor Noise Scales with Exposure Time
  • JimK on Calculating reach for wildlife photography
  • Geofrey on Calculating reach for wildlife photography
  • JimK on Calculating reach for wildlife photography
  • Geofrey on Calculating reach for wildlife photography
  • Javier Sanchez on The 16-Bit Fallacy: Why More Isn’t Always Better in Medium Format Cameras
  • Mike MacDonald on Your photograph looks like a painting?
  • Mike MacDonald on Your photograph looks like a painting?

Archives

Copyright © 2025 · Daily Dish Pro On Genesis Framework · WordPress · Log in

Unless otherwise noted, all images copyright Jim Kasson.