• site home
  • blog home
  • galleries
  • contact
  • underwater
  • the bleeding edge

the last word

Photography meets digital computer technology. Photography wins -- most of the time.

You are here: Home / Printers / Epson P800 drop size

Epson P800 drop size

September 12, 2019 JimK Leave a Comment

This is a continuation of testing that I’ve been doing on the Epson P800 printer. I’ve created a category called “Printers”, and put this post in that category. I will go back and find all the previous posts in this series and put them in the same category. If you go to the Category List (on the right in the desktop formatting), find “Printers” and click on it, you’ll see all the posts in the series.

In analyzing the results of my testing of the Epson P800, an interesting question is: does the blurring that the printer does come mostly from the halftoning and the postition of the print heads, or is it mostly inherent in the drop size on the paper? I’m going to show you some scans of Epson P800 prints on Epson Premium Glossy Photo Paper using the Color setting, and maximum quality (which ticks the Finest Detail Checkbox and sets the printer to halftone from a 720 ppi contone image). I scanned the prints at 4800 ppi on an Epson V850 Pro scanner, with unsharp masking on.

The first thing I did is print some gray gradients, from very little ink coverage to a lot of ink on the paper, and examined the sizes of the ink blobs. At 4800 ppi scanning, there are about 7 scanner pixels linearly for every putative printer pixel. I’ve blown up the scans so you can count scanner pixels if to desire.

Here’s a light-coverage area:

Depending on how faint the ink blob has to be before you stop counting, the blobs are less than one 720 pp pixel, or greater than that.

The yellow blob is larger than one 720 ppi pixel no matter how you count, possibly because the paper is also wet by the cyan pixel adjacent to and overlapping it, and the light black pixel on the other side.

With greater than 100% coverage, the dots don’t appear to get much bigger. That’s encouraging.


I’m guessing that this is about 250% coverage, and the droplets are not spreading much.

Now well look at some light gray one-pixel-wide lines.
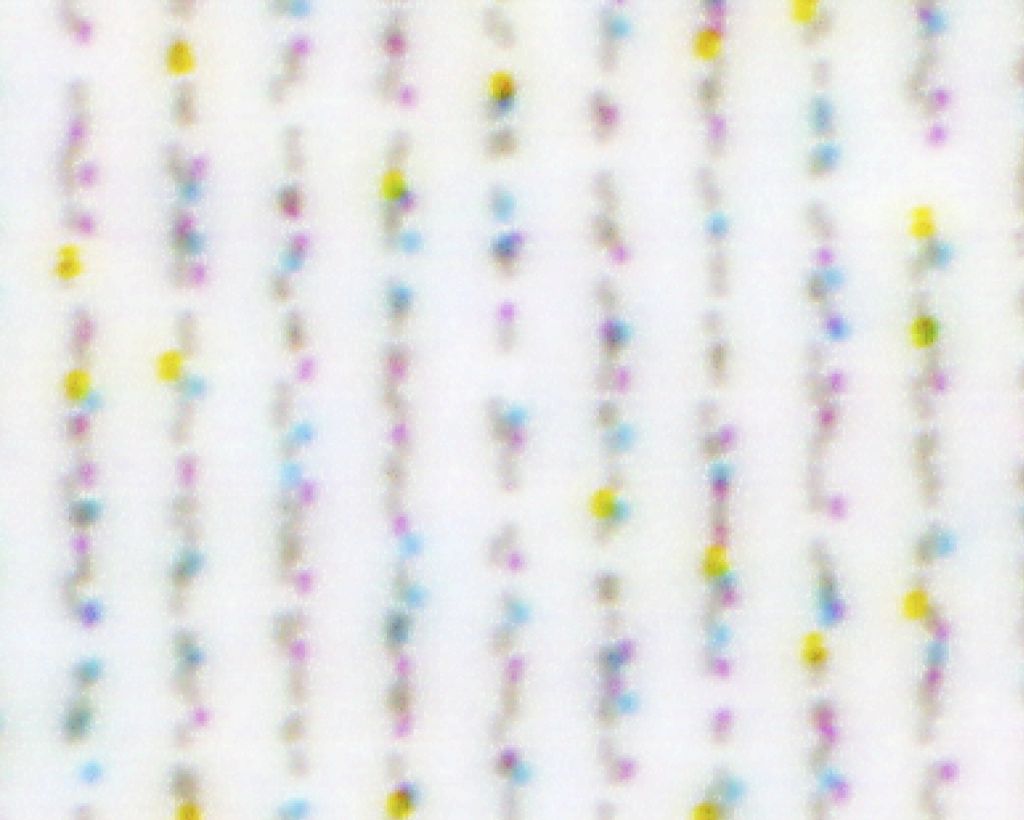
 

Here’s a close-up:

The spread of the lines seems to be at least as much a function of the uncertainty in the ink-drop location as in the spread.

If we make the line a little darker, there’s more spreading of the dot centerlines:


To me, there’s no obvious long pole in this tent. The ink blobs are larger than we’d like, but the scatter in their position undoubtedly contributes to the softening of the printed image.

Printers

← Epson P800 720 ppi MTF curves Epson P800 — graphics at 720 ppi →

Leave a Reply Cancel reply

Your email address will not be published. Required fields are marked *

May 2025
S M T W T F S
 123
45678910
11121314151617
18192021222324
25262728293031
« Apr    

Articles

  • About
    • Patents and papers about color
    • Who am I?
  • How to…
    • Backing up photographic images
    • How to change email providers
    • How to shoot slanted edge images for me
  • Lens screening testing
    • Equipment and Software
    • Examples
      • Bad and OK 200-600 at 600
      • Excellent 180-400 zoom
      • Fair 14-30mm zoom
      • Good 100-200 mm MF zoom
      • Good 100-400 zoom
      • Good 100mm lens on P1 P45+
      • Good 120mm MF lens
      • Good 18mm FF lens
      • Good 24-105 mm FF lens
      • Good 24-70 FF zoom
      • Good 35 mm FF lens
      • Good 35-70 MF lens
      • Good 60 mm lens on IQ3-100
      • Good 63 mm MF lens
      • Good 65 mm FF lens
      • Good 85 mm FF lens
      • Good and bad 25mm FF lenses
      • Good zoom at 24 mm
      • Marginal 18mm lens
      • Marginal 35mm FF lens
      • Mildly problematic 55 mm FF lens
      • OK 16-35mm zoom
      • OK 60mm lens on P1 P45+
      • OK Sony 600mm f/4
      • Pretty good 16-35 FF zoom
      • Pretty good 90mm FF lens
      • Problematic 400 mm FF lens
      • Tilted 20 mm f/1.8 FF lens
      • Tilted 30 mm MF lens
      • Tilted 50 mm FF lens
      • Two 15mm FF lenses
    • Found a problem – now what?
    • Goals for this test
    • Minimum target distances
      • MFT
      • APS-C
      • Full frame
      • Small medium format
    • Printable Siemens Star targets
    • Target size on sensor
      • MFT
      • APS-C
      • Full frame
      • Small medium format
    • Test instructions — postproduction
    • Test instructions — reading the images
    • Test instructions – capture
    • Theory of the test
    • What’s wrong with conventional lens screening?
  • Previsualization heresy
  • Privacy Policy
  • Recommended photographic web sites
  • Using in-camera histograms for ETTR
    • Acknowledgments
    • Why ETTR?
    • Normal in-camera histograms
    • Image processing for in-camera histograms
    • Making the in-camera histogram closely represent the raw histogram
    • Shortcuts to UniWB
    • Preparing for monitor-based UniWB
    • A one-step UniWB procedure
    • The math behind the one-step method
    • Iteration using Newton’s Method

Category List

Recent Comments

  • JimK on How Sensor Noise Scales with Exposure Time
  • Štěpán Kaňa on Calculating reach for wildlife photography
  • Štěpán Kaňa on How Sensor Noise Scales with Exposure Time
  • JimK on Calculating reach for wildlife photography
  • Geofrey on Calculating reach for wildlife photography
  • JimK on Calculating reach for wildlife photography
  • Geofrey on Calculating reach for wildlife photography
  • Javier Sanchez on The 16-Bit Fallacy: Why More Isn’t Always Better in Medium Format Cameras
  • Mike MacDonald on Your photograph looks like a painting?
  • Mike MacDonald on Your photograph looks like a painting?

Archives

Copyright © 2025 · Daily Dish Pro On Genesis Framework · WordPress · Log in

Unless otherwise noted, all images copyright Jim Kasson.