Lightroom’s Calibration > Shadows > Tint slider is a powerful—but global—tool. It can help correct black point color casts or apply subtle shadow toning, but what if you want to apply different calibration settings to different parts of the image? One reason to want to do this is that the Lr shadows tint tool affects some midtones, which may not be what you want.
Here’s a technique using Lightroom and Photoshop to gain local control over shadow calibration:
-
Create a Virtual Copy
-
In Lightroom, right-click your image and choose “Create Virtual Copy.”
-
You now have two versions of the same RAW file with independent edits.
-
-
Apply Shadow Calibration Separately
-
In the original, set Calibration > Shadows > Tint to one value (e.g., +40 for magenta shift).
-
In the virtual copy, set it to a different value (e.g., 0 for neutral or –20 for green correction).
-
-
Export Both as Layers to Photoshop
-
Select both images in Lightroom.
-
Right-click and choose:
“Edit In” > “Open as Layers in Photoshop.”
-
-
Mask and Blend in Photoshop
-
Use Layer Masks on the top layer to reveal or hide parts of each version.
-
Use gradient masks, soft brushes, or selections to blend the calibration-adjusted areas precisely.
-
For example, preserve green-corrected shadows in the foreground while using a neutral version for the background.
-
-
Finalize and Save
-
Once satisfied, flatten the image, or keep the layers for future editing, and Save—it will return to Lightroom as a new file.
-
Lightroom doesn’t allow local Calibration adjustments—but by combining virtual copies with Photoshop’s masking tools, you effectively create region-specific shadow calibration, something not natively possible in Lightroom.
Example:
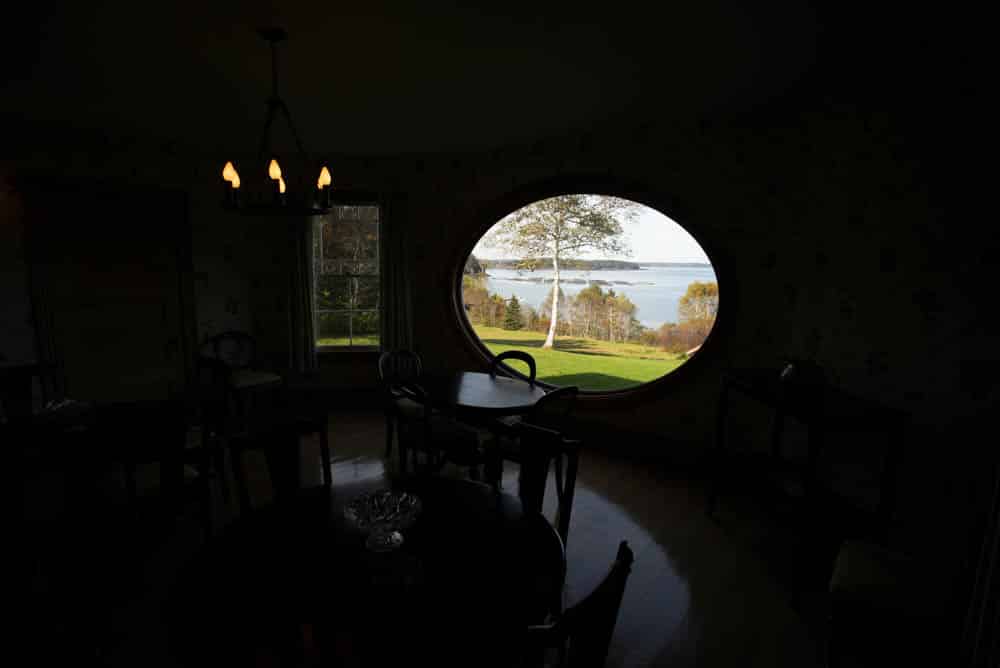
Original image:
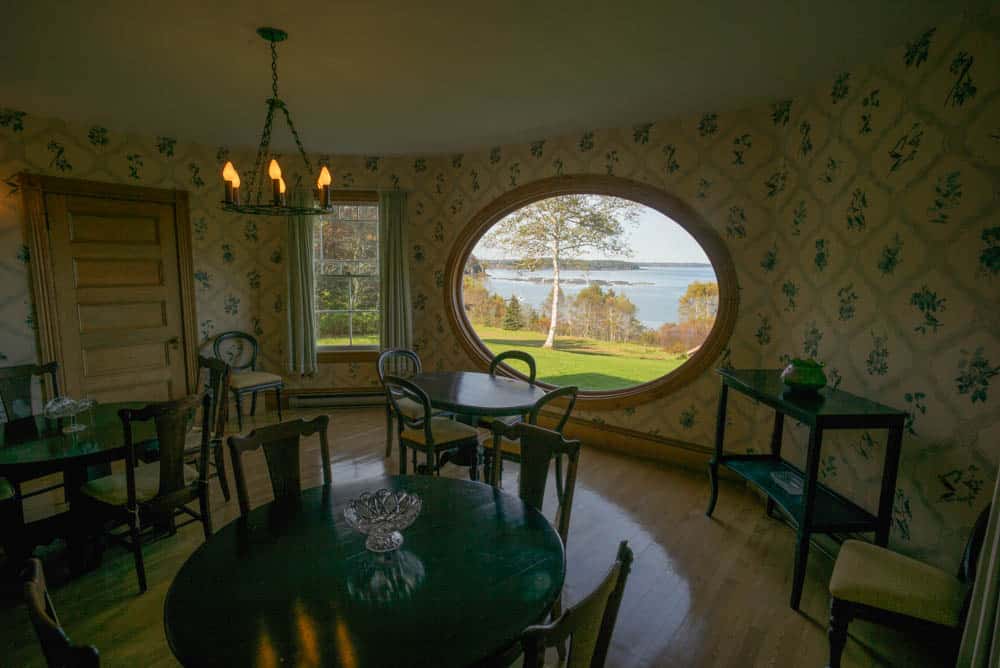
Dark areas boosted:
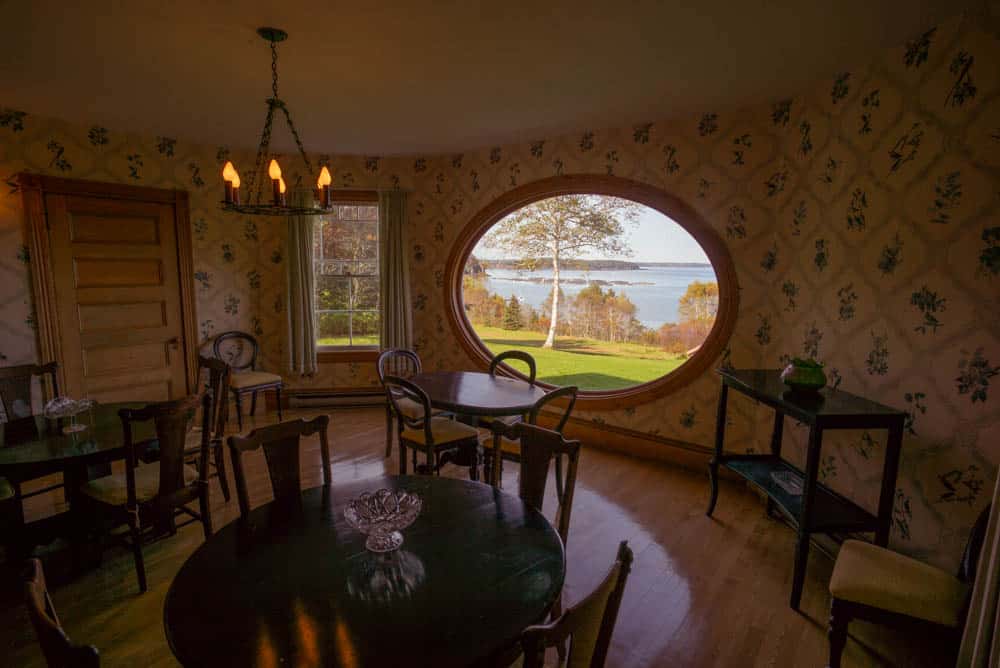
Shadows corrected. Note the color shifts in the sunlit portions of the image:
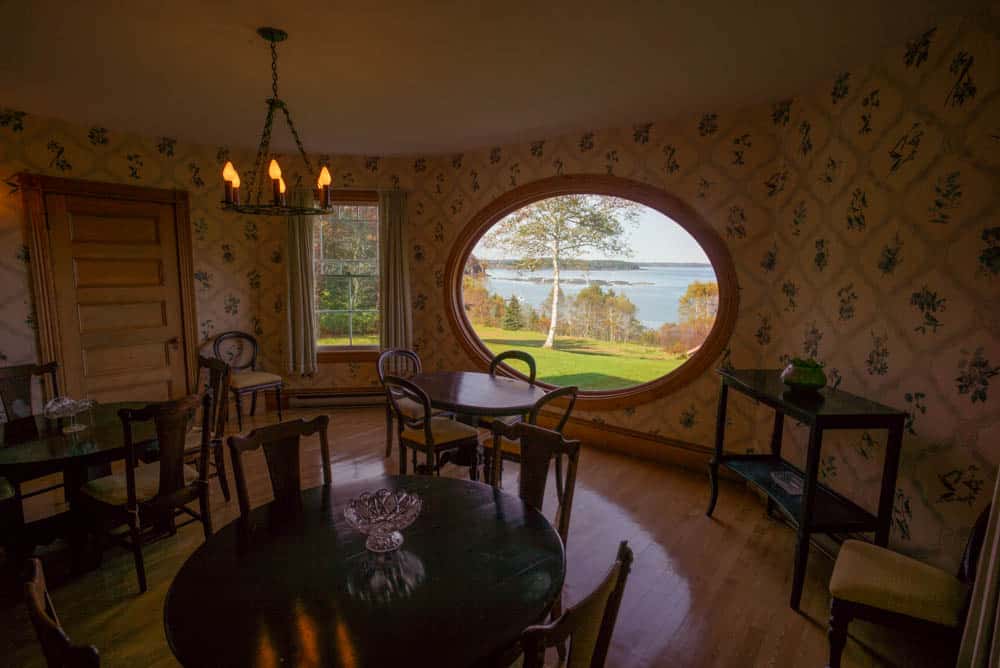
Shadow correction masked out from sunlit parts of the image:
Leave a Reply