I’ve been working on improving my toolset for analyzing the PDAF-pixel-induced banding that we’re seeing on some of the a7III demo shots, and that — through some pretty extreme measures — I got to occur on the a9.
I wrote some Matlab code to find and measure the intensity of the artifacts. Then I set up a test similar to the a9 test, but with an a7RIII and the flash in the center of the image:
- Godox Flashpoint XPLOR 600PRO TTL aimed at the camera
- a7RIII with Batis 135/2.8, wide open
- Mechanical shutter at 1/125
- Godox R2 Pro trigger
- Flash set to 1/128 power, which is as low as it goes with the R2 Pro remote.
- ISO 100
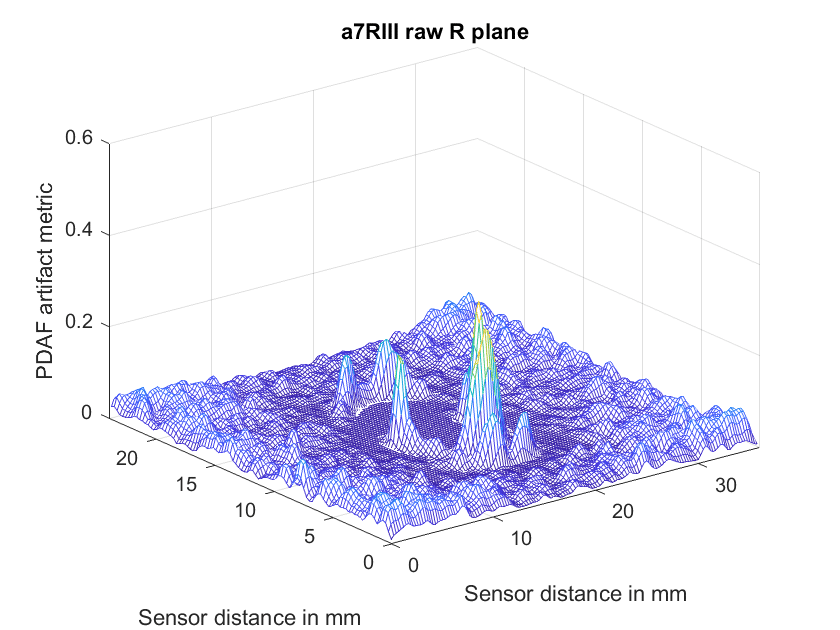
Ignore that spike in the middle; that’s caused by deficiencies in my artifact-detection algorithm. I’ll explain the algorithm at the end of this post, because the explanation is technical and not useful for most folks.
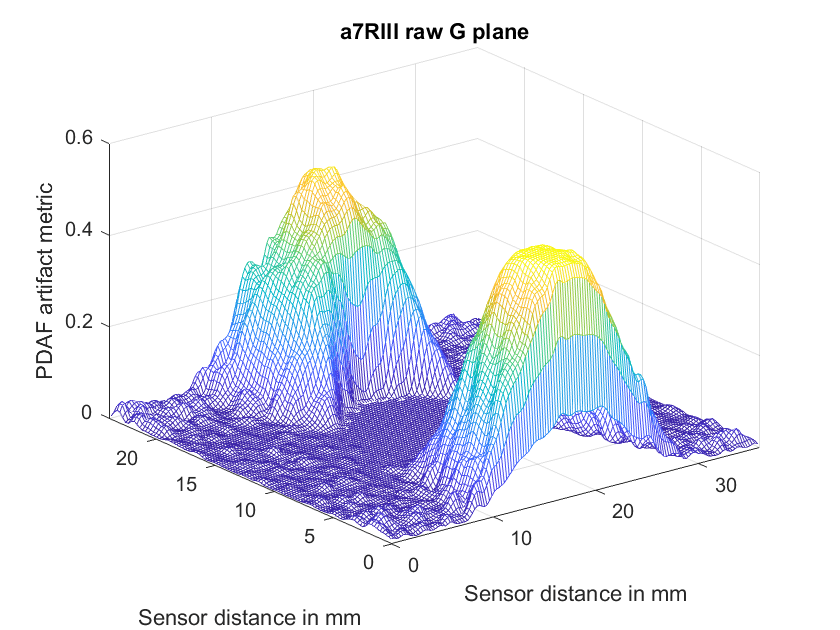
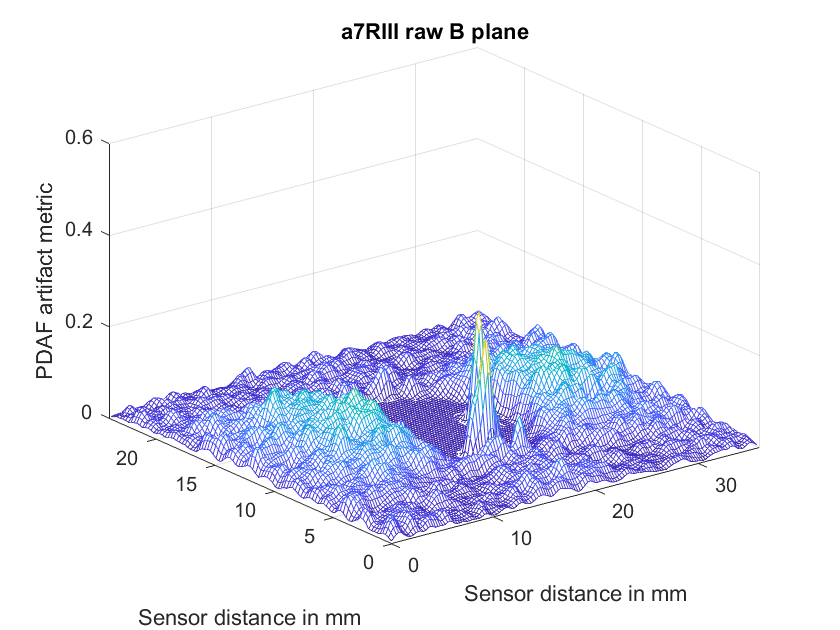
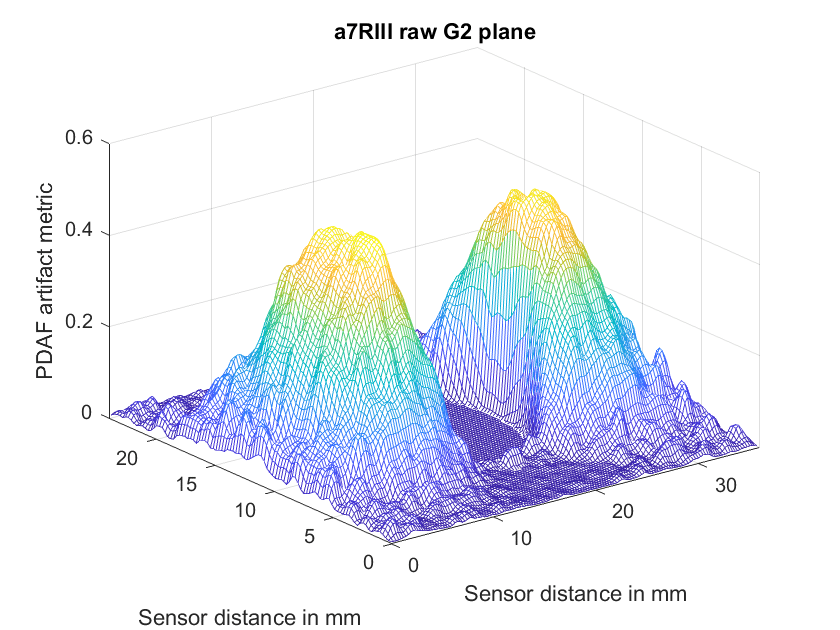
The a7RIII has behavior that similar to what we saw with the a9. Most of the artifacts are in the green raw channels, and which of those are the worst depends on the orientation of the light source to the affected pixels.
Since you haven’t seen the a9 data presented this way, I’ll show it to you.
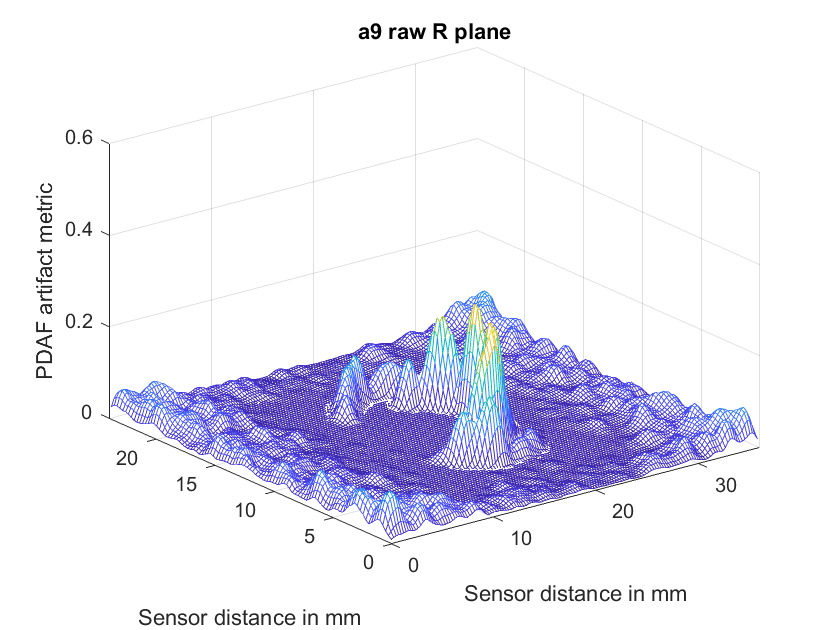
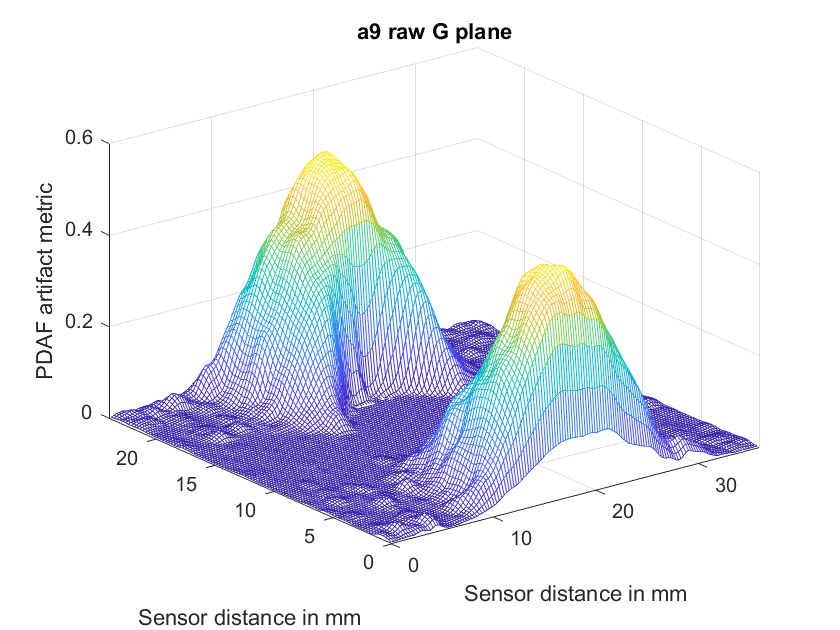
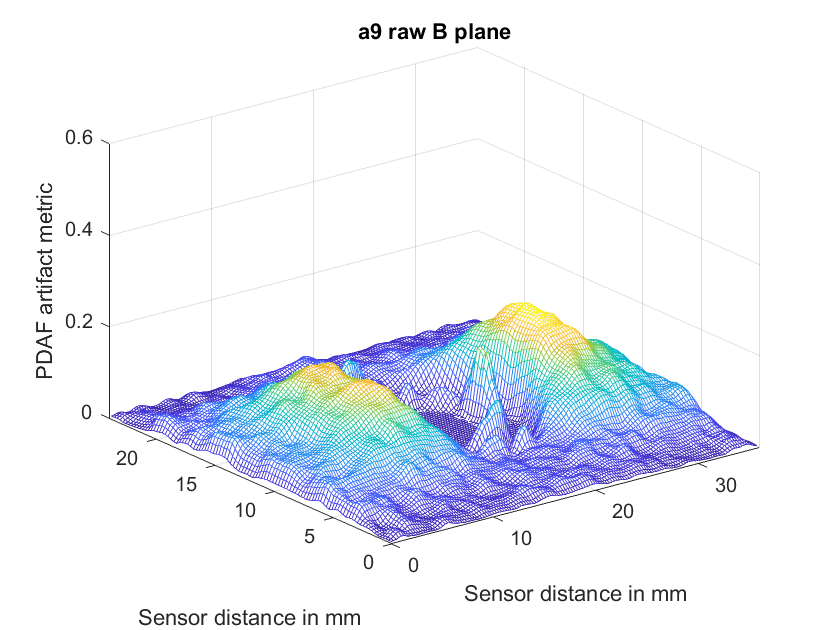
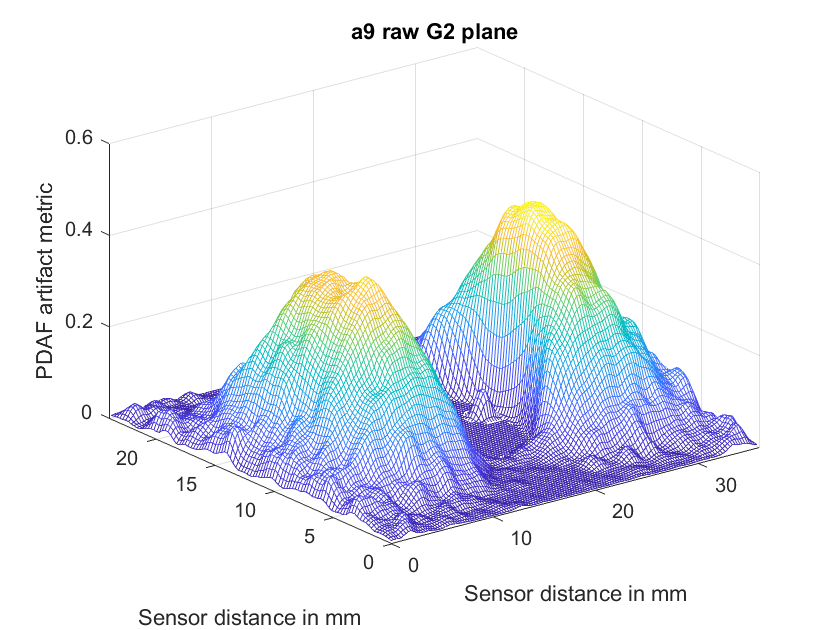
The big difference is that we see more of the artifact in the blue channel in the a9.
This peculiarity has apparently been with us for some time, but I’m just getting around to seeing it. It has not adversely affected a single one of my a9 or a7RIII images, so for those cameras, this is mostly of academic interest. Whether the effect is worse in the a7III, as it appears to be, and how much worse will have to await further study.
Here’s the artifact-detection algorithm in English:
- Read in one raw plane
- Construct a 3-pixel-high by 100-pixel-wide highpass kernel with the all the columns the same and the top and bottom rows negative so that the total of the kernel is zero. That’s a high-pass filter.
- Pass the kernel over the image.
- Remove entries where a pixel and the one immediately above or immediately below are both over some threshold. One of those isn’t a PDAF artifact. Just do this once, so we don’t throw out good data.
- Morph artifacts found from one row high to six rows high. That’s enough to blend one set of artifacts with the ones above or below them.
- Low-pass filter the image with a disk filter with 100-pixel radius.
- Do all that for all the other raw planes.
- Subtract the smallest value in all raw planes at each pixel location from all the raw planes. This gets rid of some clutter.
- Plot.
If anyone wants to see the Matlab code, sing out.
Is one green channel horizontal detection and one vertical detection?
Well done Jim!
Do you still own A7R2? Can you run the same test on it?
I tried extreme processings on my backlit images filled with flare and didn’t find any flaw.
Jim, can you extract any info about how the intensities in G1 vs B and G2 vs B are related ?
I mean ..
is there a constant relation of the intensity of the artefact .. ?
For example, in the simpler case (linear), constant (not varying depending on distance or direction) ratio G1intens/Rintens or G2intens/Bintens?.
Or maybe a more complex but which can be mathematically expressed ?. like say Bintens = sqrt( G2intense) ?.
This info about the “signature” of the artefact can be very helpfool for correcting algorithms 😉
Hi Jim,
I develop images from Festival Photographers a few times a year. Some big ones. One photographer switched to this camera and used silent shutter mode…. The banding and lack of ‘depth’ that occurred because of this was quite shocking. These bands use the latest and greatest lighting technology that can sometimes hit those extremes you seem to be talking about ?
When you use silent shutter the scan time goes way down (to 1/15 to 1/30 second at full frame) in the a7RIII and a7RII, causing banding with non-continuous light sources. Modern stage lighting is often non-continuous. The scan time is faster in the a9, at about 1/160 second, but you can still run into problems in some venues. Even mechanical focal plane shutters can have difficulties. The only real solution is to use a leaf shutter or a global one. Both restrict your camera choices greatly.
Jim