This is the 51st in a series of posts on the Sony a7RIII You should be able to find all the posts about that camera in the Category List on the right sidebar, below the Articles widget. There’s a drop-down menu there that you can use to get to all the posts in this series; just look for “a7RIII”.
I have reported in the past (here, here, here, and here) that Sony’s Imaging Edge software oversharpens when flattening ARQ files. It does that even when sharpening is explicitly turned off in the app. Up to now, I haven’t quantified the oversharpening, but have simply pointed out that there is a workaround: flatten the ARQ stacks that Imaging Edge produces with another editor. Raw Therapee works fine. There is also a program quite descriptively called SonyPixelShift2DNG that works right on the ARW files and allows you to skip Imaging Edge entirely.
I set up a Sony a7RIII with a Batis 135/2.8 lens set to f/4 on a set of RRS carbon fiber legs and an Arca Swiss C1 head. I aimed the camera at a slanted edge target, focused, and made a set of pixel-shifted exposures. Then I did that again, three more times.
Here’s what one of the images looks like:
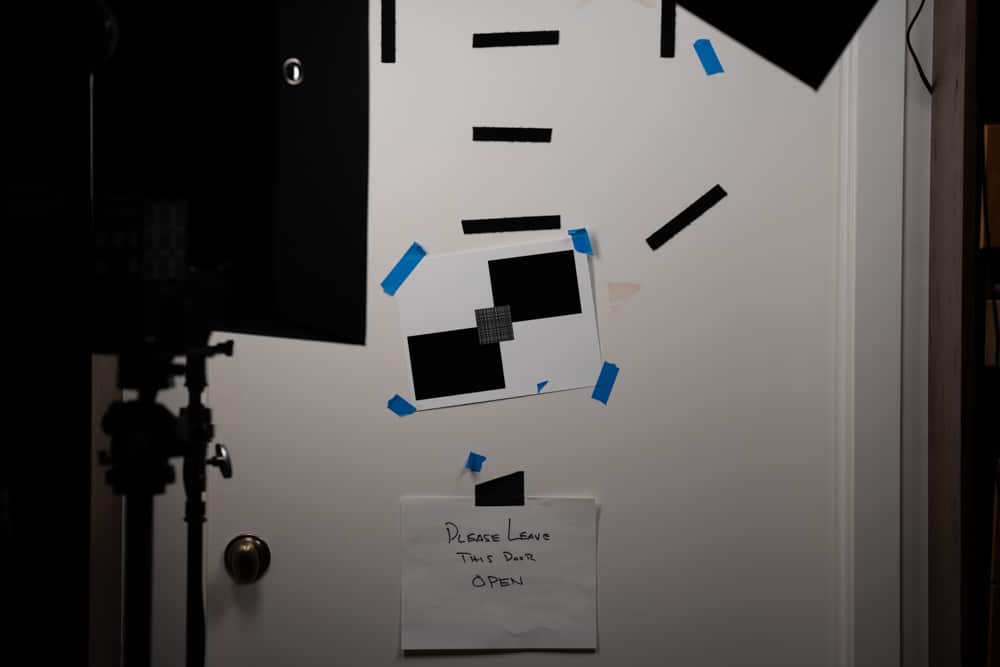
I ran Imatest’s sharpest image finder over the set and found the best set of four images. They were all about the same, with there being about as much variation within a set than among the sets. Still, I picked the sharpest set and ran it through Imaging Edge to produce an ARQ stack. While I was at it, I made sure that sharpening was turned off and exported a flattened version as a TIFF.
Here is an MTF analysis of the sharpest image in the set as demosaiced by dcraw with the Imatest default option string:

And here is that same image demosaiced by Lightroom with default settings:
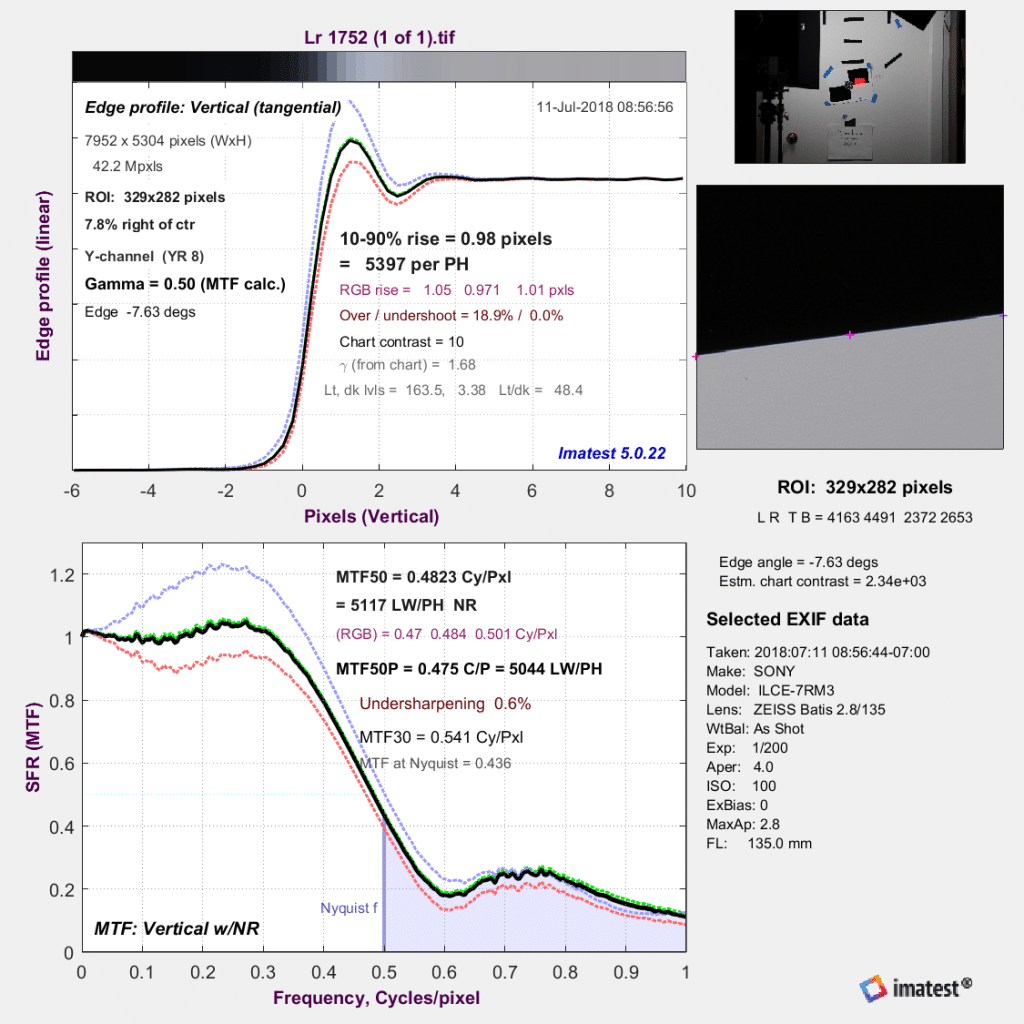
The aggressive Lr default sharpening is evident. Here’s what happens when you turn Lr’s sharpening to zero:
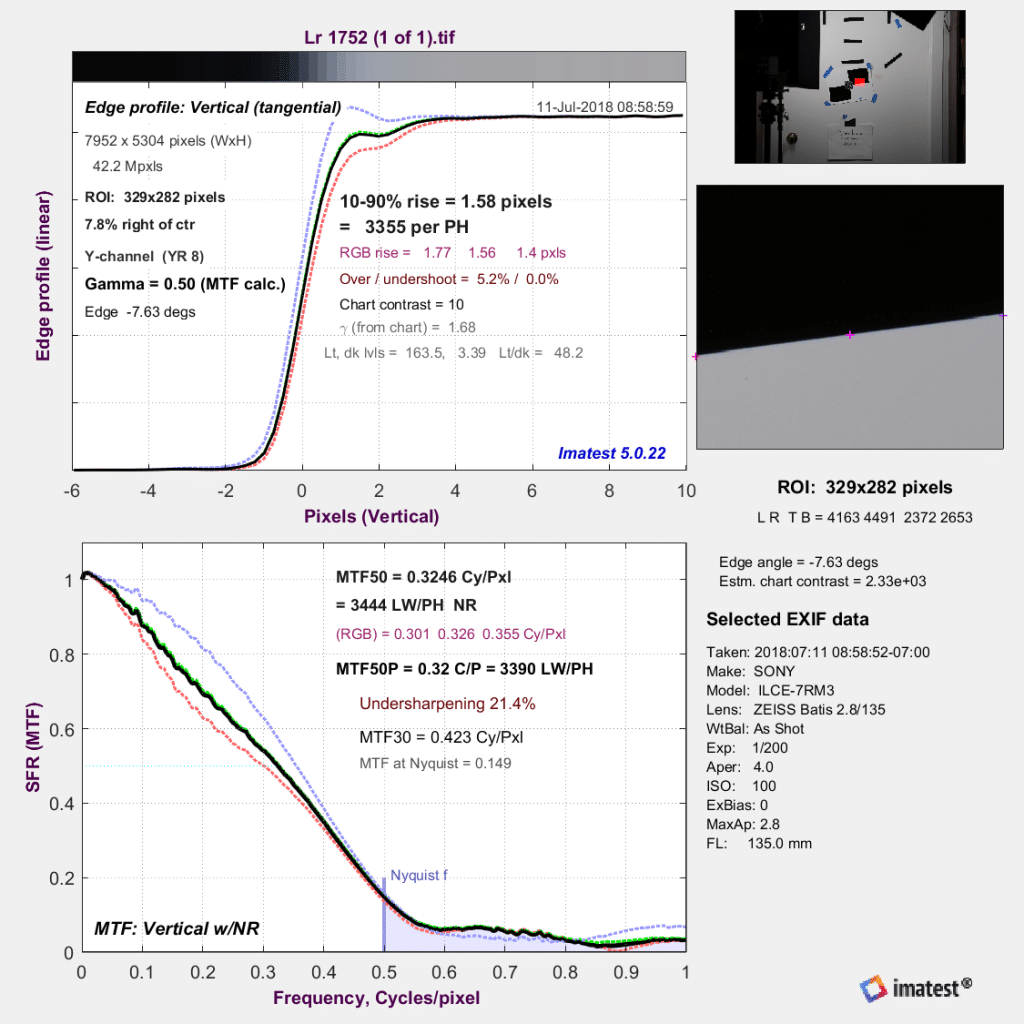
The edge isn’t quite as pristine as with dcraw, but it’s not bad.
Now we’ll look at what we get with three different ways to flatten the four-shot stack.
First, Imaging Edge:
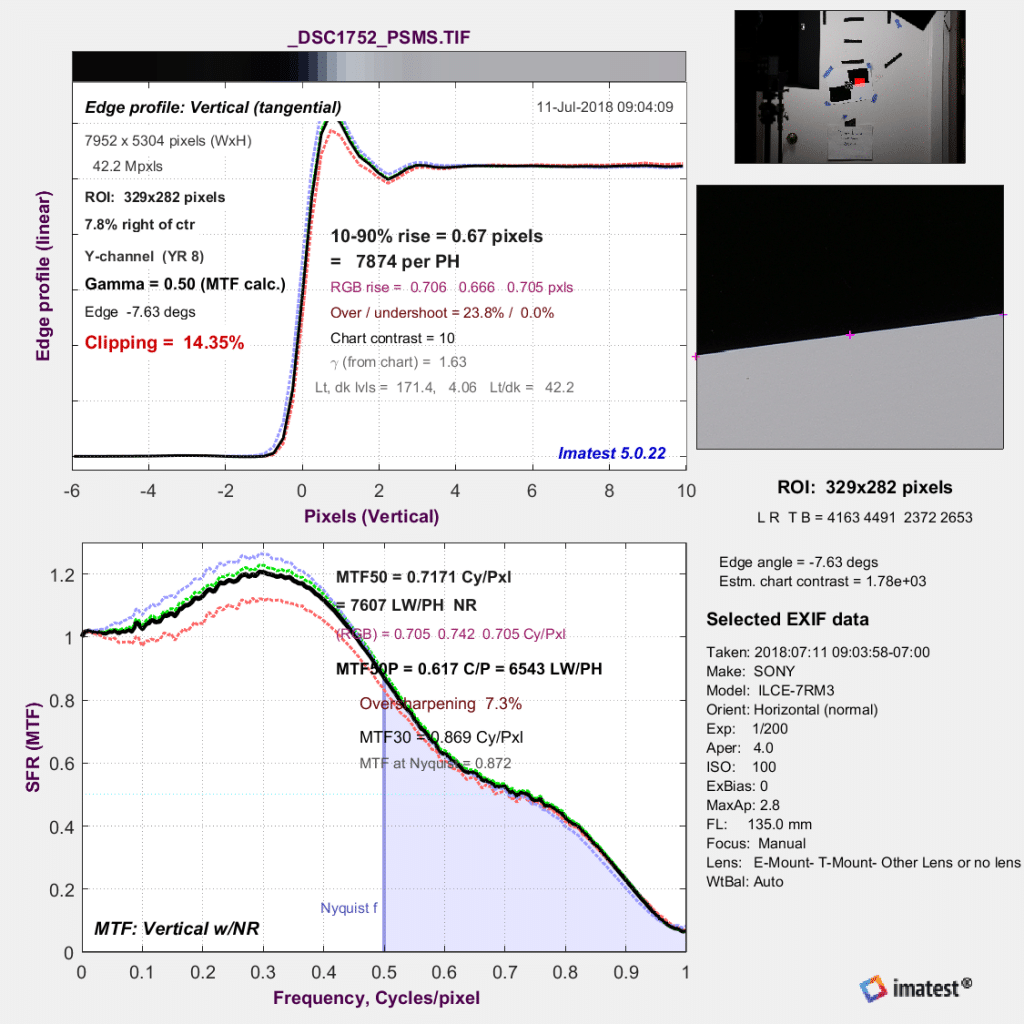
That’s pretty yucky. It makes Lr’s default sharpening look restrained. Note the MTF at Nyquist: 0.872!
Raw Therapee:
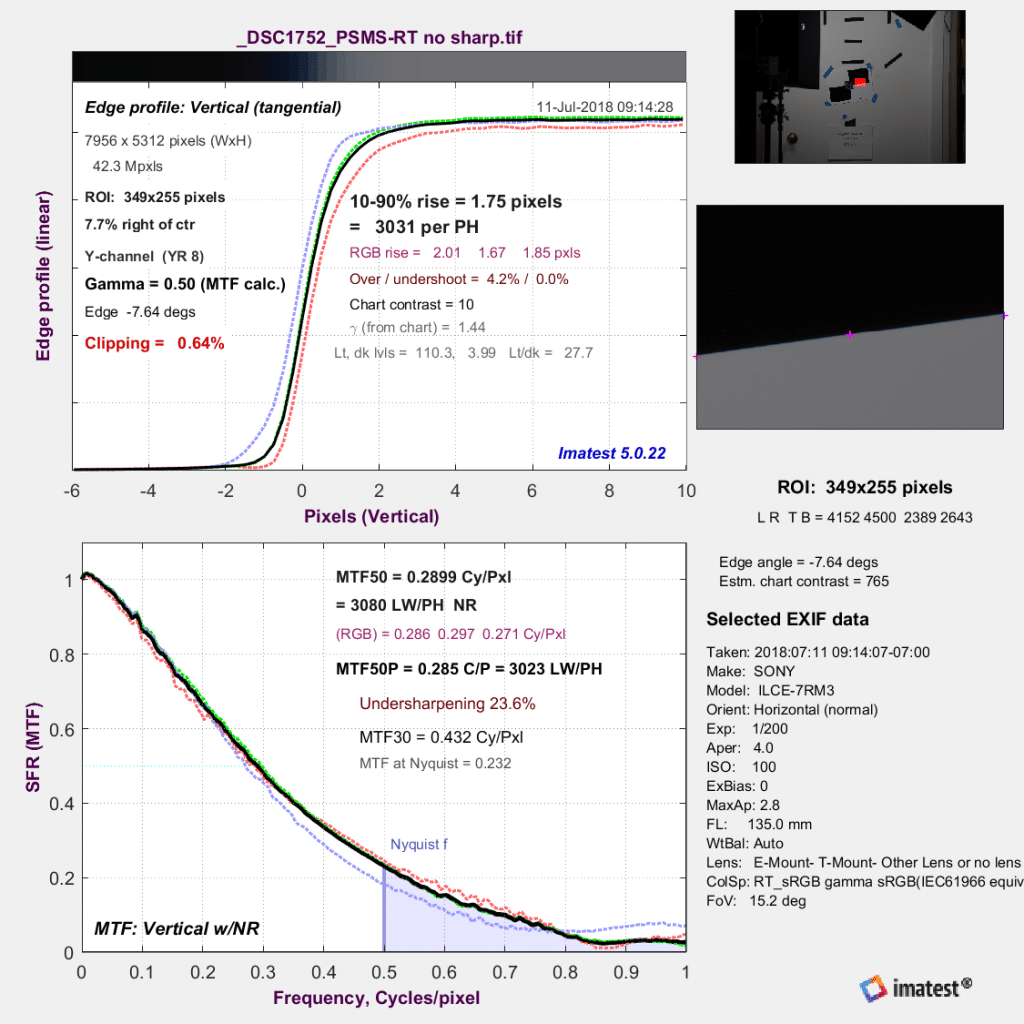
That looks great.
And finally, SonyPixelShift2DNG working right on the ARW files, not the ARQ file like Raw Therapee.
![]()
That also looks fine.
It’s much better to add sharpening to taste in image processing than to try to undo baked-in sharpening.
A7RIII Pixel Shift – I can’t see benefit
Why am I not seeing any difference between a regular Raw file and Pixel Shift (combination of 4 files)which is supposed to have more detail? Here is my workflow:
1. camera on very sturdy tripod, 55m/1.8, aperture f7.1 to avoid diffraction. 100 iso.
2 Using ir remote
3. shoot a plain raw file (uncompressed) and follow that with the Pixel shift version
4. process the 4 files in SonyPixelShift2DNG (much simpler & quicker than Sony’s app) and open the resulting .dng and the .arw file in ACR (adobe camera raw)
4. Viewed at 100% on a 27in iMac retina, apply same sharpening and corrections to match the two
They look about the same. Not much difference.
Then process the same 4 files with Sony’s imaging edge>Viewer and they look much better even though I select convert not adjust and convert. And I just looked at the Edit component, even though I didn’t use it, to be sure that there is 0 sharpening
Maybe I’m overlooking something obvious?
I bought the A7R3 for this feature but I’m not seeing the benefit
Have you tried it with a Siemens Star?
https://blog.kasson.com/a7riii/sony-a7riii-pixel-shift/
IMO, the main benefits relate to reduced aliasing, not to sharper images.
Strange, I’m experiencing the same thing as Frank. I can only see the difference in Sony’s Viewer, not in LR. I’ve saved to ARQ using Sony’s software as well as to DNG using SonyPixelShift2DNG.
The difference I’m seeing in Sony’s Viewer is pretty dramatic.
Have you tried it with a Siemens Star?