• site home
  • blog home
  • galleries
  • contact
  • underwater
  • the bleeding edge

the last word

Photography meets digital computer technology. Photography wins -- most of the time.

You are here: Home / a7RIII / Sony a7RIII star spreading — raw composites

Sony a7RIII star spreading — raw composites

December 13, 2017 JimK 4 Comments

This is a continuation of a series of posts on the Sony a7RIII.  You should be able to find all the posts about that camera in the Category List on the right sidebar, below the Articles widget. There’s a drop-down menu there that you can use to get to all the posts in this series. You can also click on the “a7RIII” link in the “You are here” line at the top of this post.

I’ve reported several times in this series of posts on the a7RIII about the digital spatial filtering that takes place at exposures of 4 seconds and longer. Among astronomical photographers, that is known as “star-eater” processing. Yesterday I reported how the processing affected an artificial star. For that post, I let Lightroom demosaic and process the images. Today I’m going to give you a less-varnished version and show you the undemosaiced raw images. It is usual to white-balance the four raw color planes when showing these images, but in the case of the artificial star images, that is unnecessary. Because I don’t want to do unnecessary processing, I’m leaving that step out.

3.2 seconds


4 seconds

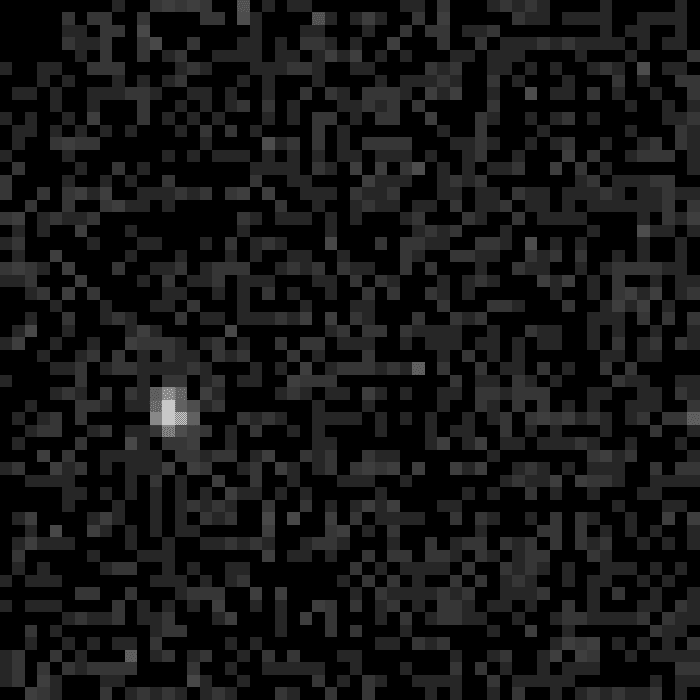
All the crops that I’ll show you have the same extent in the camera’s frame, so the RGGB Bayer pattern does not move from image to image. Unfortunately, the artificial star does, as I jostled the camera when changing the shutter speed or moving it along the focusing rail.

In the four-second exposure of the above pair, the blue pixel that was quite bright in the 3.2-second exposure has been suppressed by the star-eating processing, appearing as a hole in the middle of a constellation of four green pixels. 

Here’s another pair:

3.2 seconds


4 seconds


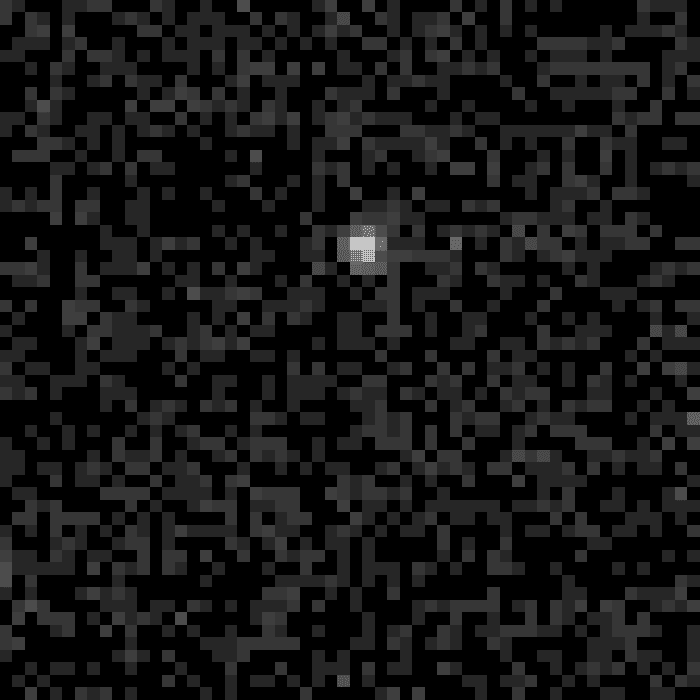
The same kind of thing happens.
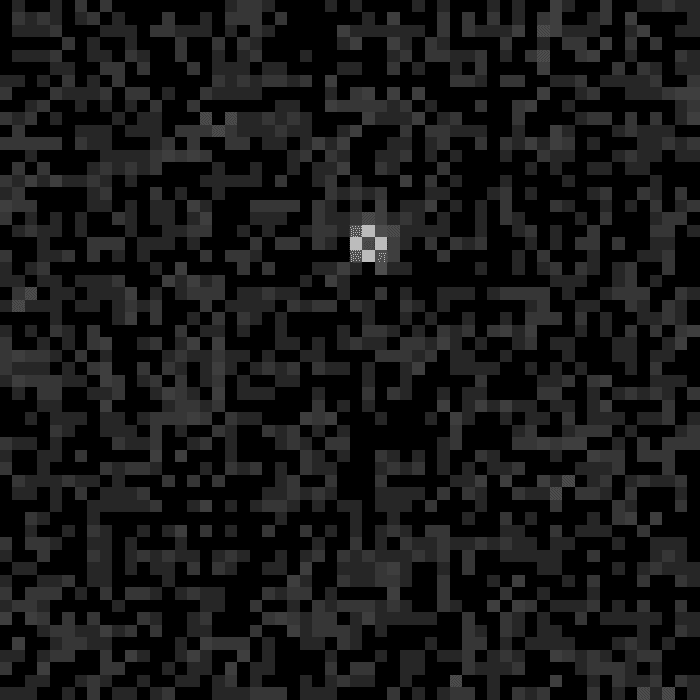
One last pair:

3.2 seconds


4 seconds

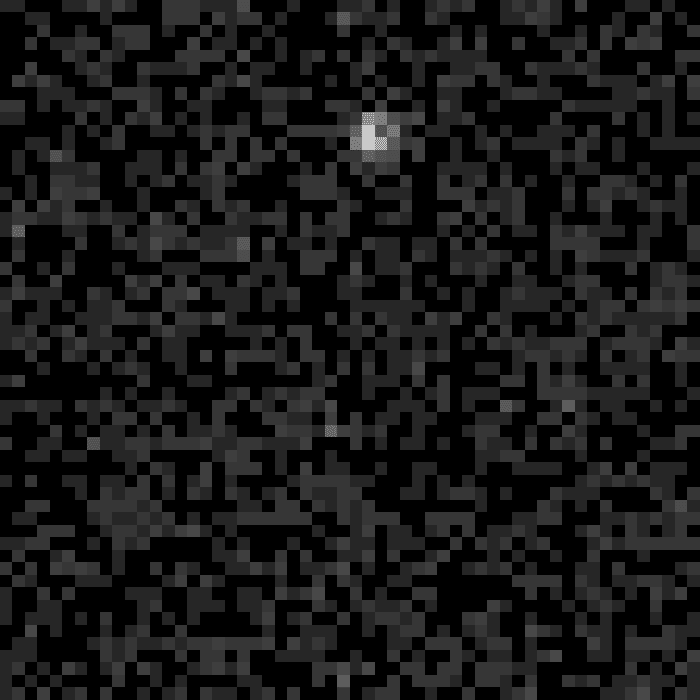
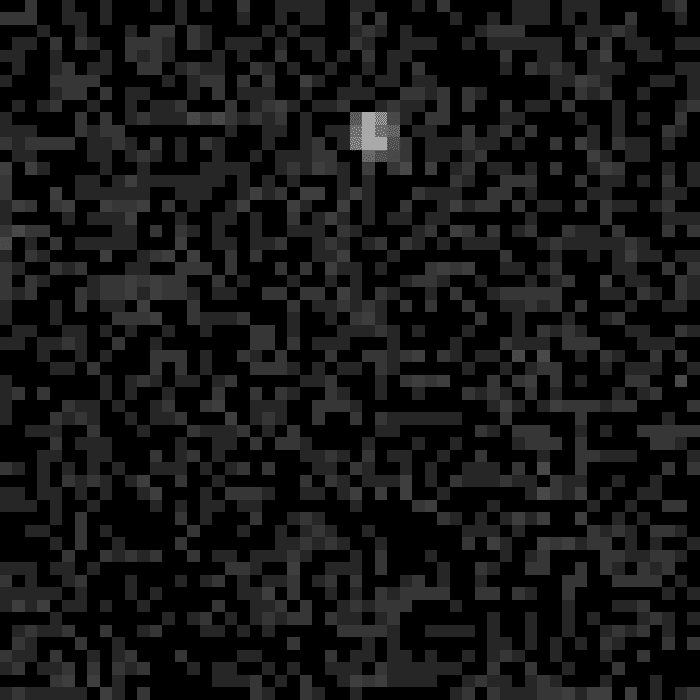
In this case, we just see a broadening and diminution of intensity of the artificial star image, and no hole in the middle.

a7RIII

← a7RIII star spreading Sony a7RIII pixel shift red sharpness →

Comments

  1. John says

    December 13, 2017 at 11:11 am

    Thanks for demonstrating this so clearly, Jim. As I just commented elsewhere, the disappointing thing for me about Sony’s approach here is not just the loss of the smaller and/or fainter stars, its the leaving behind of unrealistic detritus that shouldn’t be there. I’d never quite realised the source of that until these last two posts of yours. Hopefully with evidence like this we can persuade them to either give us an on/off option, or to implement a more sophisticated approach such as that which is used by Nikon with the same sensor.

    Reply
    • JimK says

      December 13, 2017 at 11:51 am

      It’s clear from the demosaiced examples in the preceding post that this processing can cause big color shifts, usually towards green.

      Reply
  2. Mark Shelley says

    December 13, 2017 at 11:41 am

    Excellent experiment – with results I would have predicted. My guess is that in the third example, the brightest pixel was a green one. If so, it supports the argument that the green channel is treated differently.

    I’m not convinced that the star has broadened if by that you mean it has spread. It’s just been attenuated.

    Reply
    • JimK says

      December 13, 2017 at 11:57 am

      As to broadening: at 3.2 seconds we had one bright pixel and one runner-up. At 4 seconds we have four pixels of nearly the same intensity.

      Reply

Leave a Reply Cancel reply

Your email address will not be published. Required fields are marked *

May 2025
S M T W T F S
 123
45678910
11121314151617
18192021222324
25262728293031
« Apr    

Articles

  • About
    • Patents and papers about color
    • Who am I?
  • How to…
    • Backing up photographic images
    • How to change email providers
    • How to shoot slanted edge images for me
  • Lens screening testing
    • Equipment and Software
    • Examples
      • Bad and OK 200-600 at 600
      • Excellent 180-400 zoom
      • Fair 14-30mm zoom
      • Good 100-200 mm MF zoom
      • Good 100-400 zoom
      • Good 100mm lens on P1 P45+
      • Good 120mm MF lens
      • Good 18mm FF lens
      • Good 24-105 mm FF lens
      • Good 24-70 FF zoom
      • Good 35 mm FF lens
      • Good 35-70 MF lens
      • Good 60 mm lens on IQ3-100
      • Good 63 mm MF lens
      • Good 65 mm FF lens
      • Good 85 mm FF lens
      • Good and bad 25mm FF lenses
      • Good zoom at 24 mm
      • Marginal 18mm lens
      • Marginal 35mm FF lens
      • Mildly problematic 55 mm FF lens
      • OK 16-35mm zoom
      • OK 60mm lens on P1 P45+
      • OK Sony 600mm f/4
      • Pretty good 16-35 FF zoom
      • Pretty good 90mm FF lens
      • Problematic 400 mm FF lens
      • Tilted 20 mm f/1.8 FF lens
      • Tilted 30 mm MF lens
      • Tilted 50 mm FF lens
      • Two 15mm FF lenses
    • Found a problem – now what?
    • Goals for this test
    • Minimum target distances
      • MFT
      • APS-C
      • Full frame
      • Small medium format
    • Printable Siemens Star targets
    • Target size on sensor
      • MFT
      • APS-C
      • Full frame
      • Small medium format
    • Test instructions — postproduction
    • Test instructions — reading the images
    • Test instructions – capture
    • Theory of the test
    • What’s wrong with conventional lens screening?
  • Previsualization heresy
  • Privacy Policy
  • Recommended photographic web sites
  • Using in-camera histograms for ETTR
    • Acknowledgments
    • Why ETTR?
    • Normal in-camera histograms
    • Image processing for in-camera histograms
    • Making the in-camera histogram closely represent the raw histogram
    • Shortcuts to UniWB
    • Preparing for monitor-based UniWB
    • A one-step UniWB procedure
    • The math behind the one-step method
    • Iteration using Newton’s Method

Category List

Recent Comments

  • JimK on Goldilocks and the three flashes
  • DC Wedding Photographer on Goldilocks and the three flashes
  • Wedding Photographer in DC on The 16-Bit Fallacy: Why More Isn’t Always Better in Medium Format Cameras
  • JimK on Fujifilm GFX 100S II precision
  • Renjie Zhu on Fujifilm GFX 100S II precision
  • JimK on Fuji 20-35/4 landscape field curvature at 23mm vs 23/4 GF
  • Ivo de Man on Fuji 20-35/4 landscape field curvature at 23mm vs 23/4 GF
  • JimK on Fuji 20-35/4 landscape field curvature at 23mm vs 23/4 GF
  • JimK on Fuji 20-35/4 landscape field curvature at 23mm vs 23/4 GF
  • Ivo de Man on Fuji 20-35/4 landscape field curvature at 23mm vs 23/4 GF

Archives

Copyright © 2025 · Daily Dish Pro On Genesis Framework · WordPress · Log in

Unless otherwise noted, all images copyright Jim Kasson.