This is the fifteenth post in a series of tests of the Fujifilm GFX 100, Mark II. You can find all the posts in this series by going to the Categories pane in the right hand panel and clicking on “GFX 100 II”.
I’ve done a lot of quantitative work aimed at figuring out what the heck is going on with the ISO 80 setting of the GFX 100I II, without really understanding it yet. You could say I’m just as confused as when I started, but at a much higher level. Sometimes quantitative methods alone are not enough; you have to take a look.
For this test, I mounted a 110 mm f/2 Fuji GF lens on the GFX 100 II, put the camera on a RRS tripod and C1 head, turned AF-S on, and set an exposure that by the camera’s metering system, was 5 stops down from normal for the ISO 80 shot.
The rest of the particulars:
- ISO 80 and ISO 100
- f/4 at 1/25 second
- EFCS
- 14-bit precision
- Single shot drive mode
- Same exposure for each, so same photon noise in each image; this is a test about read noise
Developed in Lightroom, with default settings except:
- 5-stop Exposure move
- Shadows +70
- Blacks +26
- Noise reduction turned off
- Sharpening amount 20 (default is 40)
- White balanced to the white text in Hunt’s book on color
Here is the whole frame at both ISOs.


You can see that the 1/3 stop “overexposure” doesn’t make all that much difference.
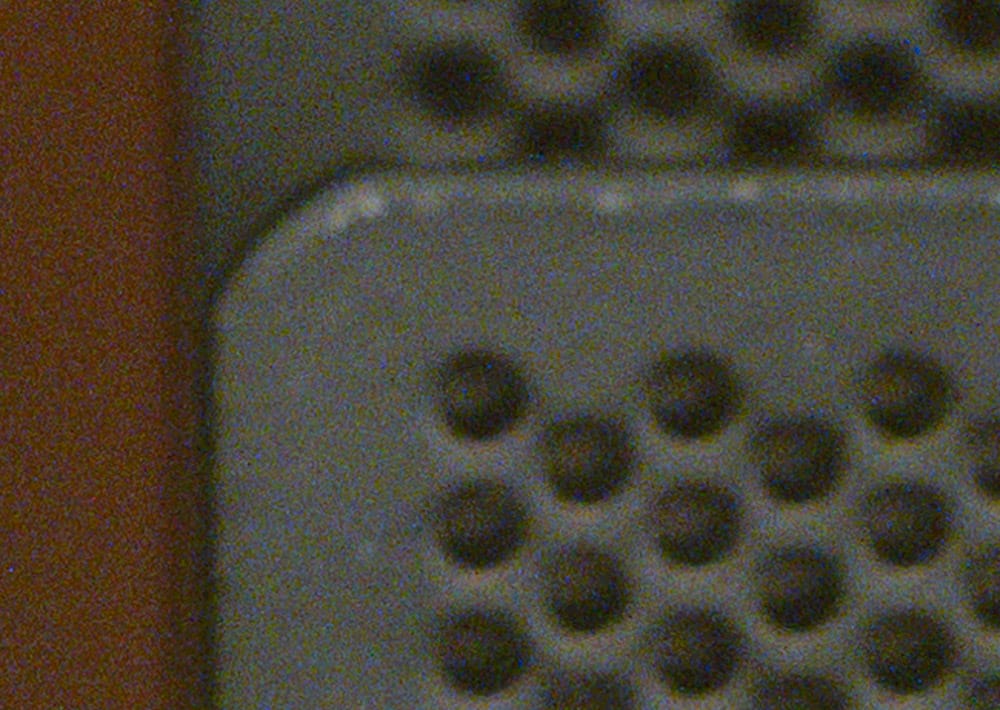
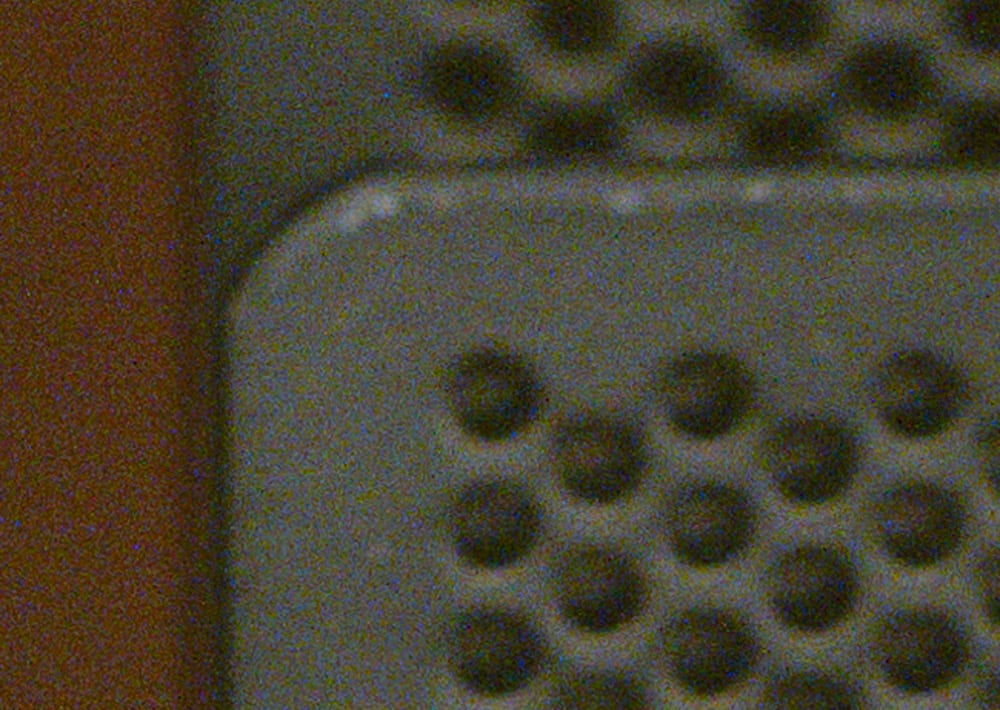
Some about 150% crops of a generously exposed region:

Not much difference.
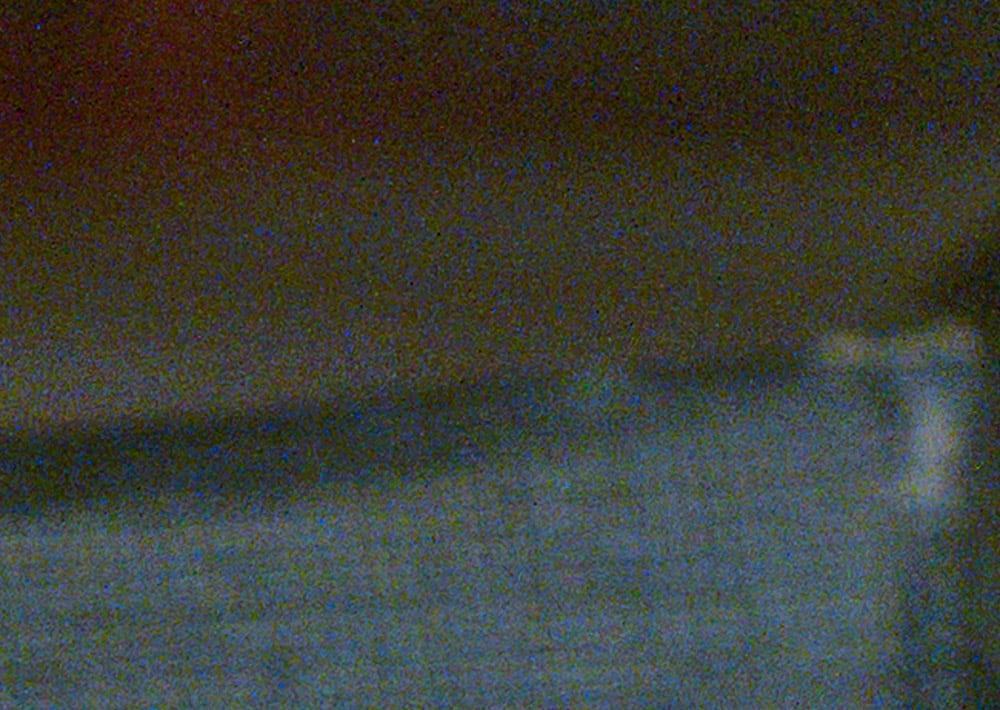
Now a darker region:
The ISO 100 image is noisier. Not night and day nosier, but definitely noisier. This is a dark enough region that the read noise is significant (unlike the well-lit crops above), and the read noise reduction at ISO 80 compared to ISO 100 is visually apparent, and not just something that quantitative programs notice.
Here’s another section of the image, cropped the same way.

I still don’t know what the camera is doing at ISO 80, but I now know it’s not just a trick of the numbers.
There are color shifts in the deep shadows. Those are due to inadequate black point calibration in Lightroom. I used the default calibration for these images. Custom calibration could remove most, if not all of the differences.
Christian says
have you considered that maybe the background processing applied by adobe software plays a roll as the camera is not officially supported yet ? using c1 and adjusting the 80/100iso files for brightness and WB differences makes the noise level indistinguishable at 400%. i have repeated your test using a colorchecker and a sekonic munsell target with studio flash, 14 and 16 bit captures also including a -6 stop underexposure. there seems to be a very small advantage for 16 bit and the difference between 80 to 100 iso seems also a little bit more pronounced with 14 bit but I´m not really sure but the 14bit files underexposed 6 stops fall totally apart with a green shadow cast while the 16bit files hold up rather well and stay fairly neutral. the iso 80 14bit shot holds up also a little better but not much. think this green cast problem is already visible in your -5 sample files.
Eric says
I feel they did something with blue channel.
Emmmmmmmm says
I’m glad you reviewed the GFX100 II, you always provide such useful and truthful information.
I suspect that the ISO80 mode is possibly achieved by accumulating the capacitance of the two saturations of ISO100 and ISO500 (filling HCG/ISO500 first, then overflowing to fill LCG/ISO100), and arithmetically this superposition approximates ISO80.
But here’s a question, if it’s just expanding the CFD to the level of possible nonlinearity that it should have originally been, it shouldn’t result in a dynamic range increase, and in fact your tests show that it has no nonlinearity issues.
Another possibility is that Fuji customized the HDR function for double conversion gain reading on the CIS side to use the HCG as the dark part of the LCG+HCG.
In that case, perhaps a review of the difference in reading times at ISO80, ISO100, and ISO500 should show it: since DCG-HDR requires double the reading time.
However, one cannot rule out the possibility that Fuji uses two SCG readouts in other readout modes to synchronize the DCG readout time. In that case it would be difficult to recognize.
But if the ISO80 is designed with DCG-HDR, it should have less dark noise than the ISO100, which would fit your ISO lessness test.
The above is my personal opinion.
Hats off to you.
Johan Peijnenburg says
The initial rendition of GFX100II files taken at ISO 80, seems off in Capture One as well. Blacks are washed out and whits do not transition smoothly to the highlights. This happens when using the Auto setting for the curve. Switching to something like Film Standard makes things better, however I get the feeling it is still not ideal compared to how GFX100 files are rendered.
At the moment I don’t see the same issues in LR … did they fix the calibration for it?
Best, Johan
Chris O says
Finally! With this information I will be able to take compelling photographs. If my audience disagrees I will simply l remind them that I shot at iso 80 and that if they bring their microscope, they will see the superior nature of my work. Thank you.