This is one in a series of posts on the Fujifilm GFX 100S. You should be able to find all the posts about that camera in the Category List on the right sidebar, below the Articles widget. There’s a drop-down menu there that you can use to get to all the posts in this series; just look for “GFX 100S”.
I’ve shown you some theoretical work on the sub-Nyquist and ultra-Nyquist behavior of pixel shifting systems. I’ve also showed some visual demonstrations of how the Fuji 16-shot stacking system does when compared to a straight single shot with Lightroom demosaicing. Now I’ll take the shots that I captured for the latter and analyze slanted edges for some quantitative judgements.
The scene:
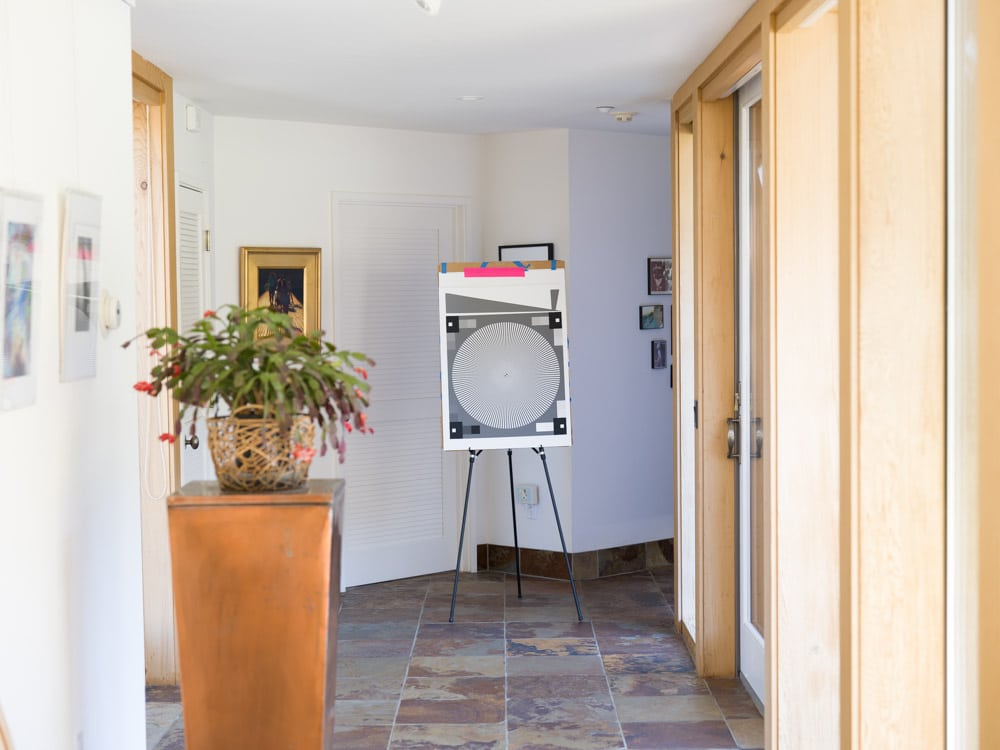
The protocol:
- 80 mm f/1.7 lens on the GFX 100S
- f/4
- C1 head
- RRS legs
- Sinusoidal Siemens star for focusing.
- Slanted edge above it
- Electronic shutter
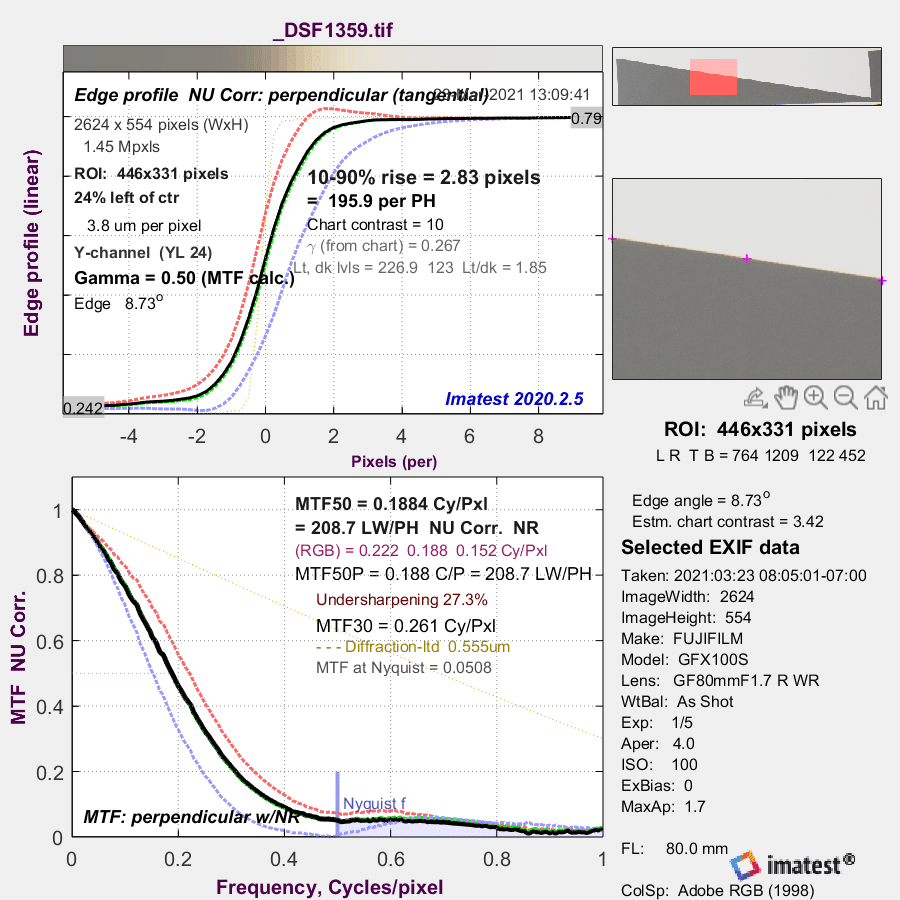
The single shot, developed in Lightroom 10.2 with default setting except for sharpening turned off and withe balance to lower left gray background around star.
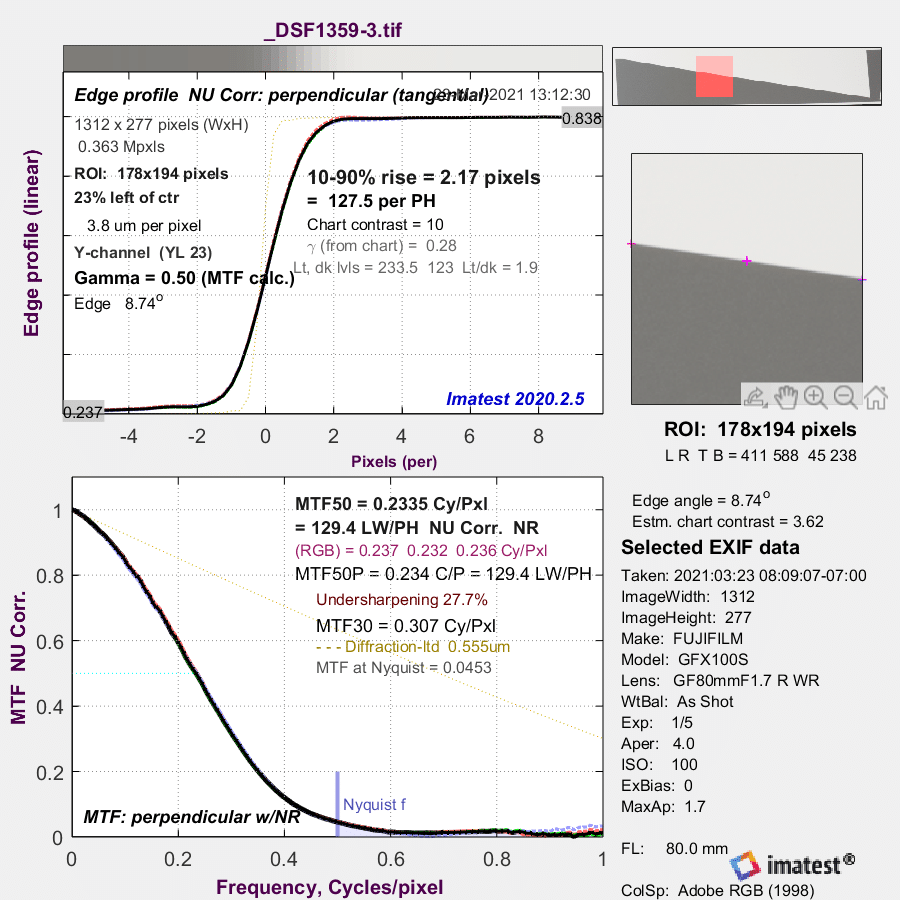
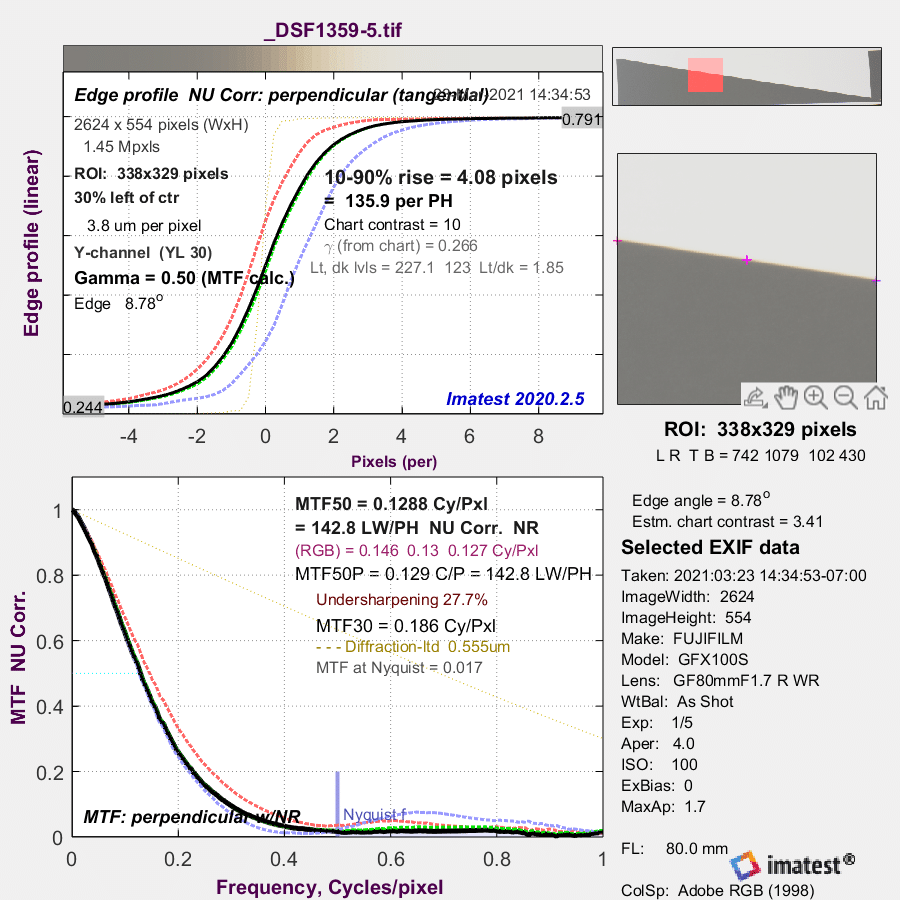
To compare these, remember that the number of pixels in each direction in the 16-shot image is twice what it is in the single capture. So divide the MTF x-axis in cycles per pixel by 2 in the single shot image to get the equivalent number in the 16-shot capture.
MTF 30 of the 16-shot capture is 0.186 cy/px. MTF 30 of the single capture is 0.348 cy/px. Divide that by two and you get 0.174 cy/px. So the two images are about the same sharpness measured at MTF 30.
But there’s something really strange going on. Look at the edge profile on the 16-shot image, paying attention to the three color planes. There is a lot of chromatic aberration. But there’s not much with the single shot image.
Now, both shots with Lightroom default sharpening:
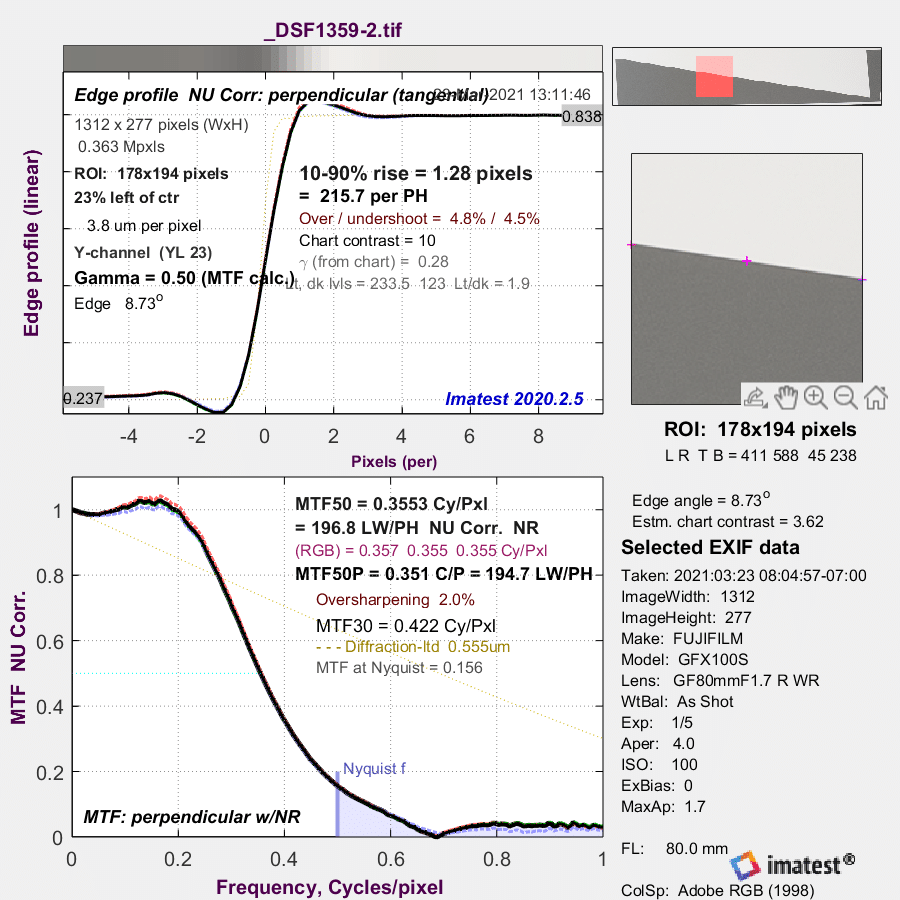
There’s a lot more sharpening in the single shot image. That’s because the Lr default sharpening for this camera and lens always uses a 1-pixel radius, and one pixel is twice as big in the single shot image as it is in the 16-shot one, as measured in terms of field of view.
This chromatic aberration thing is going to need some more work. Is it a bug in the Fuji Pixel Stack combiner software?
Hi Jim,
Super-resolution and subpixel scene estimation is funny with bayer. This is actually an active area of research for a project I’m working on at work, in which we can turn 40MP images into 2.6 giga-pixel images with our own wunderbar algorithm that does demosaicing, super-resolution, and aperture synthesis (obscure optics topic, ignore at the moment) in one shot.
In making it do debayering at the same time, I played quite a bit with where the samples have to be. aligned. If you consider the bayer subplanes as independent entities (and you should), then in the input you have R samples at (0, 2, 4, …), and G samples at (1, 3, 5, …) If you doubled the resolution of the image using half pixel shifts, then you have R samples at (0, .5, 2, 2.5, 4, 4.5, …) and so on. To bring this down to the original sampling, you would need to shift one set of samples by 1/2, prior to “combining” the images (however you combine them).
Your commercial prototypical camera does pixel shift in whole pixel increments first to get fully dense color sampling. You can see that the R, B ESFs are one pixel apart. This is because the dense red sampling is one row offset from blue. The notional location for a “super-pixel” has its sample at the corner where R, G1, G2, B all meet. That is (1,1), if you think of the coordinate of a pixel as its top-left corner. In that scheme, the output red pixel grid has top-left corner at (0,0) and blue is at (1,1).
One pixel shift between them.
A shift, whether by rolling the image, Fourier shift, whatever, will clean it up.
Cannot make any sense of this as written. The positions of R/G/B sensels are exactly the same when 4 (or 16) shots are “mixed together”.
It seems probable that the converter is confused in which direction the pixels are shifted in each shot.
Jim, you skipped introducing the second Imatest result. (I presume it is for the multi-shot.)
Also, it is unclear why it has “_5” in the name. Is it for a 4-shot-mode?!
The name changes because I export versions with different sharpening.