This is the fifteenth in a series of posts on the Fujifilm GFX-50S. The series starts here. You should be able to find all the posts about that camera in the Category List on the right sidebar, below the Articles widget. There’s a drop-down menu there that you can use to get to all the posts in this series; just look for “GFX 50S”.
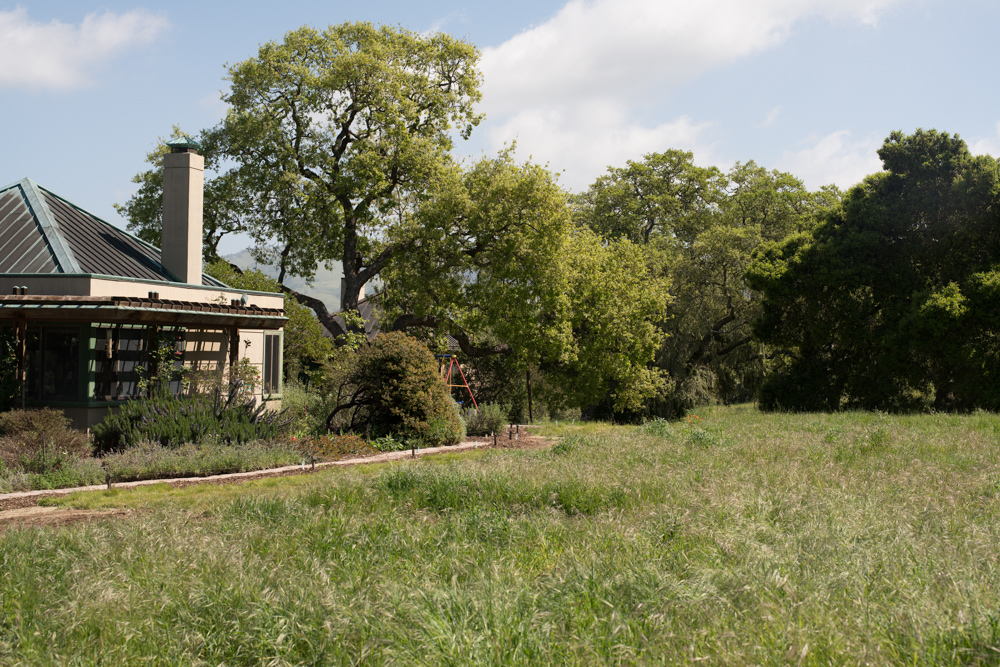
I like square photos. One of the attractions of the Fujifilm GFX-50S to me was the opportunity to use full frame lenses on the camera, since the coverage necessary to span a square 33×33 mm sensor is not that much greater than that required to cover a 24x36mm one. Today I’m going to see how much better — or worse — the GFX is at making square photos than the a7RII. I don’t have a lens of Otus quality for the a7RII that has the same field of view (FOV) as the Otus on the GFX, so I picked the closest thing around: the Otus 55. The right focal length to match FOV would be 62mm, and 55 will have to do.
The recipe
Shutter set to EFCS for both cameras, which meant it really was EFCS at the narrower apertures for the GFX. Exposure compensation set to zero. I focused five times at each aperture, and picked the sharpest images. 2-second self-timer used in both cases. Arca-Swiss C1 cube on RRS sticks. Small exposure corrections in Lr. Daylight white balance selected in Lightroom. Focus was in the center of the image, and all images were refocused at each aperture. Tripod and head were not moved between series.
The scene full frame:
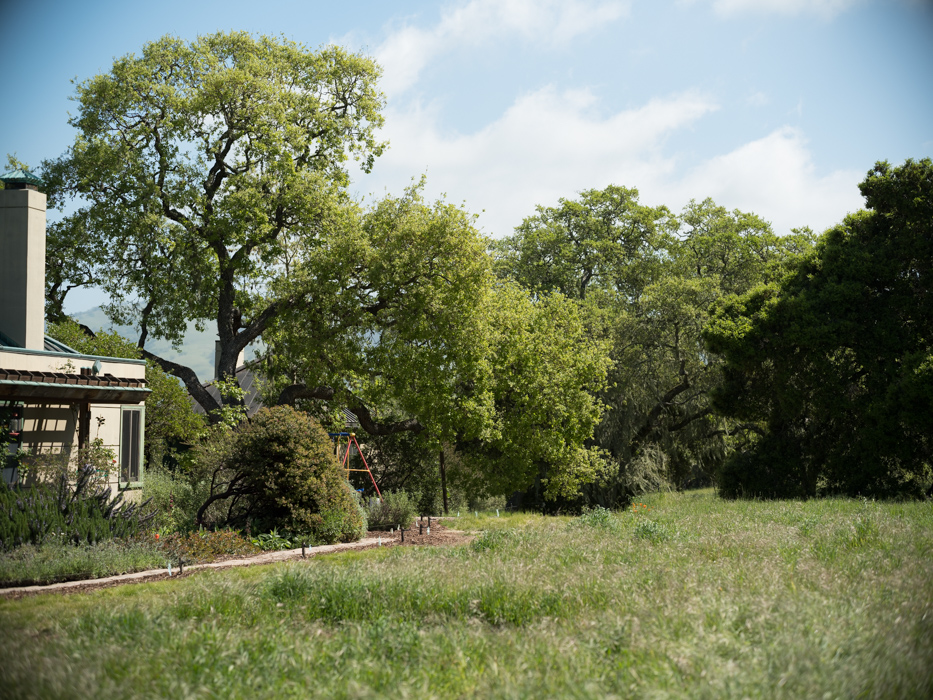
You can see some corner vignetting. When you drop the GFX image to 4:5 proportions, it looks like this:

Now the coverage is pretty good.
Both cameras cropped square:


In the center, at roughly 250% magnification for the GFX, and the same vertical sensor extent for the lower-resolution a7RII. This would give the same vertical field of view if the lenses were vertically equivalent focal lengths. Details: the GFX crops are 357×277 pixels, and the Sony crops are 306×237 pixels. All are enlarged to 700 pixels high on export from Lightroom.
If you just want a rough idea of the differences, just look at the images as displayed in-line in the posts. However, if you wish to compare these images in detail, you should view these images by clicking on them to see the source files, then setting your browser for 100% zooming. Even better, download them and make Photoshop stacks.
No matter what you do, these crops are all going to look horrible. I’m blowing them up so much so that they will represent the original file after JPEG’s discrete cosine transform has had its way with them. If you want to get a good idea of what the images would look like printed, get far away from your monitor. No, farther than that. Put a bunch of the images up on the screen and back up until the best one starts to look good. Then look at the others. There’s another reason why these images won’t look like the best thing the camera/lens combination can deliver. They’re demosaiced with Lightroom. Lightroom is not awful, but for a particular image, there are usually better raw processors. I use Lr because it’s a de facto standard, because I know it well, and because it’s got good tools for dealing with groups of images.
If you want to get an idea of how the differences between the images would translate to what you can see in a print, you’ll have to look at them from the right distance. An Epson printer samples at 360 pixels per inch (unless you’ve got finest detail checked, which is good sometimes but not always). I’ve taken care of the resolution differences between the two cameras with the different magnifications I’m using, so you don’t have to worry about that. What you need to know is that the GFX sensor is 6192 pixels high. Thus, the 277 pixel height of the GFX crops is 0.0447 (4.47%) of the height of the entire capture.
I’ve prepared a little table:
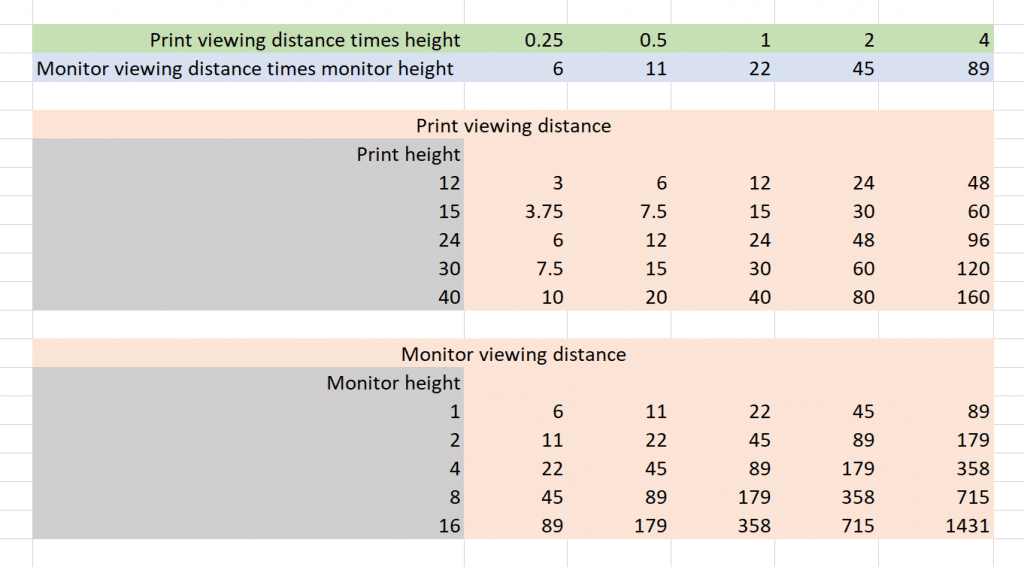
It’s all based on ratios, so you can use whatever unit you please: inches, centimeters, heck, if you’re going to make billboards, even meters. I’ve calculated viewing distances based on five ratios to the image height: quarter, half, same as image height, double, and quadruple. If you view the print at its image height, you’ll want to view the image on the monitor at 22 times its height. If you view the print at half its image height, you’ll want to view the image on the monitor at 11 times its height. From that distance, the image on the monitor is going to appear small, but remember, we’re only looking at 1/22 of the height of the whole print.
The next two blocks in the table above are merely examples for viewing the print (top) and the image on the monitor (bottom). As long as you measure the print height and monitor height in the same units as the distance, you can use any units that please you.
This procedure elides the diminution in sharpness caused by the printer’s halftoning and the spread of ink on the paper, but it should get you close.
OK, here we go:


As expected. the GFX is slightly better by virtue of its greater resolution. Also as expected, the differences are not great. This is both lenses’ sharpest stop on axis.


By f/11 we have a lot of diffraction, and, as expected the GFX handles it better. If you wish, you can compare the GFX images with the a7RII ones made a stop wider.
In the upper left corner:


This is very encouraging. The increased coverage requires by a GFX square crop doesn’t get the Otus 85 out of its comfort zone. The results are clearly sharper than the Otus 55 on the a7RII.


The Otus on the GFX is a clear step up to me.
Clearly the 85 on the Fuji is doing better. But I don’t see anything like this Otus 85mm and D810 in the set.
From the thickness of branches and size of leaves and following your appx 250% export the photos appear to be taken from the same distance.
This is f/5.6 https://flic.kr/p/S8wDkU
Max, I’m not sure you realize that to do comparisons at equal print sizes, the GFX image needs to be looked at at 253%, the a7RII image at 295%, and the D810 image at 319%. Also, we need to equalize processing. If I set up a shared Dropbox mailbox, will you put the raw files there?
Jim,
The crop is a 300×300 (300dpi) exported at 750 pixels. I did it again at 957 pixels.
It’s here – https://www.flickr.com/photos/153475477@N06/33714063176/in/album-72157681921278456/
There is a problem already in that my default import settings for C1 include one of their sharpening processes, that as we’ve discovered (if you recall) in some Imatest files creating scores greater than Nyquist allows.
I don’t think I can undo the changes and I don’t have the time to reshoot today.
Will a tif of the 5.6 file work for you ?
Max, I think I need the raw file to take demosaicing and raw processing out of the picture. If that’s inconvenient, never mind; I’m gonna pull out the D810 and make a series myself.
Apologies about that Jim – I ran into the same problem with Nikon because they require that I use their software to import files.
I had a too sharp bird photo taken with the 300 2.8 that had created all of these right angle artifacts in several areas of the feathers.
They wouldn’t even look at the issue (understandably) with this variable inserted and I had no way of going back.