I haven’t posted much about the Nikon Z6 and Z7’s behavior when creating raw files when the in camera ISO setting is below the base ISO (100 for the Z6 and 64 for the Z7). That’s because it works like all the modern Nikon DSLRs I’ve tested (the D810, D850, D4, and D5), so I thought everybody understood it. Recent discussions show me that was a mistaken assumption. Even some competent professional photographers don’t understand how the cameras implement those low ISO settings, and how that affects their photography.
In this post I’m going to turn over some rocks and expose the ugly underside to the low ISO settings. If I’m successful, one of two things will happen;
- You’ll never, ever, use them (my preferred outcome).
- If you do use them, you’ll do so with your eye fully open to the consequences.
I’m going to do this in three posts. The first one, which you’re reading now, will be mostly textual and qualitative. For doubting Thomases and Teresas, the second will demonstrate with numbers and tests that you can do at home to prove to yourself that the camera operates the way I say it does. The last will discuss a few edge cases where you might want to consider using the ISO settings below base ISO.
First off, if you shoot only out-of-camera JPEGs, this series of posts doesn’t apply to you; save yourself some time and move along.
For you raw shooters, we’ll get right to it now.
If you’re a camera manufacturer using today’s CMOS technology, there are at least three approaches possible for providing ISOs below the base ISO.
- The zeroth is for the engineers to say to the product managers: “No, we’re not going to do fake ISOs on this camera. If you want it done, get somebody else to design this sucker.” That’s what I wish would happen with every camera that doesn’t use method three below.
- The first is manipulating the raw data so that the images exposed at the fake ISOs are darker than they would otherwise be. This lowers the saturation point of the resultant raw file, and causes the dynamic range calculations to be wrong if this is not compensated for.
- The second is to set the in-camera gain to that appropriate to a higher ISO value than indicated by the knob, record the result in the raw file, but change the processing of the JPEG preview image to make it darker than it would be if it were a straight rendition of the raw file. This is what the Z6 and Z7 do. In fact, in the Z6 the gain for all ISO settings below 100 is the same as the gain at ISO 100. In the Z7 the gain for all ISO settings below 64 is the same as the gain at ISO 64.
- The third, and the high road, is to insert some kind of neutral density filter in the light path. This is the method used on some video cameras.
In the fullness of time, other approaches may be viable, but until then we’re stuck with the above.
If you press the ISO mode button on the Z6 and look at what happens as you dial down from ISO 100, you’ll see, in this order: ISO Lo 0.3, ISO Lo 0.7, and ISO Lo 1.0. On the Z7, that’s what you see if you dial down from ISO 64. The camera is trying to tell you that it’s doing something special below base ISO, but it’s not saying what. It’s a mixed message, because, if you look at the EXIF data in a raw file from a Z6 at ISO Lo 0.3, you’ll see ISO 80. ISO Lo 0.7 will show ISO 64 in the EXIF, and ISO Lo 1.0 will show ISO 50 in the EXIF. On the Z7, ISO Lo 0.3 will show up as ISO 50 in the EXIF, ISO Lo 0.7 will turn into ISO 40 in the EXIF, and ISO Lo 1.0 will become ISO 32.
All that implies that the camera becomes less sensitive to light at ISOs below the base ISO. But that’s just not true; at base ISO and below, the sensor is precisely as responsive to light as it is at base ISO.
You can prove to yourself with the Z6 by making raw images of the same subject at ISOs 100, ISO Lo 0.3, ISO Lo 0.7, and ISO Lo 1.0, opening up the lens aperture a third of a stop each time. If you look at the JPEG preview images, you’ll see that they look like the all have the same brightness. However, if you look at the raw images in RawDigger, you’ll see that the ISO Lo 0.3 image is 1/3 stop overexposed with respect to the ISO 100 image, the ISO Lo 0.7 image is 2/3 stop more exposed than ISO 100 image, and ISO Lo 1.0 image is one full stop more exposed than the ISO 100 image.
In fact, for metered shots:
- The raw data at ISO Lo 0.3 will be the same as the raw data at base ISO with + 1/3 stop of exposure compensation.
- The raw data at ISO Lo 0.7 will be the same as the raw data at base ISO with + 2/3 stop of exposure compensation.
- The raw data at ISO Lo 1.0 will be the same as the raw data at base ISO with + 1 stop of exposure compensation.
If setting the ISO “knob” in the camera to less than ISO 100 isn’t really making the sensor less sensitive, what the heck is it doing? Several things:
- Telling the metering system to overexpose the capture from normal.
- Making the finder image darker if the finder is set to simulate exposure.
- Making the JPEG preview image written into the raw file darker.
- Moving the live histogram in the finder to the left.
- Moving the histogram of the image in playback mode to the left.
- Writing instructions to the raw developer program into the metadata to make the image darker. You can’t count on your raw developer following those instructions.
Whether you use the camera’s metering system, the live histogram, or you chimp, if your exposure was going to be right at base ISO, setting a lower ISO will result in overexposure, and increased likelihood of clipping highlights. Some raw developers are remarkably good at recovering clipped highlights if only one channel is clipped, but the best course is to use the best exposure – by whatever your personal criteria – in the first place. If you use ETTR and have calibrated your in-camera white balance, setting an ISO below base ISO will undo all your careful work. Your histogram will lie to you, and you are quite likely to clip highlights.
And here’s the really pernicious thing: if your raw developer complies with the instructions in the metadata as Lightroom does, it will apply the pulled development for ISOs below base ISO as instructed completely silently. If you look at the Exposure setting in the Lightroom Develop module, it will indicate 0 with default settings in each case. Unless you look at the raw data with a program such as RawDigger or Fast Raw Viewer, you will be completely in the dark as to what’s happening under the covers. There will be little clues at the top end of the histogram, but you’d have to be looking for them to see them.

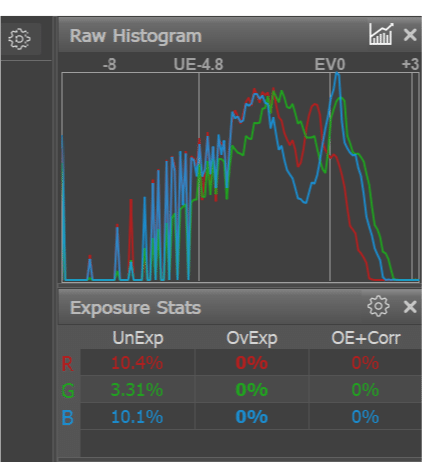
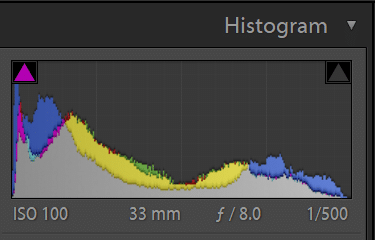
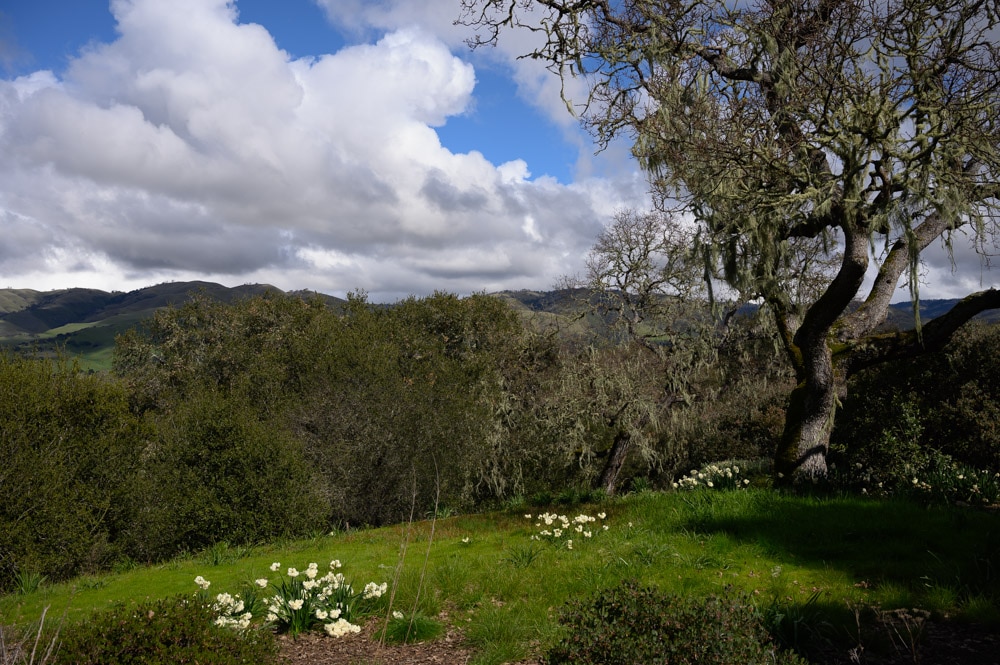
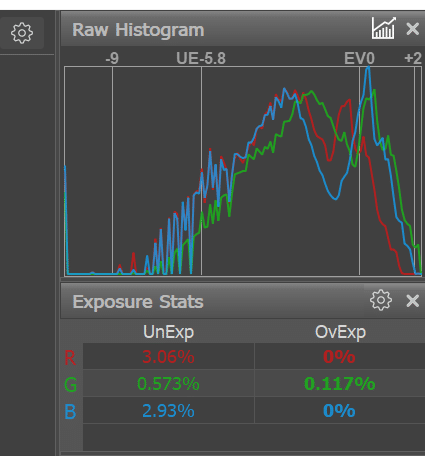
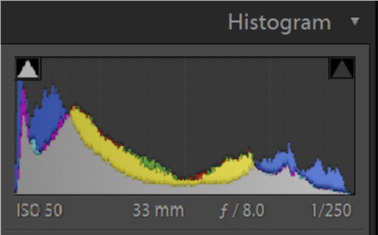
Note that, in the above example, the ISO 50 exposure is actually better from an ETTR prospective than the ISO 100 one. That’s because I didn’t use ETTR for this shot.
What to do if you want to use an exposure so long or an aperture so wide that you’re fearful of overexposure at base ISO? My first suggestion is to use neutral density filters. My second suggestion is to dial in positive exposure compensation and watch the histogram like a hawk. Dialing in an ISO setting below base ISO may give you the same exposure as adding exposure compensation, but if you use the settings below base ISO, you’ll be flying blind because your histogram and preview image will be out of synch with your raw file.
I have been calling the ISO settings in Sony and Nikon cameras that are below base ISO fake ISOs. I think that fits, since they’re not really less sensitive for raw files. But it rubs some people the wrong way. Would JPEG ISOs be better?
Thomas Gutschick says
Die Situation das ich weniger als ISO 100 brauche ist so selten wie ein Lottogewinn. Das meine Kameras bei oberhalb ISO 1600, 2500 oder ab ISO 3200 anfangen zu rauschen ist für mich schlimmer. Aber mal eine Frage: Gefühlt ist ein Bild bei ISO 3200 bei viel Licht viel besser als bei einem richtig belichtetem Bild bei Dunkelheit. Die Werte sind f2,8 1/160 oder 1/ 200 mit VR und frei Hand und ISO 2500-3200. Es wäre doch besser an diesen Werten zu arbeiten. wenn es doch zu hell ist, einfach gute Filter einsetzen oder schneller belichten, wenn möglich.
JimK says
Google translate:
The situation that I need less than ISO 100 is as rare as winning the lottery. The fact that my cameras start to noisy above ISO 1600, 2500 or ISO 3200 is worse for me. But one question: It feels like a picture at ISO 3200 in a lot of light is much better than a properly exposed picture in the dark. Values are f2.8 1/160 or 1/200 with VR and handheld and ISO 2500-3200. It would be better to work on these values. if it is too bright, simply use good filters or expose faster, if possible.