• site home
  • blog home
  • galleries
  • contact
  • underwater
  • the bleeding edge

the last word

Photography meets digital computer technology. Photography wins -- most of the time.

You are here: Home / a7RIV / Sony, Nikon 20mm f/1.8 OOF bokeh on a7RIV, Z7

Sony, Nikon 20mm f/1.8 OOF bokeh on a7RIV, Z7

March 28, 2020 JimK 1 Comment

There are two pieces to bokeh. The first is what things look like when they are well out of focus (OOF), and the second is how the transition from OOF to in-focus happens. The second is complicated, but the first is very simple. What you see when part of the image is well OOF is each point in the image times the OOF point spread function (PSF, in this case, aka bokeh balls). So you can understand what the bokeh in the OOF regions is gonna look like by looking at the OOF PSF across the frame.  After you’ve looked at a few of these images that I’m going to show you here, you can see how the deep-OOF bokeh of just about any lens is going to look like with just about any scene.

The technique that I used to obtain the images below is explained here.  I moved the camera around and captured the PSFs in just one quadrant for each camera, because these things are radially symmetric for well-constructed lenses.

Here’s the set of point spread functions uncropped:

20 mm f/1.8 Nikkor S on Z7, OOF PSF


Sony 20 mm f/1.8 G on a7RIV, OOF PSF

And here they are cropped to the lower-left quadrant:

20 mm f/1.8 Nikkor S on Z7, OOF PSF


Sony 20 mm f/1.8 G on a7RIV, OOF PSF

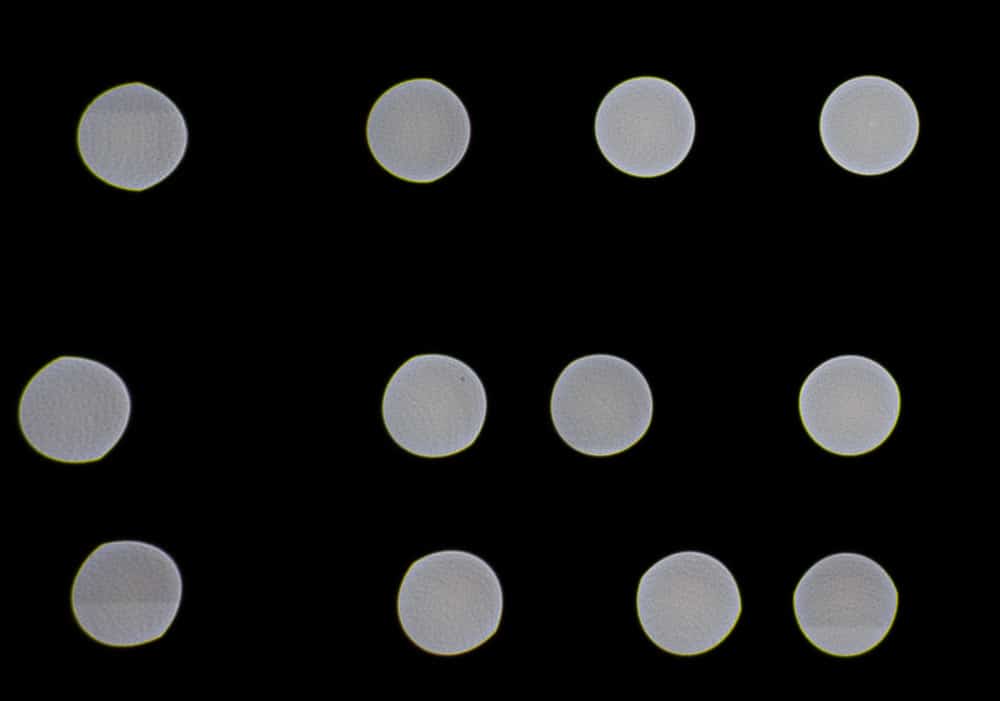
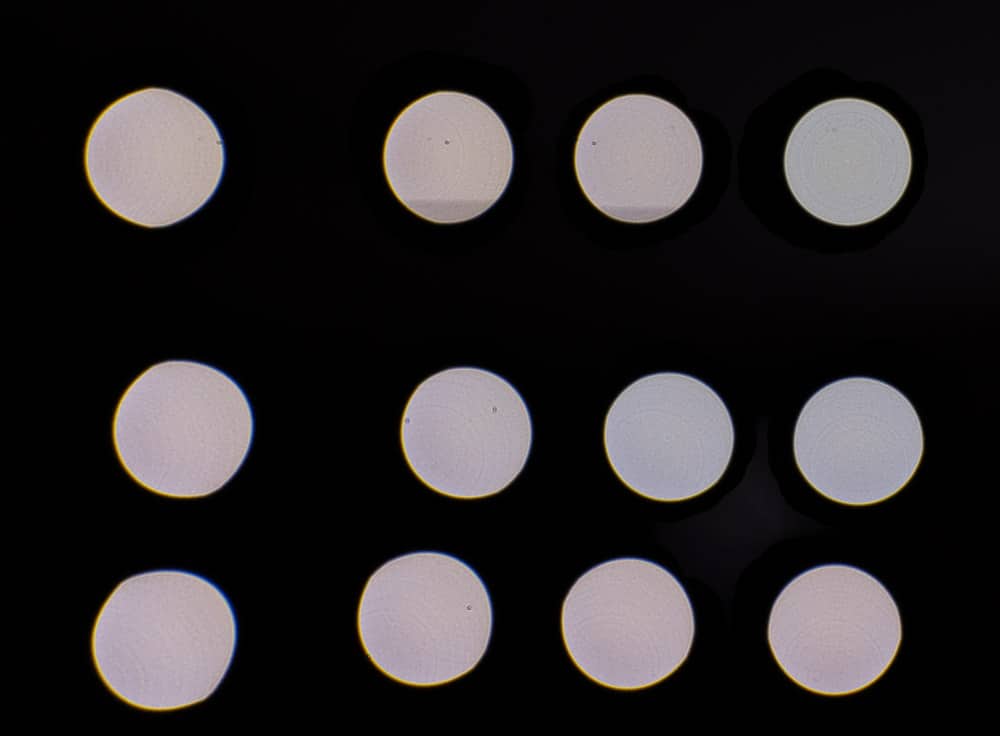
Ignore the horizontal banding. That’s the LED flashlight interacting with the focal plane shutter of the cameras. The OOF PSFs should ideally be gray freatureless circles. The bright rings around the perimeter are defects, but these are quite benign compared to many lenses I’ve seen. In a perfect world, you wouldn’t get the cat’s-eye effect that you see as you get further away from the center of the image. That is due to mechanical vignetting in the lenses, and is well-controlled here.

Full marks to both lenses.


a7RIV, Nikon Z6/7

← Nikon, Sony 20/1.8 foliage test Nikon 20 mm f/1.8 through-focus behavior →

Comments

  1. JimK says

    March 30, 2020 at 12:25 pm

    I’m posting this on behalf of Brandon Dube:

    Some of the cat’s eye in (very) wide angle lenses is actually a projection issue. E.g., fisheyes never really have any vignetting to speak of, but the OOF PSF becomes extremely stretched in the corners. This is because the pupil is actually increasingly oblique to the image.

    I wouldn’t call it “mechanical vignetting” either, just vignetting suffices, but that is (somewhat) a matter of taste.

    Reply

Leave a Reply Cancel reply

Your email address will not be published. Required fields are marked *

May 2025
S M T W T F S
 123
45678910
11121314151617
18192021222324
25262728293031
« Apr    

Articles

  • About
    • Patents and papers about color
    • Who am I?
  • How to…
    • Backing up photographic images
    • How to change email providers
    • How to shoot slanted edge images for me
  • Lens screening testing
    • Equipment and Software
    • Examples
      • Bad and OK 200-600 at 600
      • Excellent 180-400 zoom
      • Fair 14-30mm zoom
      • Good 100-200 mm MF zoom
      • Good 100-400 zoom
      • Good 100mm lens on P1 P45+
      • Good 120mm MF lens
      • Good 18mm FF lens
      • Good 24-105 mm FF lens
      • Good 24-70 FF zoom
      • Good 35 mm FF lens
      • Good 35-70 MF lens
      • Good 60 mm lens on IQ3-100
      • Good 63 mm MF lens
      • Good 65 mm FF lens
      • Good 85 mm FF lens
      • Good and bad 25mm FF lenses
      • Good zoom at 24 mm
      • Marginal 18mm lens
      • Marginal 35mm FF lens
      • Mildly problematic 55 mm FF lens
      • OK 16-35mm zoom
      • OK 60mm lens on P1 P45+
      • OK Sony 600mm f/4
      • Pretty good 16-35 FF zoom
      • Pretty good 90mm FF lens
      • Problematic 400 mm FF lens
      • Tilted 20 mm f/1.8 FF lens
      • Tilted 30 mm MF lens
      • Tilted 50 mm FF lens
      • Two 15mm FF lenses
    • Found a problem – now what?
    • Goals for this test
    • Minimum target distances
      • MFT
      • APS-C
      • Full frame
      • Small medium format
    • Printable Siemens Star targets
    • Target size on sensor
      • MFT
      • APS-C
      • Full frame
      • Small medium format
    • Test instructions — postproduction
    • Test instructions — reading the images
    • Test instructions – capture
    • Theory of the test
    • What’s wrong with conventional lens screening?
  • Previsualization heresy
  • Privacy Policy
  • Recommended photographic web sites
  • Using in-camera histograms for ETTR
    • Acknowledgments
    • Why ETTR?
    • Normal in-camera histograms
    • Image processing for in-camera histograms
    • Making the in-camera histogram closely represent the raw histogram
    • Shortcuts to UniWB
    • Preparing for monitor-based UniWB
    • A one-step UniWB procedure
    • The math behind the one-step method
    • Iteration using Newton’s Method

Category List

Recent Comments

  • JimK on Goldilocks and the three flashes
  • DC Wedding Photographer on Goldilocks and the three flashes
  • Wedding Photographer in DC on The 16-Bit Fallacy: Why More Isn’t Always Better in Medium Format Cameras
  • JimK on Fujifilm GFX 100S II precision
  • Renjie Zhu on Fujifilm GFX 100S II precision
  • JimK on Fuji 20-35/4 landscape field curvature at 23mm vs 23/4 GF
  • Ivo de Man on Fuji 20-35/4 landscape field curvature at 23mm vs 23/4 GF
  • JimK on Fuji 20-35/4 landscape field curvature at 23mm vs 23/4 GF
  • JimK on Fuji 20-35/4 landscape field curvature at 23mm vs 23/4 GF
  • Ivo de Man on Fuji 20-35/4 landscape field curvature at 23mm vs 23/4 GF

Archives

Copyright © 2025 · Daily Dish Pro On Genesis Framework · WordPress · Log in

Unless otherwise noted, all images copyright Jim Kasson.