The is the sixth in a series of posts about the Voigtlander 65 mm f/2 Apo-Lanthar macro lens. The series starts here. I screwed up the last landscape comparison that I tried to do between the Apo-Lanthar and the F-mount 55 mm f/1.4 Zeiss Otus, so I redid the test this morning.
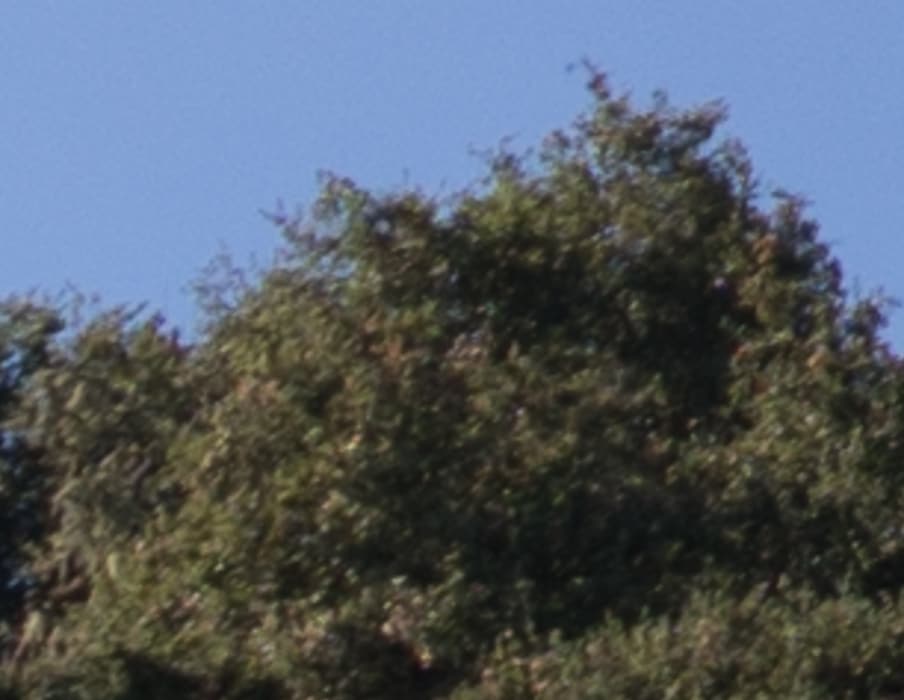
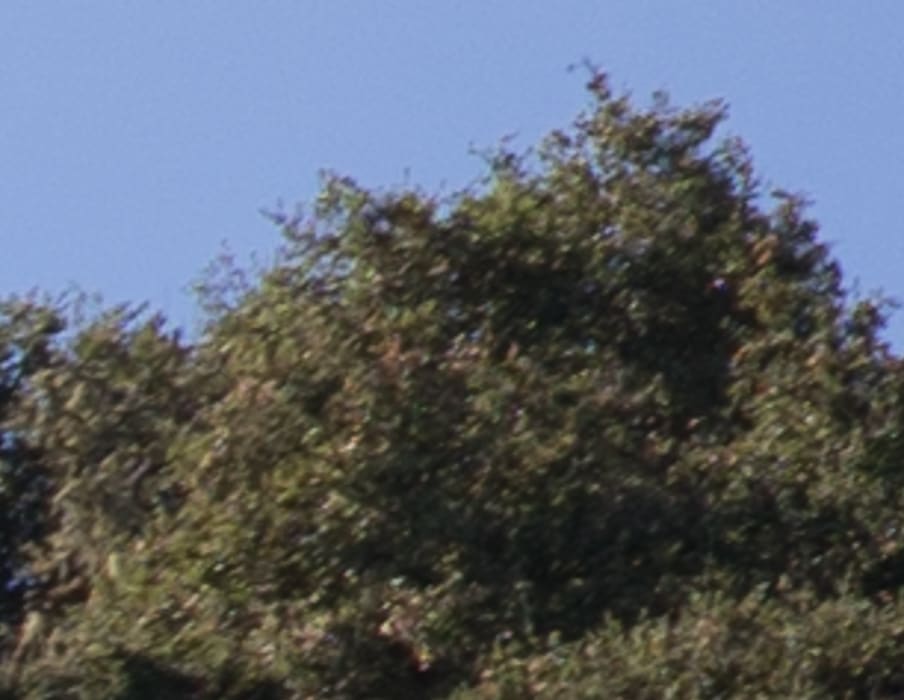
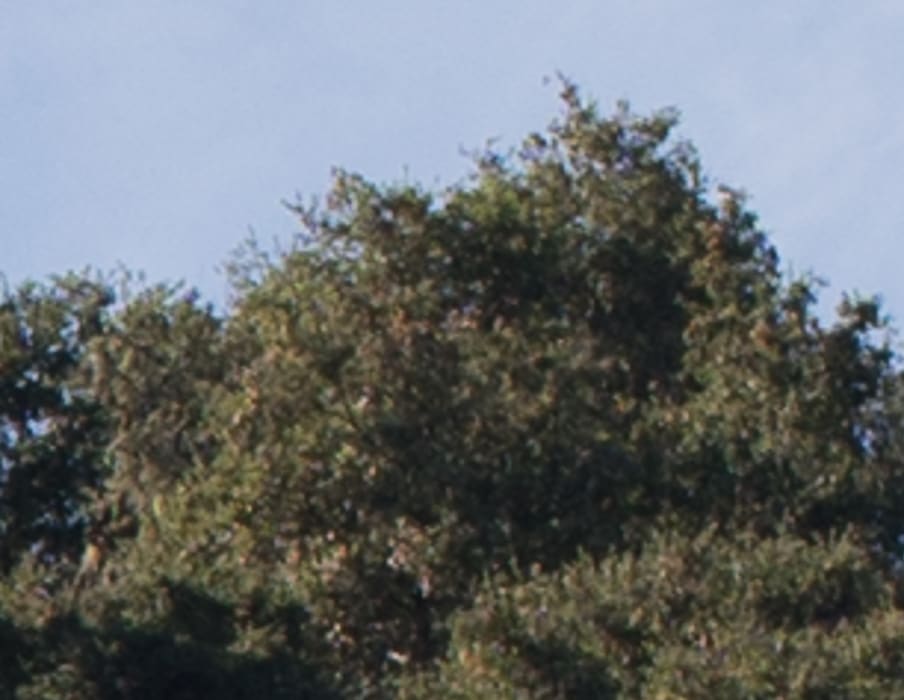
The scene with both lenses on a Sony a7RII at f/2:
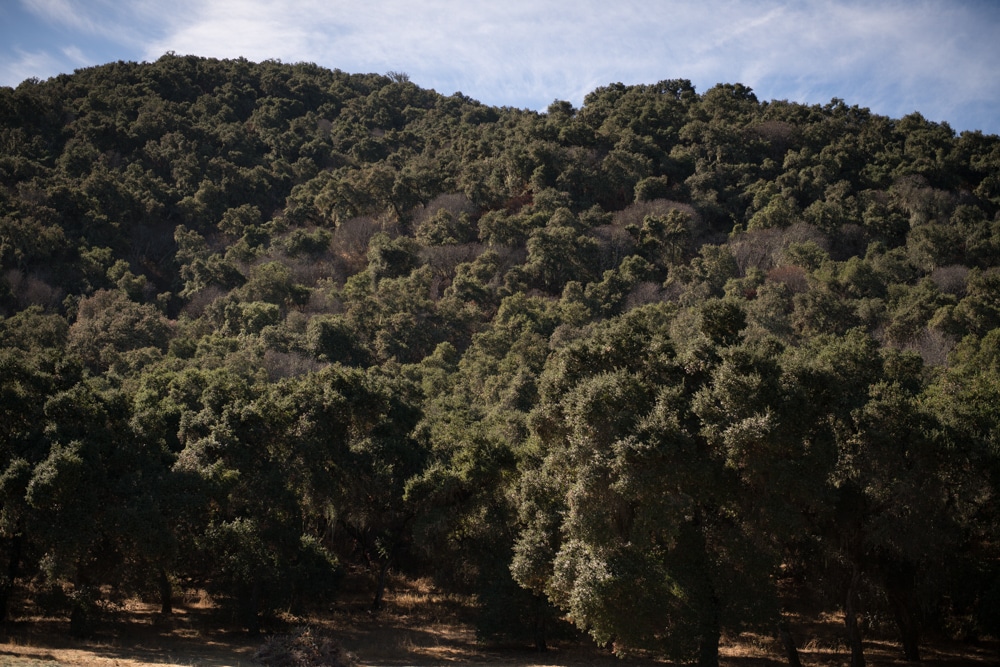

The trees in the center of the image are 235 meters from the camera. A few particulars:
- ISO 100
- EFCS on
- 2-second self-timer
- RRS heavy-duty legs
- Arca Swiss P0 Hybrid head
- Manual focus on the central trees, wide open for the Apo-Lanthar, at the taking aperture for the Otus until f/5.6, then focusing at f/5.6
- Wide open through f/11 in whole-stop increments
- Lightroom development
- Lr default settings except WB set to Daylight
- Three series of images for each lens; pick the sharpest one
I exported 306×237 pixel crops from the developed images as 700-pixel-high JPEGs. That means that the images are all heavily upsampled. The images here are 295% of their original size in both dimensions.
If you just want a rough idea of the differences, just look at the images as displayed in-line in the posts. However, if you wish to compare these images in detail, you should view these images by clicking on them to see the source files, then setting your browser for 100% zooming. Even better, download them and make Photoshop stacks.
No matter what you do, these crops are all going to look horrible. I’m blowing them up so much so that they will represent the original file after JPEG’s discrete cosine transform has had its way with them. If you want to get a good idea of what the images would look like printed, get far away from your monitor. No, farther than that. Put a bunch of the images up on the screen and back up until the best one starts to look good. Then look at the others. There’s another reason why these images won’t look like the best thing the camera/lens combination can deliver. They’re demosaiced with Lightroom. Lightroom is not awful, but for a particular image, there are usually better raw processors. I use Lr because it’s a de facto standard, because I know it well, and because it’s got good tools for dealing with groups of images.
In the center at f/2:
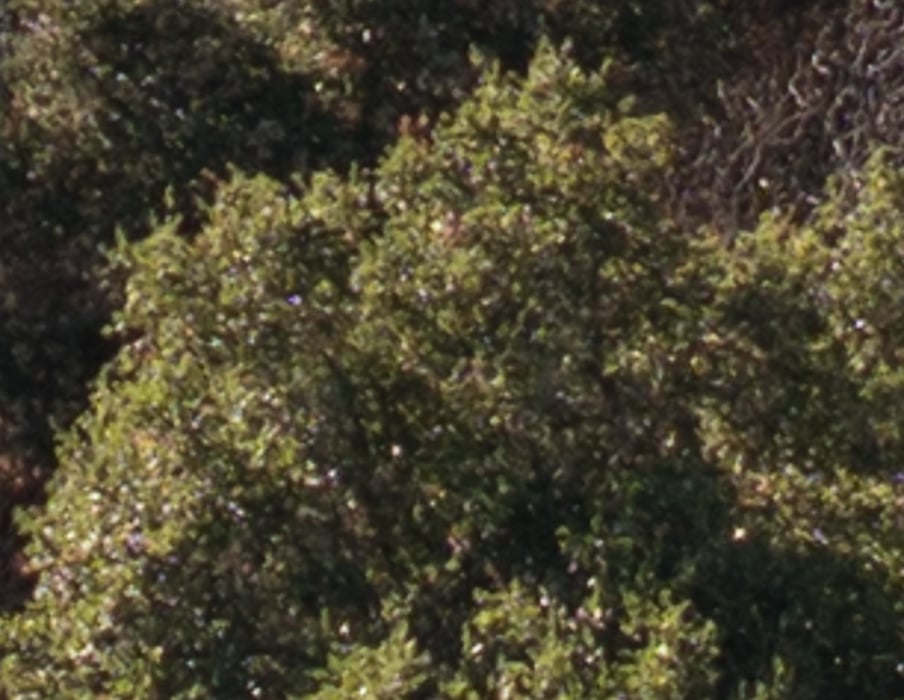

If anything, the Apo-Lanthar is sharper. It measured slightly sharper on-axis, too. Both are plenty sharp. I could show you the rest of the aperture series in the center, but it would be really boring. The sharpness is — for real-world photography — identical, and there are no aberrations to speak of that can be seen with this subject.
For the images to follow, I tweaked the Exposure control in Lr to compensate for edge falloff.
In the upper right corner.
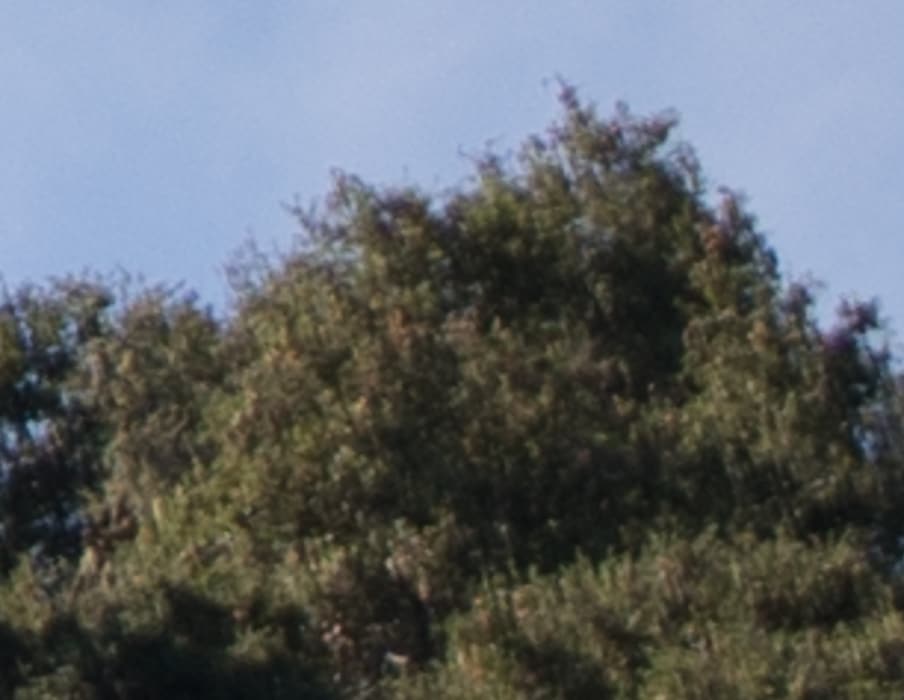

The Voigtlander acquits itself quite well. Note that we’re giving the Zeiss a small advantage since I didn’t reframe between images, the Otus focal length is shorter than the Voigtlander, and therefore the same object near the corner will be further off-axis for the Apo-Lanthar. The Otus does not exhibit the purple fringing that we see on the Apo-Lanthar.

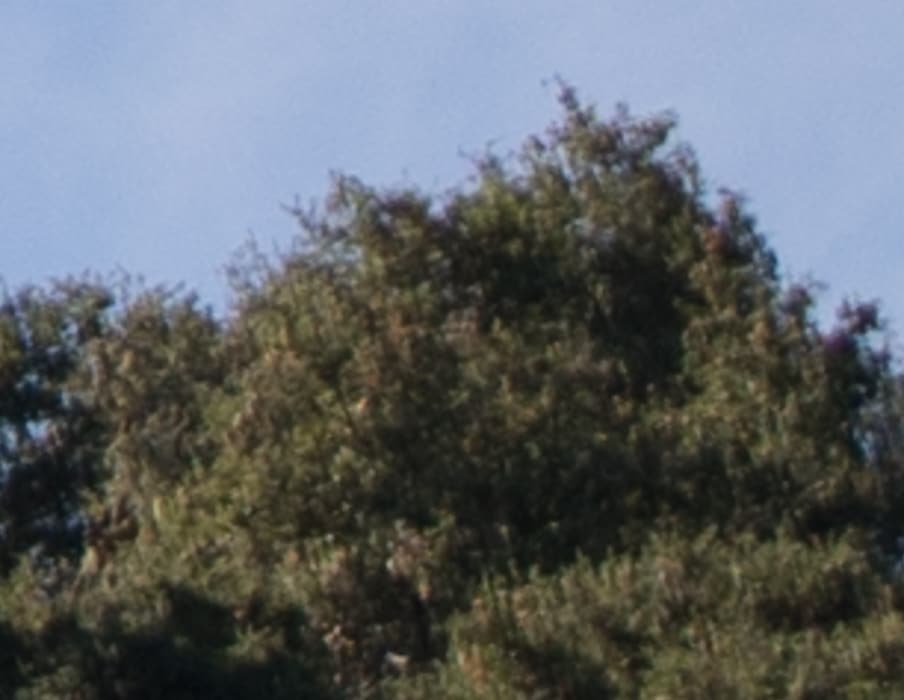
Except for the fringing, the Voigtlander looks very close.

The Apo-Lanthar lags, but not by much. The fringing is the biggest difference.

With respect to sharpness, it’s a wash by now. The fringing is the biggest of the small differences.


Both are great lenses. But when you think about the Otus, “bargain” is not the first word that springs to mind.
Jim, you wrote “I’m blowing them up so much so that they will represent the original file after JPEG’s discrete cosine transform has had its way with them.” This has become boilerplate in your work. Can you link to a justification of this? I have to admit that your testing protocol looks excellent to me, except possibly for this one step that I don’t quite understand.
I realize that testing lenses with different focal lengths is a big challenge in terms of fair and helpful methodology.
As for the Voigtlander 65mm f/2, it is yet another lens purchase I have made (just now) after your helpful testing and analysis. I’ve been perfectly delighted so far with the lenses I picked up after your testing, and I expect I will keep this lens too, after I see its results. 🙂
https://en.wikipedia.org/wiki/Discrete_cosine_transform
https://www.w3.org/Graphics/JPEG/itu-t81.pdf
I would like to see the test using a flat field subject, otherwise too confounding.
With the central object well over 200 meters away, the more distant ridge will be in focus if the center is and the lens field is flat. We’re talking CoCs on the order of a um at worst.
But would it not be a better test on a less distant and flat field object since at 200 meters especially with a busy subject even at 100% it is difficult to judge um differences?
Some people don’t like the quantitative lab tests I run. Many have a hard time interpreting the numbers and the graphs. Also, the lab tests take a long time to run. I don’t have enough time to test all the things I want to test as it is. So I supplement the lab work with these quick visual tests. They also allow direct comparison without needing numerical skills on the part of the reader.
Foliage has some advantages for this. It is not regular. People know what it should look like. It moves from shot to shot, so people won’t look at things that depend on the subject’s alignment with the sampling grid. If there’s sky, it’s great for observing CA. A big advantage for me is that it’s handy. If I had to drive to do these tests, I’d do a lot fewer of them. Last, and maybe least, it has a long history in photographic lens testing; AA recommended it; although he liked bare tree branches against the sky, too. Not too easy to find a lot of those where I am.
Yes, foliage has disadvantages. It moves, and I have to plan my shutter speeds accordingly. It’s green, so the wavelengths for a camera with a good IR filter are in its sweet spot.
Using closer, planar subjects requires precise alignment, which is hard to do right.
Super helpful review Jim. I just read all 6 parts. I received the Voigtlander 65mm in the mail the other day and I am loving it thus far. My gut told me it was going to be a great lens before I even saw any reviews or heard much about it. Thank you for the great info!