• site home
  • blog home
  • galleries
  • contact
  • underwater
  • the bleeding edge

the last word

Photography meets digital computer technology. Photography wins -- most of the time.

You are here: Home / a9 / Instrumenting the Sony a9 battery draw

Instrumenting the Sony a9 battery draw

June 6, 2017 JimK 1 Comment

This is the 16th in a series of posts on the Sony a9. The series starts here.

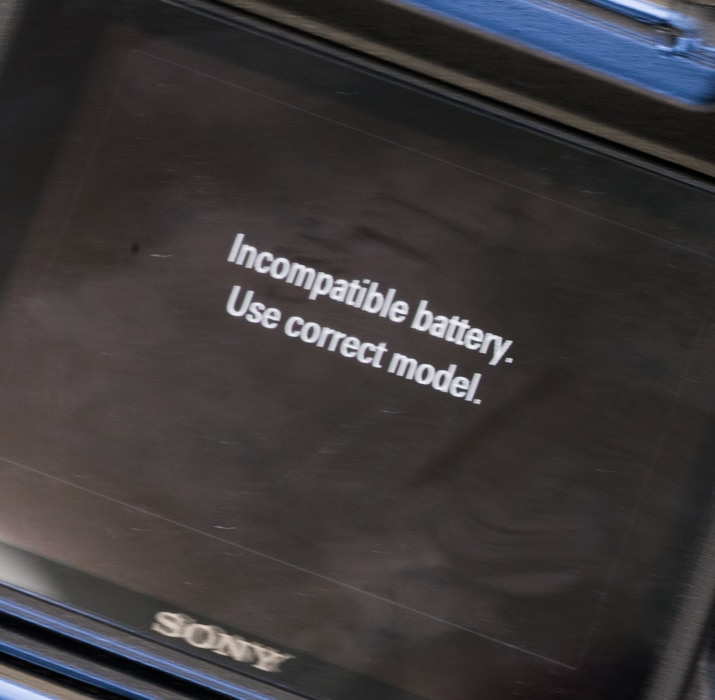
There have been reports of Sony a9s overheating. Mostly tales of warnings when you wouldn’t think there would be warnings, but some stories of actual shutdowns when the camera was being used for still photography. There is a new release of the firmware, 1.01, which is intended to reduce the frequency of the warnings. I’m getting ready to measure the a9 battery draw under various circumstances, with the idea of calculating the heat that the camera has to shed in the field. This is a post about the preparations. 

If you’re not interested in home-brew electronics measurements, it’s probably a good idea to move on. I can promise, however, that at no time in these preparations did I have to warm up the soldering iron.

I started by buying a Sony NPAMQZ1K Multi Battery Adaptor Kit,

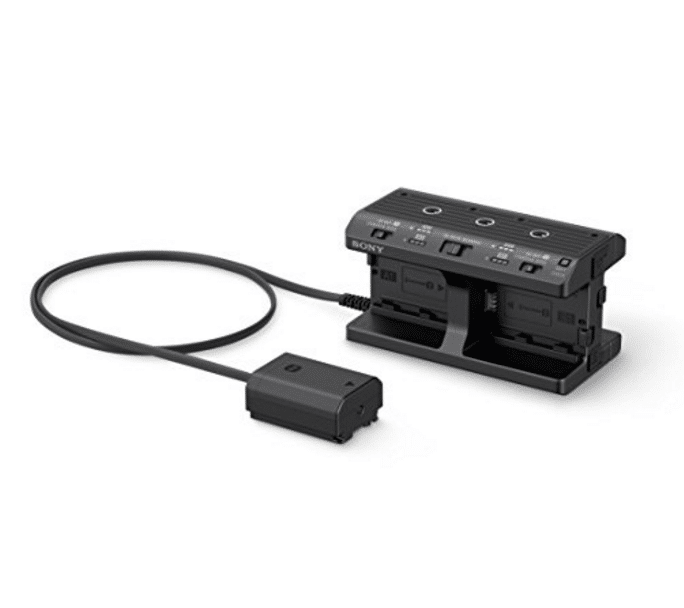
It’s got places to mount 4 batteries, and something that slides into the camera’s battery compartment. Could Sony have put a connector between the battery holder and the dummy battery that plugs in the camera? That would have made it too easy. It would have also made it more practical to use the battery holder as a battery charger. I tested the unit so I could be sure that it worked. Then I winced, cut the cord and peeled back the outer layer of insulation:

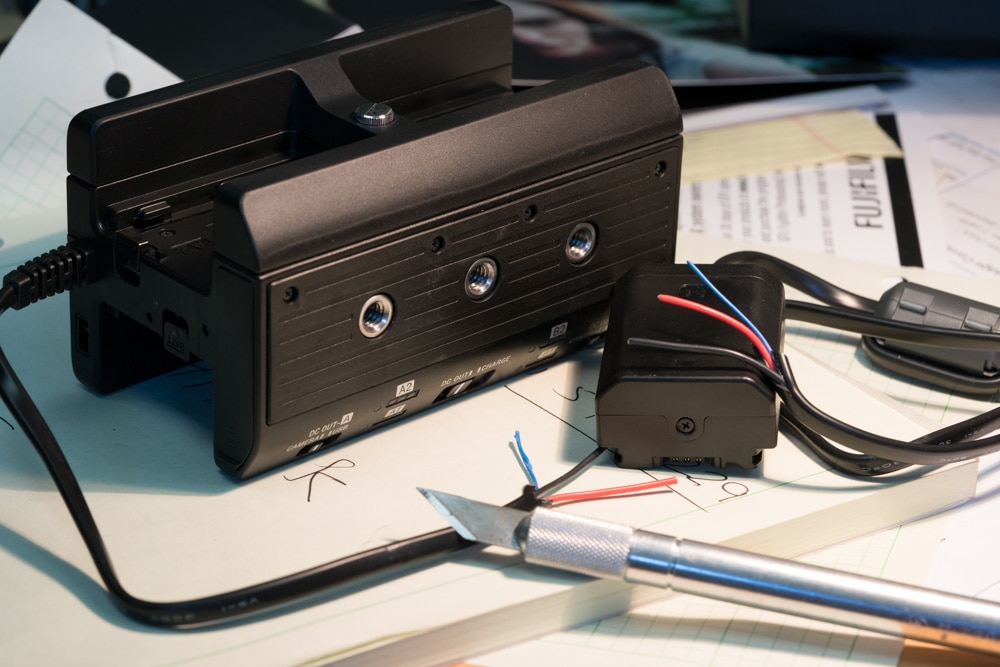
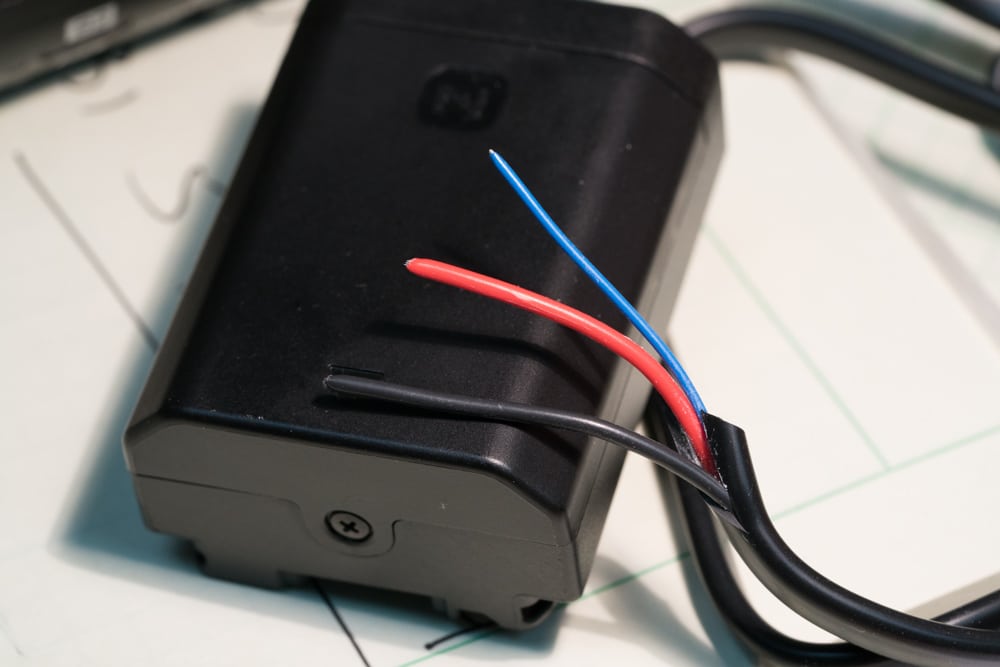
There are two 18 or 20 gauge wires. They’re red and black. Probably power and ground respectively. The blue one must be for monitoring battery condition. It’s 26 gauge, and I don’t want to mess with it.

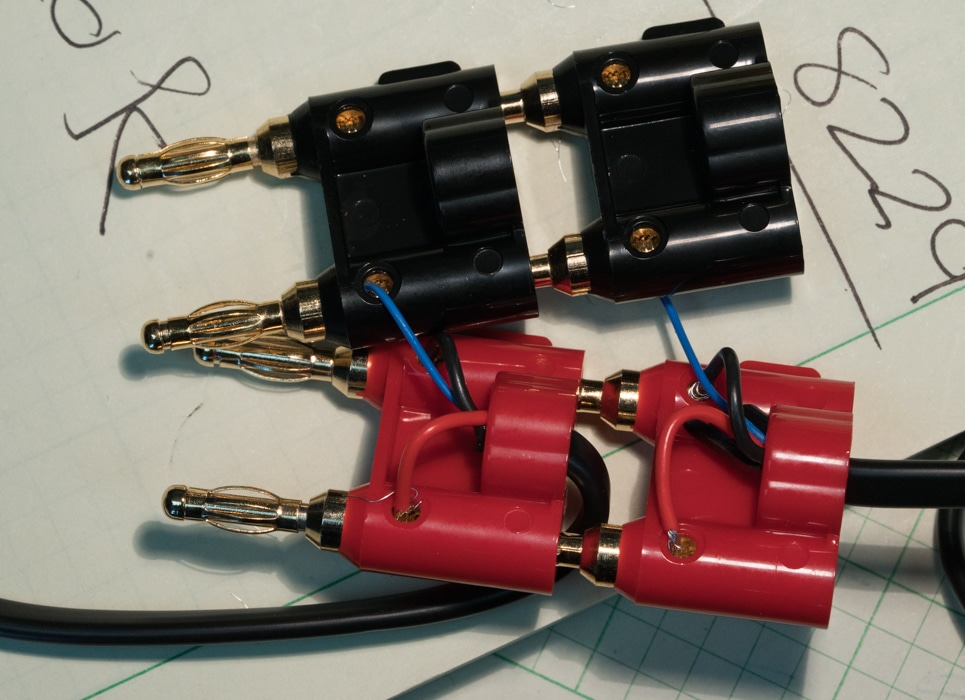
I stripped the red and black wires on both sides and attached them to GR plugs:

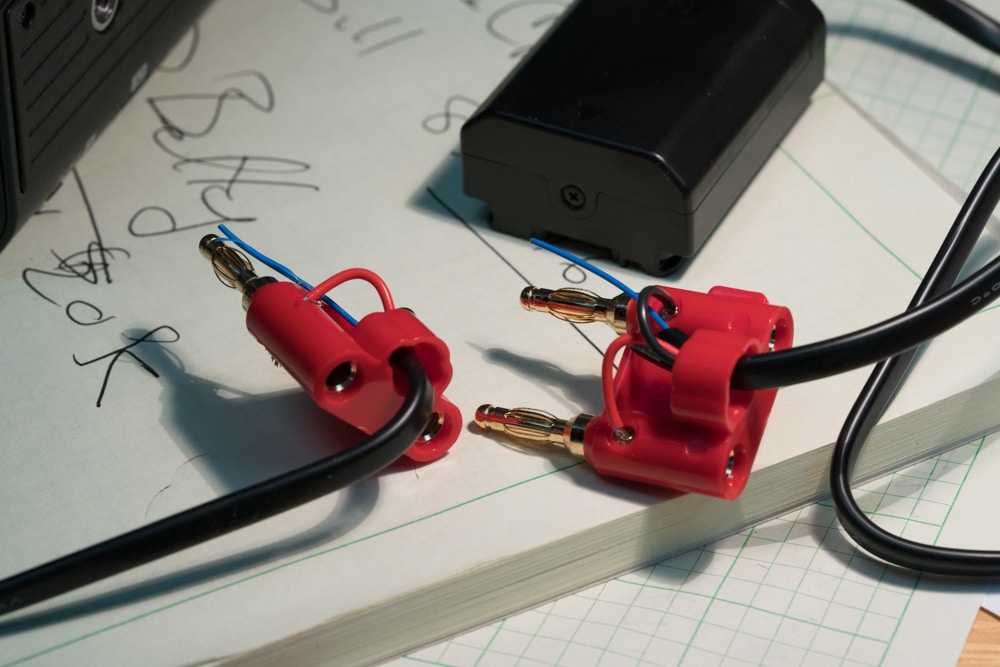
Now I can plug the two GR plugs together and the battery should power the camera:

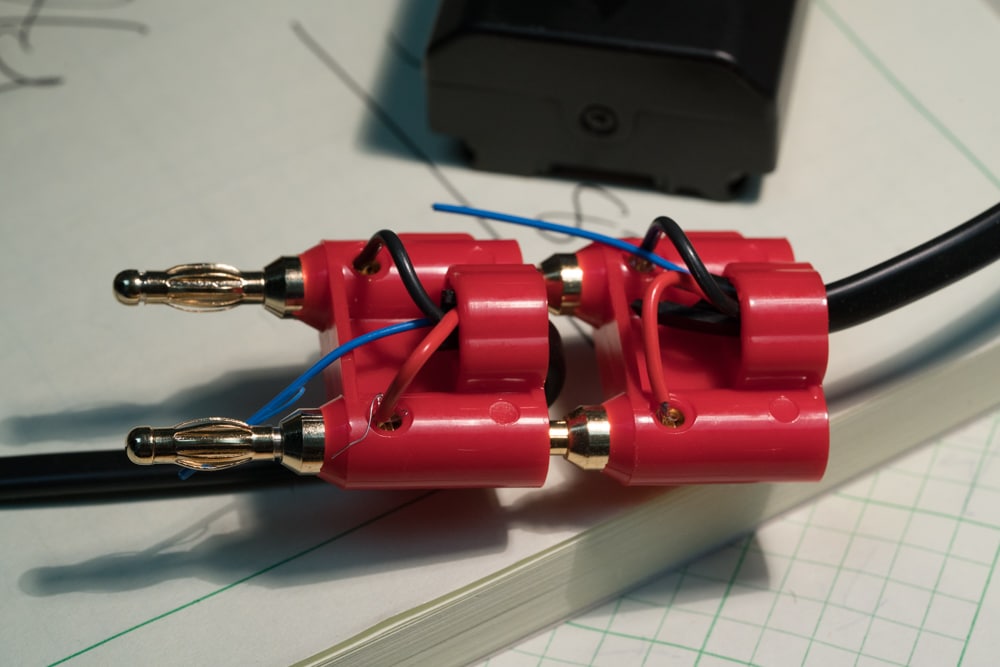
Oops! Looks like I need the blue wire:

Now the hookup is a bit more complicated, but the camera works:

I’ll be able to monitor voltage as the arrangement above sits, and I can monitor current by breaking into the power or ground sides of the circuit.

Am I all set? I’ll find out tomorrow.

a9, The Last Word

← Sweep panos with the Sony a9 Sony a9 read noise anomalies & shutter modes →

Trackbacks

  1. Sony a9 Q&D battery draw numbers says:
    June 7, 2017 at 1:38 pm

    […] set up the test fixture that I described here. It didn’t work. That darned 26 gauge blue wire had come loose. I got out the soldering iron […]

    Reply

Leave a Reply Cancel reply

Your email address will not be published. Required fields are marked *

May 2025
S M T W T F S
 123
45678910
11121314151617
18192021222324
25262728293031
« Apr    

Articles

  • About
    • Patents and papers about color
    • Who am I?
  • How to…
    • Backing up photographic images
    • How to change email providers
    • How to shoot slanted edge images for me
  • Lens screening testing
    • Equipment and Software
    • Examples
      • Bad and OK 200-600 at 600
      • Excellent 180-400 zoom
      • Fair 14-30mm zoom
      • Good 100-200 mm MF zoom
      • Good 100-400 zoom
      • Good 100mm lens on P1 P45+
      • Good 120mm MF lens
      • Good 18mm FF lens
      • Good 24-105 mm FF lens
      • Good 24-70 FF zoom
      • Good 35 mm FF lens
      • Good 35-70 MF lens
      • Good 60 mm lens on IQ3-100
      • Good 63 mm MF lens
      • Good 65 mm FF lens
      • Good 85 mm FF lens
      • Good and bad 25mm FF lenses
      • Good zoom at 24 mm
      • Marginal 18mm lens
      • Marginal 35mm FF lens
      • Mildly problematic 55 mm FF lens
      • OK 16-35mm zoom
      • OK 60mm lens on P1 P45+
      • OK Sony 600mm f/4
      • Pretty good 16-35 FF zoom
      • Pretty good 90mm FF lens
      • Problematic 400 mm FF lens
      • Tilted 20 mm f/1.8 FF lens
      • Tilted 30 mm MF lens
      • Tilted 50 mm FF lens
      • Two 15mm FF lenses
    • Found a problem – now what?
    • Goals for this test
    • Minimum target distances
      • MFT
      • APS-C
      • Full frame
      • Small medium format
    • Printable Siemens Star targets
    • Target size on sensor
      • MFT
      • APS-C
      • Full frame
      • Small medium format
    • Test instructions — postproduction
    • Test instructions — reading the images
    • Test instructions – capture
    • Theory of the test
    • What’s wrong with conventional lens screening?
  • Previsualization heresy
  • Privacy Policy
  • Recommended photographic web sites
  • Using in-camera histograms for ETTR
    • Acknowledgments
    • Why ETTR?
    • Normal in-camera histograms
    • Image processing for in-camera histograms
    • Making the in-camera histogram closely represent the raw histogram
    • Shortcuts to UniWB
    • Preparing for monitor-based UniWB
    • A one-step UniWB procedure
    • The math behind the one-step method
    • Iteration using Newton’s Method

Category List

Recent Comments

  • bob lozano on The 16-Bit Fallacy: Why More Isn’t Always Better in Medium Format Cameras
  • JimK on Goldilocks and the three flashes
  • DC Wedding Photographer on Goldilocks and the three flashes
  • Wedding Photographer in DC on The 16-Bit Fallacy: Why More Isn’t Always Better in Medium Format Cameras
  • JimK on Fujifilm GFX 100S II precision
  • Renjie Zhu on Fujifilm GFX 100S II precision
  • JimK on Fuji 20-35/4 landscape field curvature at 23mm vs 23/4 GF
  • Ivo de Man on Fuji 20-35/4 landscape field curvature at 23mm vs 23/4 GF
  • JimK on Fuji 20-35/4 landscape field curvature at 23mm vs 23/4 GF
  • JimK on Fuji 20-35/4 landscape field curvature at 23mm vs 23/4 GF

Archives

Copyright © 2025 · Daily Dish Pro On Genesis Framework · WordPress · Log in

Unless otherwise noted, all images copyright Jim Kasson.