• site home
  • blog home
  • galleries
  • contact
  • underwater
  • the bleeding edge

the last word

Photography meets digital computer technology. Photography wins -- most of the time.

You are here: Home / The Last Word / Off-axis aberration testing — Sony 12-24/4 on a7RII

Off-axis aberration testing — Sony 12-24/4 on a7RII

August 25, 2017 JimK 2 Comments

This is a continuation of the development of a simple, relatively foolproof, astigmatism, field curvature, and field tilt test for lens screening. The first post is here.

I’m trying to refine my off-axis test procedures with the idea of getting them posted in a single document and inviting users to try them out. I’m sure that real users will cause me to make changes, and I’d like to get that process started.

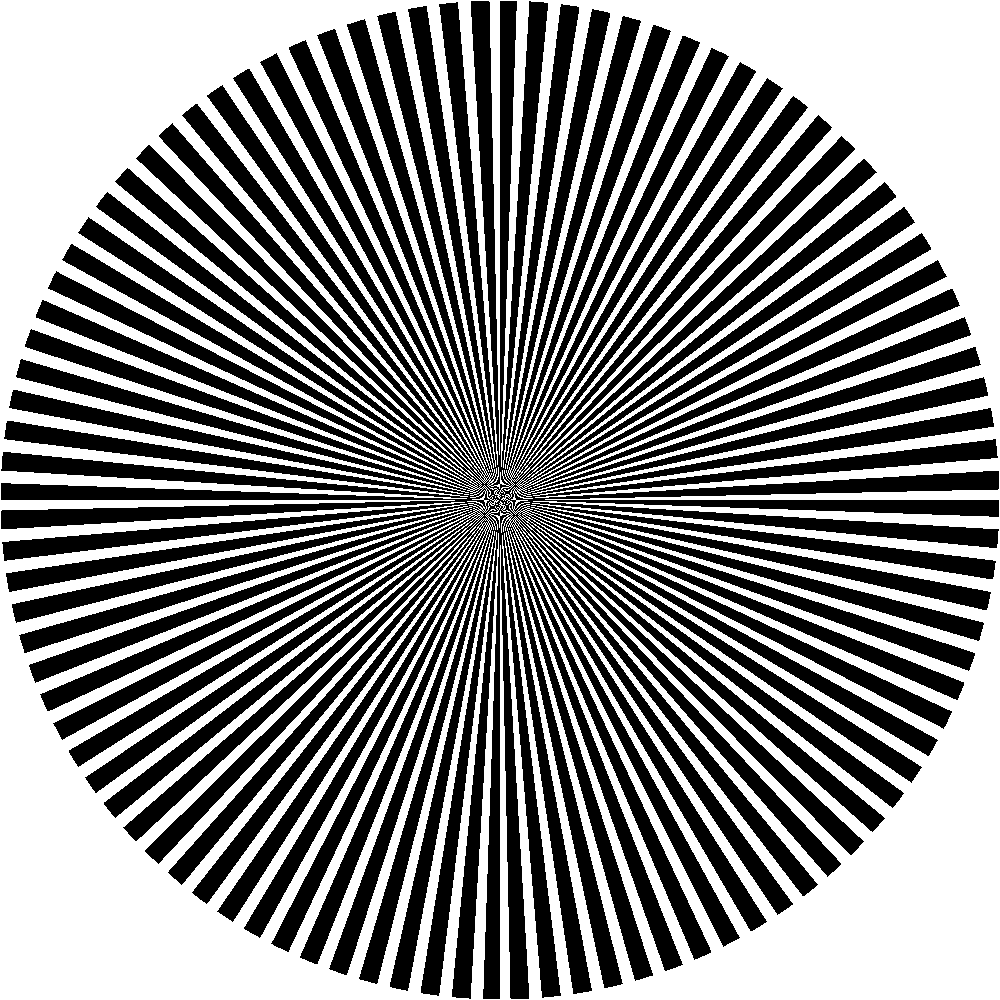
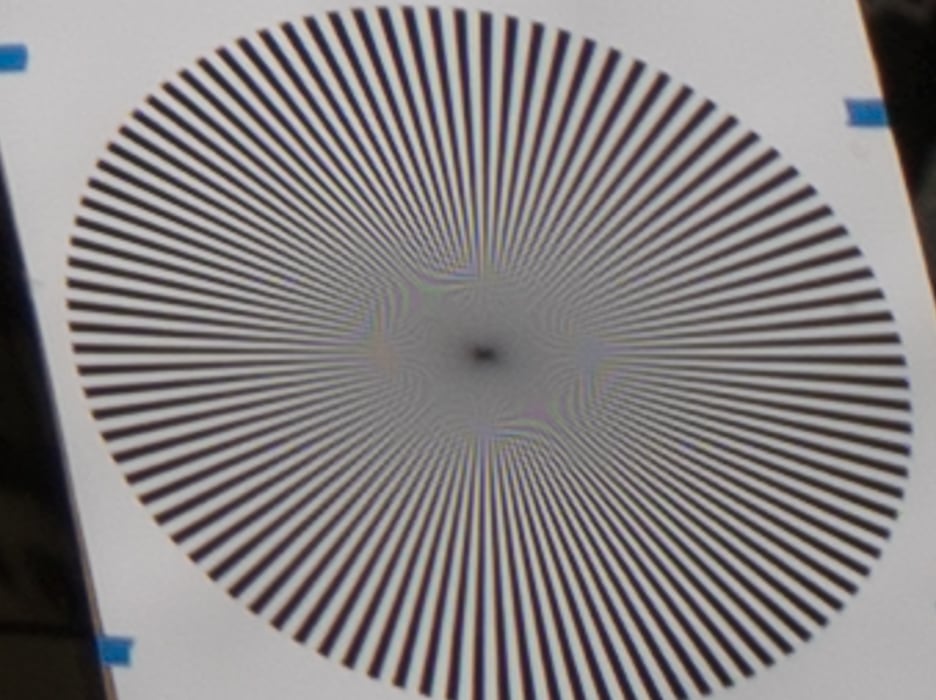
I’ve decided that the raised-sinusoid Siemens Stars offer no real advantages in these kinds of screening tests, where the extra aliasing and false color introduced by the binary targets are actually useful in making fine discriminations. They make a sensitive test even more sensitive, which may in itself be a problem, but I hope to be able to deal with that by coming up with a procedure for evaluating the images. I’ve also decided that a target with multiple stars with different numbers of spokes is not the best use of space. A single large star seems to be sufficient. More spokes are better than fewer spokes until the spokes get so close together in the center of the target that the lens can never come close to resolving detail there. I tried a 140-spoke 22.5×22.5 inch star and decided that that was too many spokes. For this test, I settled on a 100-spoke star. 


I printed a high-res version of the above star with an image size of 22.5×22.5 inches on a piece of 24×30 paper.  I put the Sony 12-24 mm f/4 lens on a Sony a7RII body.

I plotted minimum distances for a FF sensor:


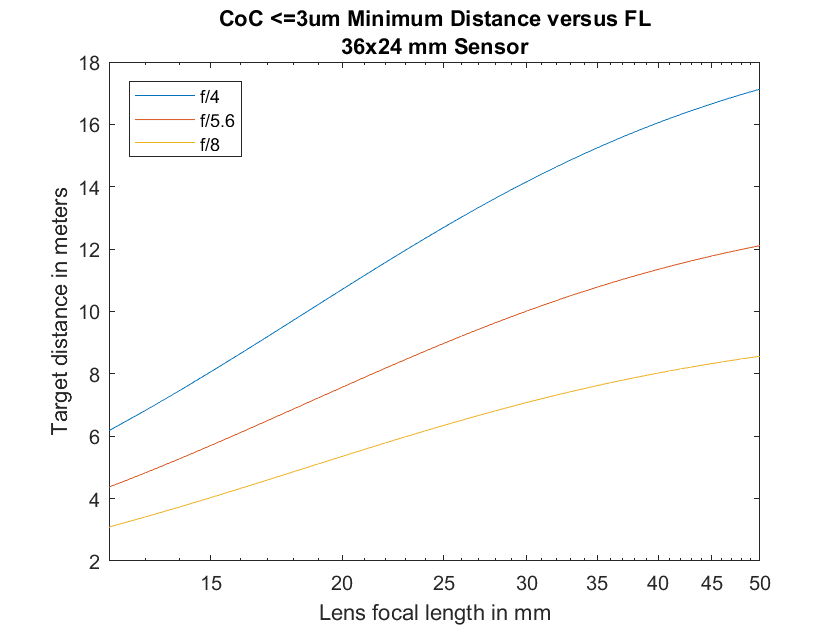
I’ll want to test the lens wide open, so that means that I’ll need to be at least 7 meters away with the lens set to 12 mm, and about 12 meters back with the lens set to 24 mm. I decided to run all the tests at 13 meters. With a target as big as the one I printed, I shouldn’t have to move in closer for the 12 mm images.

Here’s the scene at 24 mm:

24 mm

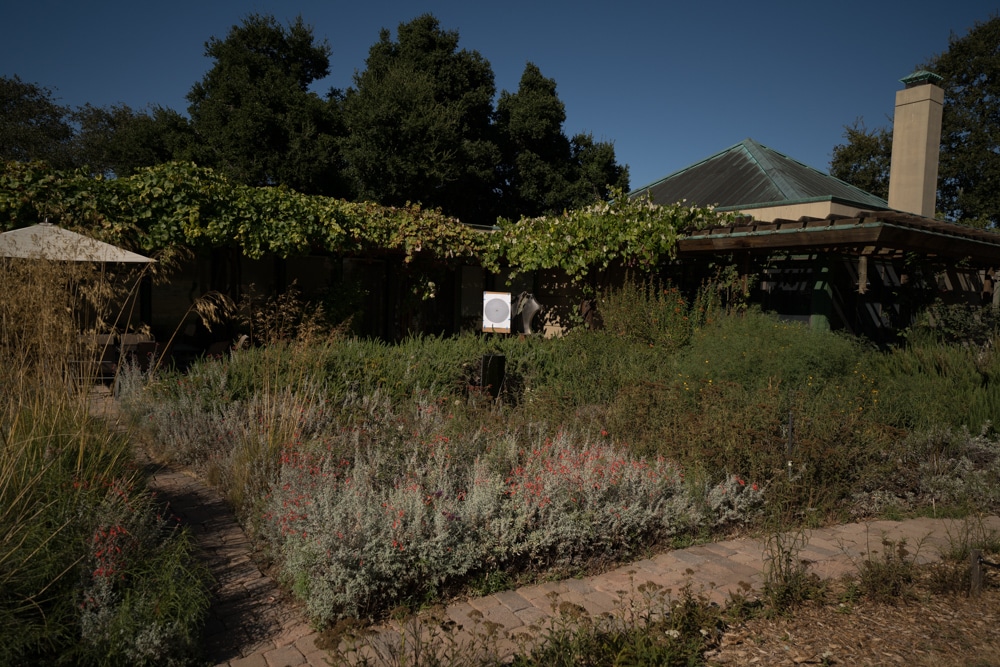
The reason it looks so dark is that I wanted the background of the target to be in no danger of clipping.

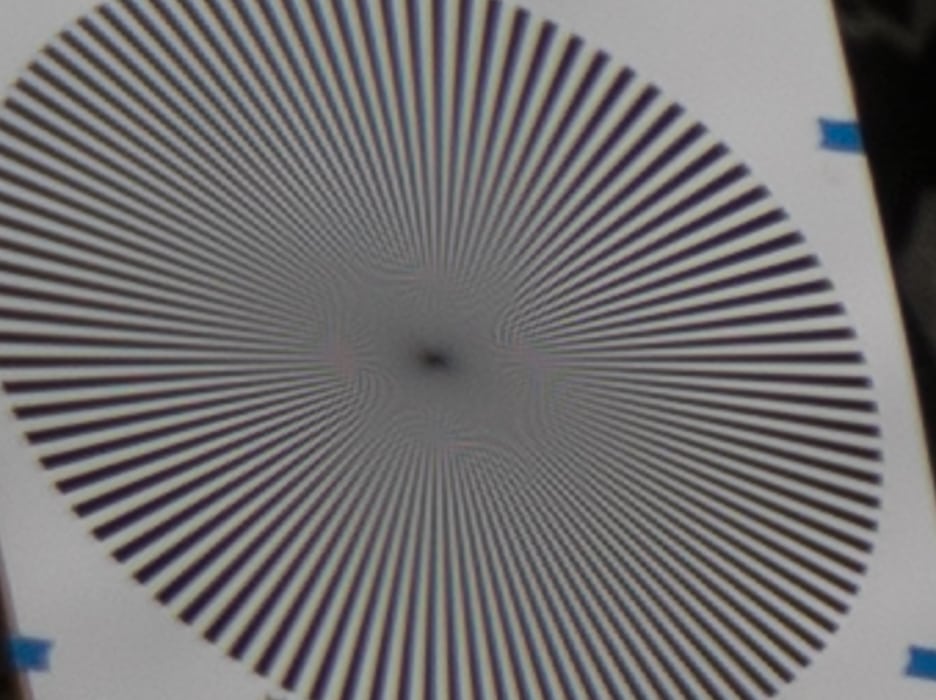
Here’s a blowup of the center of the image:

Center

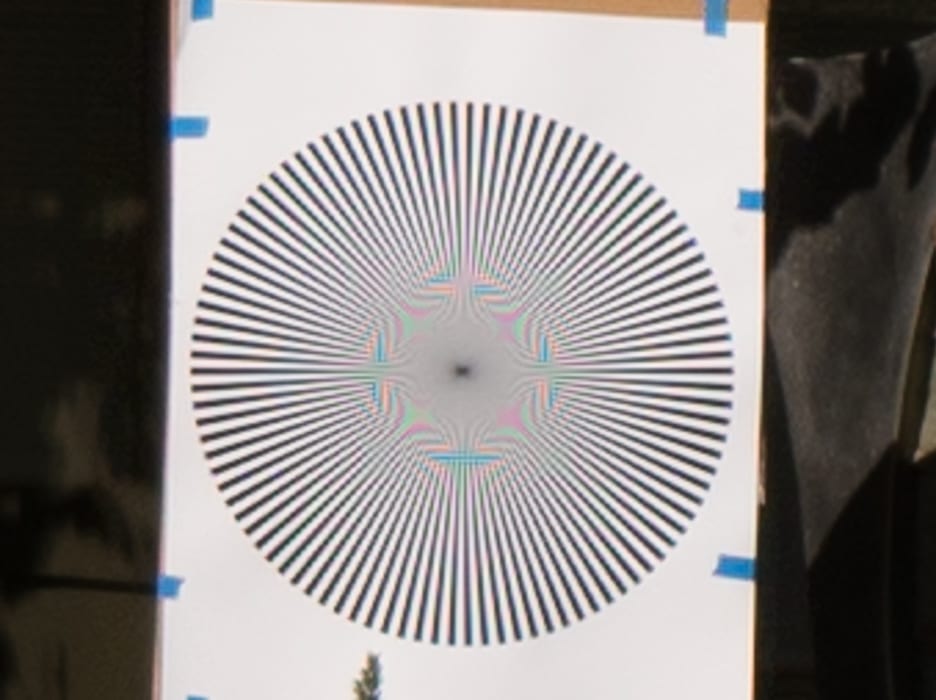
I’m going to make all the crops the same size, 339×253 pixels. That way you can get a sense of the resolution as the focal length changes. The reason the crop looks generous in the above image is that the star will get bigger in the corners, and I’m allowing for that. Note that the aliasing and false color is not very strong in the above image. That’s because 24 mm is not the 12-24’s best focal length. It’s still sharp enough to resolve detail beyond Nyquist, however. 

Now we’ll go around the periphery of the frame in a clockwise direction starting at the upper left-hand corner.

Upper left


Upper Middle


Upper Right


Center Right


Lower Right


Lower middle

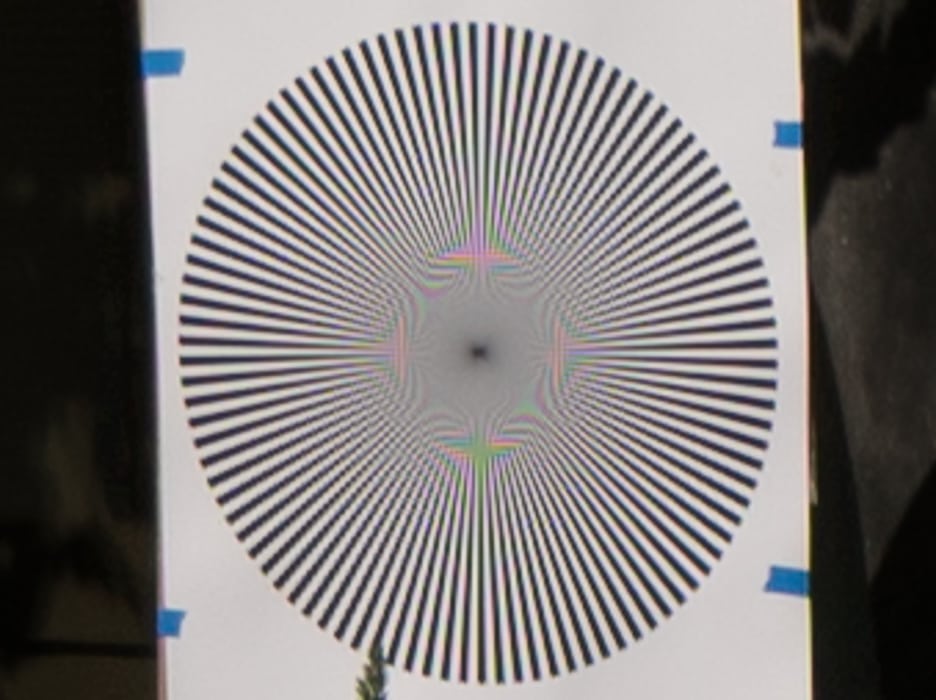
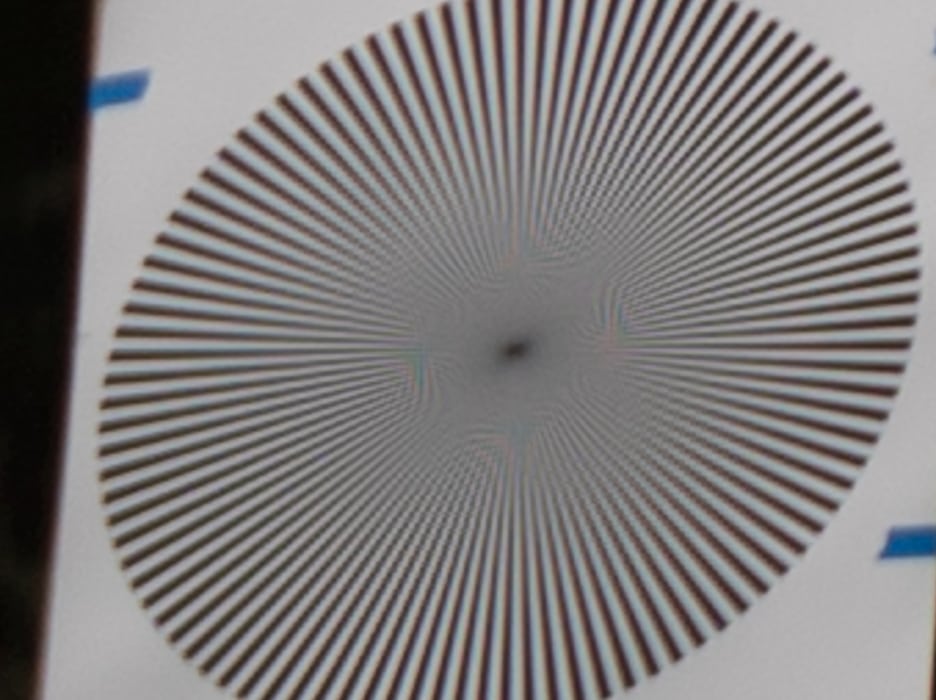
There’s something a bit strange about the image above. Note that it’s sharper in the SW/NE direction, even though that is neither saggital nor tangential. Astigmatism?


Lower Left


Center Left


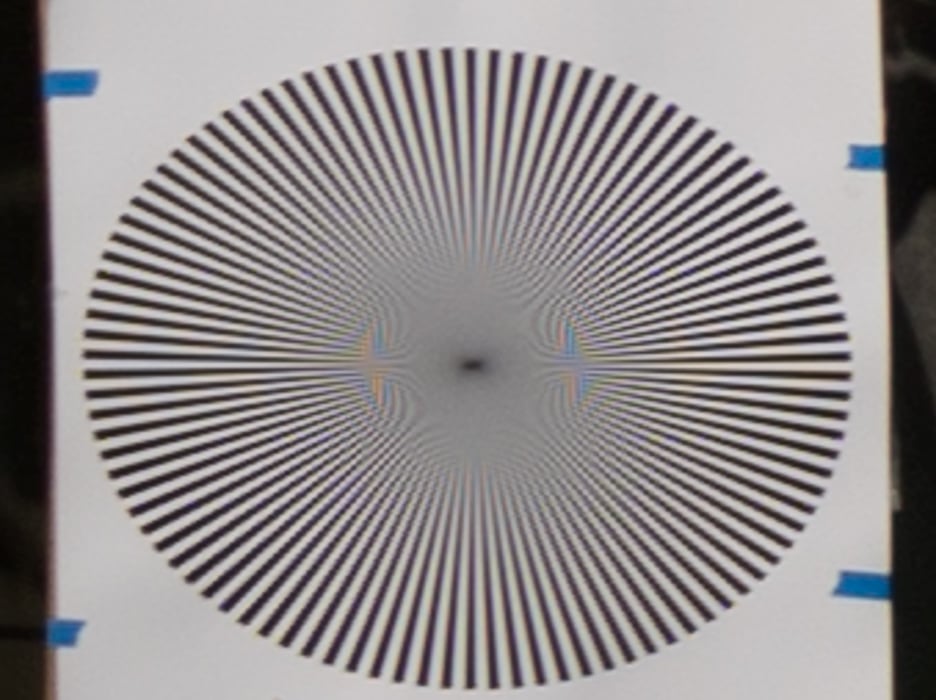
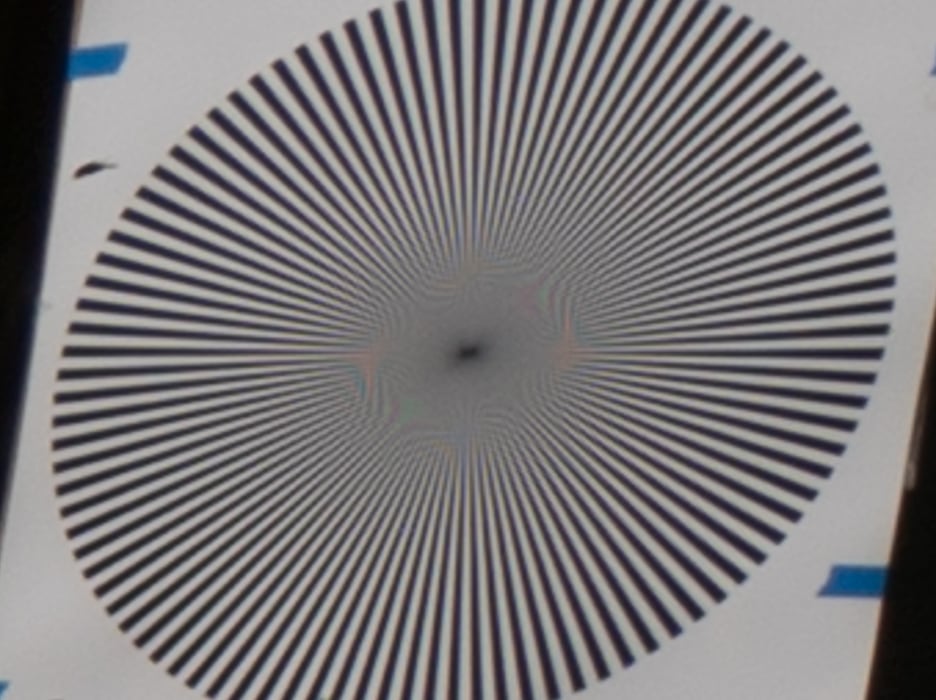
You can see that the resolution is worse in the corners, so much so that the lens can’t generate any significant false color. You can see aliasing in all four corners though, which I think is truly remarkable for a lens like this. There are no significant variations in sharpness among opposite pairs of stars. Which is what you look for in this kind of test.

I’ll show you the results at 18 mm and 12 mm in the next post.

The Last Word

← Simulated architectural shots vs fill factor Sony 12-24/4 off axis at 18 & 12 mm →

Comments

  1. Brandon Dube says

    August 25, 2017 at 12:38 pm

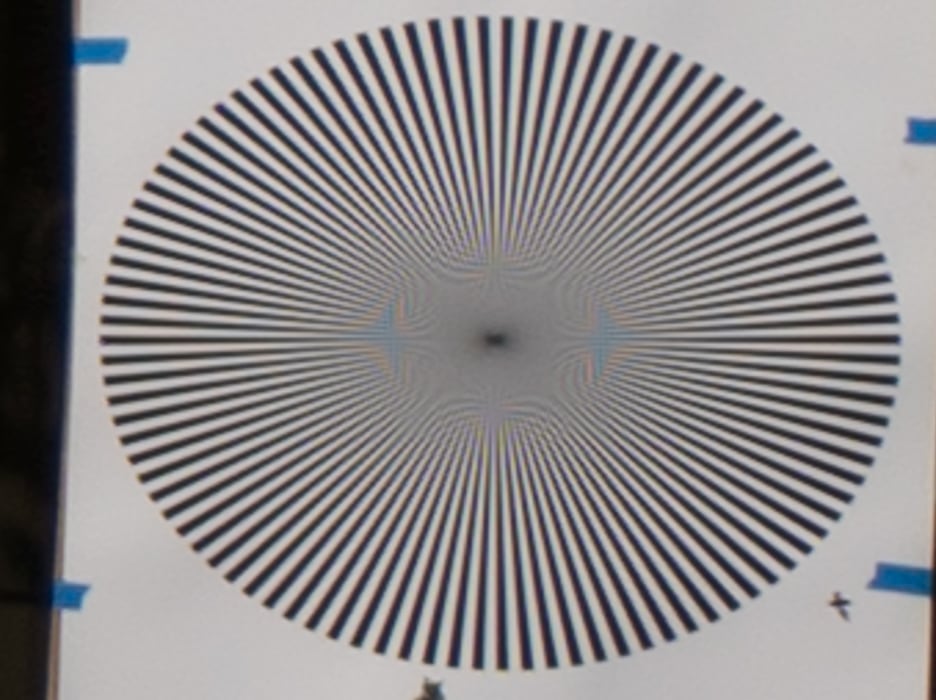
    The lower middle image looks to contain either astigmatism or coma to me. The magnitude is not great enough that my eyes can distinguish them.

    There is a greatest loss of detail, to me, along the center-left extent of the star. Normally an odd/asymmetric loss of contrast like this would imply coma, but the relative frequencies that are taken away look to be more the work of astigmatism.

    What does the (full, 2D, and centered) FFT of the image look like? Astigmatism and coma are more easily separable in that domain.

    Reply

Trackbacks

  1. Fourier transforms of Sony 12-24 Siemens Star tests says:
    September 3, 2017 at 1:38 pm

    […] this post, I showed the center, edge and corner renderings of a Siemens Star captured with a Sony 12-24 mm […]

    Reply

Leave a Reply Cancel reply

Your email address will not be published. Required fields are marked *

May 2025
S M T W T F S
 123
45678910
11121314151617
18192021222324
25262728293031
« Apr    

Articles

  • About
    • Patents and papers about color
    • Who am I?
  • How to…
    • Backing up photographic images
    • How to change email providers
    • How to shoot slanted edge images for me
  • Lens screening testing
    • Equipment and Software
    • Examples
      • Bad and OK 200-600 at 600
      • Excellent 180-400 zoom
      • Fair 14-30mm zoom
      • Good 100-200 mm MF zoom
      • Good 100-400 zoom
      • Good 100mm lens on P1 P45+
      • Good 120mm MF lens
      • Good 18mm FF lens
      • Good 24-105 mm FF lens
      • Good 24-70 FF zoom
      • Good 35 mm FF lens
      • Good 35-70 MF lens
      • Good 60 mm lens on IQ3-100
      • Good 63 mm MF lens
      • Good 65 mm FF lens
      • Good 85 mm FF lens
      • Good and bad 25mm FF lenses
      • Good zoom at 24 mm
      • Marginal 18mm lens
      • Marginal 35mm FF lens
      • Mildly problematic 55 mm FF lens
      • OK 16-35mm zoom
      • OK 60mm lens on P1 P45+
      • OK Sony 600mm f/4
      • Pretty good 16-35 FF zoom
      • Pretty good 90mm FF lens
      • Problematic 400 mm FF lens
      • Tilted 20 mm f/1.8 FF lens
      • Tilted 30 mm MF lens
      • Tilted 50 mm FF lens
      • Two 15mm FF lenses
    • Found a problem – now what?
    • Goals for this test
    • Minimum target distances
      • MFT
      • APS-C
      • Full frame
      • Small medium format
    • Printable Siemens Star targets
    • Target size on sensor
      • MFT
      • APS-C
      • Full frame
      • Small medium format
    • Test instructions — postproduction
    • Test instructions — reading the images
    • Test instructions – capture
    • Theory of the test
    • What’s wrong with conventional lens screening?
  • Previsualization heresy
  • Privacy Policy
  • Recommended photographic web sites
  • Using in-camera histograms for ETTR
    • Acknowledgments
    • Why ETTR?
    • Normal in-camera histograms
    • Image processing for in-camera histograms
    • Making the in-camera histogram closely represent the raw histogram
    • Shortcuts to UniWB
    • Preparing for monitor-based UniWB
    • A one-step UniWB procedure
    • The math behind the one-step method
    • Iteration using Newton’s Method

Category List

Recent Comments

  • JimK on Goldilocks and the three flashes
  • DC Wedding Photographer on Goldilocks and the three flashes
  • Wedding Photographer in DC on The 16-Bit Fallacy: Why More Isn’t Always Better in Medium Format Cameras
  • JimK on Fujifilm GFX 100S II precision
  • Renjie Zhu on Fujifilm GFX 100S II precision
  • JimK on Fuji 20-35/4 landscape field curvature at 23mm vs 23/4 GF
  • Ivo de Man on Fuji 20-35/4 landscape field curvature at 23mm vs 23/4 GF
  • JimK on Fuji 20-35/4 landscape field curvature at 23mm vs 23/4 GF
  • JimK on Fuji 20-35/4 landscape field curvature at 23mm vs 23/4 GF
  • Ivo de Man on Fuji 20-35/4 landscape field curvature at 23mm vs 23/4 GF

Archives

Copyright © 2025 · Daily Dish Pro On Genesis Framework · WordPress · Log in

Unless otherwise noted, all images copyright Jim Kasson.