• site home
  • blog home
  • galleries
  • contact
  • underwater
  • the bleeding edge

the last word

Photography meets digital computer technology. Photography wins -- most of the time.

You are here: Home / Nikon Z6/7 / Optimum Z6/7 manual focusing strategies

Optimum Z6/7 manual focusing strategies

August 21, 2019 JimK 1 Comment

This is a post of interest to any mirrorless interchangeable-lens camera (MILC) user. I’ve illustrated it with images from the Nikon Z7. You can find all the posts about that camera in the Category List on the right sidebar, below the Articles widget. There’s a drop-down menu there that you can use to get to all the posts in this series; just look for “Nikon Z6/7”.

In the previous post, I laid out a strategy for precise manual focusing with MILCs, and illustrated it with screen shots from a Fujifilm GFX 100. I’m going to show you similar shots from a Nikon Z7. The principles are the same, but the peaking and magnification implementations in the two cameras are a bit different. In particular, the Z7 has three levels of magnification beyond unmagnified, and the GFX 100 has 4. The Z7 has three levels of peaking sensitivity beyond off, and the GXF 100 has two.

If you haven’t read at least the first part of the previous post, I encourage you to do so now. Click here. Otherwise, what’s to come won’t make much sense.

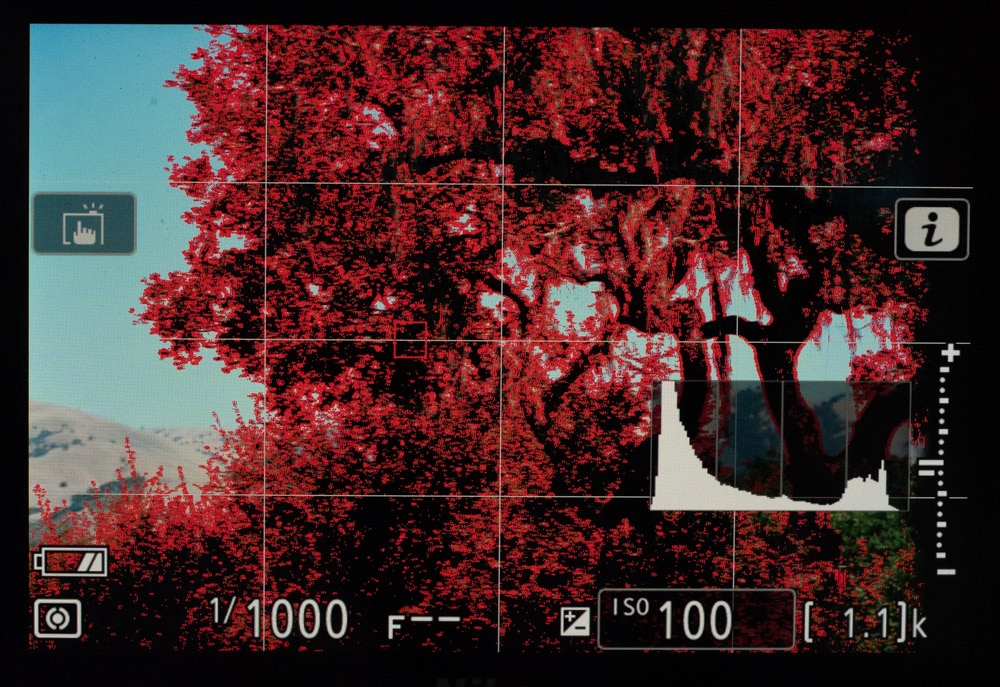
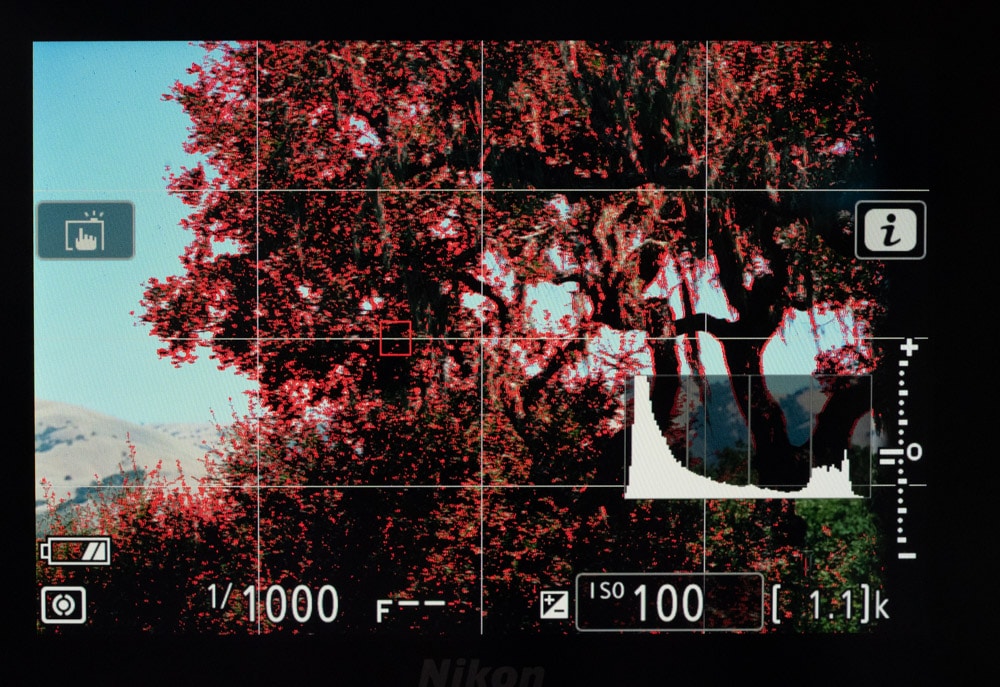
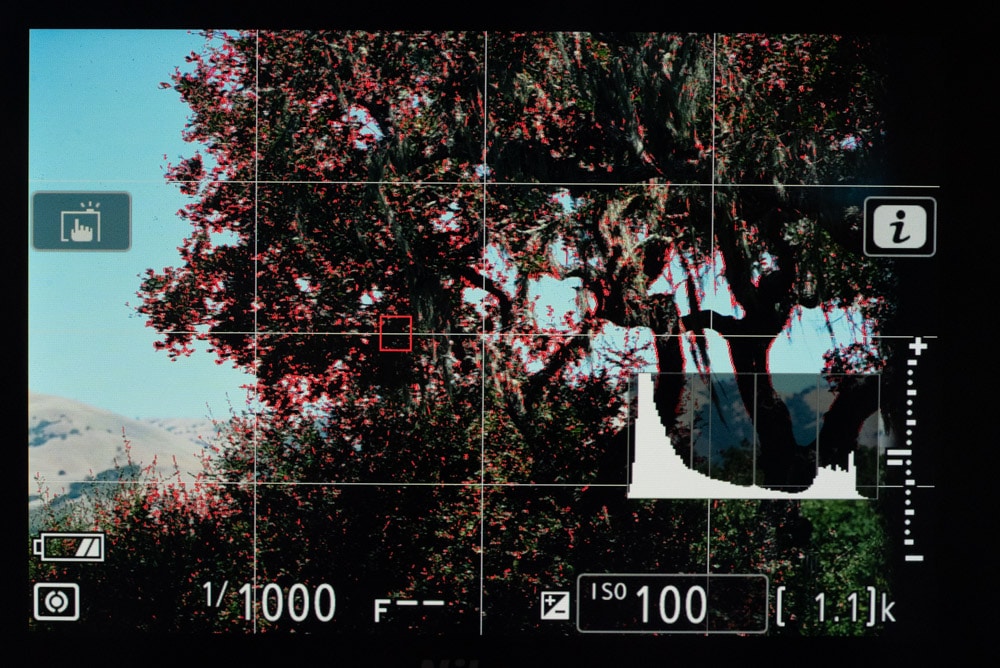
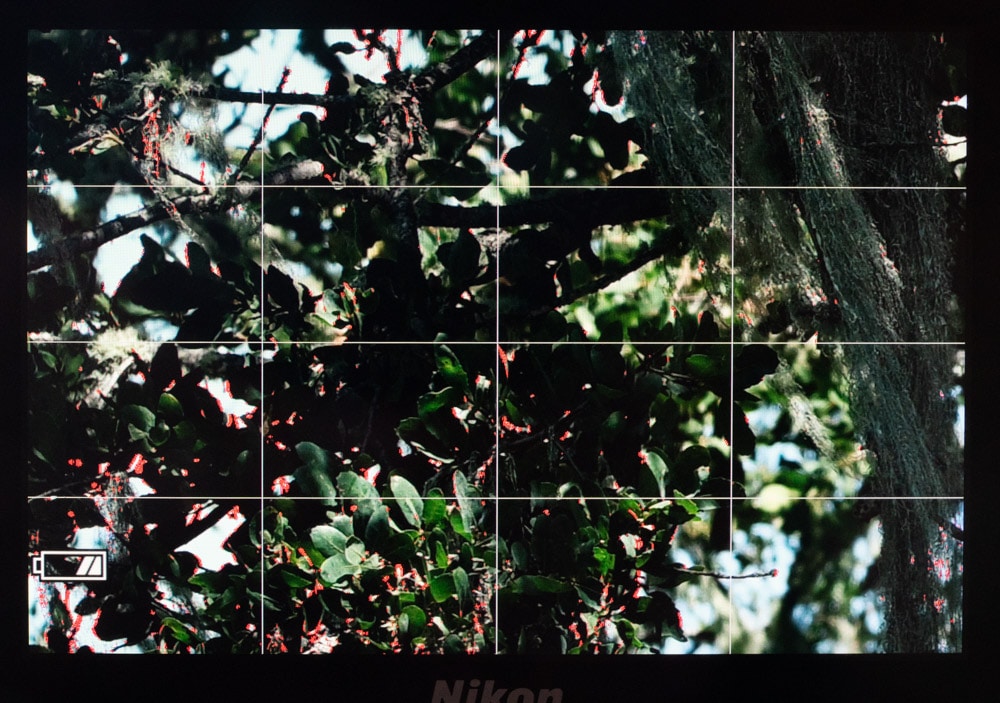
We’ll start with no magnification, and all three levels of peaking sensitivity. If you ask me, all are useless.

Nikon Z7, no magnification, peaking sensitivity 3


Nikon Z7, no magnification, peaking sensitivity 2


Nikon Z7, no magnification, peaking sensitivity 1

Now I’ll show you three levels of magnification, together with the peaking settings that I think work best for this scene with this lens.


Nikon Z7, low magnification, peaking sensitivity 1


Nikon Z7, mid magnification, peaking sensitivity 2


Nikon Z7, max magnification, peaking sensitivity 3

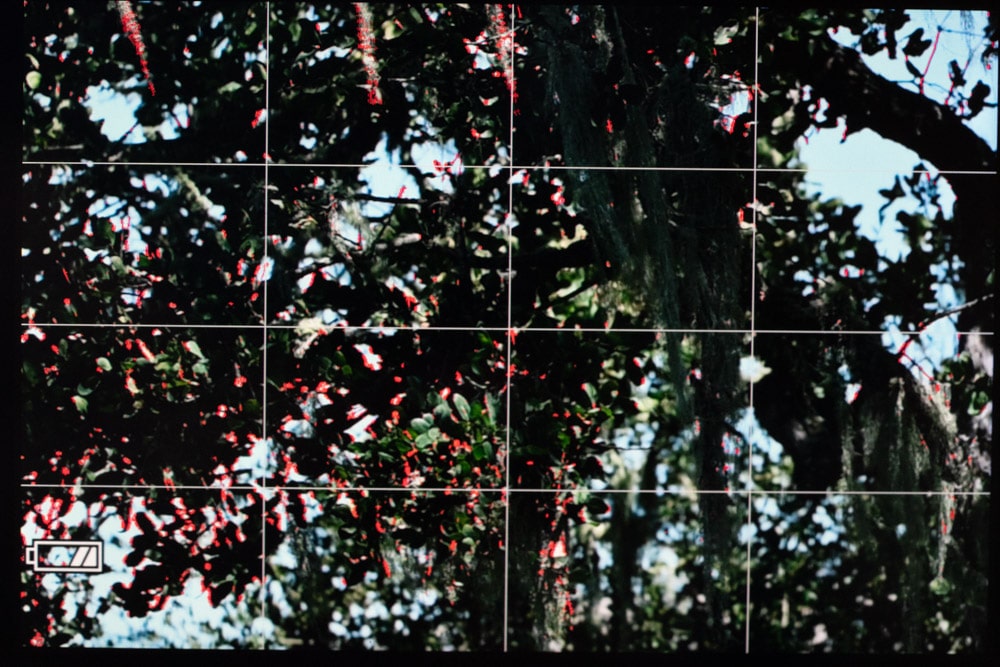
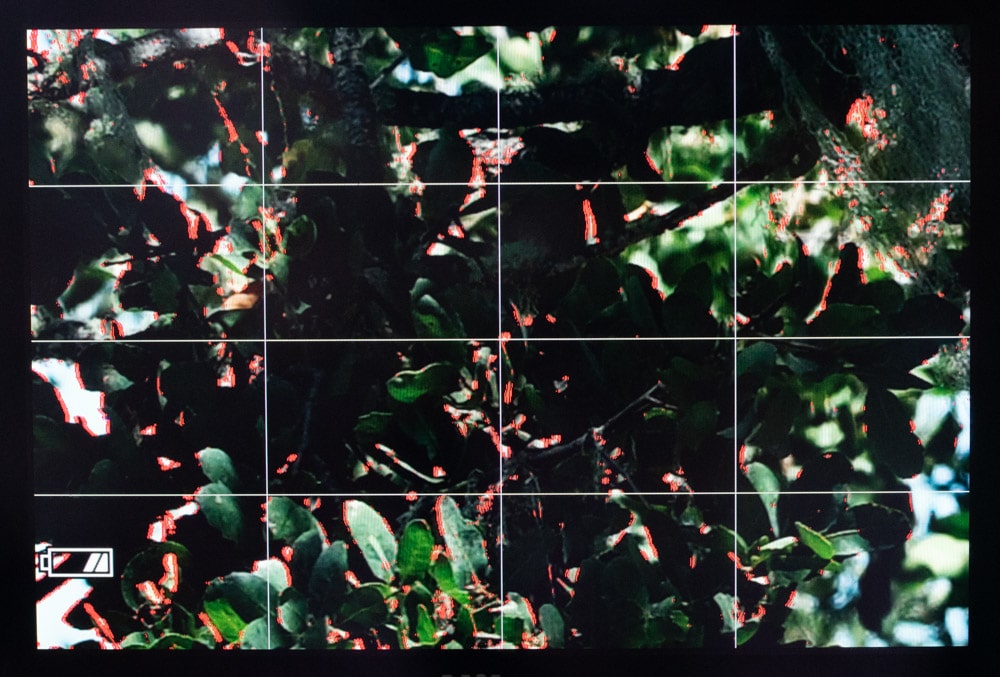
In the mid and max magnification settings, dropping the peaking sensitivity from the ones above by one step makes the peaking color disappear.


Nikon Z6/7, The Last Word

← Optimum MILC manual focusing strategies Visibility of aliasing GFX 50R, 100 aliasing in prints →

Trackbacks

  1. Optimum MILC manual focusing strategies says:
    August 21, 2019 at 2:52 pm

    […] get to all the posts in this series; just look for “GFX 100”. If you’re a Z6 or Z7 user, the next post has examples that you may find more a […]

    Reply

Leave a Reply Cancel reply

Your email address will not be published. Required fields are marked *

May 2025
S M T W T F S
 123
45678910
11121314151617
18192021222324
25262728293031
« Apr    

Articles

  • About
    • Patents and papers about color
    • Who am I?
  • How to…
    • Backing up photographic images
    • How to change email providers
    • How to shoot slanted edge images for me
  • Lens screening testing
    • Equipment and Software
    • Examples
      • Bad and OK 200-600 at 600
      • Excellent 180-400 zoom
      • Fair 14-30mm zoom
      • Good 100-200 mm MF zoom
      • Good 100-400 zoom
      • Good 100mm lens on P1 P45+
      • Good 120mm MF lens
      • Good 18mm FF lens
      • Good 24-105 mm FF lens
      • Good 24-70 FF zoom
      • Good 35 mm FF lens
      • Good 35-70 MF lens
      • Good 60 mm lens on IQ3-100
      • Good 63 mm MF lens
      • Good 65 mm FF lens
      • Good 85 mm FF lens
      • Good and bad 25mm FF lenses
      • Good zoom at 24 mm
      • Marginal 18mm lens
      • Marginal 35mm FF lens
      • Mildly problematic 55 mm FF lens
      • OK 16-35mm zoom
      • OK 60mm lens on P1 P45+
      • OK Sony 600mm f/4
      • Pretty good 16-35 FF zoom
      • Pretty good 90mm FF lens
      • Problematic 400 mm FF lens
      • Tilted 20 mm f/1.8 FF lens
      • Tilted 30 mm MF lens
      • Tilted 50 mm FF lens
      • Two 15mm FF lenses
    • Found a problem – now what?
    • Goals for this test
    • Minimum target distances
      • MFT
      • APS-C
      • Full frame
      • Small medium format
    • Printable Siemens Star targets
    • Target size on sensor
      • MFT
      • APS-C
      • Full frame
      • Small medium format
    • Test instructions — postproduction
    • Test instructions — reading the images
    • Test instructions – capture
    • Theory of the test
    • What’s wrong with conventional lens screening?
  • Previsualization heresy
  • Privacy Policy
  • Recommended photographic web sites
  • Using in-camera histograms for ETTR
    • Acknowledgments
    • Why ETTR?
    • Normal in-camera histograms
    • Image processing for in-camera histograms
    • Making the in-camera histogram closely represent the raw histogram
    • Shortcuts to UniWB
    • Preparing for monitor-based UniWB
    • A one-step UniWB procedure
    • The math behind the one-step method
    • Iteration using Newton’s Method

Category List

Recent Comments

  • JimK on How Sensor Noise Scales with Exposure Time
  • Štěpán Kaňa on Calculating reach for wildlife photography
  • Štěpán Kaňa on How Sensor Noise Scales with Exposure Time
  • JimK on Calculating reach for wildlife photography
  • Geofrey on Calculating reach for wildlife photography
  • JimK on Calculating reach for wildlife photography
  • Geofrey on Calculating reach for wildlife photography
  • Javier Sanchez on The 16-Bit Fallacy: Why More Isn’t Always Better in Medium Format Cameras
  • Mike MacDonald on Your photograph looks like a painting?
  • Mike MacDonald on Your photograph looks like a painting?

Archives

Copyright © 2025 · Daily Dish Pro On Genesis Framework · WordPress · Log in

Unless otherwise noted, all images copyright Jim Kasson.