Yesterday I talked about the impediments to getting, in real world situations, all the sharpness that our best cameras and lenses can deliver. Focusing, diffraction, depth of field, internal and external camera vibration are at the top of the list, and the situation will get worse as better lenses and higher-resolution cameras hit the streets.
What should we do? Should we save ourselves a bundle by not buying gear that we can’t get the most out of? Should we go to monumental extremes to stabilize our cameras? That’s the subject of today’s post.
The first thing to do is realize that sharpness is not a photographic end in itself. It should exist in service of a greater photographic goal, which will vary from image to image, based on content, the photographer’s vision, print size, and expected viewing conditions.
Not every print needs to be razor sharp. In fact, sharpness would detract from some images.

Images like this can be enlarged as much as the photographer pleases without adverse effect, because they won’t lose sharpness that wasn’t there to begin with. Images like this can be made with equipment that is not capable of delivering sharp images, although the use of such gear won’t hurt anything.
Other images can be successful even if exquisite sharpness isn’t there. If they get sharper, it won’t hurt anything, but the greater sharpness won’t make the image any better; it’s “sharp enough” already.
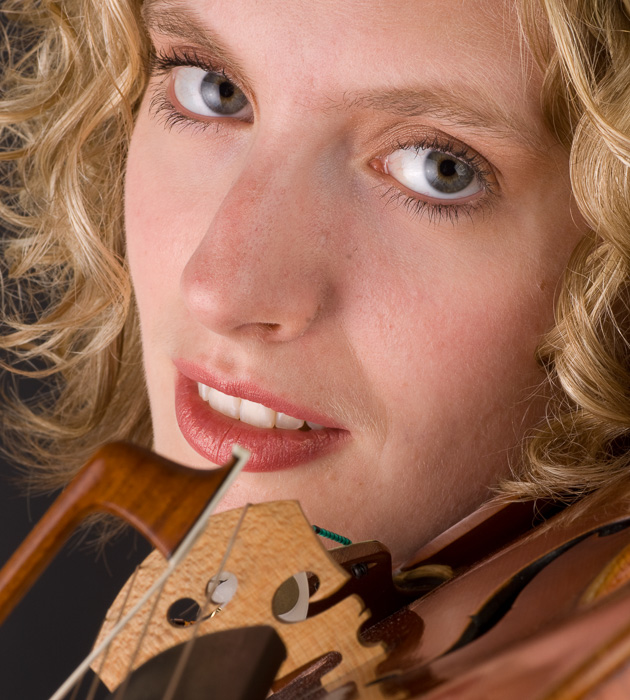
If this were to be a big image in a department store selling makeup, you’d probably want more than the original 12 MP or so, to make the skin tones hold up at close range, but it wouldn’t need to actually be sharper than it is.
Then there are images for which sharpness matters a lot, but they’re not going to be printed bigger than C-size (17×22 Inches). Sharpness such as the D810/Otus 55 can achieve when the stars are in alignment isn’t necessary, since the print can’t resolve it.
We tend to think that current print resolution of 300-720 pixels per inch and roughly 3000 drops/inch is perfectly adequate, and it is for some purposes. However, that resolution is substantially inferior to technology that’s well over a century old: a silver-gelatin black and white contact print. I have some of these prints, and they’re something special. Even if you can’t see the level of detail that they posses without a loupe, you can sense that it’s there, and the prints invite close inspection.
I remember taking a workshop from George Tice in the late 70s. He showed us a contact print of Joe’s Barber Shop, handed us a magnifying glass, and invited us to read the newspaper.
Absent a step-function increase in printer resolution, the only places we’re going to need state-of-the art sharpness is in prints bigger than C size.
OK, now let’s say you have a subject that demands critical sharpness and you’re going to make a big print. What do you do?
Use strobes. Camera motion is your enemy. One solution is to free yourself from the constraints of shutter speed in freezing that motion. While you’re at it, use trailing curtain synch at slower shutter speeds to let the vibrations caused by the opening of the shutter die down. Both Paul Buff and Elinchrom have short-duration strobes available.
Use leaf shutters. A smaller shutter forcing function means less vibration.
Use EFCS. I look forward to the day when all cameras will have it.
Use a focusing target. Recognizing the limitations of ground glass large-format focusing, the Betterlight scanning back ships with a set of high-contrast targets that you can place in the scene, focus on, and remove before making the exposure. Works like a champ, if you have the time.
Use focusing aids. The Betterlight has a mode where it displays intensity versus position along a scanning line. It is remarkably effective when used with the Betterlight focusing target. Focus peaking, as employed by Sony and others in their mirrorless cameras, can also be very effective, both with and without a target.
Use focus stacking. If your subject doesn’t move, the light doesn’t change, and there aren’t any reflections in your subject, focus stacking can let you use your lenses at the apertures they perform best and still have lots of depth of field.
Stitch. If you have a cooperative subject, there’s no better way to get gobs of resolution than stitching together two, 20, 200, or 2000 images. You get to sidestep diffraction problems, use the focal lengths where it’s easiest to make the lenses good. It’s magic. You can even combine it with focus stacking.
Now we get to the inelegant, but effective, coping strategies. I’m not proud of these, but I’m not too proud to use them when I need to.
Go ahead, stop down too far. To some extent, you can fix diffraction blur by deconvolution sharpening in post. It’s actually pretty amazing how well programs like Lightroom and Topaz Detail do this. You can’t fix hugely out of focus foregrounds or backgrounds caused by too wide an f-stop.
Focus bracket. I didn’t say this would be pretty, did I?
Well, you get the idea. Feel free to post your favorite tricks as comments.
Jim, I’m curious if you tried out turning up the sharpening in the D810 to help with liveview focusing. That’s the method I use, and it seems to work, but if your tests don’t show any difference, I should reconsider its use.
Deconvolution applied to a stopped down image is in no way inelegant. It’s replacing an unknown transfer function (defocus which varies over the field) with a known one (diffraction from a small aperture) and then undoing that in software.
It really gets at the ultimate tradeoff: the wider the transfer function you are deconvolving, the more it amplifies noise. You end up choosing between noise (or having to take multiple shots to reduce noise), sharpening less (and getting less resolution), or not stopping down so much (reducing depth of field).
On a way, that’s the most elegant method, since you are riding on the boundaries of what is physically possible to capture, and you can adjust which aspect you are willing to compromise.
I hear you, and I agree with you on a fine-grained level, but it still seems like throwing in the towel.
Jim
Could you elaborate on focus stacking combined with stitching. Let’s say you’re doing a three pane rotational stitch. Would you focus, expose/rotate, expose/rotate expose. Refocus and repeat.
Or would you focus stack in each individual pane, then rotate and focus in the next pane?
In post would you merge your stitched together image then apply Helicon Focus ?
As you say none of it’s very pretty, but all’s fair in love and war.
Thanks
Claude
Claude, I’ve found the combination most effective for multi-row landscape stitches, with the bottom row focused a little closer, and lots of overlap.
Jim
I’m fuzzy on what is the difference between “focus stacking” and “focus bracketing” … also I want to see if I’m notified of a reply to an older blog article if I use a gmail address. Ping?
I did a google search, and it seemed a “difference without a distinction”.
Is “stacking” where you have the set of captures, and use post processing software to get the increased focus depth?
Is “bracketing” where the camera does this for you, and you get the single result?
Hi Jim,
Good article!
Best regards
Erik