The Sony/ Zeiss 55mm f/1.8 Sonnar is the first native FE (Full frame E) I’ve tried on the a7R. This is not a particularly small lens, but it’s very light, and makes for a happy shoulder when mounted to the a7R body.
The first thing I did was check for falloff and color shift, with and without the internal shading correction enabled.
With no correction at f/2, there’s a reasonable amount of falloff but virtually no color cast:

When you turn on the shading correction, the corners are brightened somewhat, but not completely evened out as they are when you use Adobe Flat Field:

As you stop down further, the field evens out, and so does the correction. By the time you get to f/16, the two fields are virtually indistinguishable by just looking, although if you poke around with the eyedropper you can see some small differences..
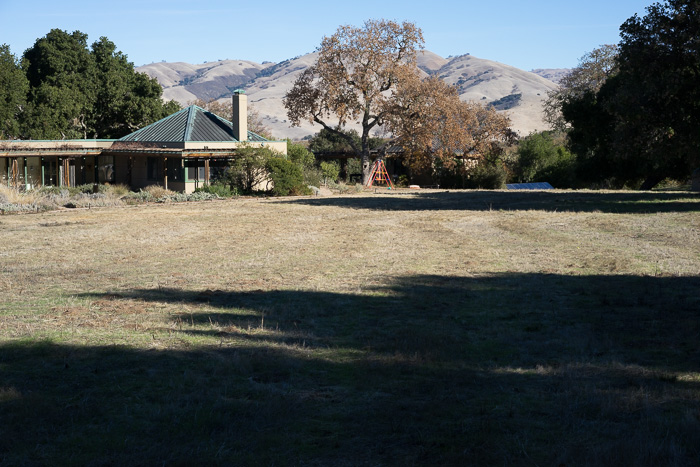
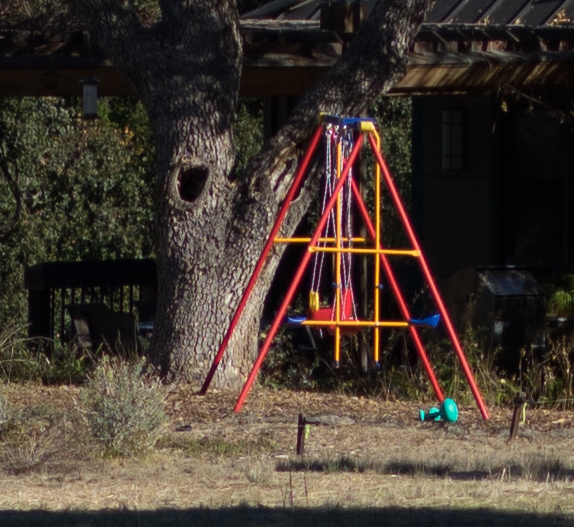
I set up on the usual medium/long lens scene:
I focused the series presented here manually, but I did a series where I let the camera’s AF have its way with the focusing ring, and it was very close to as good, and probably more repeatable.
Manual focusing on the NEX-7 was an exercise in frustration because the focus-by-wire software wasn’t very good. There’s been a big improvement. In the a7R, the manual focusing isn’t as good as it is with the best old-fashioned helicoid lenses, but it’s not bad at all. It’s actually easier to focus the 55 f/1.8 than it is the Coastal Optical 60mm APO, because the focusing ring on the 60 is so sensitive; a tiny nudge makes a big difference — in its defense, it is a macro lens..
In the center, at f/2 and 1:1, sharpness is really impressive considering the aperture:
At f/2.8, there is significant improvement in both sharpness and contrast:

f/4 is a little better, and f/5.6 is as good as it gets: and that’s really good:

f/8 is slightly softer than f/4, f/11 is as soft as f/2, and f/16 is softer still.
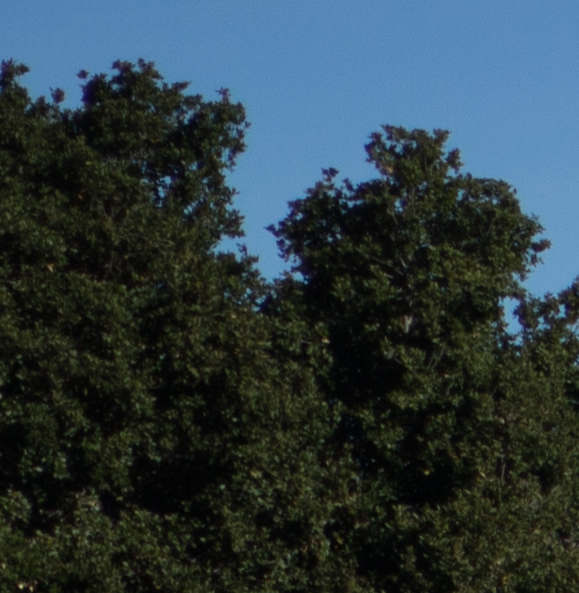
In the upper left corner, there is only a small amount of chromatic aberration, and I had the in-camera CA corrections turned off. It’s a little soft, but considering the aperture, it’s great. Here it is at 1:1:
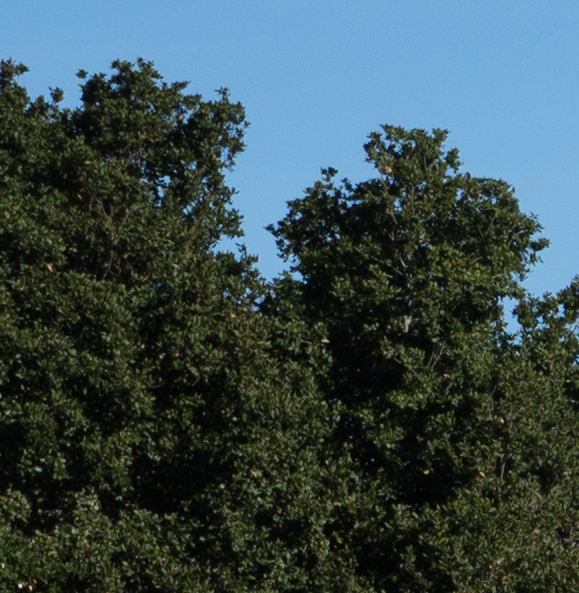
Contrast and sharpness improve at f/2.8, and again at f/4. It’s even better at f/5.6:
At f/8, it’s about the same. F/11 is a bit softer, and f/16 has the sharpness of halfway between f/2.8 and f/4.
Compared to the Coastal Optical 60mm f/4 APO, in the center, the 55mm is slightly sharper at f/4, and about the same at f/5.6. The 60mm is slightly sharper at f/8 through f/16.
In the upper right corner, the Sony/Zeiss lens is night-and day sharper at f/4 and f/5.6. It somewhat sharper at f/8, a bit sharper at f/11 and about the same at f/16.
Maybe the focus was a little bit better with the Sony/Zeiss lens since I could focus at f/1.8, and I couldn’t focus the Coastal Optical lens any wider than f/4. Maybe I got a really good example of the 55 mm lens. Still, the differences in the corners between this kilobuck lens and one that costs five times as much are truly impressive.
This is a great lens for corner-to-corner sharpness. For the price, it’s flat amazing.
Here’s a link to the Photoshop stack of all the center images with both lenses.
Here’s a link to the Photoshop stack of all the upper left images with both lenses.
After reading Joe Holmes letter this AM on Sonyalpharumors (http://www.sonyalpharumors.com/the-shutter-vibration-issue-explained-by-joseph-holmes/). I took several shots today with the A7r using Joe’s solution and without. I also took a similar shot using the 5D Mk III. These were all taken with the maximum focal length I could muster a Canon 100 – 400 with a 1.4 extender. All the shots were taken at f/8.0, 1/100 with the Sony at ISO 100 and the Canon at ISO 200 as it was getting dark here on the east coast.
The lens was mounted on a Gitzo 1348 (with only the thicker top three tubes extended), with a RRS BH-55 on top. I did have a RRS aluminum center tube installed and was too lazy to put in the plate, but the column was down and tightened. I used the 100 – 400 tripod collar with a RRS plate in the BH – 55. My interest in the Sony with Canon lens is generally with the 24 and 45 TS-Es and my normal configuration is with an Arca Swiss Universal L Bracket attached to the Metabones III via an Hejnar Spacer. As there wasn’t enough room to put a bracket on the camera and the adapter I used the lens tripod collar. I moved the Arca-Swiss L Bracket ((http://www.bhphotovideo.com/c/product/723386-REG/Arca_Swiss_802306_Universal_L_Bracket.html) to the A7R and attached a RRS CB-10 Package as the stabilizing weight (http://reallyrightstuff.com/ProductDesc.aspx?code=CB-10-Pkg&type=3&eq=&desc=CB-10-Package%3a-CB-10-and-Mini-Clamps). Together they add up to about 33 oz or about 1/3 more than Joe Holmes calculates as required.
After an initial long range shot (1.08 miles per google maps) of the Domino Sugar Plat in Baltimore Harbor https://www.dropbox.com/s/ege9kumh97qxroq/A7R_02445.ARW I did the sequence of three cited above. Per google, they are at a distance of about 115 feet.
All shot with a wired remote and with mirror lockup on the 5d mk iii.
2469 is A7r without the CB-10, 2472 has the CB-10 on and the 5D Mk III just happened to have a grip and RRS L bracket on ti.
https://www.dropbox.com/s/1z3cv1fhd02ndks/A7R_02469.ARW
https://www.dropbox.com/s/g4lin8wve9qhdq7/A7R_02472.ARW
and the close but not exact 5D mk iii image
https://www.dropbox.com/s/fb8we32c27me9b9/5D3_59937.CR2
Holmes did some sharpening and analysis and concluded:
re: the 5d III — This time it shows that the 5D II is sharper per pixel, as though there were a secondary component of blur in addition to the up-down component. It’s possible that the shutter vibration affects the image on secondary ways too, and that those effects are not as well addressed by the weight, but they actually should be, as it is simply well-attached, hard (apart from the foam layer [On the Arca Swiss L Bracket]) and heavy.
between the weighted and unweighted A7R — So I just checked: Success!! In this comparison, I can see no hint of vertical motion in the one with the weight. This is very good. The overall level of detail isn’t something that Lloyd [Chambers] would be thrilled with, but it’s fundamentally sound. Sharpening in LR would work even better.
Clearly there are better ways to get to 500+mm and that likely accounts for the diminished detail. Having some time ago qualified for an NPS Senior Pass and having prisms in both eyeglass lenses, I am probably not the best suited to judge and I tend to prefer impressionists anyway.
So… thought I would just send along in case it would be at all helpful in your analysis.
Joe Nash
Thank you, Joe. That’s a big step forward.
Jim
Hi Jim,
Interesting work as always. With regards to measuring shutter shock, I may have happened upon a method using MTF50 off slanted edges. See what you think of these graphs here, for instance http://www.dpreview.com/forums/thread/3583280 . Assuming good technique and equipment, it would of course be better to keep ISO at base and simply change shutter speed.
Jack