A couple of months ago, before I got started on the Sony a7R Odyssey, I was looking for a way to compare a photograph of the ISO 12233 target made with electronic flash to one made with a continuous light source. The idea was to use the electronic flash to find out what the target looked like with no camera movement, and to be able to compare that to images made of the continuous source at various shutter speeds. Knowing what the no-movement image looked like was important to deciding how to evaluate the continuous lighting pictures. Let’s say the images at 1/250 and ¼ second looked the best of the series. Were they essentially uncontaminated by camera motion, or were they merely the least contaminated?
I tried using incandescent lights, but I never could get results as sharp as the strobe pictures. Was that because of camera motion, or was it because the spectra of the two illuminants were so different, and the lens was having trouble focusing the redder, more easily diffracted light from the hot lamps? In order to find out, I needed a bright continuous light source with 5500 degree Kelvin color temperature, and, ideally, a smooth spectrum. I looked at LED Fresnel assemblies, but was put off by their cost, especially since my only current use for such a light is testing.
Finally, about a week ago I ordered a single Fotodiox LED-200WA-56 lamp, a 200-watt, 5500K continuous source whose manufacturer says is dimmable with little change to its spectrum. Conventional LED wisdom says to multiply the output by a factor of 6 or so to get the incandescent equivalent, but I’d been warned that it wasn’t really that bright. The dimmability was originally a key characteristic, but that was before I discovered the variable ND filter trick; now it’s just a nice to have. It was a fraction of the cost of a Fresnel unit, so I was willing to experiment. It arrived on Monday, and I set it up yesterday, and made a series of pictures that surprised me so much that I had to go back and do them over to make sure I hadn’t made a mistake. That’s the reason for no post yesterday.
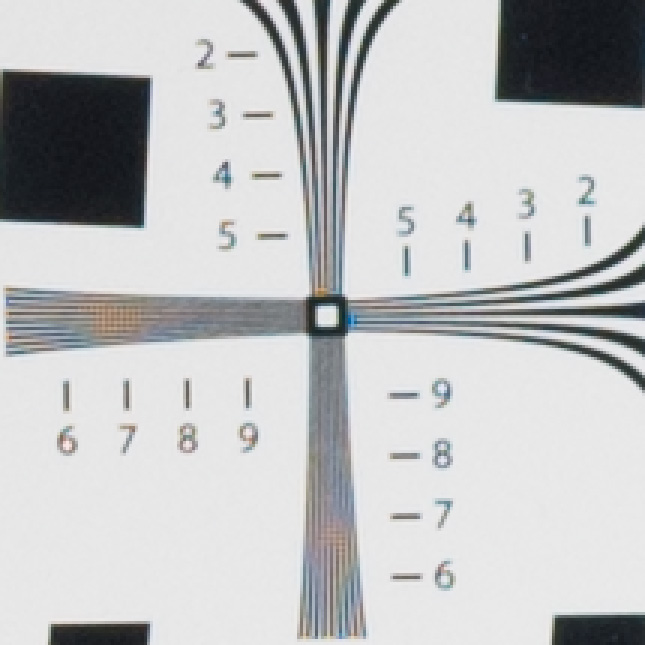
I set up this gear: Zeiss 135mm f/2 APO Sonnar ZF.2 on a Nikon D800E, RRS D800 L-bracket, Arca Swiss C1 Cube, RRS TVC-44 legs. I put a Heliopan 77mm variable neutral density filter on the lens. Release was in Mirror Up shutter mode, with a five second delay between the mirror rising and the shutter firing provided by a Cognisys controller and electronic shutter release. ISO 400, lens set at f/5.6. ISO 12233 target with the camera at a distance to yield an active area 670 pixels high. Thus, the lines labeled “7” represent 1 line pair per pixel pair.
Target illumination for the continuous lighting images was provided by a single Fotodiox LED-200WA-56 lamp set to full output, usng the supplied reflector. Lighting for the strobe images came from a Paul Buff Einstein 640 watt-second flash set to 2.5 watt-seconds. At this power setting, the flash duration is about 1/13000 second. As a further – and probably unnecessary – measure to mitigate shutter shock affecting the strobe images, the camera was set to trailing curtain synch and the shutter to 3 seconds, allowing the camera to stabilize from the shock of the first curtain movement before the flash went off.
For the continuous-lighting pictures, the camera was set to 1/250 second with the ND filter at minimum absorption. An exposure was made. Then the shutter was set 1/3 stop slower, the ND filter was adjusted to give the same meter reading, and another exposure effected. That process was repeated all the way to maximum ND filter absorption and a shutter speed of ¼ second.
Then I processed the images in Lightroom with the default settings, corrected for (minor, as it turns out) exposure differences, and exported the files to Lightroom as layers. I labeled the layers with the exposure times and compared them. The images that I’m posting here are crops from the upper right-hand corner, enlarged 3x using nearest neighbor, and JPEG’d. Because of the way that Photoshop handles EXIF data from images composed of multiple layers, the EXIF data for the posted images is bogus. If anyone would like to see the Photoshop stack, please contact me.
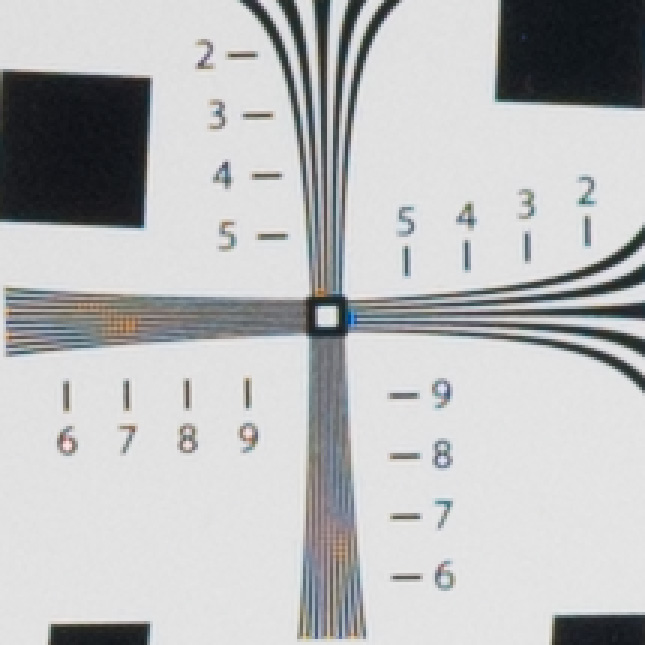
The strobe-lit layer shows sensel level resolution. This lens is probably capable of resolving detail far beyond the capability of the 36 megapixel camera:
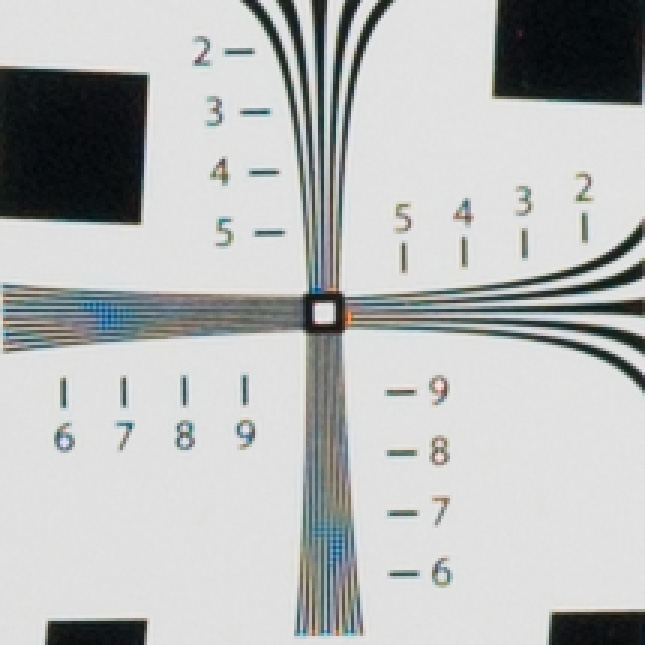
There is virtually no resolution lost in the 1/250 second image:
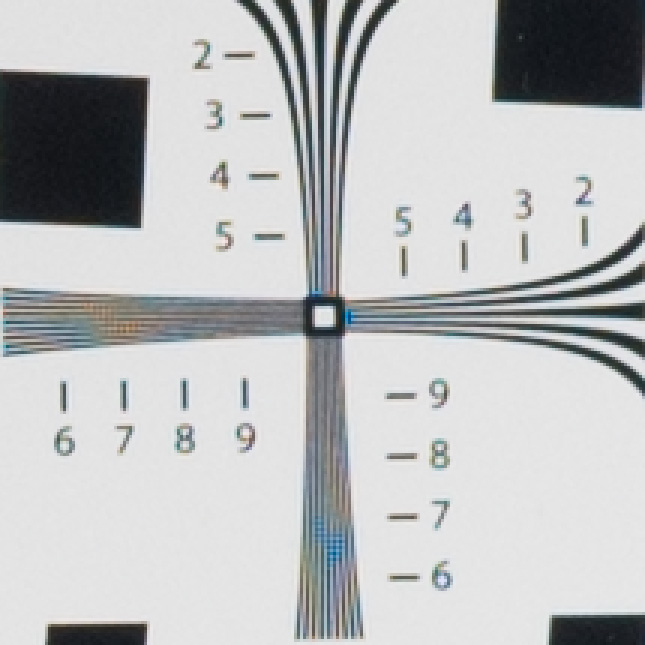
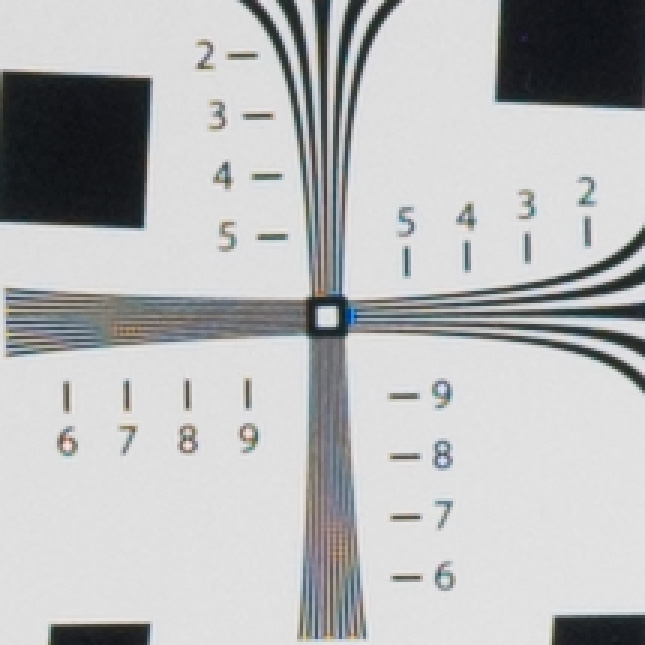
We lose a little bit at 1/125, but it’s still very good:
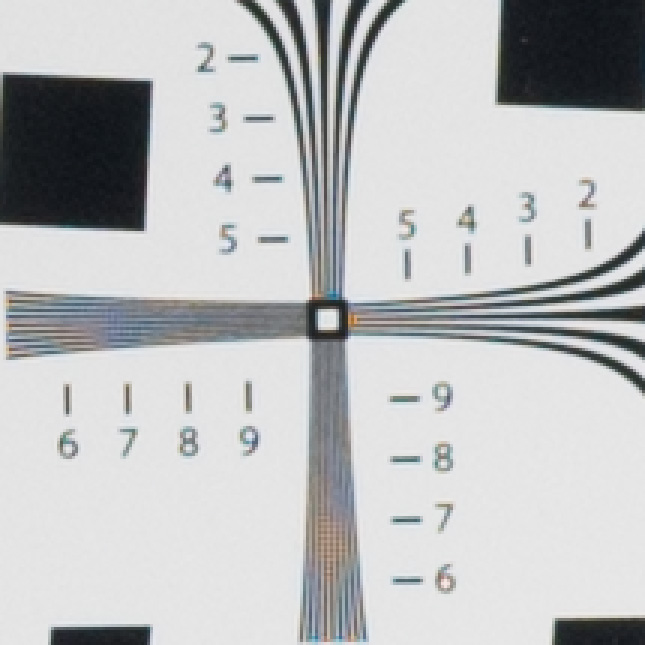
Things are a little bit worse at 1/80:

But they improve at 1/60:
They continue to improve slightly to 1/30:
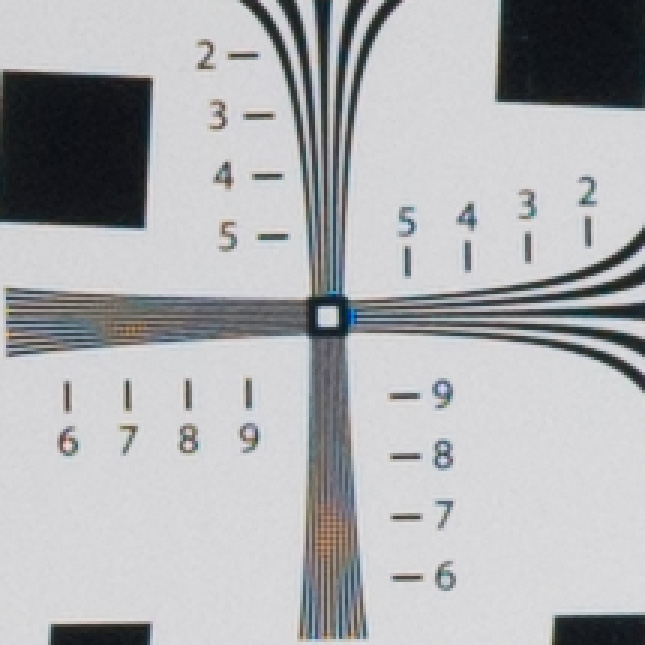
More steady improvement follows, until, at 1/5, we have almost recovered the resolution of the vertical features of the strobe-lit image:
1 / 2.5 gives an image that’s very close to the strobe lit one:
The surprising thing to me, based on my earlier experiments, is how good all the images are. 1/80 second, and maybe 1/100, are the only images that I think show sharpness loss that you’d notice in real photographs (as opposed to ones of test charts) and they’re not bad. In all cases the resolution is sufficient to trigger aliasing errors in the Lightroom demosaicing software.
A possible take-home lesson here is that tungsten illumination doesn’t allow as sharp images as daylight lighting. Further testing will be necessary to make sure.
This is a night-and-day difference from the earlier a7R results with a slightly different testing regime. Now I’ll have to run a side-by-side test just to make sure.
[…] this is a 24 megapixel camera, the pixels are bigger than the pixels of the a7R or the D800E. If you’re going to compare these ISO 12233 images to those of the other two cameras – and I […]