There’s an old thread on the Luminous Landscape board that I just noticed. The original poster wanted to know what camera is best for street photography. As you might imagine, that question evoked a lot of discussion about the definition of street photography. Horses for courses, as the adage goes, and you need to identify the course before you pick the horse.
Upon reflection, I think that any photographic pursuit aimed at making art is personal and idiosyncratic to a degree that makes questions like “What camera is best for [pick a genre]” at best imprecise and at worst likely to elicit answers which are useless to any particular practitioner of the genre in question. Whatever your photographic pursuits, whether they fit into a neat description or not, what you want is different than what anyone else wants, and what you must do to get what you want is different from what anyone else does.
The bad news is that no one can tell you the perfect instrument for you to achieve your photographic goals from a pigeon-hole description of those goals. The good news is that your photography will tell you how to formulate a question which has an answer that moves you along your path in a productive direction.
The first step towards equipment selection is the same as the first step towards any photographic goal: make pictures. Pick up whatever gear seems right to you and use it as best you can. It may seem awkward for the task, but ignore that for a while. After a while, you’ll notice that you aren’t learning as fast as you did. Sit down and make a list of what you’d like your equipment to do for this project, and what your current equipment does that doesn’t work for this project (It doesn’t feel like a project yet — then maybe you need to keep working a while longer). Now, armed with your list, if you want other people’s opinion, ask around for recommendations for equipment. It’s quite likely that you’ll look at your list and you’ll know what you need to use in the next phase of your project.
The shoot-analyze-buy cycle can, like the cycle on the shampoo bottle, be repeated indefinitely. There is no danger that it will converge, because your vision for the project will change as you work on it, and the universe of available equipment will change as well. Be careful about blaming your equipment for your failures in vision and attempting to buy artistic inspiration, but accept the fact that your experience with new gear will give you insights you wouldn’t have gotten with your old stuff.
I’ll illustrate what I’m saying with an example from my own experience in what could be broadly categorized as street photography. In the early 80s when I became serious about making art, I did street photography using a Nikon S2 with a 50mm f/2 lens that I’d owned since 1958. You might call it a classic street photography setup: small rangefinder camera with a lens that encouraged getting close. I might have preferred a wider lens but I used what I had. I would occasionally work in the street with a 500-series Hasselblad and a 50mm lens, which also happened to be a camera I had around – I’d purchased it for landscapes. Not a classic street camera, but Max Yavno and others had done great work with two-and-a-quarter-square reflex cameras.
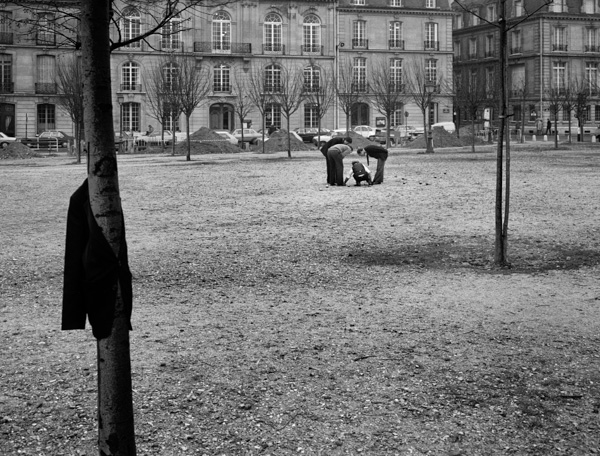
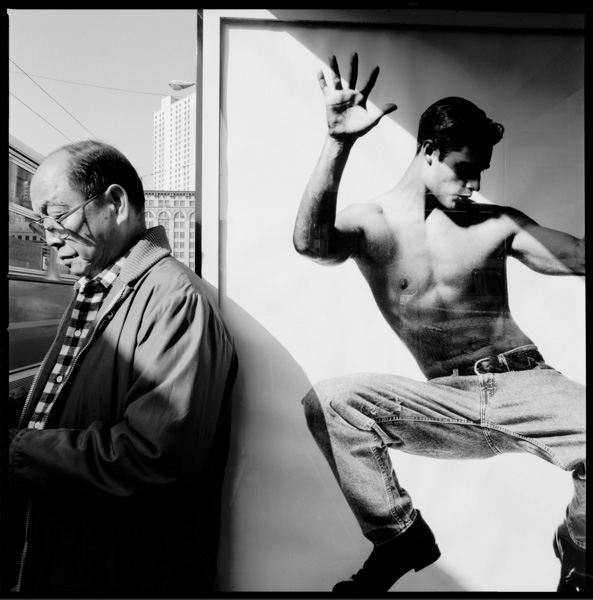
After working for a couple of years with the Nikon and the Hasselblad, I decided that I wanted something that handled like the Nikon, was as quick to operate, was easy to travel with, and gave me medium format image quality. That narrowed things down quite a bit. I bought a Palubel Makina with an 80mm lens. It folded up into a small package, was almost as quick and fluid to use as the S2, and had a negative that was slightly larger than the Hasselblad. I used that camera in the street for four years, making images like this:
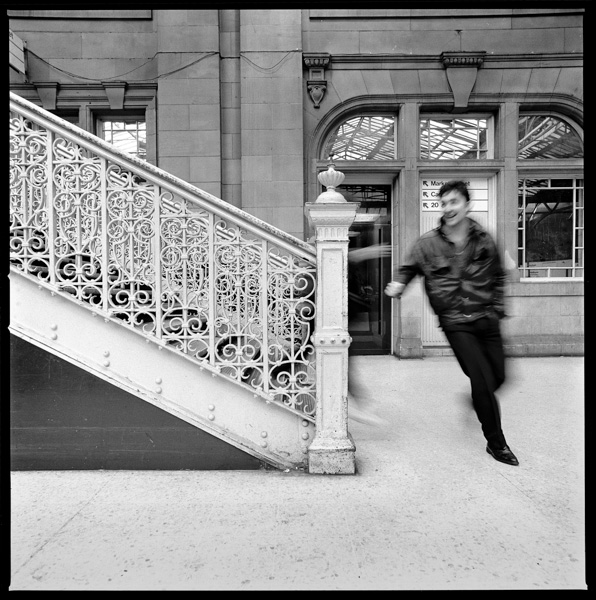
One rainy day in Switzerland when I wandered into a train station and my street photography took an indoor turn that would eventually become the series Alone in a Crowd.
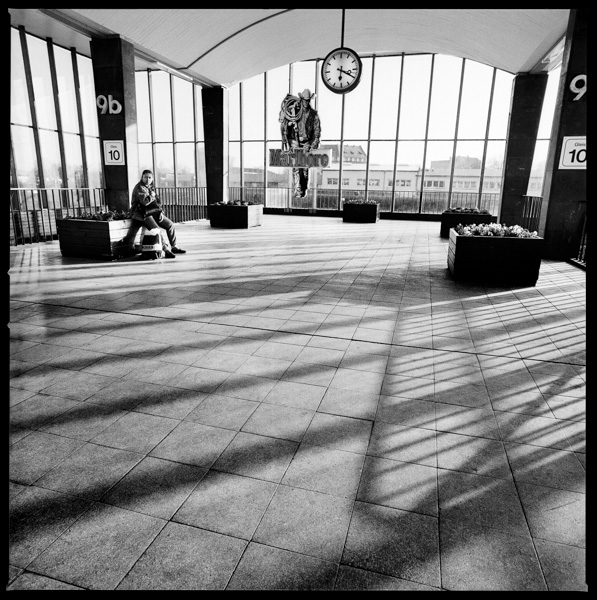
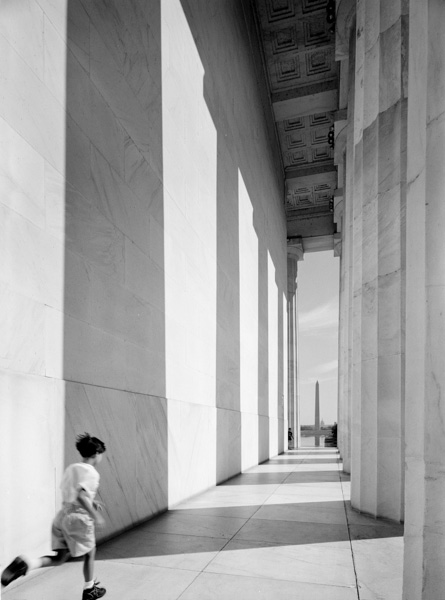
Now I was working with a tripod, so speed and fluidity were non-issues. In order to keep tripod travel weight down, I wanted a camera with a waist-level finder. I went back to the Hasselblad, using it with a 40mm lens that was at once wider and sharper than my old 50. Wider was good, because I was working indoors now and backing up was often inconvenient or dangerous.
The indoor pictures looked like this:
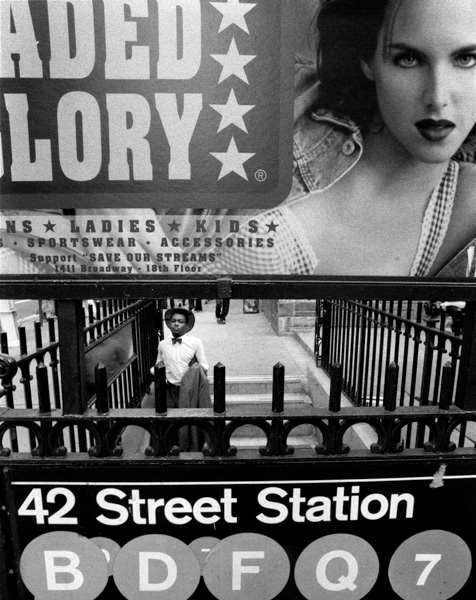
Or this:
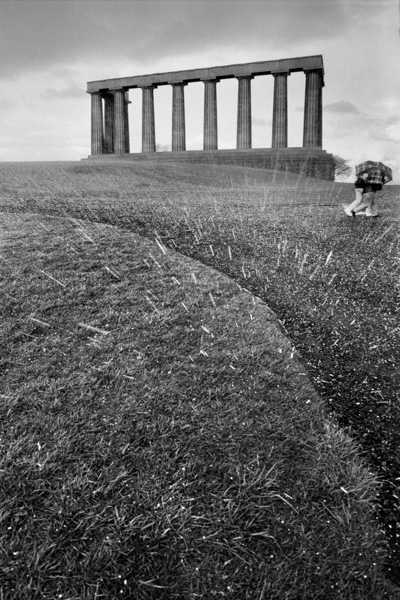
I wasn’t working in the street, but I was making unposed pictures of people in public places, just as in street photography. The technical difference was the roof over my head, and the main esthetic differences from the street photography mainstream were more emphasis on the architectural qualities of the surroundings (though not more than Yavno) and the use of motion blur. Eventually, I took my newly polished techniques outside, producing images like this one:
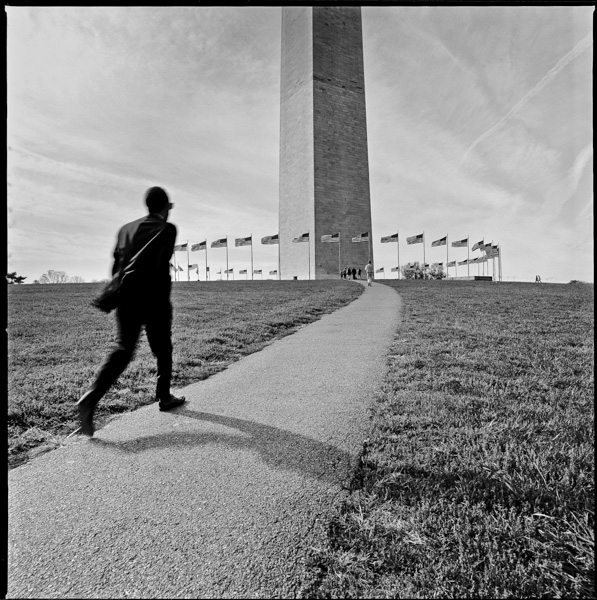
Or this one:
After a few years of working with the Hasselblad and the 40, I’d run into many situations where I was frustrated by my ability to control perspective. This was back in the film and darkroom days, when it wasn’t easy to fix those things in post. I wanted to keep the medium format quality. I wanted to stay with roll film, since I was working on the road. I wanted reflex focusing to keep the tripod small. I wanted a lens at least as wide as the 40 on the Hasselblad. Just like with the Makina decision, this set of criteria didn’t leave a lot of cameras to choose from. I bought a field version of the baby Arca-Swiss, with a folding monorail optimized for travel. I bought the reflex focusing hood, even though it was almost as big as the folded-up camera. I got a back that made 10 6x8cm images on a roll of 120 film, and had an electric advance for repeated exposures with a minimum of fiddling. I selected a Schneider 47mm lens which covered the frame nicely, even with quite a bit of shift applied. I used that combination for a few years, making images like this:
When I tired of architectural perfection and wanted to get loose and free and a little grittier, I loaded a Nikon D4 that I’d been using for underwater photography with TMax 3200 or 400, slapped a 15mm lens on it and made images like this:
and this:
for a couple of years.
The whole body of work holds together, but the images produced at different times with different equipment feel different.
At each step along the way, the photography that I was doing told me what equipment I needed to do the photography that came next.
Hi Jim,
Enjoyed your article very much. In time we all find a way, provided one keeps their eye on their target. Always questioning the “why we make the things we do”. Over the years I have used many types of cameras for my work but my needs are different and somewhat the same. I am a painter and the camera has been a daily companion since I was a kid. The image quality is important but it’s ease and lightness is paramount to what I will carry. I have gone from Slrs to rangefinders then medium format to Dslrs to m43 and now use a Canon GX-1. It has an Aps sensor and matched with a very good lens. Very compact and, for my needs well suited. But I am always on the lookout for the camera that can inspire better brushstrokes!
Peter,
Thanks for the comment. Love your work.
Jim
Incredibly nice story. Probably we are always looking for the optimal not only in terms of equipment but also the motives that give birth to songs and poems in our hearts. Thanks Jim.