• site home
  • blog home
  • galleries
  • contact
  • underwater
  • the bleeding edge

the last word

Photography meets digital computer technology. Photography wins -- most of the time.

You are here: Home / Z9 / Smallrig L-bracket for Nikon Z9

Smallrig L-bracket for Nikon Z9

January 31, 2022 JimK 5 Comments

This is one in a series of posts on the Nikon Z9. You should be able to find all the posts about that camera in the Category List on the right sidebar, below the Articles widget. There’s a drop-down menu there that you can use to get to all the posts in this series; just look for “Z9”.

My Smallrig Z9 bracket came today, beating the RRS counterpart which was actually ordered far earlier.

It’s a two-piece assembly, with a bottom plate — shown above — that has a nice rubber contact pad and an anti-rotation screw.

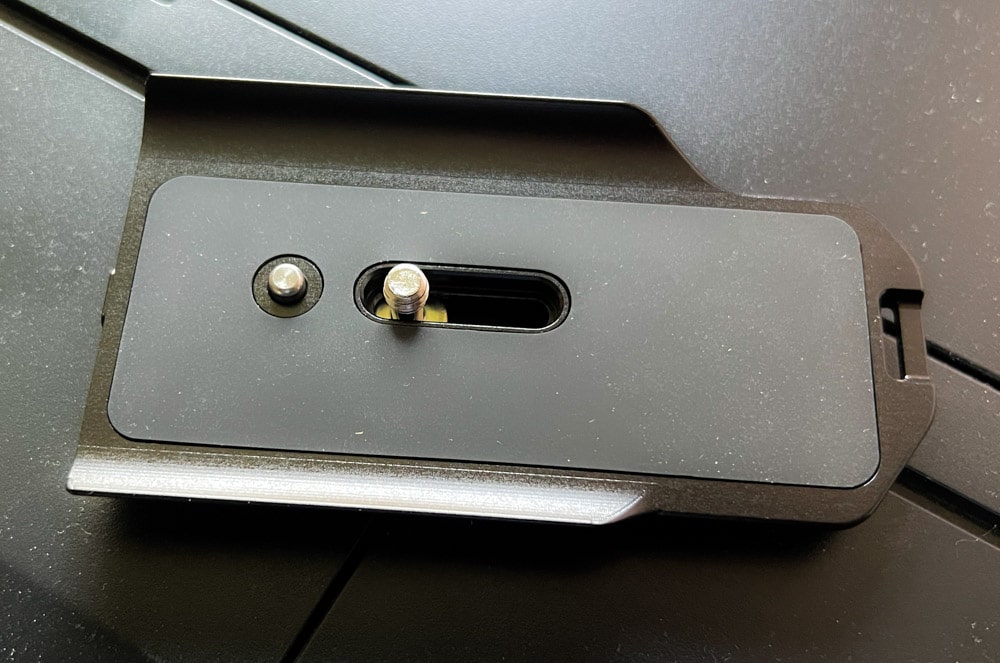
The underside of the bottom plate has SmallRig’s usual slot head screw for engaging the camera’s tripod mount. In case you’re confused about what the anti-rotation pin is for, they tell you.

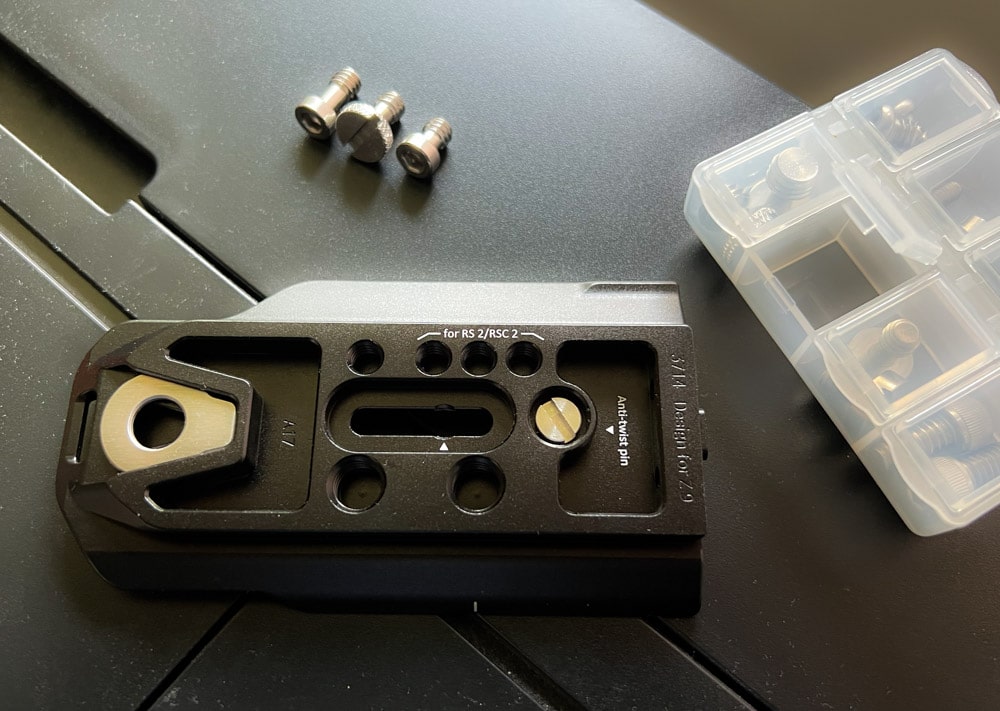
I hate the slot head 1/4-20 screws that SmallRig supplies, but they do have a screw kit that has replacements. The screw that came with the bracket is in the middle above, and two screws from the SmallRig kit flank it. I used the on on the left, which looks to be about a millimeter longer than slot head screw.

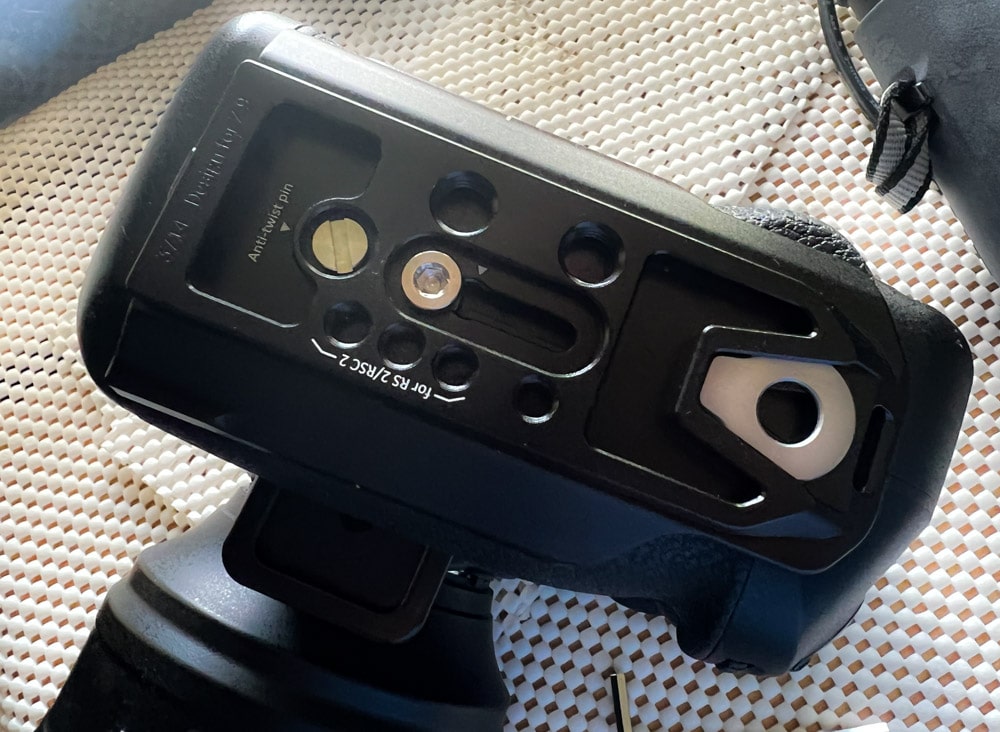
Here’s the base plate on the camera, attached with the Allen head screw I installed.

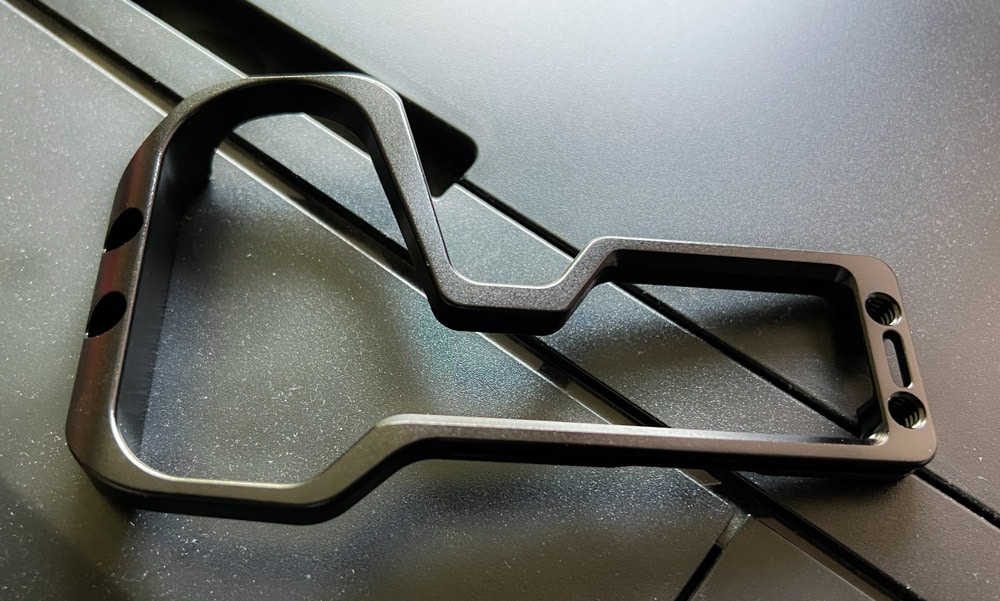
I don’t usually use the portrait orientation parts of these brackets, but the above bracket seems to be well made and light.

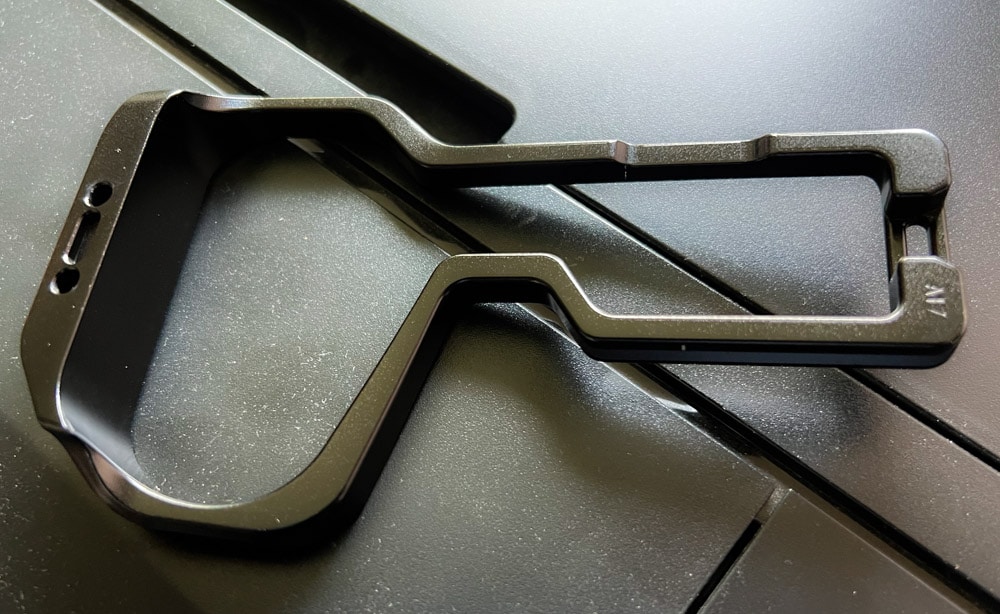
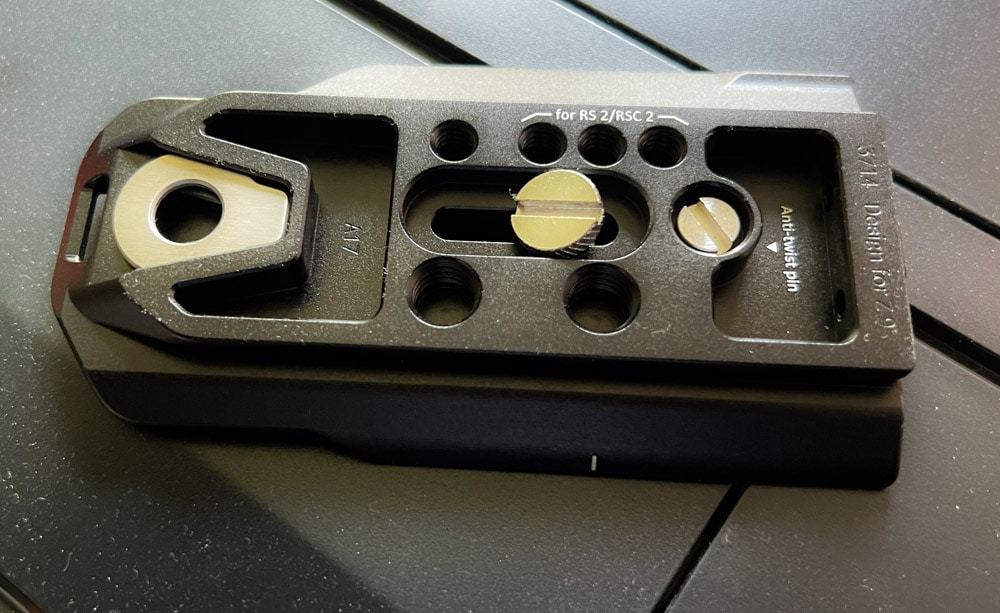
Here’s the inside of the upright extension.

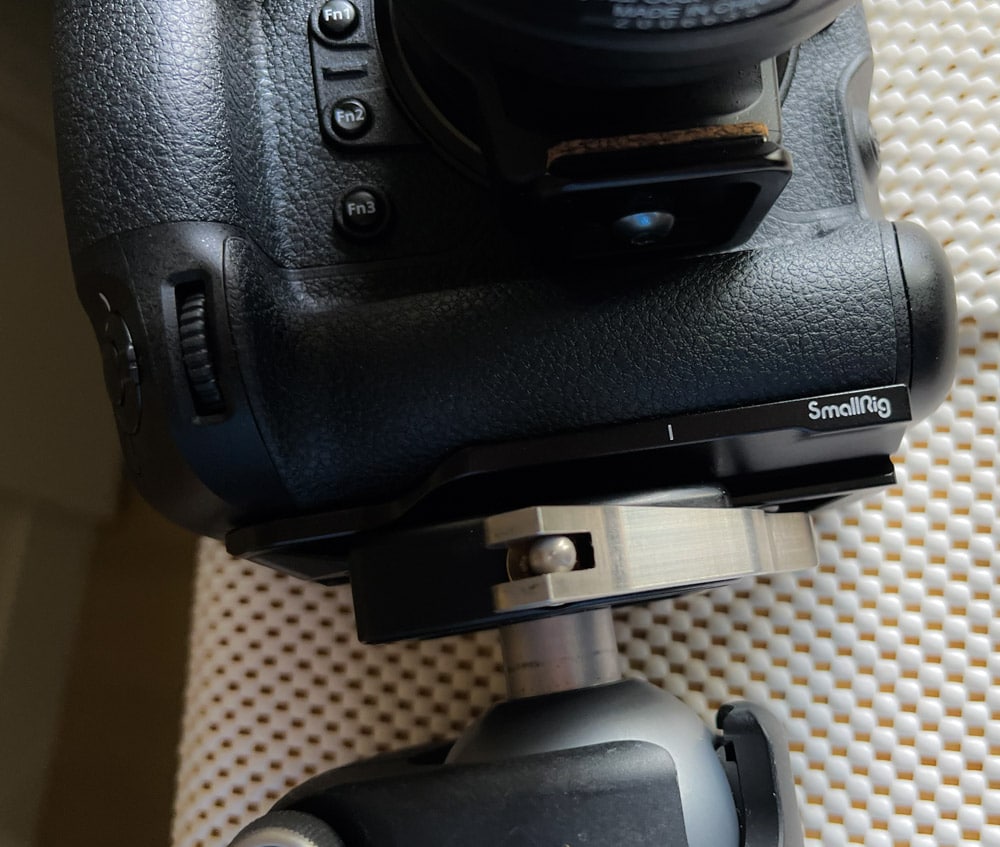
In the past, SmallRig brackets have not always been compatible with RRS cam clamps, but this one is just fine.

Z9

← Visual effects of Nikon Z9 conversion gain switching, no NR Nikon Z9 readout details →

Comments

  1. Roland Meier says

    February 13, 2022 at 11:02 am

    Hi Jim,

    I saw your review of the Smallrig Z9 l-brackets. You mentioned that you are rarely use brackets in portrait mode. I do, in particular for panoramas and noticed a problem, The bracket has markers to help alignment with the center of the lens mount. Not too relevant for normal shooting, but essential for panos. I find the bracket flexes a small amount when aligning the marker with the center of the clamp. All screws have been firmly tightened. You can check this by gripping the camera and apply some forward pressure.

    Camera I
    Camera I
    Camera |
    —-+—- |
    —+—
    Clamp
    Tripod

    There is no flex when mounting it horizontally. The flex in portrait mode can be minimized by mounting off center, i.e. by shifting the bracket as far to the left as the clamp allows:

    Camera I
    Camera I
    Camera |
    —-+—- |
    —+—
    Clamp
    Tripod

    I would be keen to know if you observe this too and if the RRS bracket is more stable in portrait mode.

    Kind regards,

    Roland

    Reply
    • Roland Meier says

      February 13, 2022 at 11:13 am

      Sorry for my crude ascii graphics. The plus signs in the first “picture” should be aligned. In the second “picture”, the plus sign representing the marker on the bracket should be to the *left* of the plus sign representing the center of the clamp. If mounted as shown, it would actually flex even a bit more.

      Overall I think the Smallrig plate is quite well made but the vertical part should be firmer.

      Reply
    • JimK says

      February 13, 2022 at 11:51 am

      When I get my RRS bracket I’ll do a comparison.

      Reply
  2. Petert Orr says

    September 1, 2023 at 4:31 am

    I own a Smallrig Z9 bracket which I like a lot and use for both horizontal and vertical mounting. I too have replaced the slot head 1/4-20 screw with the one that comes in the Smallrig screen kit.
    However, I have managed to lose the anti-twist pin on a field trip. Do you know the spec of this item? I need to procure one and it doesn’t come in the Smallrig screw kit.

    Reply
    • JimK says

      September 1, 2023 at 5:41 am

      Sorry, I don’t know that.

      Reply

Leave a Reply Cancel reply

Your email address will not be published. Required fields are marked *

May 2025
S M T W T F S
 123
45678910
11121314151617
18192021222324
25262728293031
« Apr    

Articles

  • About
    • Patents and papers about color
    • Who am I?
  • How to…
    • Backing up photographic images
    • How to change email providers
    • How to shoot slanted edge images for me
  • Lens screening testing
    • Equipment and Software
    • Examples
      • Bad and OK 200-600 at 600
      • Excellent 180-400 zoom
      • Fair 14-30mm zoom
      • Good 100-200 mm MF zoom
      • Good 100-400 zoom
      • Good 100mm lens on P1 P45+
      • Good 120mm MF lens
      • Good 18mm FF lens
      • Good 24-105 mm FF lens
      • Good 24-70 FF zoom
      • Good 35 mm FF lens
      • Good 35-70 MF lens
      • Good 60 mm lens on IQ3-100
      • Good 63 mm MF lens
      • Good 65 mm FF lens
      • Good 85 mm FF lens
      • Good and bad 25mm FF lenses
      • Good zoom at 24 mm
      • Marginal 18mm lens
      • Marginal 35mm FF lens
      • Mildly problematic 55 mm FF lens
      • OK 16-35mm zoom
      • OK 60mm lens on P1 P45+
      • OK Sony 600mm f/4
      • Pretty good 16-35 FF zoom
      • Pretty good 90mm FF lens
      • Problematic 400 mm FF lens
      • Tilted 20 mm f/1.8 FF lens
      • Tilted 30 mm MF lens
      • Tilted 50 mm FF lens
      • Two 15mm FF lenses
    • Found a problem – now what?
    • Goals for this test
    • Minimum target distances
      • MFT
      • APS-C
      • Full frame
      • Small medium format
    • Printable Siemens Star targets
    • Target size on sensor
      • MFT
      • APS-C
      • Full frame
      • Small medium format
    • Test instructions — postproduction
    • Test instructions — reading the images
    • Test instructions – capture
    • Theory of the test
    • What’s wrong with conventional lens screening?
  • Previsualization heresy
  • Privacy Policy
  • Recommended photographic web sites
  • Using in-camera histograms for ETTR
    • Acknowledgments
    • Why ETTR?
    • Normal in-camera histograms
    • Image processing for in-camera histograms
    • Making the in-camera histogram closely represent the raw histogram
    • Shortcuts to UniWB
    • Preparing for monitor-based UniWB
    • A one-step UniWB procedure
    • The math behind the one-step method
    • Iteration using Newton’s Method

Category List

Recent Comments

  • bob lozano on The 16-Bit Fallacy: Why More Isn’t Always Better in Medium Format Cameras
  • JimK on Goldilocks and the three flashes
  • DC Wedding Photographer on Goldilocks and the three flashes
  • Wedding Photographer in DC on The 16-Bit Fallacy: Why More Isn’t Always Better in Medium Format Cameras
  • JimK on Fujifilm GFX 100S II precision
  • Renjie Zhu on Fujifilm GFX 100S II precision
  • JimK on Fuji 20-35/4 landscape field curvature at 23mm vs 23/4 GF
  • Ivo de Man on Fuji 20-35/4 landscape field curvature at 23mm vs 23/4 GF
  • JimK on Fuji 20-35/4 landscape field curvature at 23mm vs 23/4 GF
  • JimK on Fuji 20-35/4 landscape field curvature at 23mm vs 23/4 GF

Archives

Copyright © 2025 · Daily Dish Pro On Genesis Framework · WordPress · Log in

Unless otherwise noted, all images copyright Jim Kasson.