Warning! This post was created before I realized that the CC24 patches in the CCSG had different values than the CC24 patches in a real CC24 target.
https://blog.kasson.com/the-last-word/cc24-vs-ccsg-spectra-and-cielab-values/
In addition to the 24-patch Color Checker 24 (CC24) target, X-rite makes a 140-patch target, the Color Checker SG (CCSG). Some of the patches are duplicates, presumably so that non uniform lighting can be ameliorated, but there are a lot more patches, which should be a good thing for making lookup table (LUT) camera profiles. X-rite also has a free computer program, the Color Checker Camera Calibration program, which will automatically detect and register the target, make a profile, and put it where Lightroom and Photoshop can find it.
It’s super convenient. But is it any good?
My first experiences were not salutary. I made a profile with the CCSG target in direct sunlight at a 45-degree angle to the target. The colors were overly chromatic. Several people said that the CCSG target might be more sensitive to glare than the CC24 — the SG does stand for semigloss — leading to dulling of the patches when the capture used to make the profile is exposed, leading to overly saturated colors when the profile is used. It was suggested that I make captures with diffuse lighting.
Well, fine. That makes sense. But is it true?
I went outside this morning. It was very cloudy: 100% cover, with no features visible in the sky. It doesn’t get much more diffuse than that unless you’re in a tent. I set up the target. I looked at the spectrum of the light incident upon it.
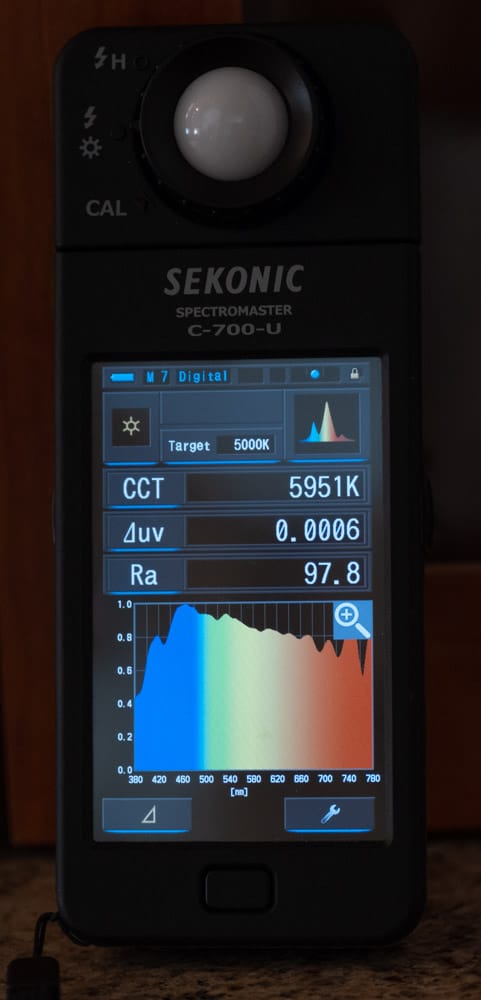
Pretty smooth, and not awfully far from a 6000 degree Kelvin black body.
I set up the GFX 100 with the 45-100/4 lens, and made captures of a CCSG and a CC24. The CCSG is brand new. The CC24 is about a year old.
Using the Color Checker Camera Calibration program, I made profiles from each target. Then I took the same captures, and developed them in Lightroom using Adobe Color Profile, the profile made from teh CC24 target, and the profile made from the CCSG target. That gave me six images. I exported them as 16-bit TIFFs, using the Adobe RGB 1998 color space. Then I analysed them, looking at the 24 patches of the CC24, and a crop of the CCSG to the area with the CC24 patches.
I’ll show you what I found. Don’t worry if it’s a bit confusing at first; I’ll explain below.
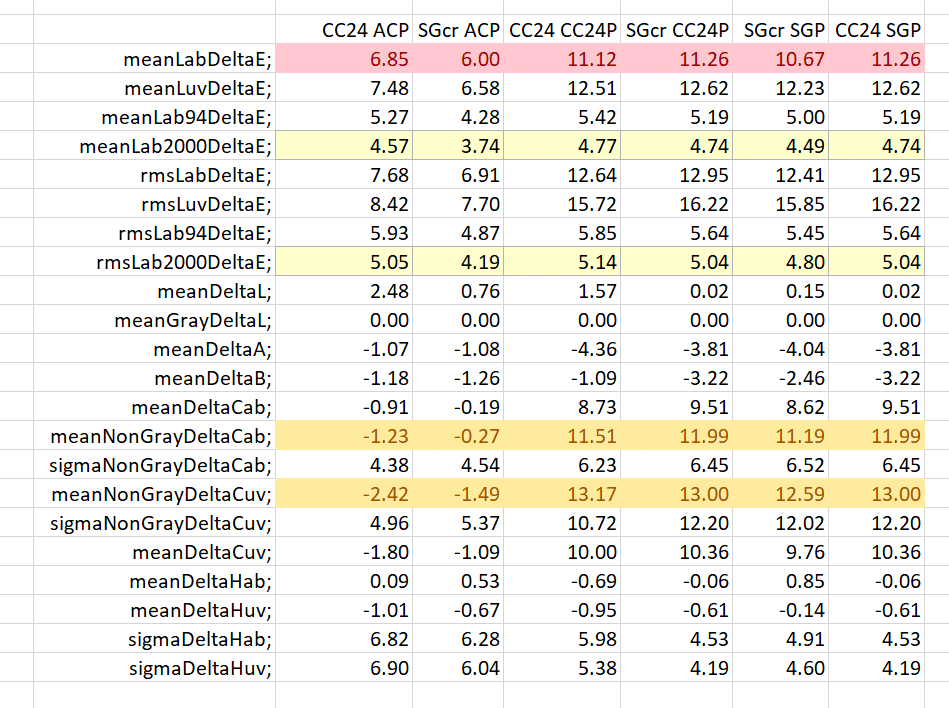
- The first column of numbers is the CC24 patches processed using the Adobe Color Profile
- The second column is the cropped CCSG patches processed using the Adobe Color Profile
- The third column is the CC24 patches processed using the CC24 profile
- The fourth column is the cropped CCSG patches processed using the CC24 profile
- The fifth column is the cropped CCSG patches processed using the CCSG profile
- The sixth column is the CC24 patches processed using the CCSG profile
Mean Delta E is the average CIELab delta E. Since Delta E can never be negative, errors in one direction don’t cancel out errors in another.
Mean Delta L is the average difference in the CIELab and CIELuv vertical (luminance) channel. Positive Delta L means that the output is brighter than it should be. Negative Delta L means that the output is darker than it should be. Thus Delta L is good for detecting systematic luminance bias.
Mean Gray Delta L is the average difference in the CIELab and CIELuv vertical (luminance) channel for the 6 gray patches. Positive Gray Delta L means that the output is brighter than it should be. Negative Gray Delta L means that the output is darker than it should be. Thus Gray Delta L is good for detecting systematic luminance bias in the gray axis.
Mean Delta A and B are the average differences in the CIELab and CIELuv a and b channels. Positive Delta A or B means that the output is redder or yellower than it should be. Negative Delta A or B means that the output is bluer or more cyan than it should be. These measures are good for detecting systematic color balance bias.
Mean Delta Cab is the average chroma error measured in Lab. A positive number means that the output colors are more saturated than they should be. A negative number means that the output colors are less saturated than they should be.
Mean Non-Gray Delta Cab is the average chroma error measured in Lab for the 18 chromatic patches. Mean Non-Gray Delta Cuv is the average chroma error measured in CIELuv for the 18 chromatic patches. A positive number means that the output colors are more saturated than they should be. A negative number means that the output colors are less saturated than they should be. The sigma metrics track the standard deviation of the 18 samples.
Mean Delta Hab is the average hue angle error measured in Lab, expressed in degrees. The gray patches are excluded from this measure, since their target hue angle is undefined. A positive number means that the output colors have a hue angle higher than they should have. A negative number means that the output colors have a hue angle lower than they should have. Mean Delta Huv is the same measure in CIELuv. The sigma metrics track the standard deviation of the 18 samples.
My conclusions:
- If we’re looking at CIELab or CIELuv delta-E, the Adobe Color profile is substantially more accurate. (And ACP is not even the most accurate Adobe profile, Adobe Standard is).
- But if we look at mean or rms Delta-E 2000, which is more closely aligned with the way that we humans see color, all the profiles are about the same accuracy.
- If we look at the mean Cab and Cuv rows, we can see that the X-rite generated profiles are substantially more chromatic than the Adobe profiles.
- It doesn’t seem to make much difference whether we use the CCSG patches or the CC24 patches to make the profile.
- It doesn’t seem to make much difference whether we use the CCSG patches or the CC24 patches to test the profile.
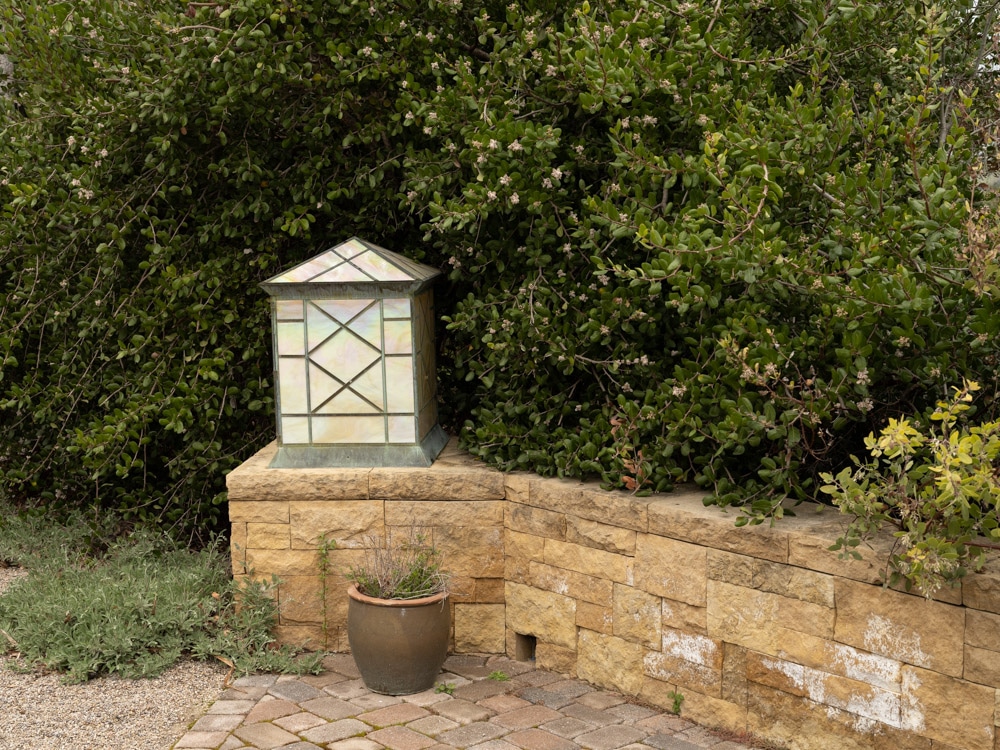
To give you a visual idea of what’s going on, I walked outside on this gray day snd made some ram=ndom captures with the GFX 100 and the 45-100/4.

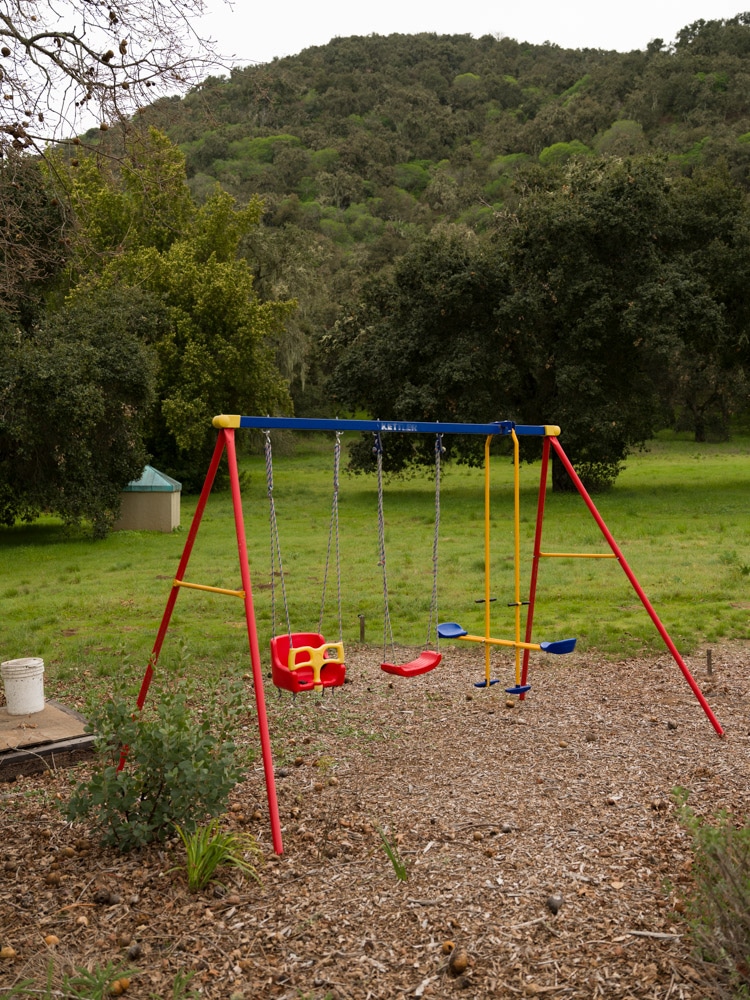
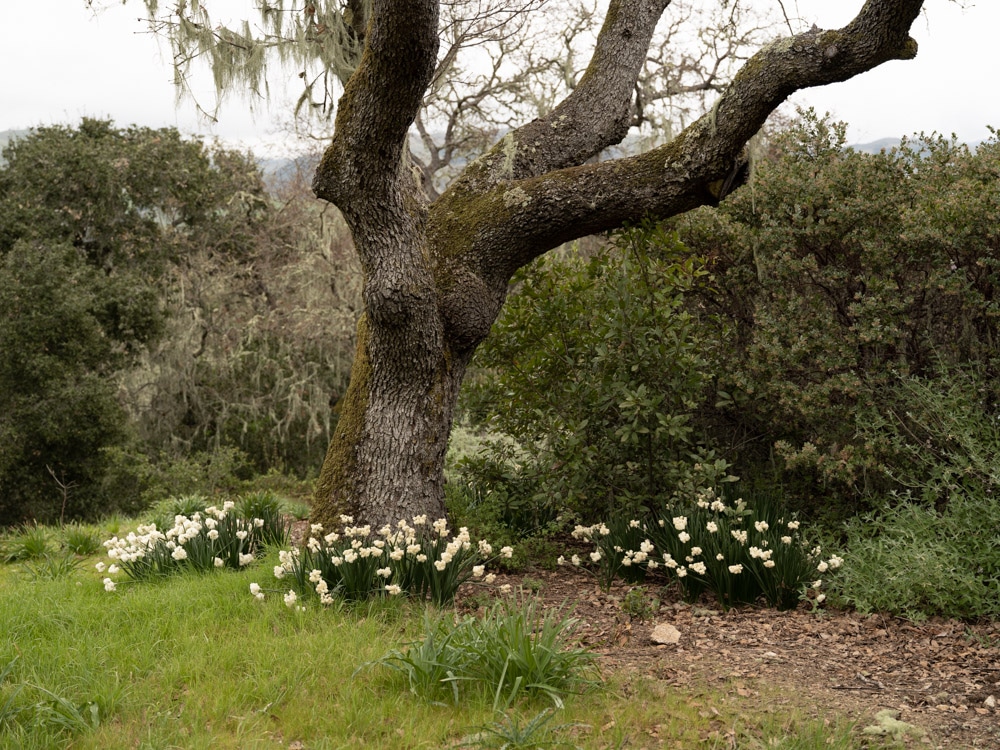


The X-rite greens are headed in the “electric” direction.
Here’s a CIELab chromaticity plot of the CC24 subset of the CCSG target with the CCSG profile:

And here is the same thing with the Adobe Color Profile
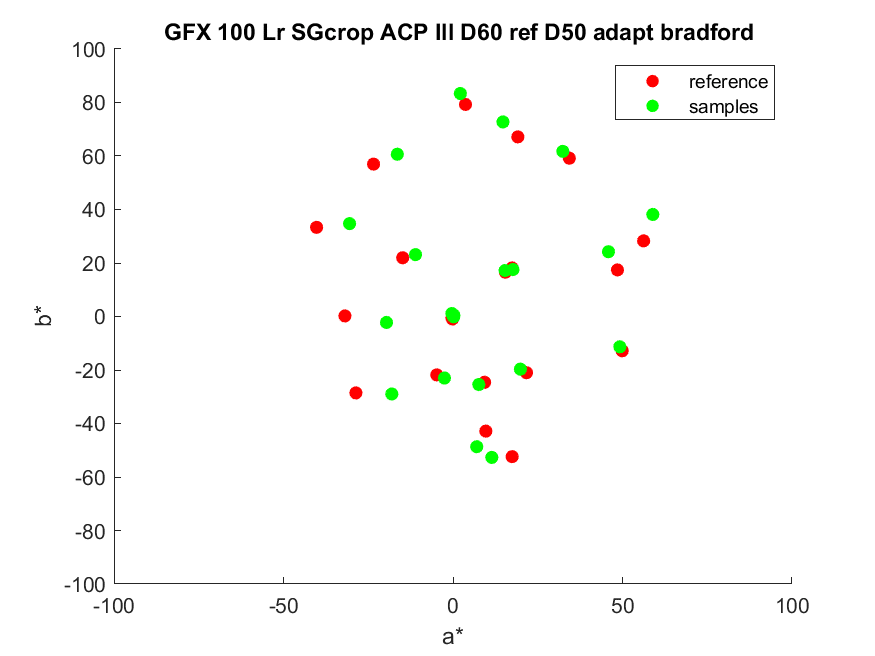
That also shows what’s going on. Adobe makes errors in both desaturated and more-saturated directions, but the X-rite program seems to go for more saturation almost all the time.
It looks like the X-rite profile making program is not trying to be accurate, but is going for a “look” they think you’ll like.
Jim, those mean DE2000 results off CC24 are very high, I normally get 1.2-1.3 by using just a simple matrix, let alone a LUT.
The reason is that camera profiles can be thought of as having two stages: a first colorimetric stage(what I measure) followed by a second, subjective, output-referred stage. When you use LR and Adobe Color you are testing tones after the subjective step, which skews colorimetric results.
If you are after the efficacy of a custom camera profile on its ability to produce ‘accurate’ tones, it is best to test the two separately (or at least turn off the subjective step). The RawTherapee color tab has switches to do some of that, for some profiles.
Jack
Right you are, Jack, and taking those two profile components apart will be a useful analysis tool. I didn’t know that about RT. But what I’m trying to test is the utility of the X-Rite profile maker using the most common workflow, which is Lr/ACR. And my interest in that is heightened because that is my workflow. It actually appears that the X-Rite output-referred processing is pretty clever, in that is dramatically increases chroma without doing much damage to the Delta-E 2000 mean and rms numbers. But I find the results a bit cartoonish.
What’s your favorite Windows tool for profile analysis? For profile editing?
Jim
I like DCamProf to generate and modify the profiles (the pay version, Lumariver Profile Designer, has a good GUI and a shorter learning curve). As for editing it’s relatively easy to load DNG converted profile data into Matlab (usually the Standard profile) and play with the various tables, though latest profiles like ‘Color’ are not easily readable.
And I hear you about the training/testing set, though I understand all such available software is pretty well forced to make that compromise.
Numbers like that are certainly obtainable. However, making the training set the same as the testing set and having the ratio of patches to “knobs” be so low means the profiles probably won’t be nearly as good on other than CC24 patches. You would think that, when tested on the CC24 patches, that profiles made with the CCSG target wouldn’t do as well, since they have more constraints. But they appeared to do about the same.
I have an SG target and read what I recommendations could find online for capturing the test image. It didn’t take long before I became completely discouraged about attempting to shoot the card in sunlight. There seemed to be way too much risk of glare off of the shiny patches, coming from everything else in the hemispherical vicinity besides the sun.
My solution was to shoot the card in a large indoor space (to keep adjacent surfaces away), with the card suspended from behind (more geometric isolation), and lit by two Solux 4700K halogens on either side at 45 degrees. Subjectively, I am really liking my Lumariver profiles, and the images have none of the neon appearances of your disappointing samples.
Hi Jim,
What is the intention? Just exploration or you feel the need to have special profiles for special lighting?
I would consider LumaRiver Profile Designer or DCamProf. I have used both. LRPD can also build repro profiles.
A little of each. I think it’s kind of weird that someone like me who once made a living as a color scientist doesn’t know much about the current profiling tools.
I have purchased Lumiriver, and I’m playing with it right now.
Jim
Nice to hear that you are going to explore this.
I may mention a few things I have noted.
First, I use Patchtool from BabelColor it is a useful tool at least with my limited skill. It can also handle spectral data.
The other thing I may mention is that I have generated a few profiles using either my own ‘Macbeth CCP’ but also “DPReview studio scene” as a learning set and using the ColorChecker SG at Imaging Resource as the verification set . In almost all cases I got less deviation on the ColorCheckerSG compared to Adobe Standard.
A third point is that I had some discussion with Tim Parkin (editor of OnLandscape) and he states that the P45+ has contaminated chlorophyll greens, on which I may agree. But what is the color of green. Furthermore, Tim indicated that profiles could not handle that contamination.
I guess I would agree with Tim, although I am never sure about how green is the grass. Although I know that the neighbor’s grass is always greener.
Nice to have you looking into it although it may be that sharing your findings you may need a thick skin…
Erik
Thanks, Erik. I have now gotten accurate enough profiles that something that wasn’t important earlier is now important. X-Rite changed the spectral (and colorimetric) responses of the CC24 and CCSG in November 2014. I have the spectral data of the old patch set from optprop, but I have no spectral data for the new patch set. I do have colorimetric data, though. With the colorimetric data I can only test with D50 illumination, or something close to that.
Here is the official X-Rite spectral data used in Passport 2.0 application
http://s3.amazonaws.com/IliahBorg/ColorCheckerSGNov2014.txt.zip
Here is how it compares with custom-measured target, basICColor catch5 application, Minolta fd-7, D50, 2 degrees:
http://s3.amazonaws.com/IliahBorg/Screen%20shot%202020-03-03%20at%2012.54.33%20PM.png
Thanks, this is great! However, I can’t get the png to download.
There are 140 rows of spectral data. Which rows are the CC24 patches?
> Which rows are the CC24 patches?
42, 52, 62, 72, 82, 92
43, 53, 63, 73, 83, 93
44, 54, 64, 74, 84, 94
45, 55, 65, 75, 85, 95
How about this? ZIP contains the png and a text file listing reference, measured, and delta values:
http://s3.amazonaws.com/IliahBorg/PatchTool%20Compare-RefDCCSG-2-CustomMeasured.zip
Hi Erick,
“using the ColorChecker SG at Imaging Resource as the verification set ” – I would suggest considering that the lights IR are using is not very even (more than 5% variation is rather common), and the SPD of the lights they are using (HMI) is rather spiky and changes with time. Here is the SPD, by Roy Berns himself – https://www.researchgate.net/figure/Spectral-power-distribution-of-the-HMI-light-source_fig3_238458600
For DPR studio scene 5500 K illuminant is a good match.
Hi Iljah,
Thanks for the good info!
Unfortunately, incorrect measurements can yield nice looking data and non scientists, like me, are less skeptical about expected results than unexpected results. Unfortunately, I am a bit to skimpy to buy my own CCSG and illumination.
Your comments are always appreciated!
Kind regards
Erik
And I hope you excuse the small joke included! 🙂
Very sorry for mistyping your name, Erik.