I haven’t posted here in a almost three weeks. That’s a long time for me. There’s a reason for that; I’ve been doing some actual photography. This is a post about what I’m doing, concentrating on how I’m doing it.
Most of my posts the past few months have been, uh, focused on testing macro lenses on the GFX 100 and GFX 100S at reproduction ratios of 1:3 to slightly higher than 1:1. My aim in that testing, besides intellectual curiosity, has been to set up a system for digitizing (I’ll call it scanning here, even though that’s not technically correct at one level) negatives. I’ll be doing mostly silver negatives from 35mm through 4×5, but I’ll do some color ones, too.
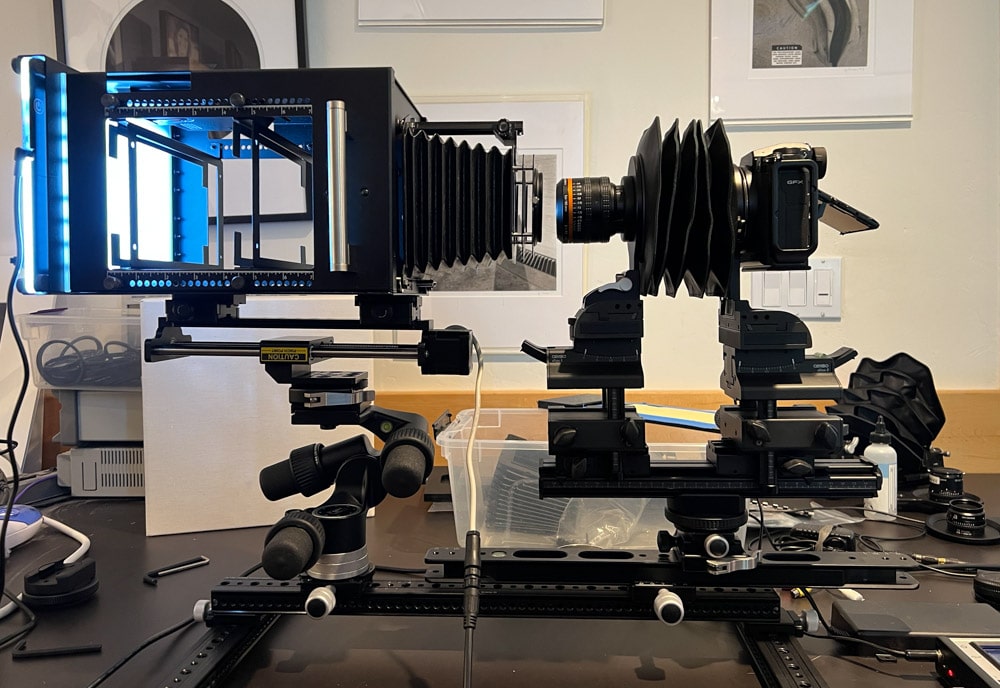
After a few false starts, I’ve devised a system that works well for me. Here’s a picture:

Looks a bit kleudgy, doesn’t it? One wag on DPR called it my “steampunk scanner”. I admit that it’s not the most esthetic piece of photographic equipment around, but it does the job. The only thing that needs work is vibration isolation, and I’ve got a plan for that.
Here is a list of my requirements for my scanner:
- Performance as good or better than my old Imacon Precision III.
- Use a GFX 100 or GFX 100S to digitize.
- No glass to keep negative flat, and no wet scanning
- Use the best lenses I can find.
- Use continuous lighting
- Correct for alignment errors, film flatness errors, and lens field curvature by using focus stacking.
- Easy adjustment of geometry (image position and angles between the lens axis and the negative plane)
- Automate the collection of the captures that form the stack.
- Throughput of a few images an hour.
- Easy conversion from one negative size to another.
- No positive transparency scanning required.
The lenses that I eventually settled on were the Rodenstock 105mm f/5.6 HR Digaron Macro and the Schneider Kreuznach 120 mm f/5.6 Macro Symmar 0058, 0059, 0060, and 0062. None of those have focusing mechanisms. I could have adapted them to the camera using adapter tubes and focusing helicoids, but, in the interest of flexibility, decided to use a Cambo Ultima II with an Actus conversion. That gave me complete control over the alignment of the camera and provided a simple way to change magnification as I scanned different formats. I mounted all the lenses on Actus lens boards, using V38 to M39 converters (and V38 to M42 and M42 to M39 stacked converters) for the Schneider lenses. Ignore those adapter specs unless you’re planning on adapting the Schneider lenses yourself.
I decided to use a Cognisys rail for controlling the stacking. I had experimented with using copy stands and lightboxes, but I decided that I wanted a horizontal scanning arrangement, with the lens axis parallel with the floor. The reasons were ease of use and the fact that I thought that there would be less backlash and less strain on the rail if it weren’t working against or with the help of gravity.
Then I had a decision to make. Should I have the rail move the camera, or should I have the rail move the negative? I chose to have it move the neg. There were two reasons for that. First, the Ultima II is a fairly tall camera, and putting the Cognisys rail under it would make it even taller. Second, The Ultima II is heavy, and I was pretty sure I could get a negative holder and light source that was lighter.
For the negative holder, I chose the Film Toaster. It provides in one unit:
- A backlight and diffuser
- A set of negative carriers
- Shielding from ambient light
- Provision for mounting the camera and adjusting the lens to negative distance
It turns out that the gear that does the last bullet above was incompatible with the Cambo Ultima II hardware, so I deep-sixed it, and build an assembly to do the same thing out of mostly Really Right Stuff Arca Swiss rails and clamps. The RRS assembly was also more rigid than the Film-Toaster-supplied one, which gave me a throughput advantage in that I didn’t have to let the system quiet down as long between the exposures of a stack.
Here’s the whole thing again.
I’ll break down the components for you.
Now let’s look at the FIlm Toaster up close.
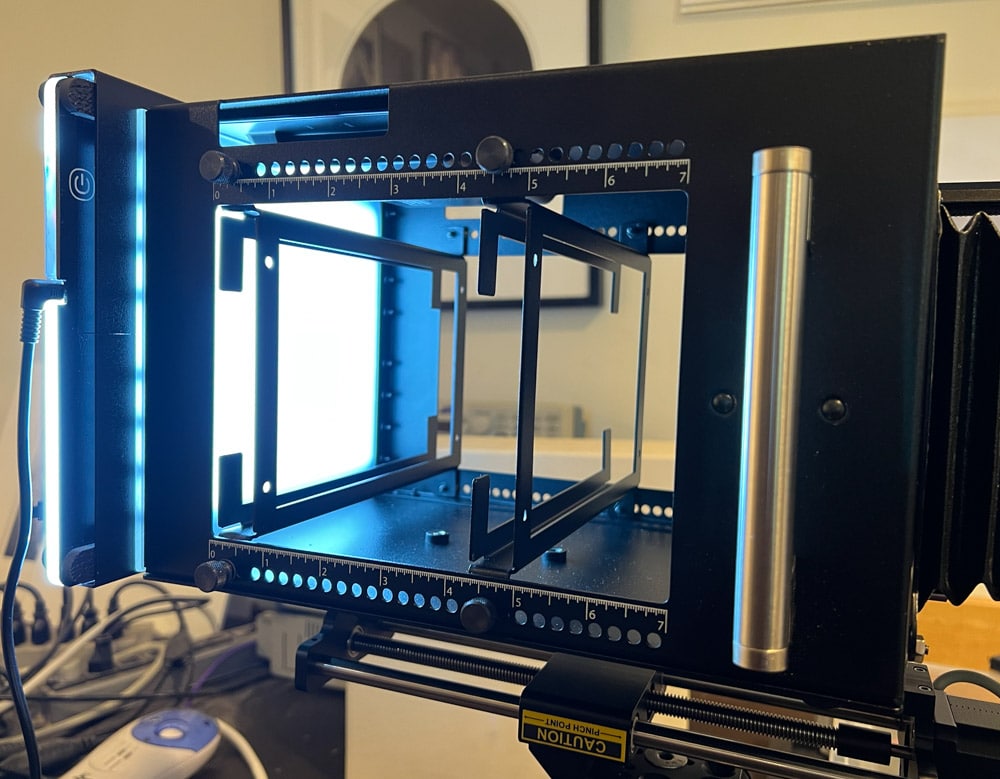
The light source is on the left. There are two brackets to position film holders. The unit comes with only one, but I ordered a second so I wouldn’t have to fiddle with the thumbscrews (at the top and bottom) when I changed film size.
Here’s the film holder for 4×5 negatives:
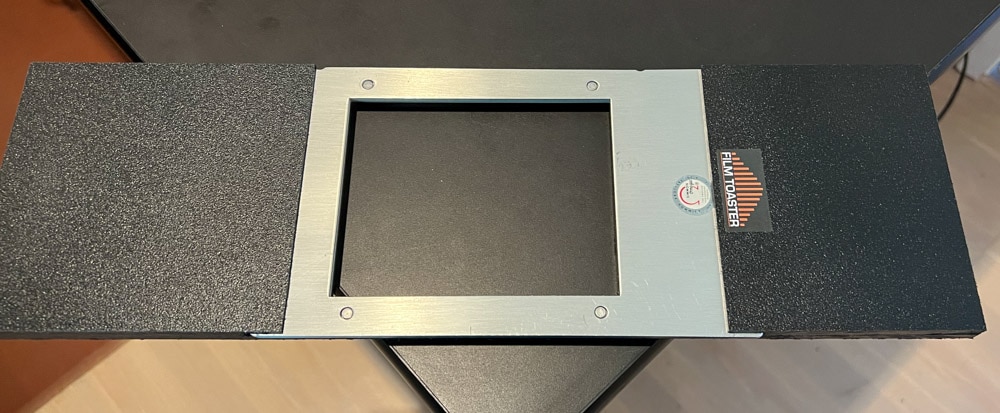
It’s a machined piece of plastic into which a modified Omega 4×5 negative carrier is inserted. I further modified the Omega negative carrier to reduce its height, and rounded the corners to make it easier to insert into the black plastic gizmo.
The Film Toaster comes with a lens shade that mounts magnetically:
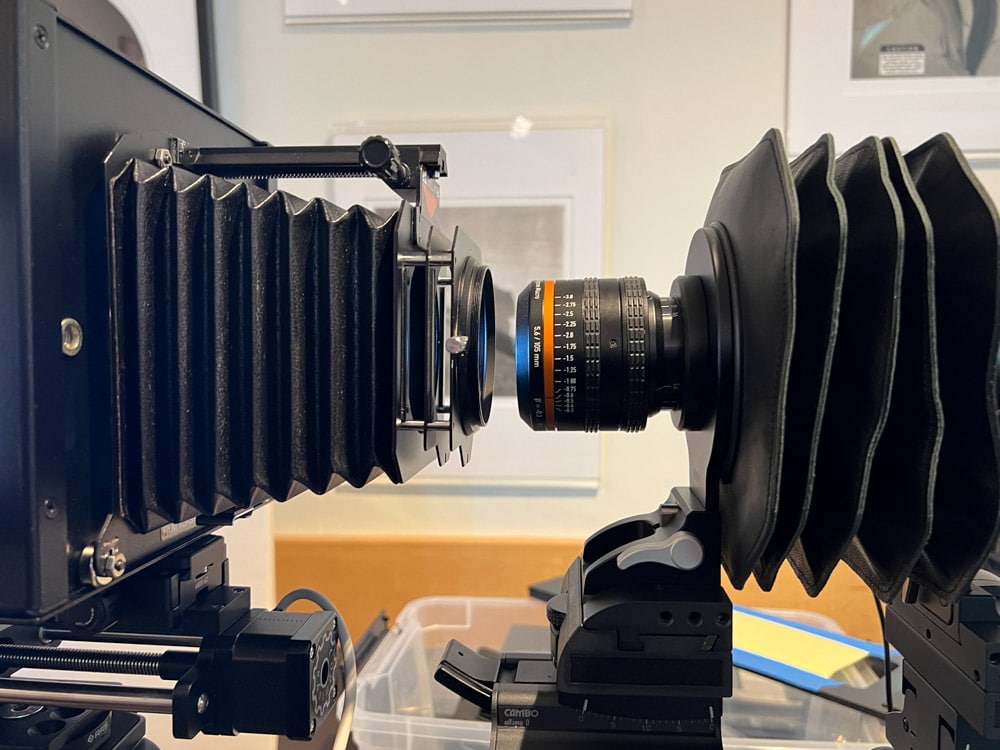
I’ve been using the Rodenstock 105 macro most of the time. That’s it above mounted to the Cambo view camera.
Here’s the whole Cambo Ultima II withthe GFX 100S mounted:
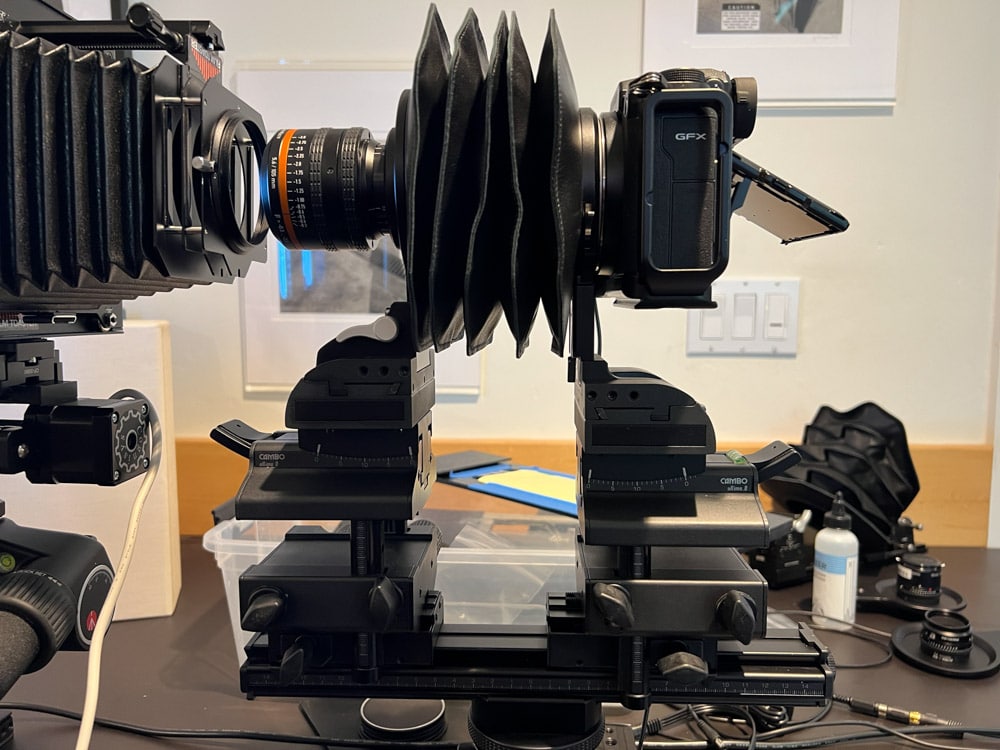
The back can be shifted independently of the lens, which will come in handy if I decide I want to do stitching. You can see the stepper motor of the COgnisys rail in the center far left. There are a couple of lenses on Actus lens boards in the lower right of the above picture.
Here’s how the camera is mounted:

I can slide the whole thing back and forth by loosening the RRS clamp.
Here’s how the Toaster is supported:
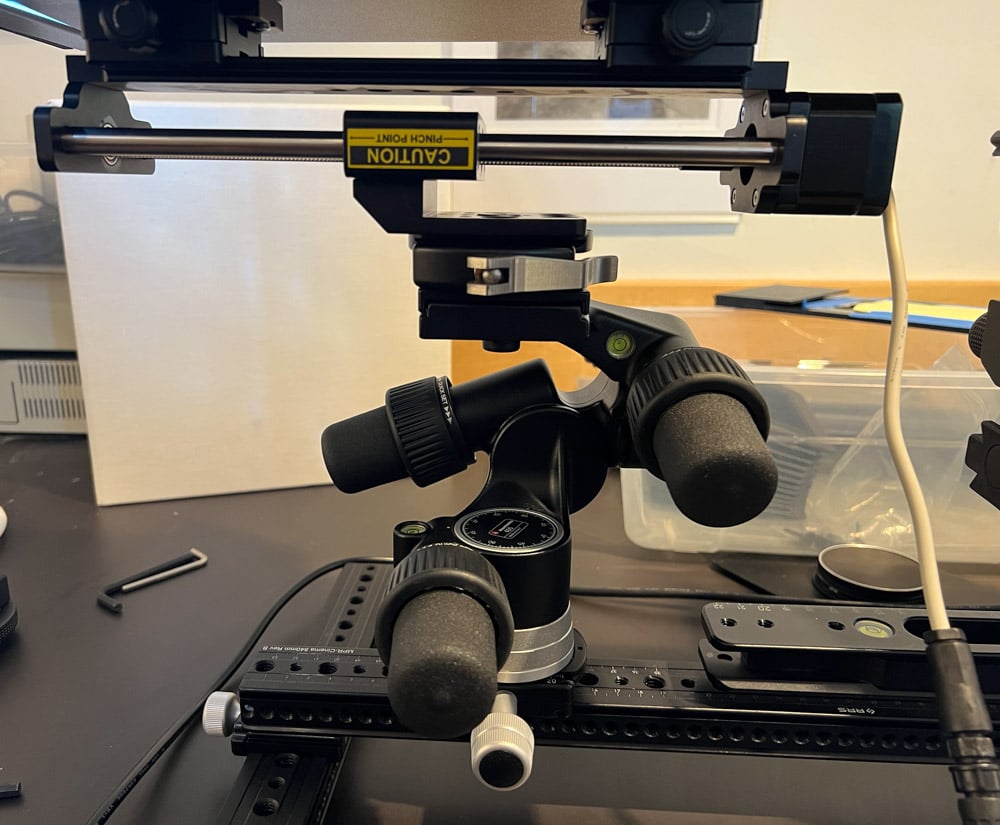
A three axis geared tripod head allows me to adjust the Toaster precisely.
Here’s how it sits on the table. The camera end:
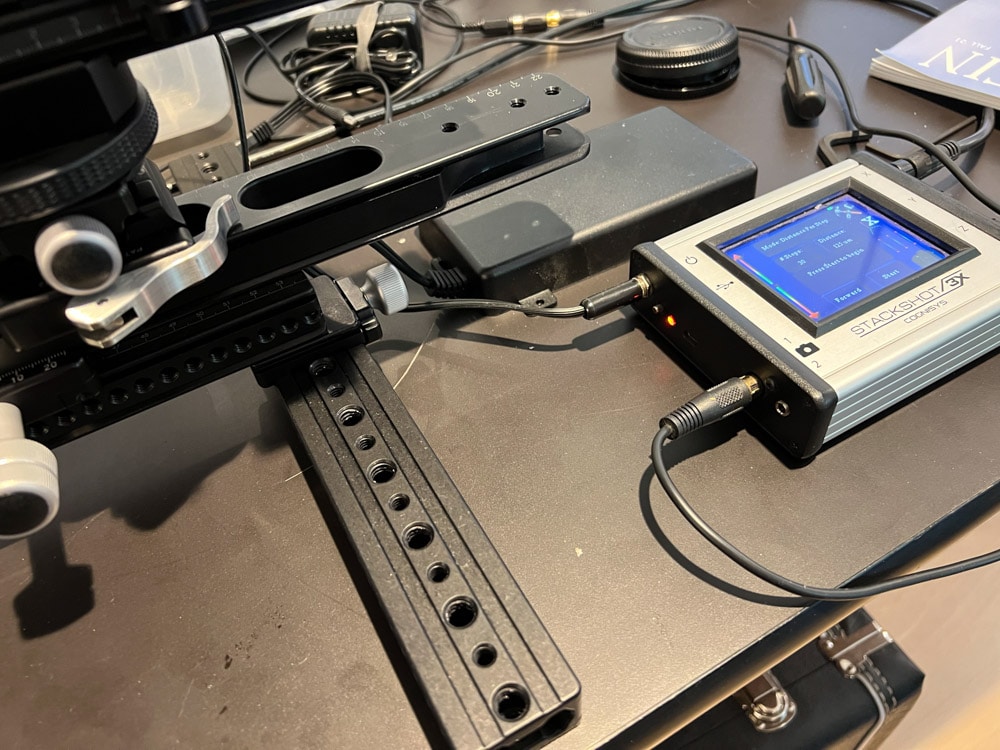
The RRS rail mounted crosswise to the others gives stability. The box with the blue screen is the Cognisys controller.
Here’s the Toaster end:
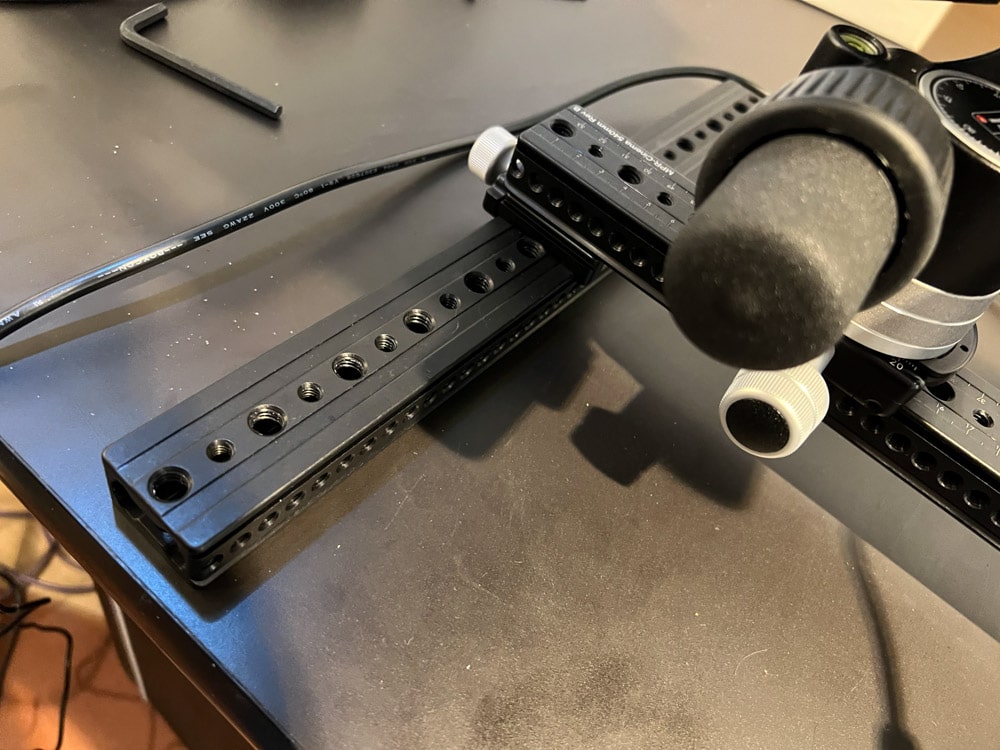
This works very well for me. The only problems are susceptibility to vibration, and I’m working on fixing that, and the connection between the Manfrotto tripod head and the rail. The head comes with a proprietary clamp and plate. There is a screw supplied to connect the plate to a camera — or, in my case, an Arca Swiss clamp, but the provided slot head screw isn’t very secure. I’m looking at ways to fix that, too.
When I had that Manfrotto geared head I used this and had success:
http://www.hejnarphotostore.com/category-s/147.htm
Ordered. Thank you!
Jim, great reporting on everything GFX… THANKS!
It sounds like you may have settled on the Digaron lens…
Do you have all four of the makro symmar lenses? I did a little research and it appears that the 0060 version is the one that covers from 4×5 down to 6×6 in the recommended magnification range, so I wanted to see if you had done testing on that particular version.
Lastly, how do any of these appear to perform for single shot macro? I’m curious how much better the corners are with the stacked frames vs single frames.
Im putting together a scanner with the GFX and I have some good macro lenses here to test (the Mamiya 120mm and also a handful of Olympus micro lenses with the bellows), but I suspect one of these macro symmar lenses will be better. My focus is 4×5 to 6×6, no 35mm.
I have three of the Makro Symmar quartet. At think, at their optimum distances and magnification ratios, they are pretty much a match for the Rodenstock lens. I use the Rodenstock lens because it’s more convenient. A set of used Makro Symmars is cheaper.
Jim, I initially used a strobe light source for scanning negatives with the GFX100s achieving good results within the constraints of single shot images. Your work here has inspired me to try other approaches such as pixel shift and focus stacking. To that end, I have purchased a continuous light source similar to the Toaster which allegedly has a high degree of color accuracy. Will test soon. My question is how do you approach WB issues in your workflow? Although primarily a BW photographer I do have some color work I would like to scan.
Thank you
I white balance to a gray card, if I have an such an image for a series. Failing that, I try to get my initial WB in the ballpark by balancing to something neutral in the image, and tweaking by eye from there.
Apropos of using stacking to correct for alignment/flatness/field curvature, can you say more about the settings you typically use for copying a 4×5 negative? I’m thinking about number and spacing of exposures for stacking, but also choice of software and any key parameter settings for the file stacking.
I usually use a 120 um step size, and about 30 steps. I import the images into Lr, turn off sharpening, set the image type to B&W, and export as TIFFs. Then I bring the images into Helicon Focus, and stack using batch mode and stack splitting by exposure interval, exporting as TIFF, and brining the stacked images back into Lr for conversion to positive using Negative Lab Pro. Then off to Ps for the edits that need to be done there, and back to Lr as a psd file for final editing, mostly using layer masks. Helicon settings are Method B, Radius 5, Smoothing 4.
Very helpful – thank you!
Hi Jim, Thank you for your useful tests. I’m planning to set up a 35mm and MF (color and BW, positives and negatives) films digitizing system to replace my X5 Hassleblad scanner in order to get similar quality and better speed performances in high volume scanning.
So I’m considering Fujifilm GFX 100S camera with Fujinon 120 Macro lens and 45 mm tube, mounted on a Kaiser vertical stand ad copy continuous lights. I see your test of this lens and I understand there are better solutions in term of sharpness uniformity.
Given these specs, what lens do you suggest?
Thanks!
I you’re not going to use a Cognisys rail, the 120 GF may be your best option, since I think focus stacking is the way to go here. If you are going to use the rail, then I’d recommend the Schneider 120/5.6 industrial lenses that I tested. If you’re not going to stack, tell me why not, and I’ll try to talk you out of it.
Hi Jim,
thank for replying me. For me it’s a matter of time, focus stacking is not viable when I need to scan hundred frames a day. I would like to use a film support such the ones offered by Negative Supply (https://www.negative.supply), It helps to keep film flat and move rapidly the strip forward. Am I wrong?
You’re not wrong if you’re getting scans that satisfy you.
It’s a speculation, I don’t get any gear yet…
Thanks,
A,
It might work well enough for you. Use a laser aligner and maybe stop down to f/8. Our needs are different. I do a few scans a week, and each one has to be right.
This is pretty interesting. There’s a glassless approach to keeping negatives flat that’s always intrigued me. At a lab where I worked way back in the 20th century, we had big HK horizontal enlarger that used a brilliantly designed neg carrier. It grabbled the negative by the corners and pulled it flat like a trampoline. Perfectly planar, but no glass, and so no extra dust or newton’s rings. This carrier was a giant chunk of machined aluminum that cost more than most enlargers, but Beseler also made a version (called negaflat) that I’ve seen on eBay for around $50. I’ve never used or seen the Beseler version in person, but if it works it could save a lot of time.
There’s also the Imacon approach of bending the negative along part of a circle, but that requires a line scanner.
What is the light source?
And do you have an opinion on them?
I’m using a LED panel that came with the Film Toaster. For B&W negs, the spectrum doesn’t make much difference. For chromes, you want something with a high CRI.
https://www.filmtoaster.photography/
Hey Jim, I know this is an old post but I would truly appreciate a reply. Could you provide an example of a scan with this setup? another thing I’m wondering: did you use the pixel shift mode to scan at a larger resolution such as the 400 megapixel resolution provided when scanning in this mode?
I showed some scans, with and without pixel shift.
https://blog.kasson.com/gfx-100s/some-scans-with-the-gfx-100s/
https://blog.kasson.com/gfx-100s/gfx-100s-scanned-images-at-100/
https://blog.kasson.com/gfx-100/what-pitch-do-you-need-to-scan-6×6-tmax-100/