• site home
  • blog home
  • galleries
  • contact
  • underwater
  • the bleeding edge

the last word

Photography meets digital computer technology. Photography wins -- most of the time.

You are here: Home / GFX 100S / Fujifilm Pixel Shift Combiner Accurate Color mode

Fujifilm Pixel Shift Combiner Accurate Color mode

April 23, 2021 JimK 3 Comments

This is one in a series of posts on the Fujifilm GFX 100S. You should be able to find all the posts about that camera in the Category List on the right sidebar, below the Articles widget. There’s a drop-down menu there that you can use to get to all the posts in this series; just look for “GFX 100S”.

Yesterday, Fujifilm issued a new version of Pixel Shift Combiner that fixes from issues and adds new features. Today, they have issued yet another version that fixes bugs in the previous version. The current version is 1.2.0.2.

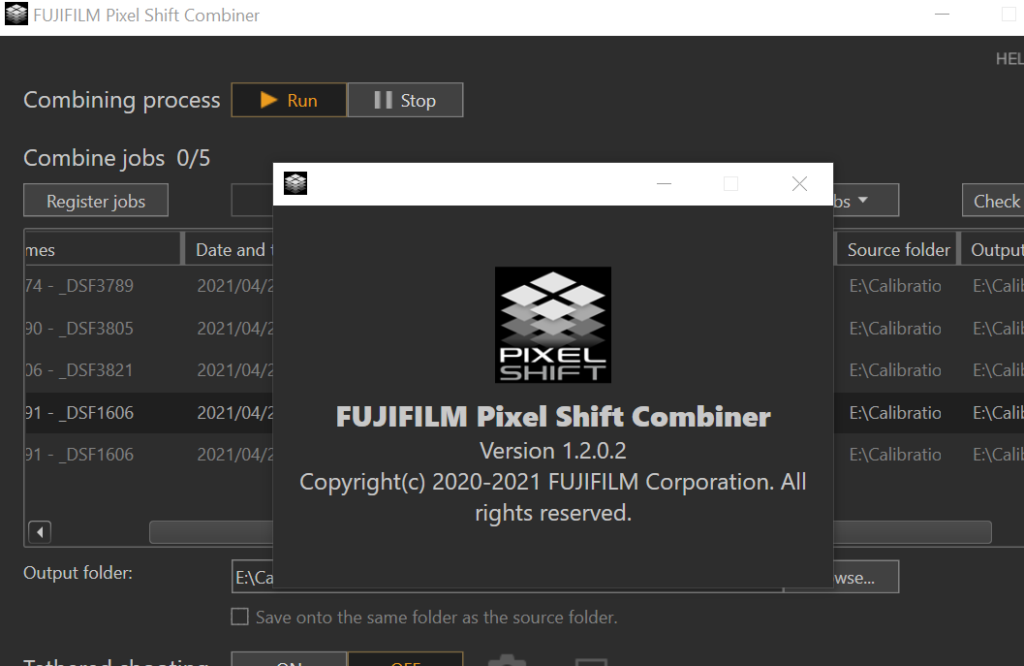
How do you get to that screen. Those fun-loving software engineers at Fujifilm have some up with a distinctly non-standard way of seeing what version you have. You right-click on the white bar at the very top of the window, the one with the name of the program, and pick “About” from the menu that pops up.

One of the new features is a way to combine the 16 images that generates only a 100 MP file rather than the 400 MP file that the old way made. The new way is called “Accurate Color”. Fuji calls the old way ” High Resolution + Accurate color”. I suspected that the Accurate Color mode was just using four of the 16-image stack that the camera produces.

I used some old captures made with the GFX 100s and the Fuji 110 mm f/2 lens that I previously told you about.  Follow that link to get the test conditions.

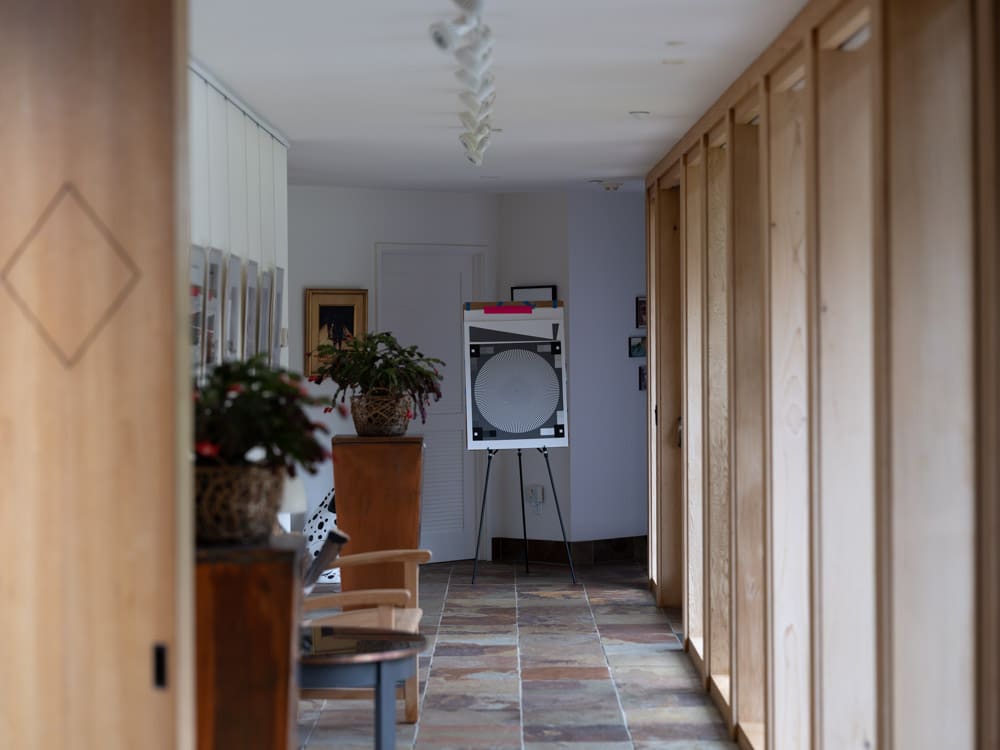
Here’s the whole shot:

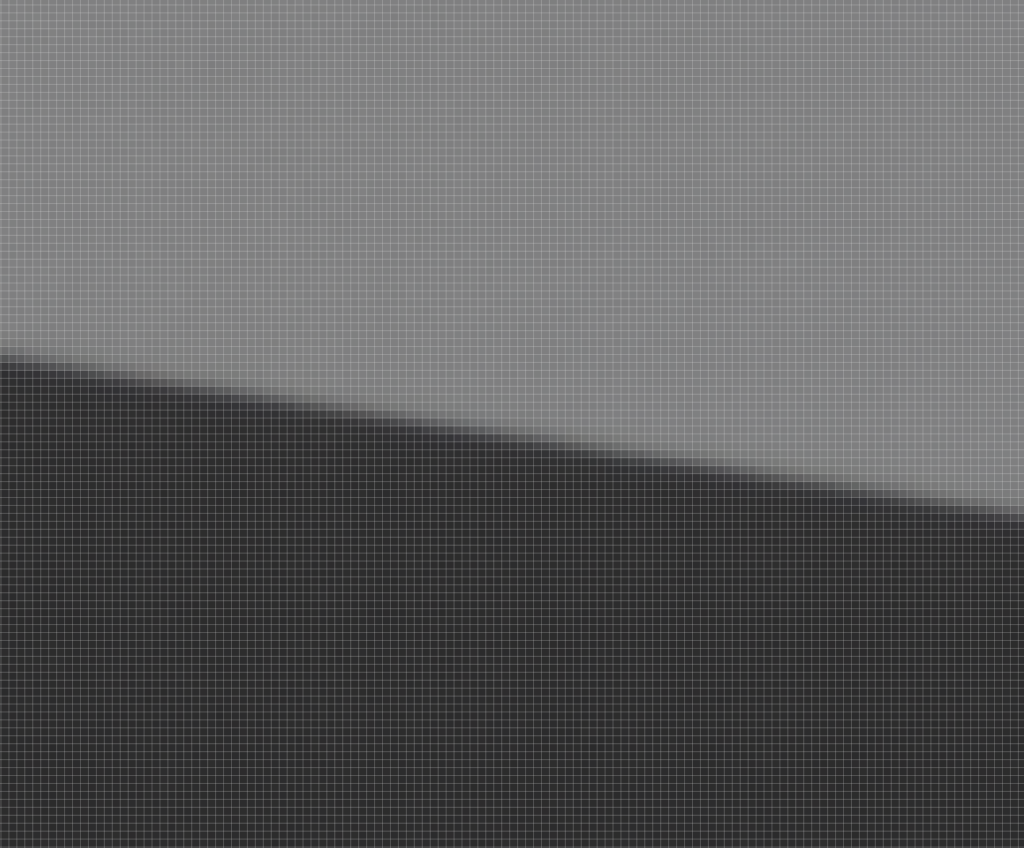
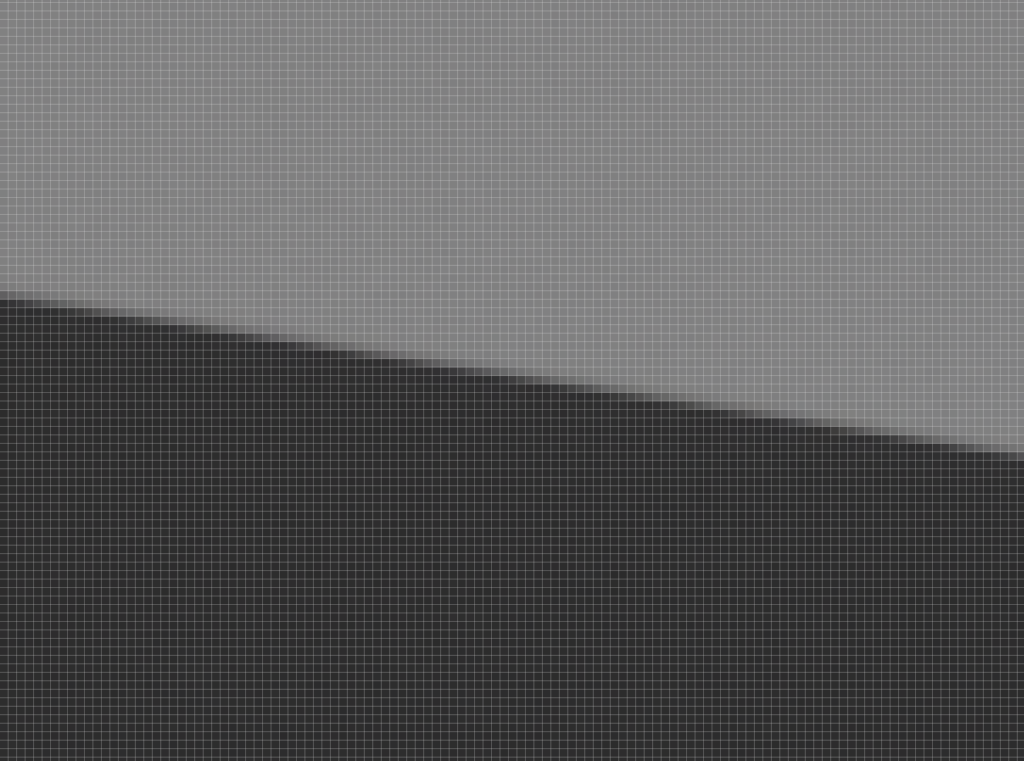
Here are some tight crops, at a bit over 100% magnification for the 400 MP image and twice that for the 100 MP image. I used sharpening  of amount 25, radius 1, detail 25 for the 100 MP image, and amount 25, radius 2, detail 25 for the 400 MP one.

High resolution and accurate color


Accurate Color Only

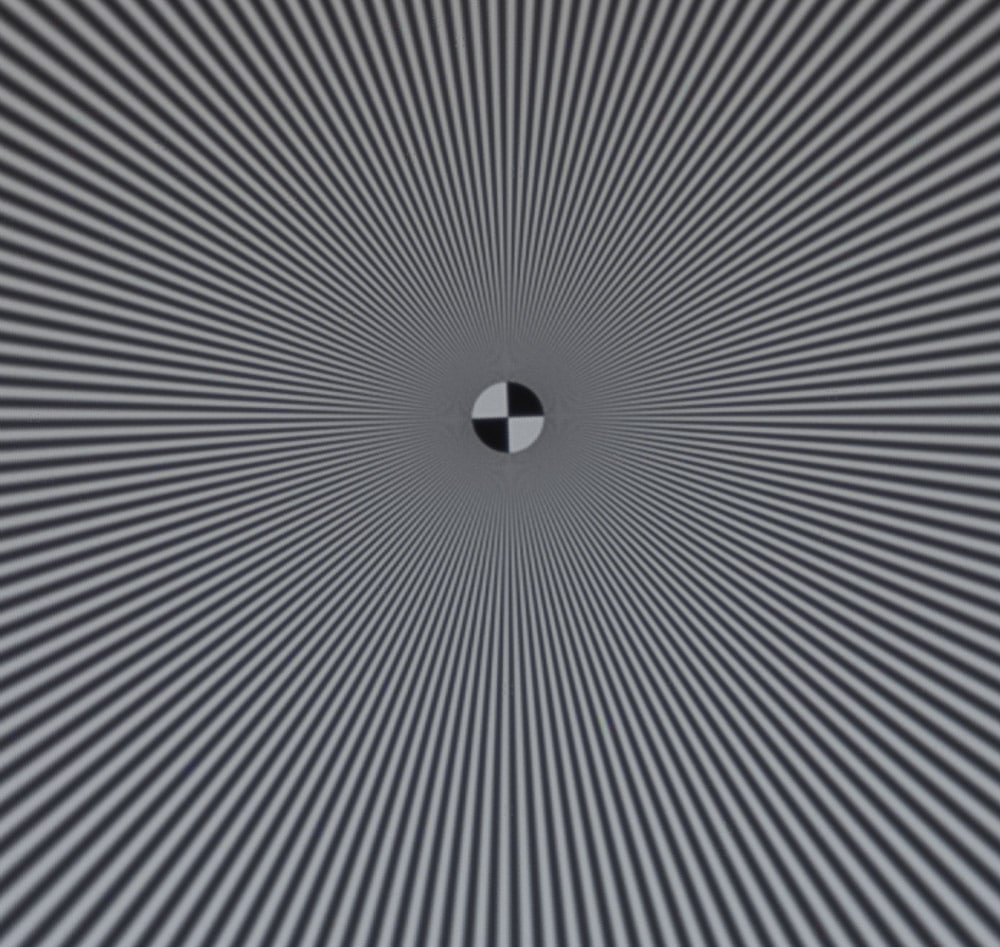
I used a sinusoidal Siemens Star; it’s not supposed to be sharp. There is virtually no aliasing in the 400 MP image, and a fair amount in the 100 MP open.  This is about what you’d expect comparing a 4-shot pixel shift image to a 16-shot one.

We can put some numbers to this. There’s a slanted edge in the target. If we ask Imatest to analyze that edge, here’s what we see:

High Resolution plus Accurate Color


Accurate color only

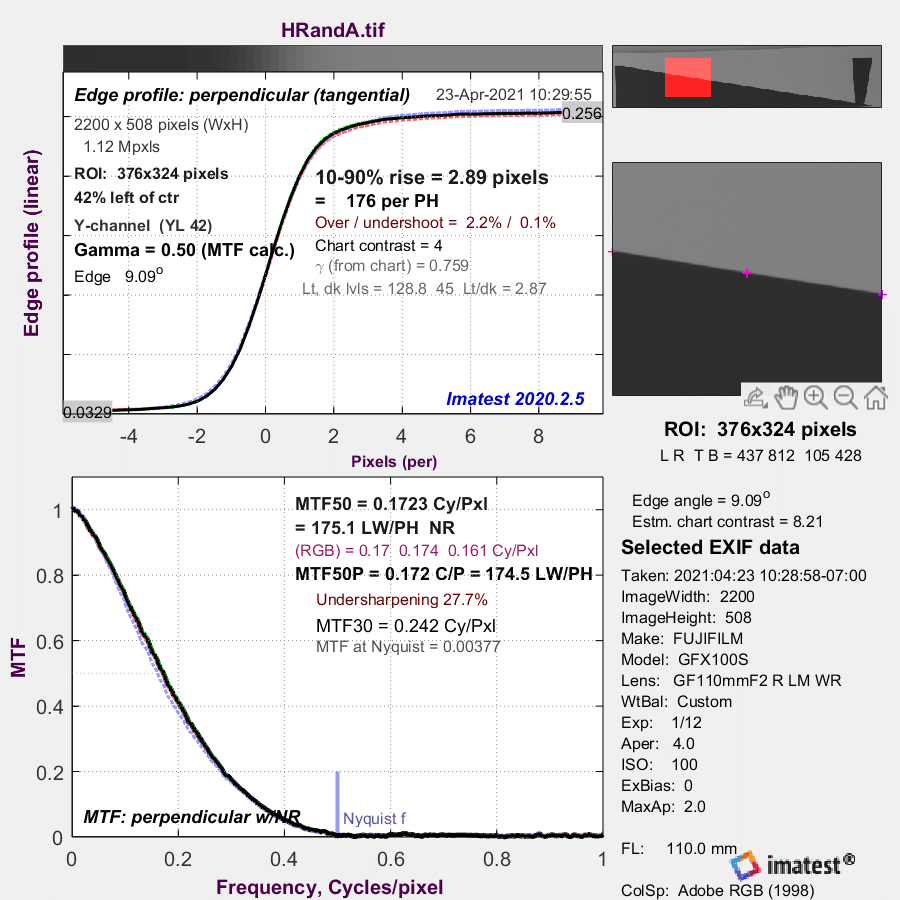
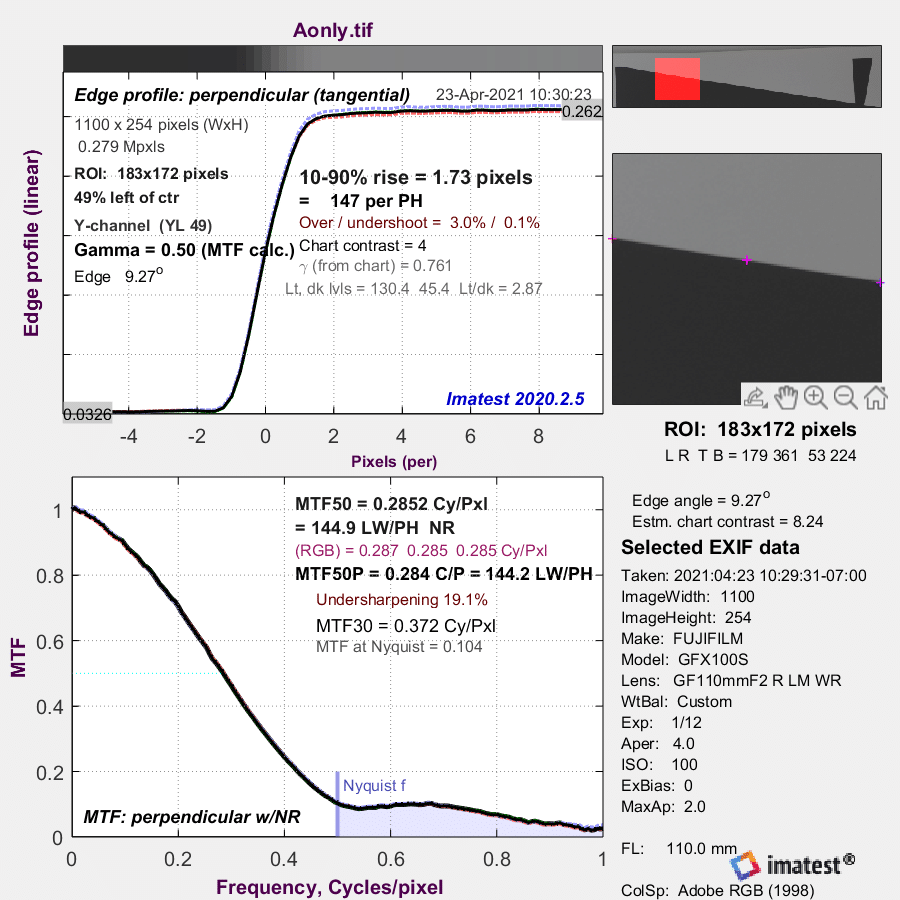
You can see that there’s a lot more aliasing in the Accurate Color (only) image than in the 400 MP one, confirming what our eyes told us when looking at the Siemens Star.

Let’s use MTF50 as a proxy for sharpness. The 400 MP image has an MTF50 of 0.172 cycles per pixel (cy/px). The 100 MP one measures 0.284 cy/px. The 400 MP image is 17448 pixel high, and the 100 MP one is 8736 pixels high. So the 400 MP image has an MTF50 of 3001 cycles per picture height (cy/ph), and the 100 MP image has an MTF50 of 2477 cy/ph. So the resolution improvement created in the combining operation is not great.

I think that, for many people, the big win with pixel shift imaging is the elimination of color aliasing, and, for those people, the new Accurate Color mode offers the advantage of not having to deal with a 400 MP file. If you want virtual elimination of luminance alisasing, you’ll have to deal with the old mode and the big files it makes.


The combing artifacts that I saw before are gone in mode modes.


High Resolution plus Accurate Color


Accurate Color


GFX 100S

← Sheen and specular surfaces with Fuji pixel shift on the GFX 100 Two ways to make 100 MP pixel-shifted images with the GFX 100S →

Comments

  1. Jean-Pierre Peretti says

    April 23, 2021 at 11:09 pm

    Thank you, Jim. So instructive as usual.

    Did you compare the 100 MB picture (AC only) with a downsized 400 MB (HR+AC) one ?
    Depending on the results, is the AC method the best option for getting images as clean* as possible in the 100 MB format ?

    * “clean” regarding the aliasing. I presume that the gain in color quality is about the same, right ?

    Best regards,

    Jean-Pierre Peretti

    Reply
    • JimK says

      April 24, 2021 at 6:20 am

      I didn’t run that test because there are so many possible down sampling algorithms, and the right one is image dependent. However, I think it wouldn’t be hard to beat AC, which after all uses nearest neighbor interpolation.

      Reply
      • Jean-Pierre Peretti says

        April 24, 2021 at 10:58 am

        Thanks for answering, Jim.
        Anyway, should you conduct such a test, I would be glad to know your conclusions.
        Merci Monsieur;)
        Jean-Pierre Peretti

        Reply

Leave a Reply Cancel reply

Your email address will not be published. Required fields are marked *

May 2025
S M T W T F S
 123
45678910
11121314151617
18192021222324
25262728293031
« Apr    

Articles

  • About
    • Patents and papers about color
    • Who am I?
  • How to…
    • Backing up photographic images
    • How to change email providers
    • How to shoot slanted edge images for me
  • Lens screening testing
    • Equipment and Software
    • Examples
      • Bad and OK 200-600 at 600
      • Excellent 180-400 zoom
      • Fair 14-30mm zoom
      • Good 100-200 mm MF zoom
      • Good 100-400 zoom
      • Good 100mm lens on P1 P45+
      • Good 120mm MF lens
      • Good 18mm FF lens
      • Good 24-105 mm FF lens
      • Good 24-70 FF zoom
      • Good 35 mm FF lens
      • Good 35-70 MF lens
      • Good 60 mm lens on IQ3-100
      • Good 63 mm MF lens
      • Good 65 mm FF lens
      • Good 85 mm FF lens
      • Good and bad 25mm FF lenses
      • Good zoom at 24 mm
      • Marginal 18mm lens
      • Marginal 35mm FF lens
      • Mildly problematic 55 mm FF lens
      • OK 16-35mm zoom
      • OK 60mm lens on P1 P45+
      • OK Sony 600mm f/4
      • Pretty good 16-35 FF zoom
      • Pretty good 90mm FF lens
      • Problematic 400 mm FF lens
      • Tilted 20 mm f/1.8 FF lens
      • Tilted 30 mm MF lens
      • Tilted 50 mm FF lens
      • Two 15mm FF lenses
    • Found a problem – now what?
    • Goals for this test
    • Minimum target distances
      • MFT
      • APS-C
      • Full frame
      • Small medium format
    • Printable Siemens Star targets
    • Target size on sensor
      • MFT
      • APS-C
      • Full frame
      • Small medium format
    • Test instructions — postproduction
    • Test instructions — reading the images
    • Test instructions – capture
    • Theory of the test
    • What’s wrong with conventional lens screening?
  • Previsualization heresy
  • Privacy Policy
  • Recommended photographic web sites
  • Using in-camera histograms for ETTR
    • Acknowledgments
    • Why ETTR?
    • Normal in-camera histograms
    • Image processing for in-camera histograms
    • Making the in-camera histogram closely represent the raw histogram
    • Shortcuts to UniWB
    • Preparing for monitor-based UniWB
    • A one-step UniWB procedure
    • The math behind the one-step method
    • Iteration using Newton’s Method

Category List

Recent Comments

  • Mike MacDonald on Your photograph looks like a painting?
  • Mike MacDonald on Your photograph looks like a painting?
  • bob lozano on The 16-Bit Fallacy: Why More Isn’t Always Better in Medium Format Cameras
  • JimK on Goldilocks and the three flashes
  • DC Wedding Photographer on Goldilocks and the three flashes
  • Wedding Photographer in DC on The 16-Bit Fallacy: Why More Isn’t Always Better in Medium Format Cameras
  • JimK on Fujifilm GFX 100S II precision
  • Renjie Zhu on Fujifilm GFX 100S II precision
  • JimK on Fuji 20-35/4 landscape field curvature at 23mm vs 23/4 GF
  • Ivo de Man on Fuji 20-35/4 landscape field curvature at 23mm vs 23/4 GF

Archives

Copyright © 2025 · Daily Dish Pro On Genesis Framework · WordPress · Log in

Unless otherwise noted, all images copyright Jim Kasson.