• site home
  • blog home
  • galleries
  • contact
  • underwater
  • the bleeding edge

the last word

Photography meets digital computer technology. Photography wins -- most of the time.

You are here: Home / GFX 100S / Pixel shift with the Fujifilm GFX 100S

Pixel shift with the Fujifilm GFX 100S

April 19, 2021 JimK 1 Comment

This is one in a series of posts on the Fujifilm GFX 100S. You should be able to find all the posts about that camera in the Category List on the right sidebar, below the Articles widget. There’s a drop-down menu there that you can use to get to all the posts in this series; just look for “GFX 100S”.

I continue to get complaints for people who are having trouble with the pixel shift feature on the GFX 100S. My own experience is that it is not usable for landscapes without moderate to considerable work in postproduction. But that’s not the fault of the pixel shift implementation; rather it’s the fault of having a camera mode that depends on the camera and subject being immobile during the set of exposures.

I’ve done some Siemens Star and slanted edge pixel shifted shots, and I found it mostly fine, with a slight combing effect on the slanted edge test that wouldn’t be an issue in real-world photography.

Today I’ll show you the results of a test that more approximates the real-world usage that I’d expect to see for pixel shifting. It does have some artificial elements, because those are the best way to show the advantages of pixel shifting, and to catch problems with the technique.

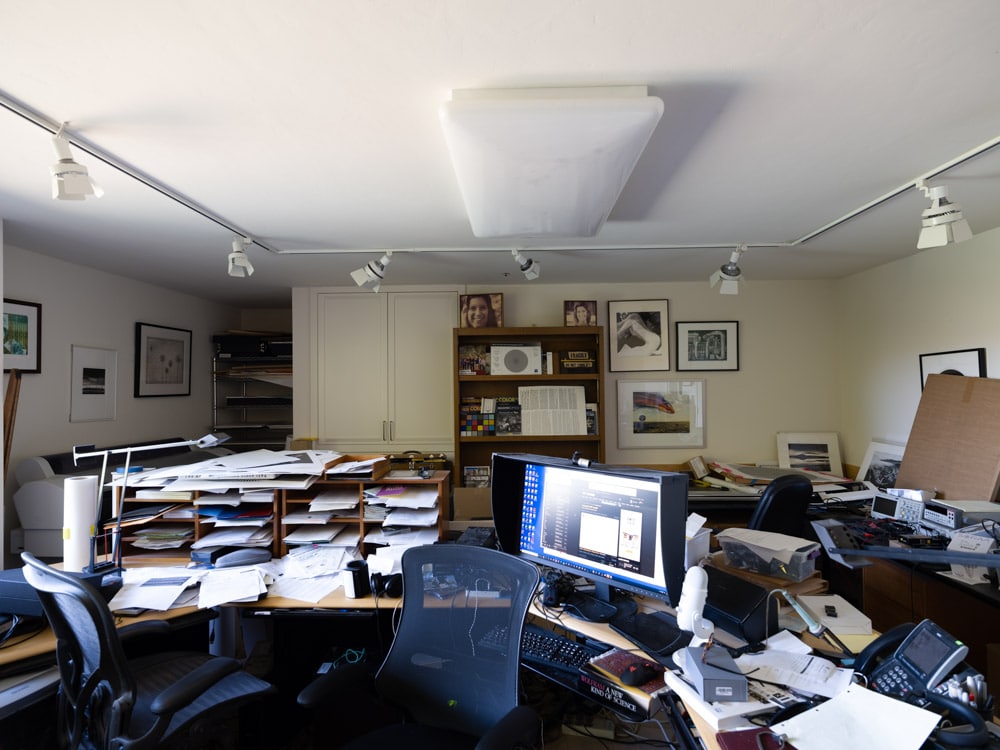
I mounted the Fuji 23 mm f/4 lens to my GFX 100S, put the camera on a Arca Swiss C1 head on a set of RRS legs. The room was on the second floor, so some vibration was to be expected. There were several operating computers in the room, each contributing fan vibrations. In addition, there was an air purifier — it’s allergy season — a few feet from the tripod. I figured all those potential vibration sources constituted a typical indoor environment. I set the lens to f/5.6, and made a set of 16 pixel-shifted exposures.

Here’s the whole shot.


I created the composite DNG file using Fuji’s Pixel Shift Combiner. I brought that file and the first image from the set into Lightroom. The images had different white balances, which is something I’d noticed before. I white balanced each to the background on the text page (you’ll see that page a bit further on). I set the sharpening on the base image to Amount = 25, Radius = 1, and Detail = 25. I set the sharpening on the pixel-shifted (double sized) image to Amount = 25, Radius = 2, and Detail = 25. That gives equivalent sharpening at the picture level.

Here’s a look at the Zeiss version of the Siemens Star at the same field of view (about a 130% enlargement for the pixel shifted image, and twice that for the base image).

Base


Pixel shifted

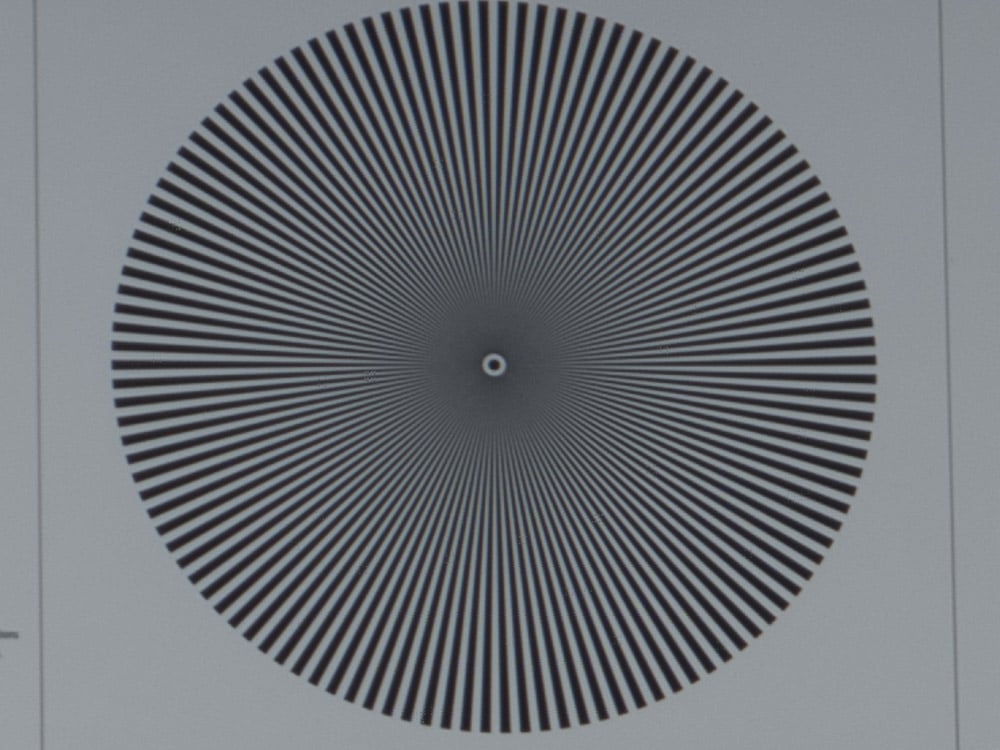
The extinction resolution is about the same, but there is far less aliasing in the pixel-shifted image. I don’t see any evidence of misalignment on the part of the Fuji Pixel Shift Combiner.

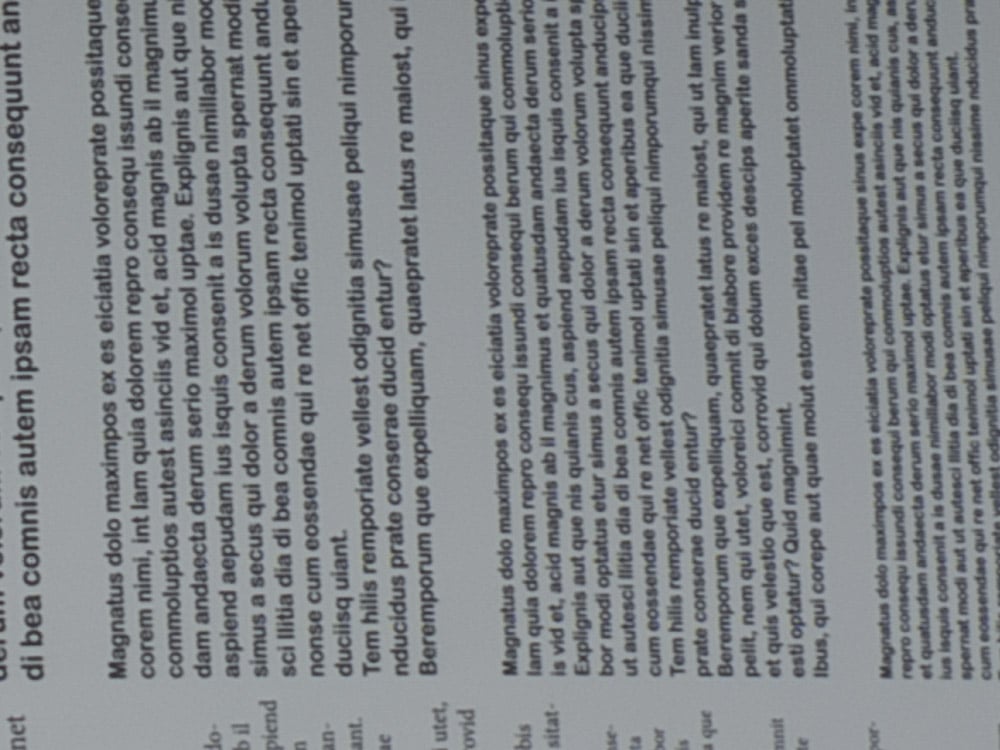
Now we’ll look at the text page at about a 70% magnification for the pixel shifted image, and twice that for the base image:

Base


Pixel Shifted

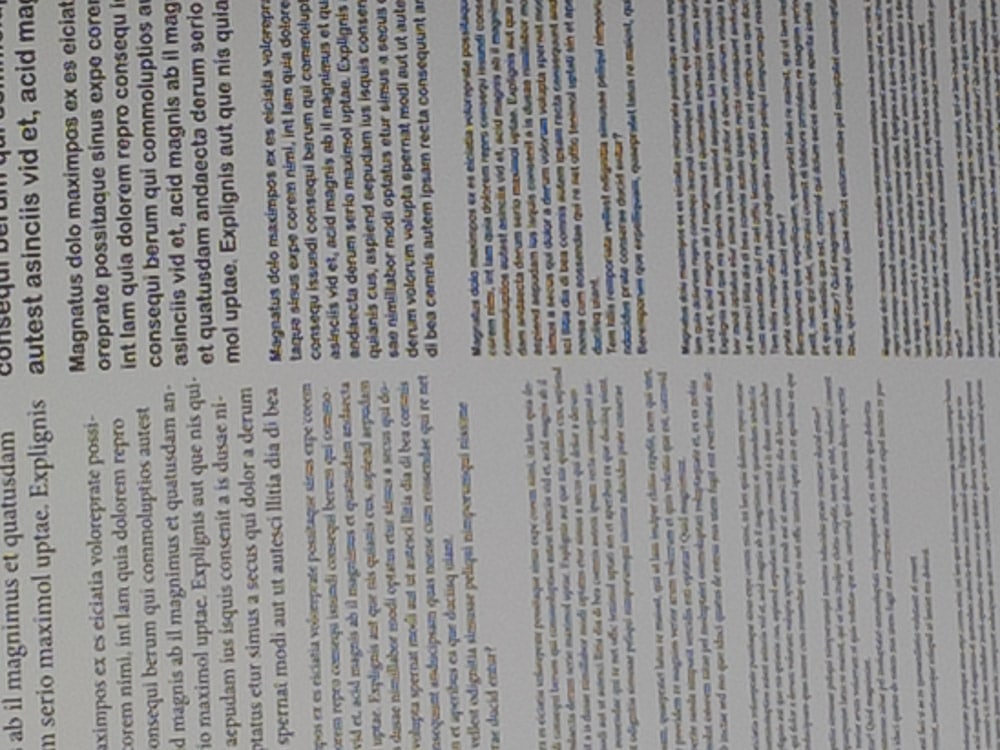
Less aliasing in the pixel shifted image.

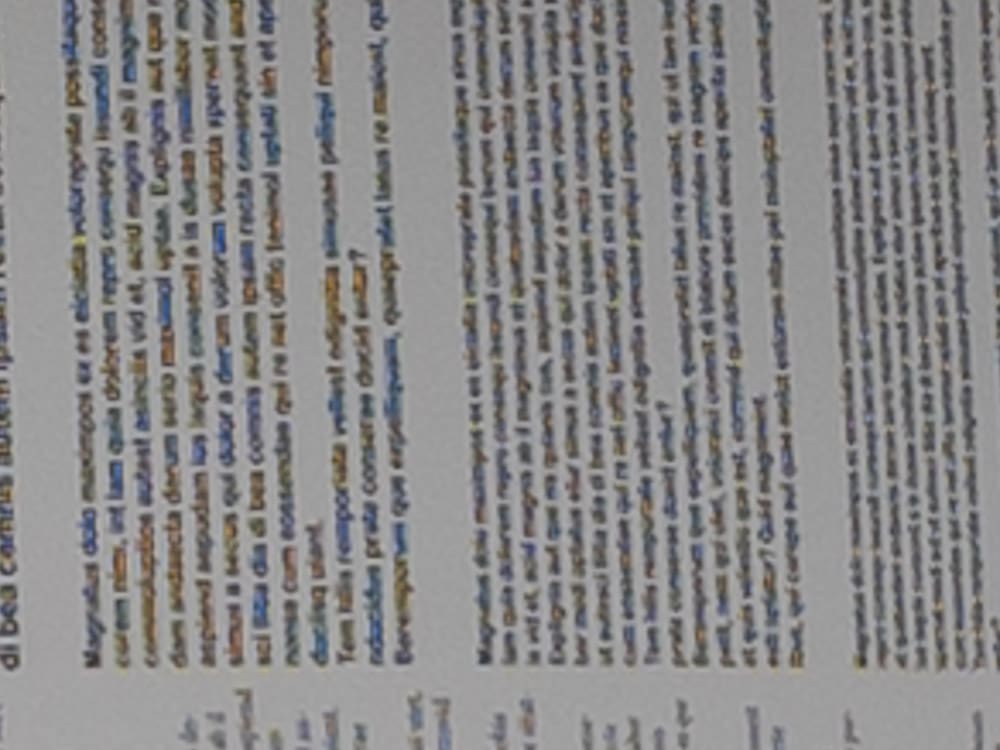
Going to a bit under 200% for the shifted image and twice that for the base image, we can see what the aliasing does to legibility:

Base


Pixel Shifted


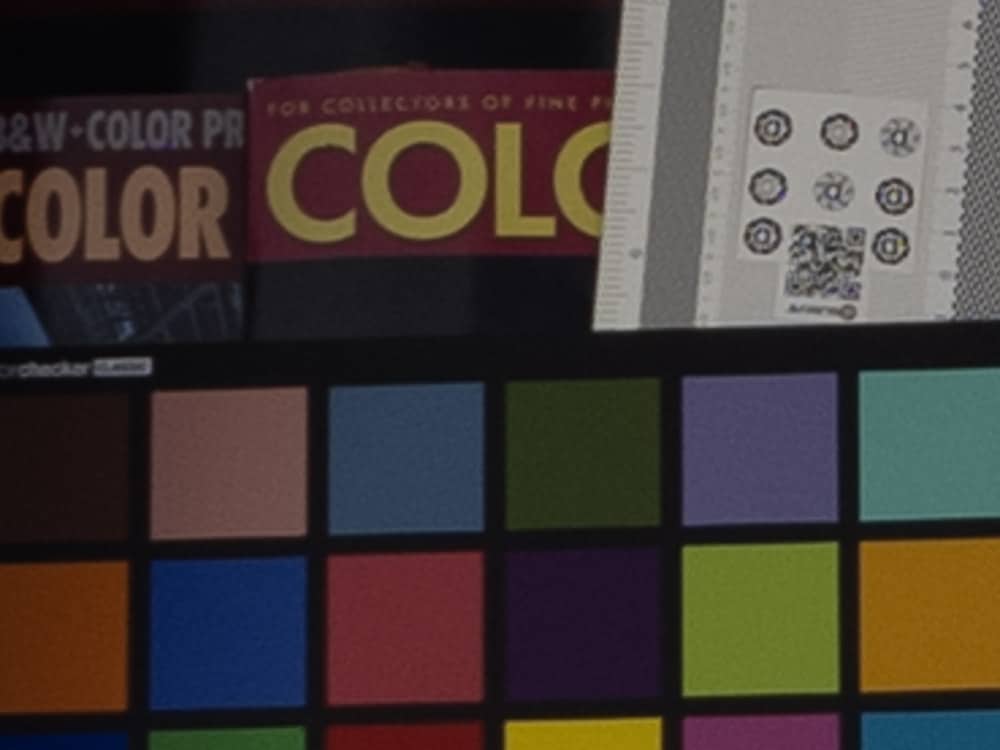
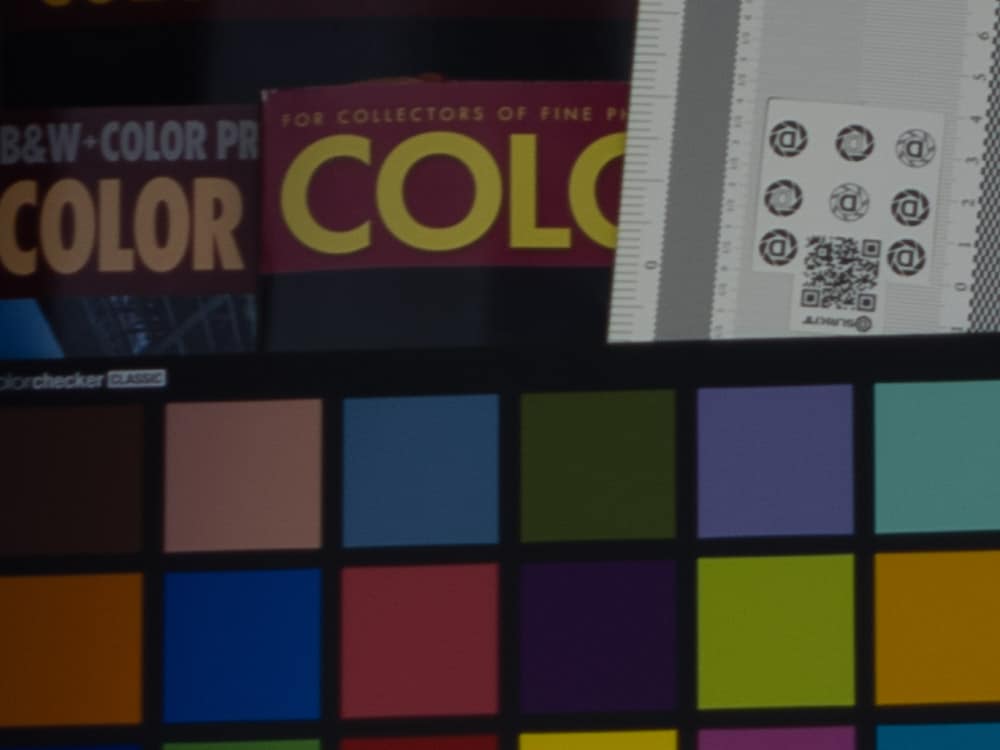
Looking at an area were there is some solid color at the same magnification as immediately above, we can see that there is less noise in the pixel-shifted image.

Base


Pixel Shifted


How about a slightly out of focus object?

Base


Pixel Shifted


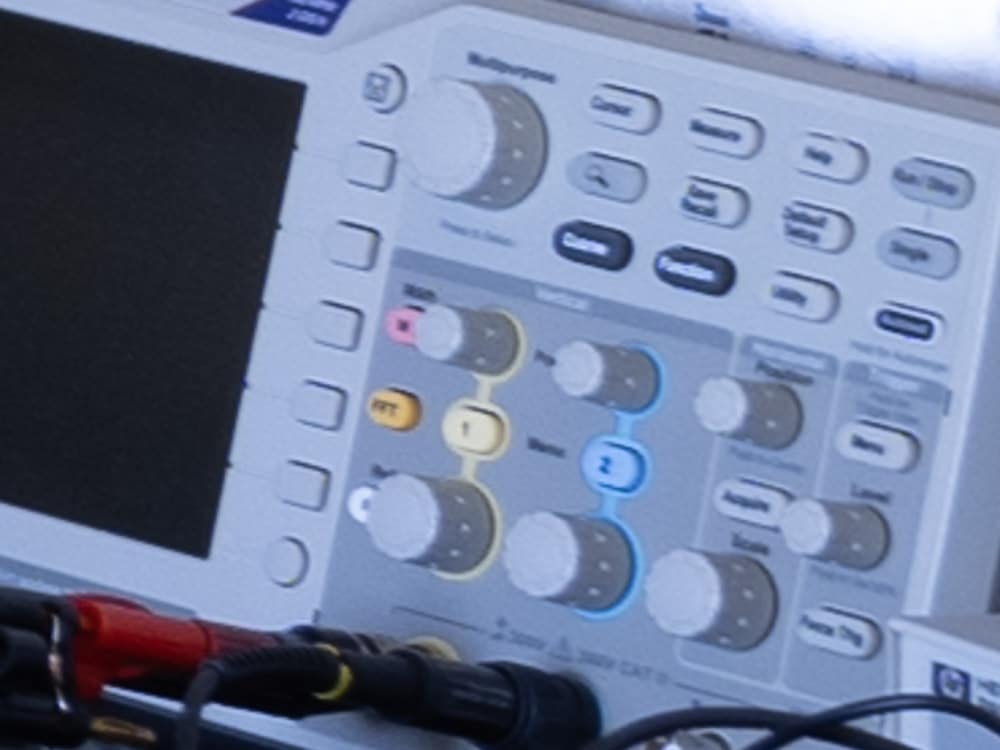
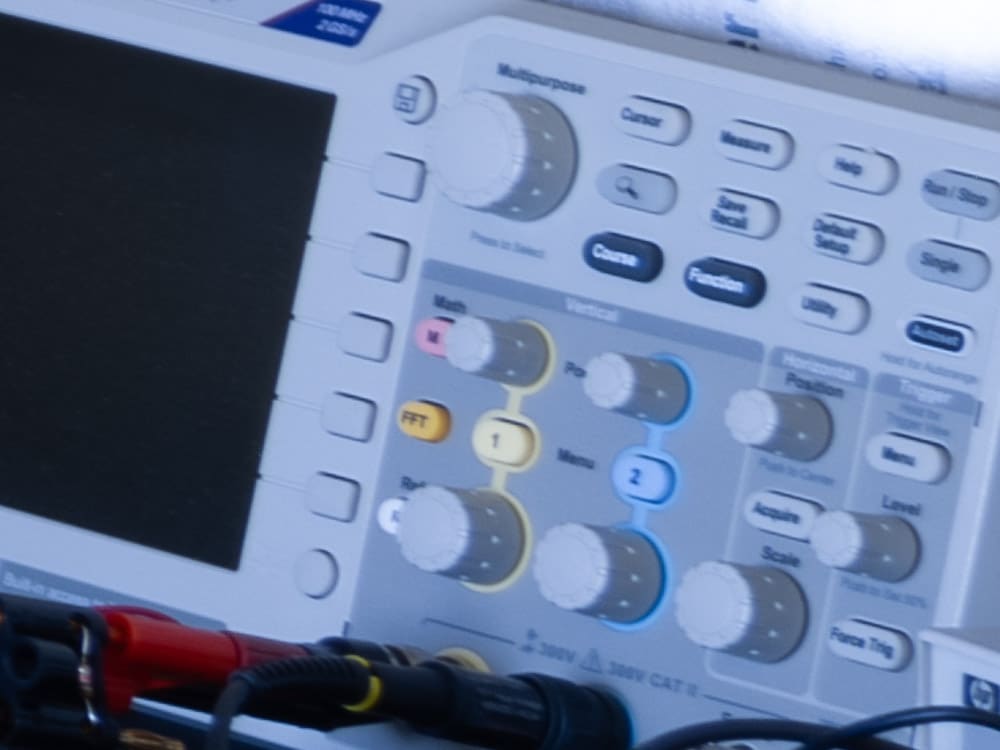
Legibility of the button legends is improved. I don’t see any artifacts.


Here’s a quite out of focus object:

Base


Pixel Shift

Pixel shift didn’t make it any better, or any worse.

This looks like pretty good performance to me.


GFX 100S

← GFX 100S sensor is a 4-shot stitch Relative sensitivity of Sony a7RIV and GFX 100S →

Comments

  1. Ilya Zakharevich says

    April 19, 2021 at 8:33 pm

    Thanks!

    You write about the last pair:
    > “Pixel shift didn’t make it any better, or any worse.”

    And what barcode-reading software thinks about it? One on the phone near me also thinks there is “no improvement”…

    Reply

Leave a Reply Cancel reply

Your email address will not be published. Required fields are marked *

May 2025
S M T W T F S
 123
45678910
11121314151617
18192021222324
25262728293031
« Apr    

Articles

  • About
    • Patents and papers about color
    • Who am I?
  • How to…
    • Backing up photographic images
    • How to change email providers
    • How to shoot slanted edge images for me
  • Lens screening testing
    • Equipment and Software
    • Examples
      • Bad and OK 200-600 at 600
      • Excellent 180-400 zoom
      • Fair 14-30mm zoom
      • Good 100-200 mm MF zoom
      • Good 100-400 zoom
      • Good 100mm lens on P1 P45+
      • Good 120mm MF lens
      • Good 18mm FF lens
      • Good 24-105 mm FF lens
      • Good 24-70 FF zoom
      • Good 35 mm FF lens
      • Good 35-70 MF lens
      • Good 60 mm lens on IQ3-100
      • Good 63 mm MF lens
      • Good 65 mm FF lens
      • Good 85 mm FF lens
      • Good and bad 25mm FF lenses
      • Good zoom at 24 mm
      • Marginal 18mm lens
      • Marginal 35mm FF lens
      • Mildly problematic 55 mm FF lens
      • OK 16-35mm zoom
      • OK 60mm lens on P1 P45+
      • OK Sony 600mm f/4
      • Pretty good 16-35 FF zoom
      • Pretty good 90mm FF lens
      • Problematic 400 mm FF lens
      • Tilted 20 mm f/1.8 FF lens
      • Tilted 30 mm MF lens
      • Tilted 50 mm FF lens
      • Two 15mm FF lenses
    • Found a problem – now what?
    • Goals for this test
    • Minimum target distances
      • MFT
      • APS-C
      • Full frame
      • Small medium format
    • Printable Siemens Star targets
    • Target size on sensor
      • MFT
      • APS-C
      • Full frame
      • Small medium format
    • Test instructions — postproduction
    • Test instructions — reading the images
    • Test instructions – capture
    • Theory of the test
    • What’s wrong with conventional lens screening?
  • Previsualization heresy
  • Privacy Policy
  • Recommended photographic web sites
  • Using in-camera histograms for ETTR
    • Acknowledgments
    • Why ETTR?
    • Normal in-camera histograms
    • Image processing for in-camera histograms
    • Making the in-camera histogram closely represent the raw histogram
    • Shortcuts to UniWB
    • Preparing for monitor-based UniWB
    • A one-step UniWB procedure
    • The math behind the one-step method
    • Iteration using Newton’s Method

Category List

Recent Comments

  • JimK on Calculating reach for wildlife photography
  • Geofrey on Calculating reach for wildlife photography
  • JimK on Calculating reach for wildlife photography
  • Geofrey on Calculating reach for wildlife photography
  • Javier Sanchez on The 16-Bit Fallacy: Why More Isn’t Always Better in Medium Format Cameras
  • Mike MacDonald on Your photograph looks like a painting?
  • Mike MacDonald on Your photograph looks like a painting?
  • bob lozano on The 16-Bit Fallacy: Why More Isn’t Always Better in Medium Format Cameras
  • JimK on Goldilocks and the three flashes
  • DC Wedding Photographer on Goldilocks and the three flashes

Archives

Copyright © 2025 · Daily Dish Pro On Genesis Framework · WordPress · Log in

Unless otherwise noted, all images copyright Jim Kasson.