• site home
  • blog home
  • galleries
  • contact
  • underwater
  • the bleeding edge

the last word

Photography meets digital computer technology. Photography wins -- most of the time.

You are here: Home / GFX 50S / Sony 135 STF on GFX-50R, sharpness

Sony 135 STF on GFX-50R, sharpness

October 14, 2020 JimK 7 Comments

I’ve already reported on the great news that the Sony 135 STF (apodized) A-mount lens covers the GFX sensor with zero vignetting. Now I’m going to look at sharpness, both on and off axis, using a slanted edge and a Siemens Star for a target.
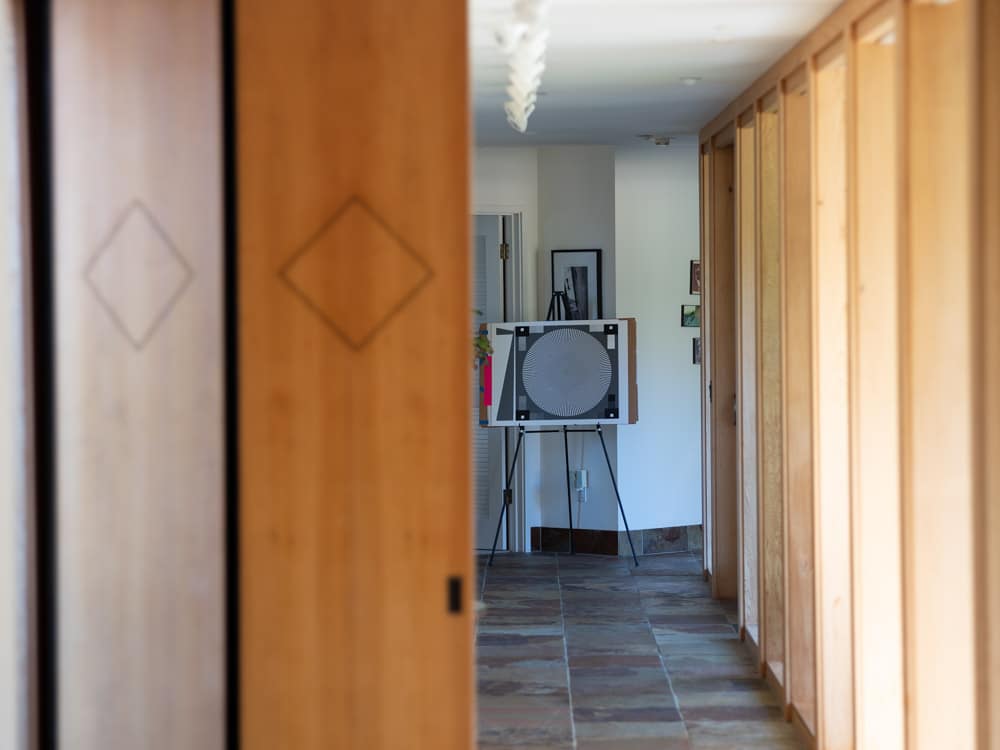
Here’s the scene:

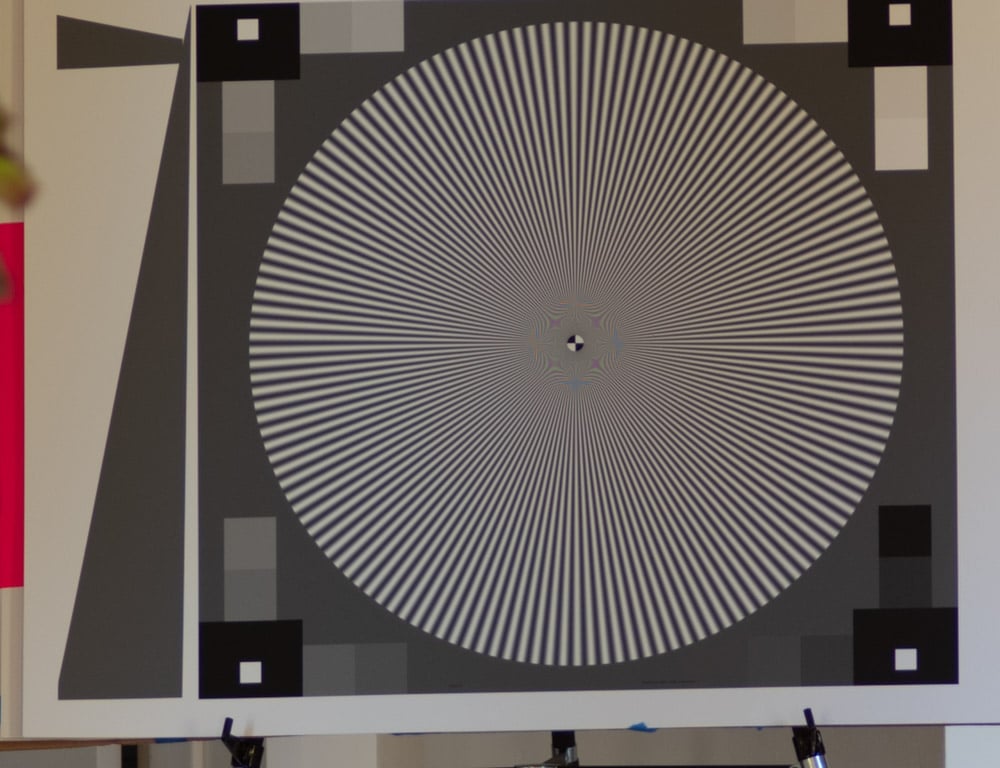
And here’s just the target area, as seen wide open with the GFX 50R, first in the center:
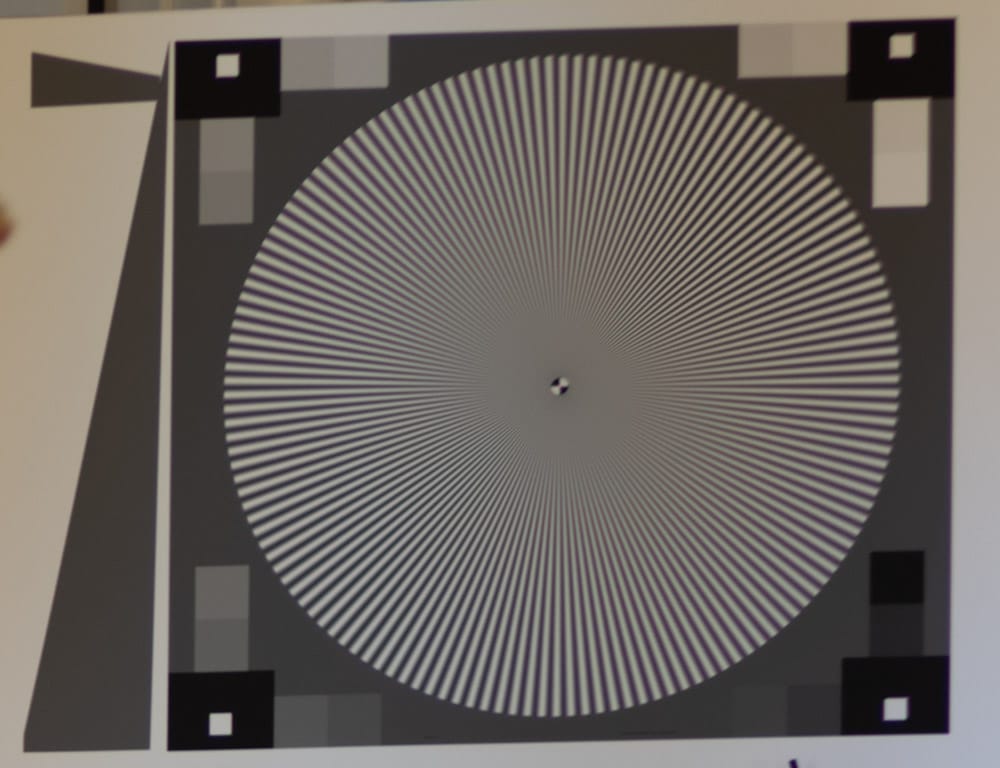
And in the corner:

Particulars:

  • ISO 100
  • Wide open in STF mode
  • Manual exposure, ETTR in live histogram.
  • Subject in the center and the upper right corner.
  • Manual focusing.
  • Six shots at each setting, focusing anew for each shot, picking the best using the Imatest sharpness ranking utility. This method calibrates out focus curvature.
  • Developed in Lightroom
  • Sharpening set to zero.
  • White balance set to gray background on Siemens Star target
  • Adobe Color Profile
  • Minor exposure adjustments, with same adjustment applied to all images from both lenses, so corner darkening is unaffected.
  • Chromatic aberration correction turned off.
  • Everything else at default settings

The slanted edge results in the center:

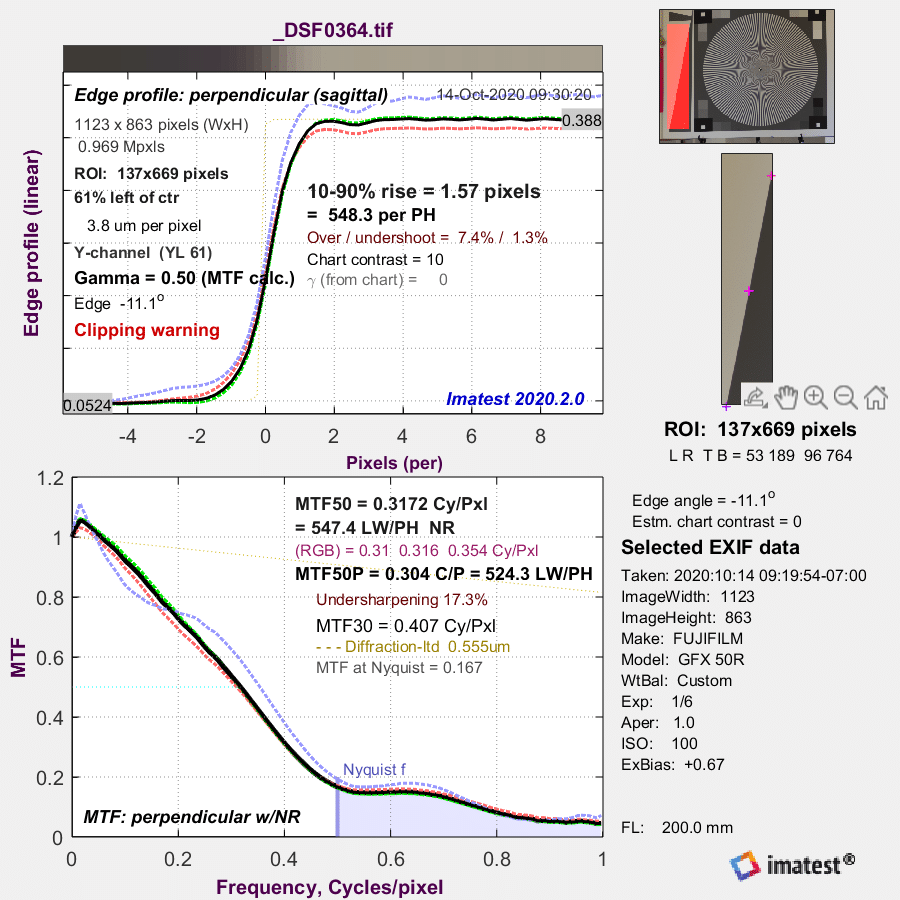
That is quite sharp. Lr’s demosaicing is providing a little sharpening, too. The small microlenses int he GFX 50x cameras are doing their part.

In the corner:

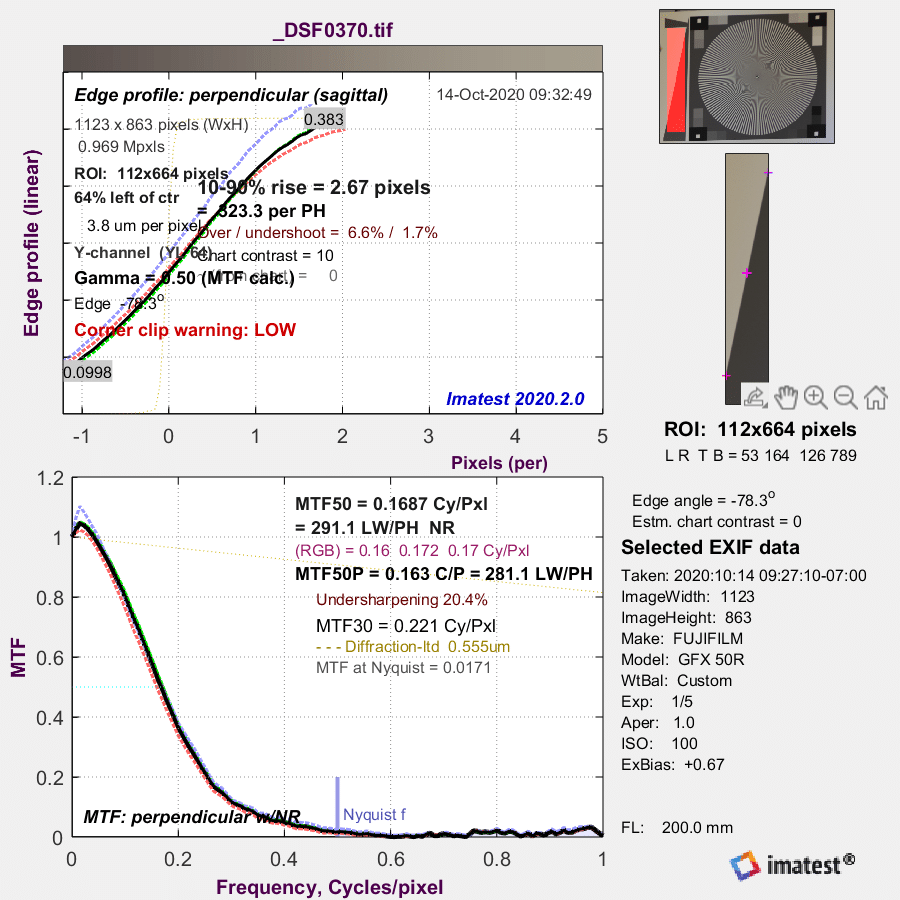
That is distinctly unsharp. But I suspect that corner sharpness is unimportant the way that most people would use this lens.

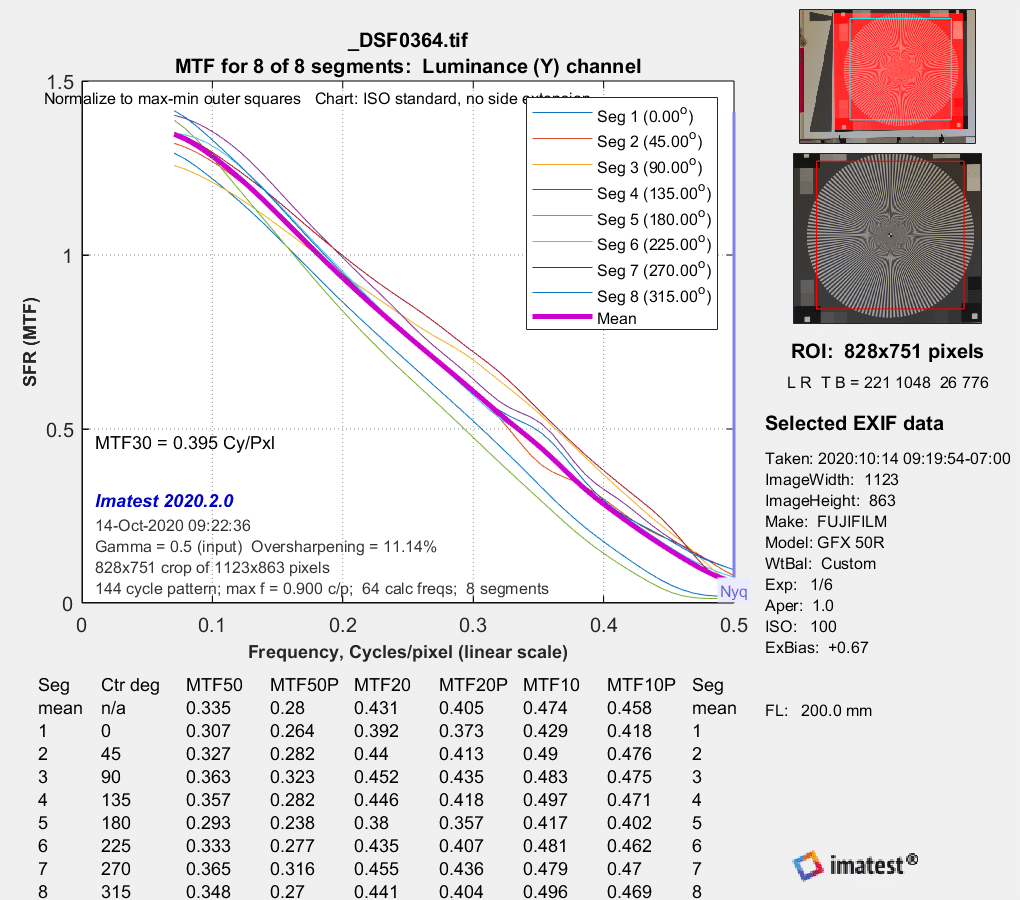
Now let’s look at how the sharpness varies with angle. First in the center:

The lens is slightly sharper vertically than horizontally, but the differences are  small.

In the corner:

The lens is much sharper in the radial direction than in the tangential one.

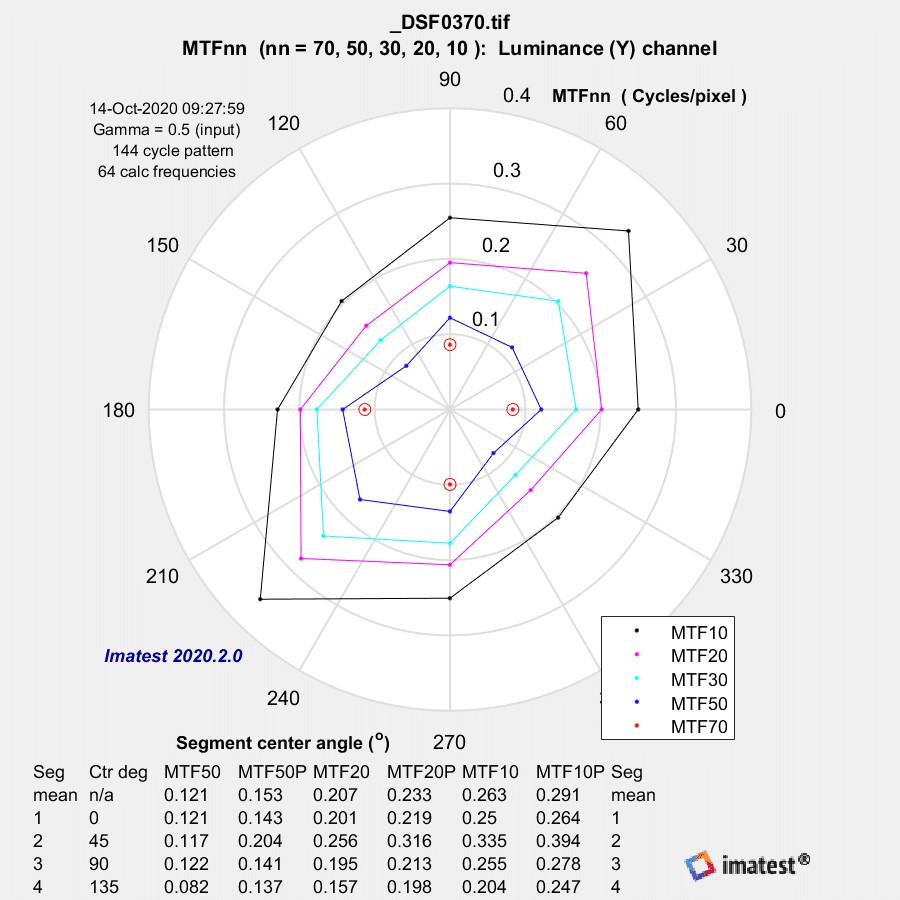
We can see the same effect when we look at the MTF curves in various directions. In the center:


And in the corner:


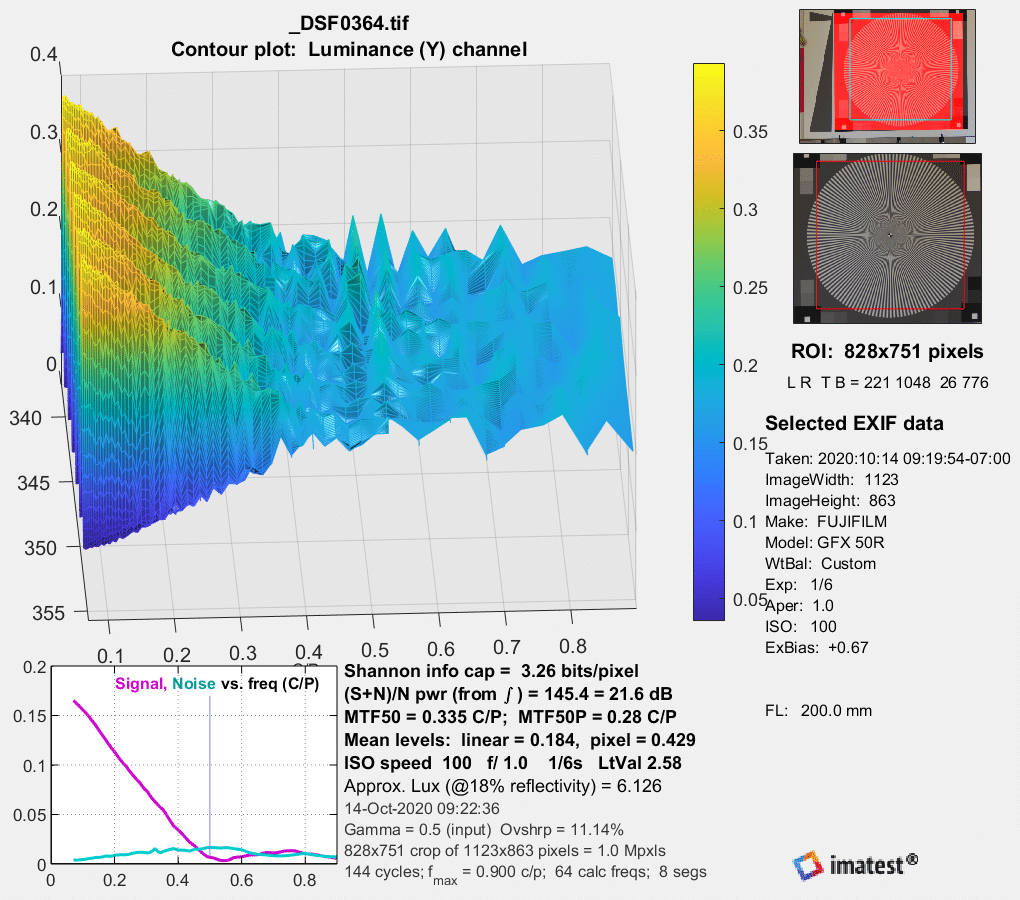
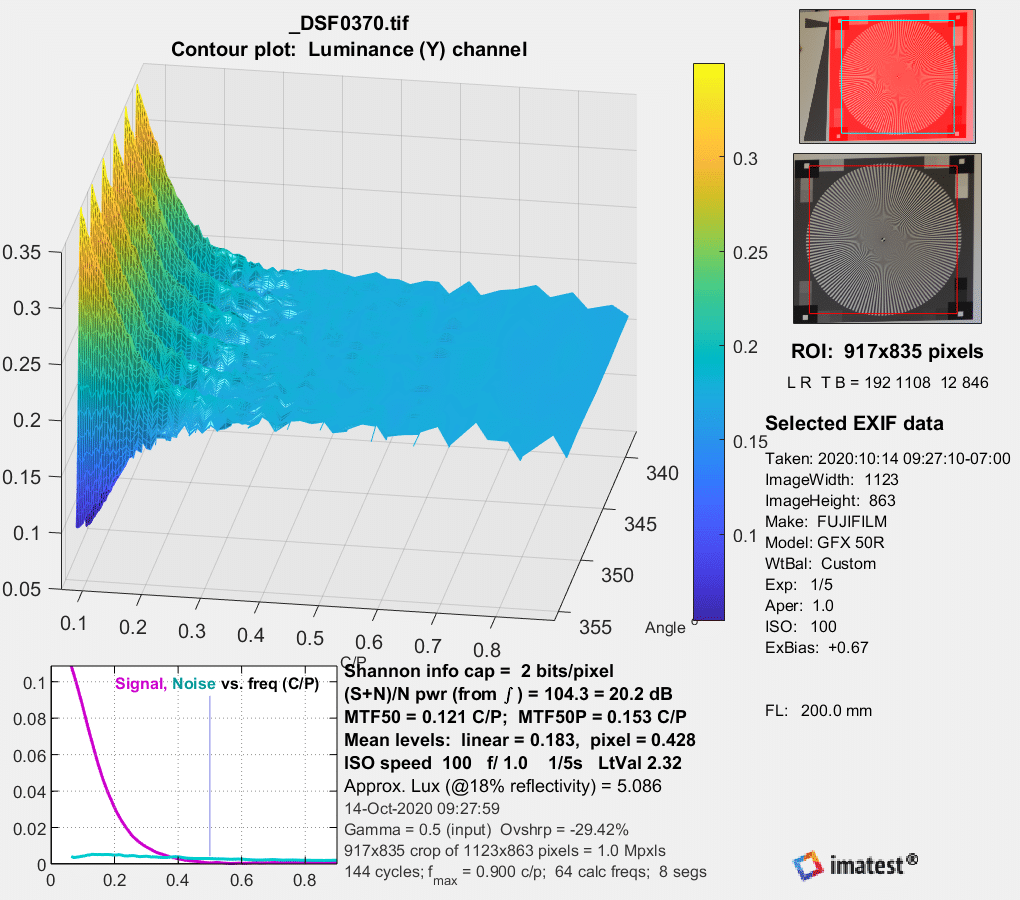
For completeness, I’ll include the new Shannon capacity curves. I’m still trying to figure out how best to use these.

In the center:


And in the corner:

It looks to me that this lens will be fine for portraits. I’ll be doing some bokeh tests next.

GFX 50S

← 70-200/2.8 E vs S at 200mm, more quantitative Sony 135 STF on GFX-50R, bokeh →

Comments

  1. Alexander Häggström says

    October 15, 2020 at 3:50 am

    Is the loss of sharpness in the corners caused by different sagittal and tangential focus planes? Transition point spread functions from the image corner would provide the answer.

    I found a good source of information on oblique astigmatism at http://hyperphysics.phy-astr.gsu.edu/hbase/geoopt/coma.html

    Reply
    • JimK says

      October 15, 2020 at 6:06 am

      That’s probably a component. There is a lot of astigmatism in the corners; you can see it as you focus there.

      Reply
  2. K says

    March 22, 2023 at 2:01 pm

    Is there any limitation for using 135 stf lens like controlling aperture?

    Reply
    • JimK says

      March 22, 2023 at 2:08 pm

      The lens aperture can be controlled manually. I think that most people will want to use it wide open, since the STF effect diminishes as it’s stopped down.

      Reply
      • K says

        April 8, 2023 at 11:06 am

        How’s the sharpness when you stop the aperture? Still doesn’t improve the sharpness?

        Reply
        • JimK says

          April 8, 2023 at 11:22 am

          You mean stop down the aperture? It will probably make the lens sharper until diffraction takes over, but what’s the point of having an STF lens unless you’re going to get the apodization effect?

          Reply
          • K says

            April 8, 2023 at 1:18 pm

            Well, I wanted to use it to replace GF 110mm F2 for now until I can get it in future so I’m curious to know the optical quality for stopping down especially for corner sharpness.

            Reply

Leave a Reply Cancel reply

Your email address will not be published. Required fields are marked *

May 2025
S M T W T F S
 123
45678910
11121314151617
18192021222324
25262728293031
« Apr    

Articles

  • About
    • Patents and papers about color
    • Who am I?
  • How to…
    • Backing up photographic images
    • How to change email providers
    • How to shoot slanted edge images for me
  • Lens screening testing
    • Equipment and Software
    • Examples
      • Bad and OK 200-600 at 600
      • Excellent 180-400 zoom
      • Fair 14-30mm zoom
      • Good 100-200 mm MF zoom
      • Good 100-400 zoom
      • Good 100mm lens on P1 P45+
      • Good 120mm MF lens
      • Good 18mm FF lens
      • Good 24-105 mm FF lens
      • Good 24-70 FF zoom
      • Good 35 mm FF lens
      • Good 35-70 MF lens
      • Good 60 mm lens on IQ3-100
      • Good 63 mm MF lens
      • Good 65 mm FF lens
      • Good 85 mm FF lens
      • Good and bad 25mm FF lenses
      • Good zoom at 24 mm
      • Marginal 18mm lens
      • Marginal 35mm FF lens
      • Mildly problematic 55 mm FF lens
      • OK 16-35mm zoom
      • OK 60mm lens on P1 P45+
      • OK Sony 600mm f/4
      • Pretty good 16-35 FF zoom
      • Pretty good 90mm FF lens
      • Problematic 400 mm FF lens
      • Tilted 20 mm f/1.8 FF lens
      • Tilted 30 mm MF lens
      • Tilted 50 mm FF lens
      • Two 15mm FF lenses
    • Found a problem – now what?
    • Goals for this test
    • Minimum target distances
      • MFT
      • APS-C
      • Full frame
      • Small medium format
    • Printable Siemens Star targets
    • Target size on sensor
      • MFT
      • APS-C
      • Full frame
      • Small medium format
    • Test instructions — postproduction
    • Test instructions — reading the images
    • Test instructions – capture
    • Theory of the test
    • What’s wrong with conventional lens screening?
  • Previsualization heresy
  • Privacy Policy
  • Recommended photographic web sites
  • Using in-camera histograms for ETTR
    • Acknowledgments
    • Why ETTR?
    • Normal in-camera histograms
    • Image processing for in-camera histograms
    • Making the in-camera histogram closely represent the raw histogram
    • Shortcuts to UniWB
    • Preparing for monitor-based UniWB
    • A one-step UniWB procedure
    • The math behind the one-step method
    • Iteration using Newton’s Method

Category List

Recent Comments

  • bob lozano on The 16-Bit Fallacy: Why More Isn’t Always Better in Medium Format Cameras
  • JimK on Goldilocks and the three flashes
  • DC Wedding Photographer on Goldilocks and the three flashes
  • Wedding Photographer in DC on The 16-Bit Fallacy: Why More Isn’t Always Better in Medium Format Cameras
  • JimK on Fujifilm GFX 100S II precision
  • Renjie Zhu on Fujifilm GFX 100S II precision
  • JimK on Fuji 20-35/4 landscape field curvature at 23mm vs 23/4 GF
  • Ivo de Man on Fuji 20-35/4 landscape field curvature at 23mm vs 23/4 GF
  • JimK on Fuji 20-35/4 landscape field curvature at 23mm vs 23/4 GF
  • JimK on Fuji 20-35/4 landscape field curvature at 23mm vs 23/4 GF

Archives

Copyright © 2025 · Daily Dish Pro On Genesis Framework · WordPress · Log in

Unless otherwise noted, all images copyright Jim Kasson.