This is one in a series of posts on the Nikon Z7. You should be able to find all the posts about that camera in the Category List on the right sidebar, below the Articles widget. There’s a drop-down menu there that you can use to get to all the posts in this series; just look for “Nikon Z6/7”.
The Nikon Z7 has excellent autofocus accuracy by the standards of MILCs, and off-the-charts AF accuracy by DSLR benchmarks. But there are times when you want to manually focus, either to eke out that last measure of sharpness, or to be able to precisely place the plane of focus across the image, or when you are worried that what the AF system wants to make sharp may not be what you want sharp.
When manually focusing the Z7, what’s the best plan? For the purpose of this post, I’m going to assume that speed is not the object here, but rather precision is the goal.
First off, with the Z7, as with most any MILC, you are miles ahead of what is practical with a DSLR, unless you turn it into a kind of MILC by invoking live view. Second, peaking is your friend. Yes, I am a big fan of peaking, even though it usually gets no respect because most people use it in a way that I think is — for most things — wrong. Most folks seem to use either peaking or magnification, and complain that their images aren’t sharp using peaking. I recommend using both together, and I’m going to tell you how I do that in this post.
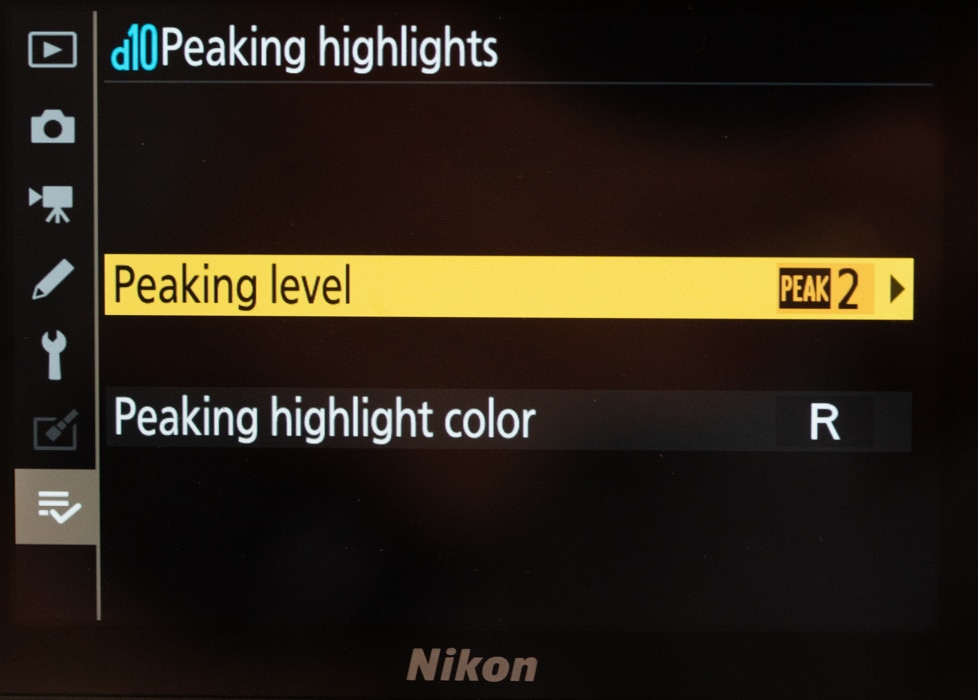
For starters, I think you ought to put the peaking level adjustment in one of the Z7 quick menus, since you’re going to be messing with it a lot.
I like red for the color, but that’s a purely personal choice.
There is one exception to my advocacy of combining peaking and magnification. Peaking alone can be useful if you have a subject with some depth, and you want to see what’s in each of the possible focus planes.
Making small adjustments to the focus ring in this scene causes the part of the image with the most red to roll from right to left as the focal plane is moved away from the camera, and it’s easy with this technique to put the plane where you want it.
But most of the time you want to focus on some object, and that’s when combining peaking and magnification is the hot ticket.
Before I demonstrate that, there are a few things you ought to know about how peaking works.
- It just measures high-spatial frequency contrast. It doesn’t know what’s in focus and what’s not, just what has a lot of energy at high spatial frequencies, whether that comes from the subject, the lighting, the lack of lens aberrations, or actual focusing.
- Not only that, it just measures that contrast in the long direction of the image. If you’ve got a bunch of horizontal lines and you’re shooting in landscape orientation, that’s not going to get the peaking very excited.
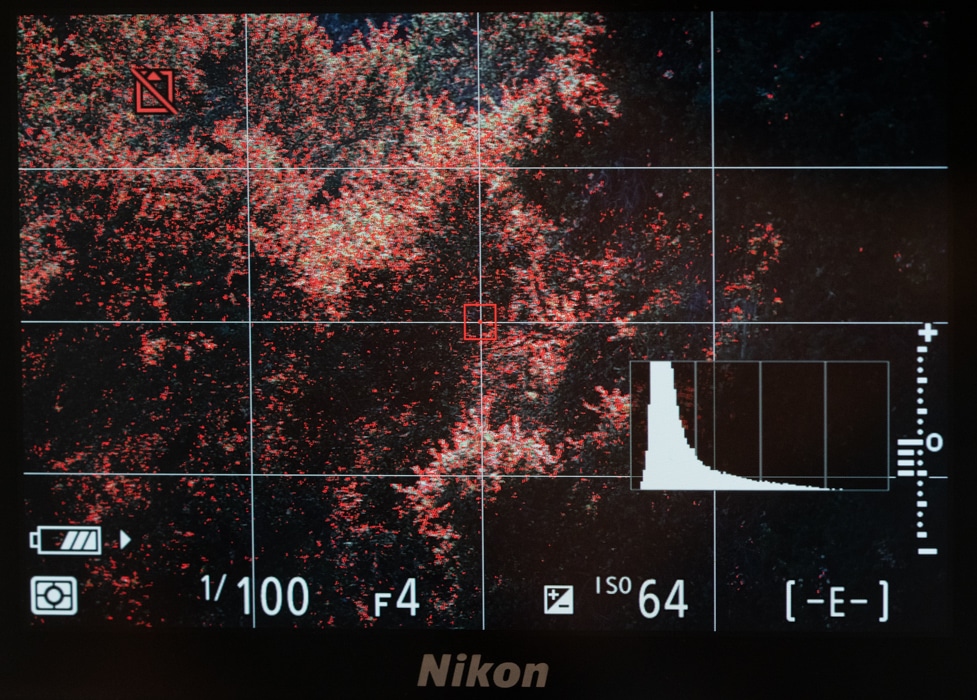
- You want to find the combination of peaking sensitivity setting, magnification, and camera orientation that gives you some peaking indication, but very little. Too much red in the image makes it hard to tell what’s in focus. No red at all is not good, either.
- Zooming in makes peaking less sensitive.
- Wide angle lenses tend to make peaking more sensitive, and long ones do the opposite.
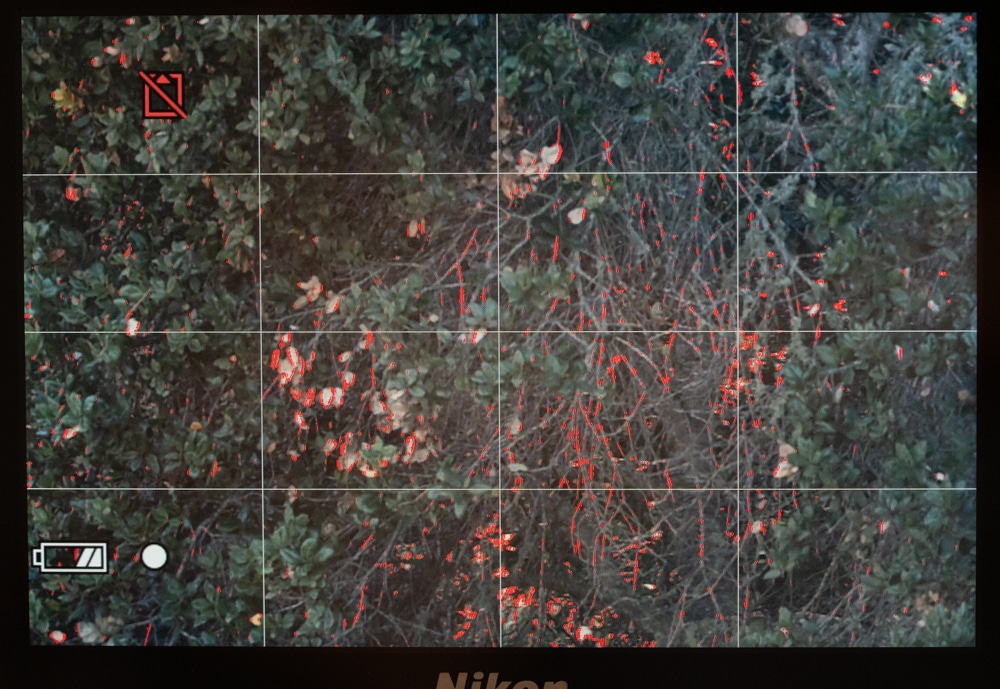
Here we are with a fairly low-contrast subject, peaking sensitivity set to 3, magnified one click:
That’s too much red. not a lot too much, but too much.
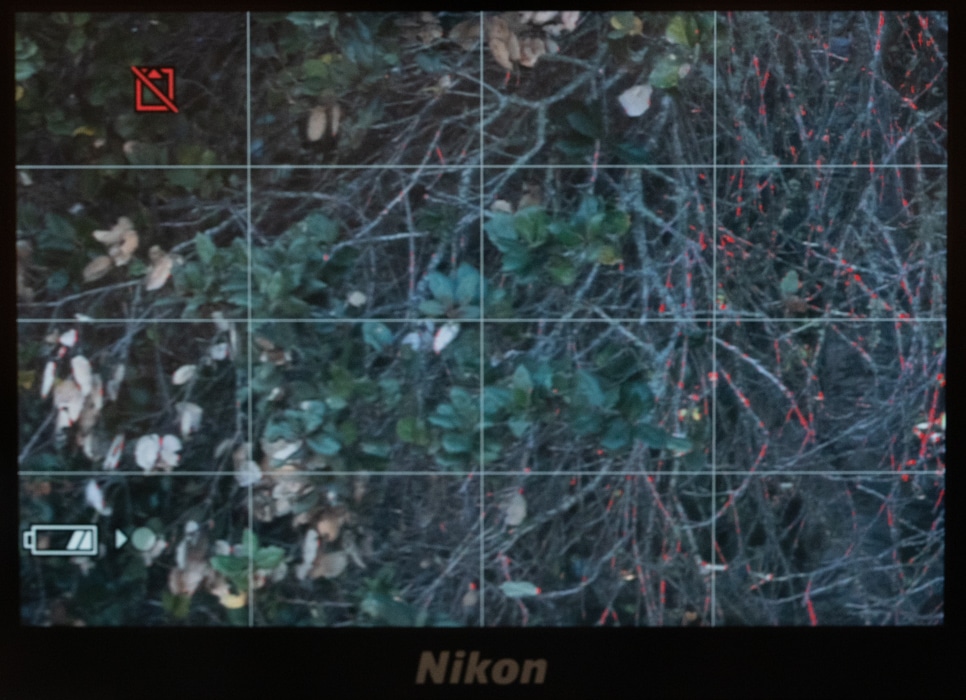
One more click:
That’s perfect. If I just touch the focusing ring when it’s set here, most of the red goes away.
[Addendum]
Horshack writes:
Here are a few more minor tips/observations I would offer:
-
The digital rangefinder in MF mode is based on what’s under the active AF point. As such, be sure to enable the focus point display in MF mode, that way you’ll always know what you’re MF’ing to (a10 Focus Point Options -> Manual focus mode -> ON). If this setting is OFF then the AF point in MF mode is only displayed momentarily when you move the active AF point.
-
Another benefit of having the active AF point always displayed in MF mode is that it’s color coded to match the rangefinder’s focus indication. A green box indicates in-focus, a flashing red/green box means at/near focus, and a red box indicates OOF. That way you don’t always have to take your eyes off the subject area you’re focusing too, rather than looking down to the rangefinder.
-
Unfortunately the active AF point is only displayed at the zoomed-out magnification level. As soon as you start zooming in it disappears. This is important because if you pan around the screen (using the multi-selector control) then you’re also moving the active AF point, and thus what the rangefinder is determining focus indication from, even though the focus point is not displayed. Although the active AF point is not displayed, it’ll always be at the center of the screen in the magnified views since the Z7 keeps the screen centered around the active AF point you’re moving as you pan. I suggest turning on the 3×3 grid (A9 Framing grid display), that way you can use the center cross-hair (intersection of horizontal/vertical grid lines) to know what the rangefinder is using for focus determination in the magnified views.
-
Irrespective of the AF area mode in AF mode (pinpoint/single-point/wide-area), the camera forces the area mode back to single-point in MF mode. It would be nice if this weren’t the case, ie the rangefinder worked over a larger AF area.


Ben says
Is there a way to assign focus peaking on/off to a programmable button, like Fn-2? Would be great to just get it when you need it but not see it otherwise. Also I can’t find a way to zoom out from full magnification in one move – have to click the zoom-out button or the i button twice. Some cameras go to normal magnification with a half-press on the shutter button but that doesn’t seem to work on the Z7.
BG says
Peaking can be assigned to one of the imenu positions. f1 Customize i menus. Choose the preferred position, then choose Focus Peaking.
Jose says
Hi,
Can you place the focus point anywhere on the EVF and it will magnify to that specific location?
Cheers,
jsv
JimK says
Yes. You can’t quite get it all the way to the edges, but that’s not been a problem for me.
Paul says
I have the same question as Ben, with other camera systems, particularly Fuji, one can toggle back and forth between magnification and the entire image rapidly. The rapid toggle back and forth makes the technique use for portraiture.
fissy says
The magnification is kind of cumbersome. Hope there’s a fix through firmware update.
JimK says
If you mean the cancellation of the magnification, I agree with you. IMO, the best way to handle it is with a wheel as on the GFX 50S, but Nikon can’t do that with firmware.
Frank Döring says
The magnification can be cancelled for example by pressing the OK button (assuming it’s programmed to “zoom”; if you need a button to re-center the focusing point, the joystick can do that). Or one can program a function button to “zoom”. I like to use the movie button for that.
JimK says
That works great! Thanks.
Gary Blunk says
I have a Z6 and a Zeiss Milvus 100mm f2. I’m excited to use this lens and squeeze the best performance I can from it. Why did you say too much red in one of your examples? I have focus peaking set to standard level, using red and would like to know if I’m using it properly.
JimK says
Decrease the peaking sensitivity by one step and give it a try. If you can’t see any of the peaking color at all, then back the sensitivity off; like the folks in Kansas City, you’ve gone about as far as you can go. If there’s still some peaking color when the lens is focused properly, that’s an improvement. It’s easy to tell the difference between no peaking and a little bit of peaking. It’s a little harder to tell the difference between a little peaking and a little more peaking. It’s really hard to tell the difference between a lot of peaking and still more peaking.
Gary Blunk says
After some practice, I’m getting some good results and more confidence in my manual focusing. This Zeiss lens is a bit of a revelation. Manual focus makes you pay more attention to the entire process. I really enjoy this lens.
Claudio Nunes says
Hi there,
Thank you for such cool article!
I recently got my hands on a Z7, but when shooting Manual the rangefinder bar at the bottom doesn’t show up, just like on your image with the histogram.
Any clue on how to turn that rangefinder bar ON?
Thanks a bunch,
Claudio