This is one in a series of posts on the Nikon Z7. You should be able to find all the posts about that camera in the Category List on the right sidebar, below the Articles widget. There’s a drop-down menu there that you can use to get to all the posts in this series; just look for “Nikon Z6/7”.
Yesterday, I posted a discussion of the Nikon Z7’s autofocus ability with a fast medium telephoto in a situation where the lighting was uncontrolled and people were the subjects. I’ve received some questions about the exposure strategy that I employed. I’m going to take one image from yesterday’s post and walk you through not only what I did at capture time and in post-production, but why I did it. I’m not saying that this is the best way to expose in the example situation. There are other techniques, and some might prefer one of them. But I think there is some merit to the way that I did it, and it produced an image that satisfies me.
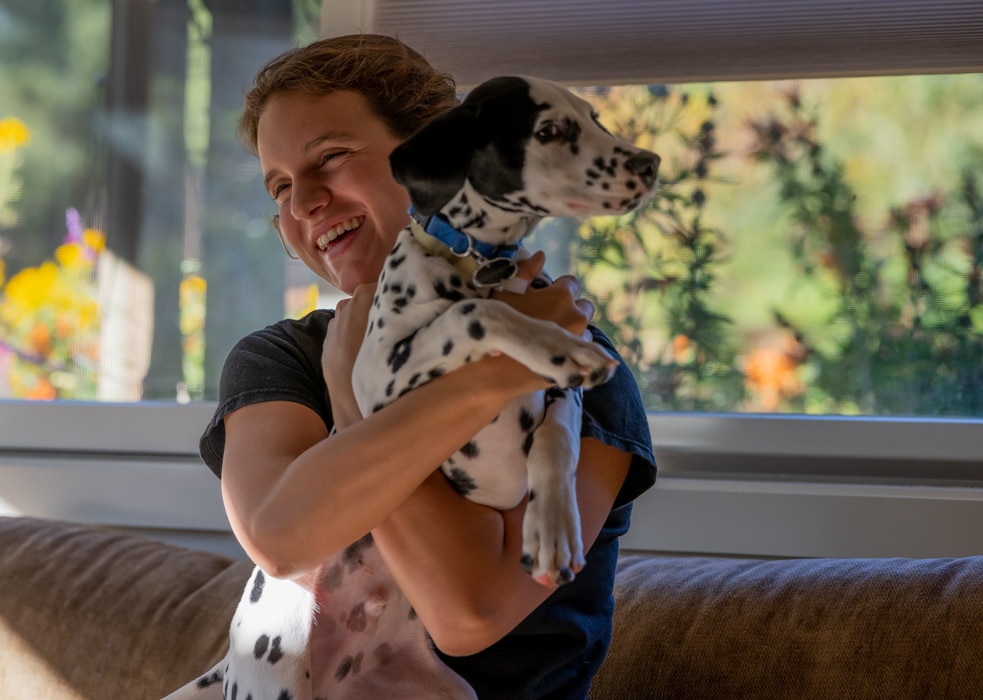
Here’s the image with Lightroom default development plus changing the profile to Adobe Color:
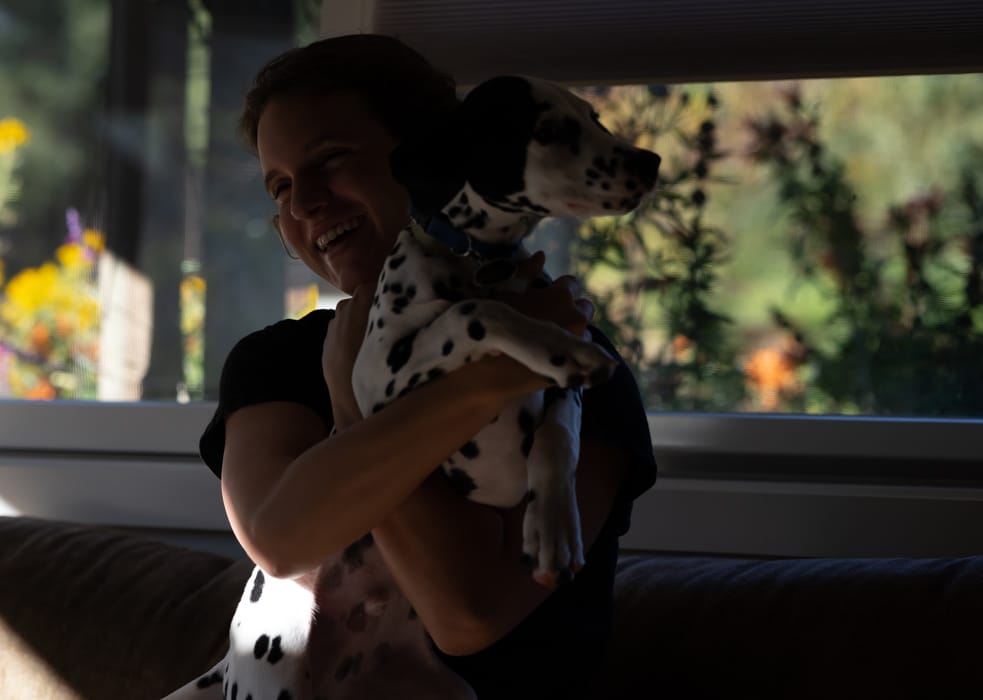
My exposure was 1/500 second at f/4 and ISO 400. I tried using ISO 64, but the camera wouldn’t focus reliably. The exposure was made using A exposure mode, matrix metering, and -2 EV compensation, picked by looking at the live histogram and determined by a desire to avoid clipping in the sunlit portion of the dog’s fur. Why didn’t I use M mode? I certainly could have, but since I was in A mode already, it was quicker and easier to just dial in the right amount of EC to produce the live histogram I wanted.
Looking at the raw histogram, we can see that there is still a little clipping.
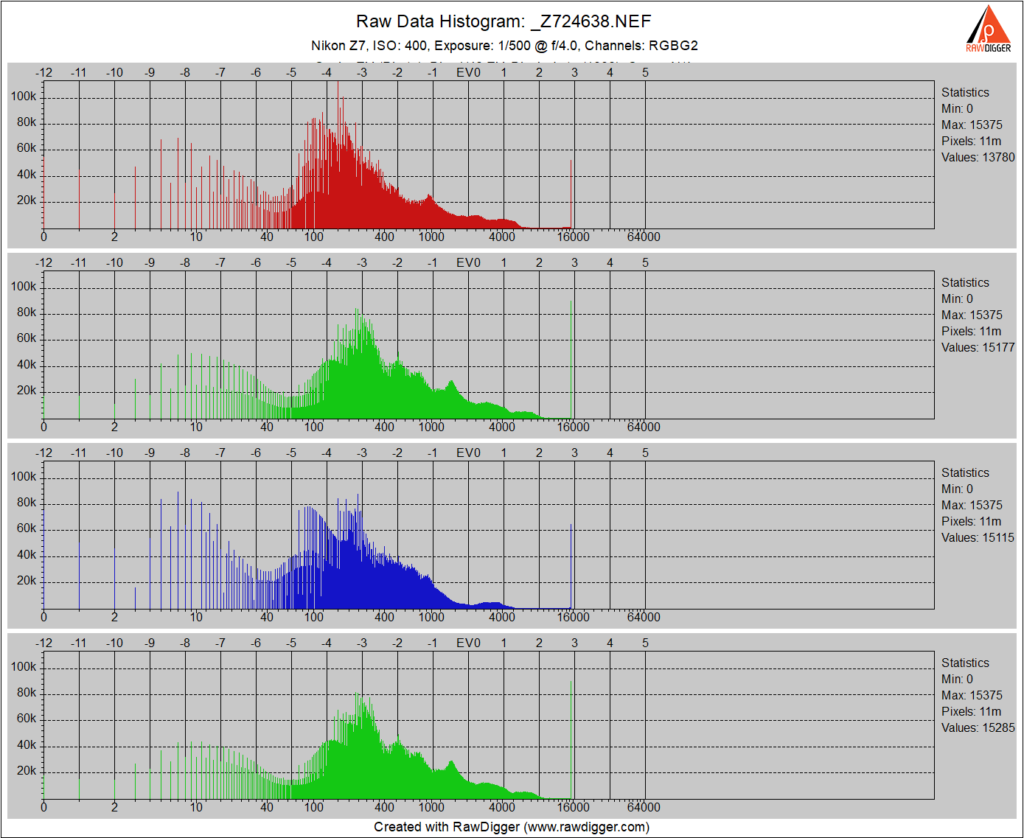
The clipping occurs in all channels, which means that Lightroom’s highlight recovery software is virtually powerless. However, it’s not too bad, since fewer than 100K pixels per color plane are affected, and there’s about a one-stop gap until the bulk of the histogram begins. While I might have dropped exposure by a stop, that would have made the post-production moves more heroic than they already have to be (see below). I consider this a good exposure, given the scene. You could argue that I should have trotted out a reflector or used a fill light. I won’t argue that point, but then I wouldn’t have had a candid photo anymore.
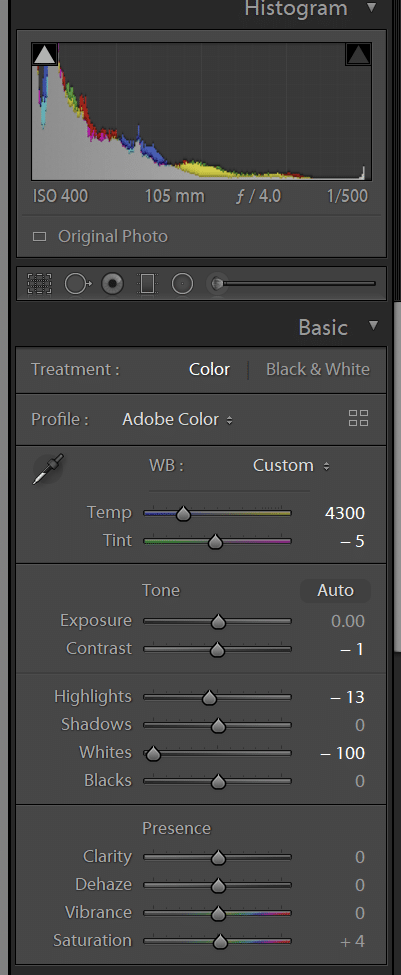
In Lightroom, dropping the whites and highlights produces about as good high tones as we’re going to get without local manipulation.

The next step is bringing up the low end of the tone curve. A lot.
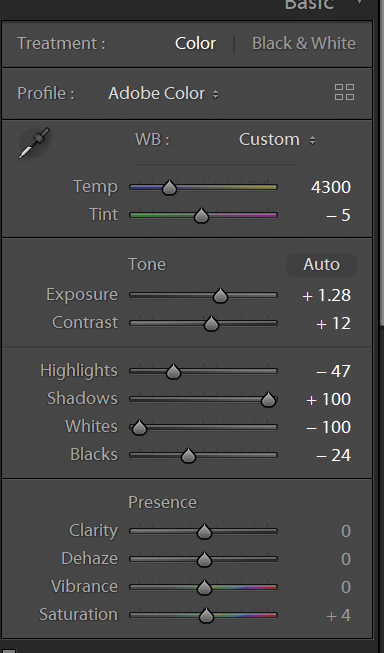
That gets us to here:
What if I’d have increased the ISO setting and let the dog fur blow out? Since the Z7 is close to ISOless above ISO 400, that wouldn’t have provided any less shadow noise than what I did.
What if I’d have left the ISO where it was and lengthened the exposure. That would have helped the shadow noise, but we’d have the blown-out fur.
What I really wanted to do was set the ISO to 64, open up the lens, and end up with a histogram about like the one above, but with less shadow noise. But the camera wouldn’t focus in that situation.
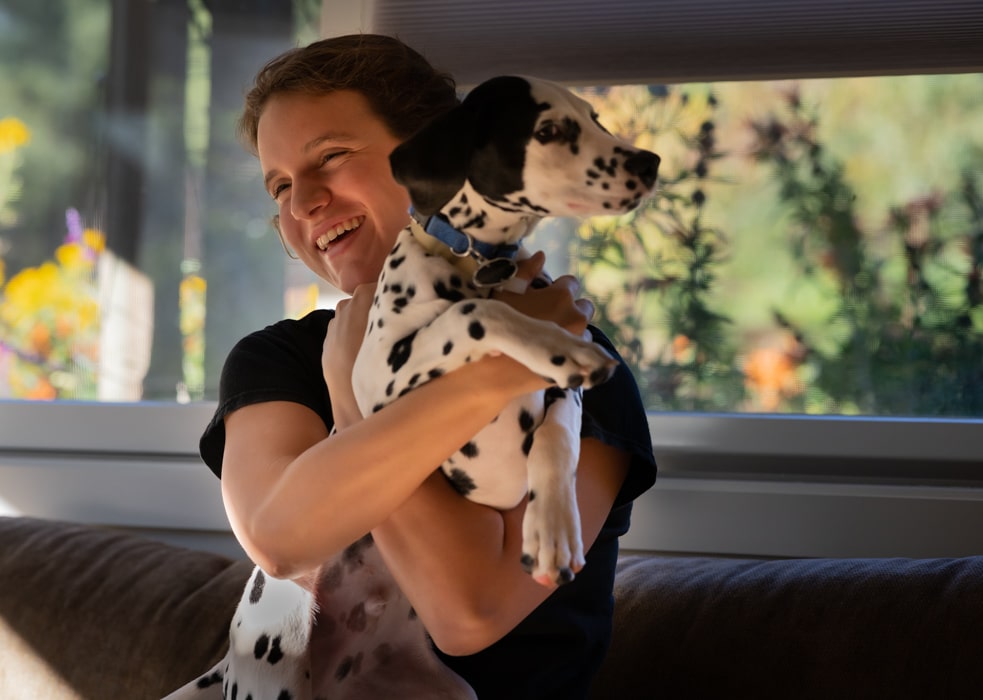
If we drop the requirement to do all corrections globally, but still stick with doing them all in Lr, here’s where it comes out for me:
N/A says
> but we’d have the blown-out fur.
why save that part of the dog – crop it out… exposure for the face and adjust exposure off that metering… Sony, as we all know, with face detection meters off the face detected, Nikon can do the same – no ?
JimK says
I don’t consider that a good exposure strategy for either camera. In the negative film days it was expose for the shadows, develop for the highlights. Now it’s expose for the highlights, develop for the shadows. There are lots of ways to avoid the high DR I dealt with in this capture. The point of the post was what to do if you need to deal with that much DR.
N/A says
if you know where firmware puts a face when you shoot something like a portrait and person is not posing for you long enough then adjusting exposure correction from that basis is a good approach… granted you can try to find brightest spot and spot meter it and adjust exposure from that metering but it is slower (when person is not waiting)… or alternatively use UniWB + flat picture OOC JPG parameters and blinkies/zebra in frame, rather than looking at histogram
> The point of the post was what to do if you need to deal with that much DR.
I surely rest my case
Jack Hogan says
” I tried using ISO 64, but the camera wouldn’t focus reliably.”
Huh, so it obviously does not do even the simplest of processing on PDAF pixels while focusing (like auto brightening by full stops). Interesting. And tsk tsk, because it forced 2.5 stops of additional unwanted clipping than necessary. I wonder why not?
Jack
JimK says
Well, there wasn’t any extra clipping since I stopped down to compensate, but I take your meaning.
Benjamin Davis says
What does ‘ISO-less above 400″ mean?
JimK says
You might just as well push in post as turn up the ISO knob on the camera.
Matt says
Jim,
Any thoughts on the Z6 vs Z7 sensor and exposure strategy? To me, with the Z7, when exposure adjustments like this are done the Z7 files feel “thinner” for lack of a better work, and contrast/saturation adjustments don’t do quite enough. Z6 feels much easier to recover without the same issues.
Am I imagining that?
JimK says
Maybe some of it. The effect is there at high ISOs, but it’s not strong.
http://www.photonstophotos.net/Charts/PDR.htm#Nikon%20Z%206,Nikon%20Z%207
Note that the conversion gain change takes place at different ISOs in the two cameras.
Matt says
Thanks. I’d looked at that graph as well as Shadow Improvement. I’m wondering if the differences in gain effected my perception, I’m probably frequently around that 400 ISO level…