This is one in a series of posts on the Nikon Z7. You should be able to find all the posts about that camera in the Category List on the right sidebar, below the Articles widget. There’s a drop-down menu there that you can use to get to all the posts in this series; just look for “Nikon Z6/7”.
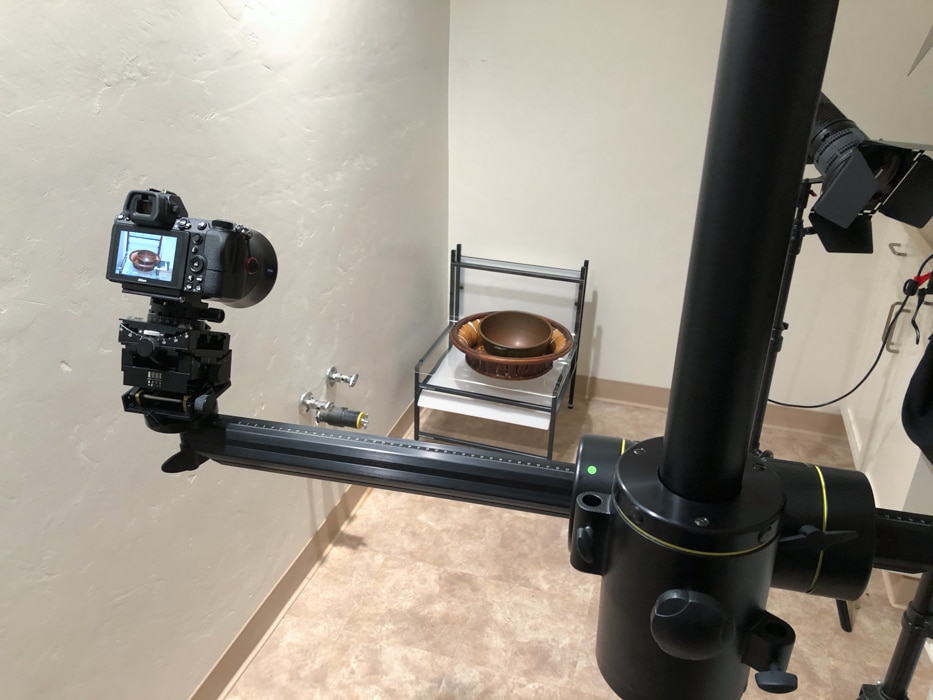
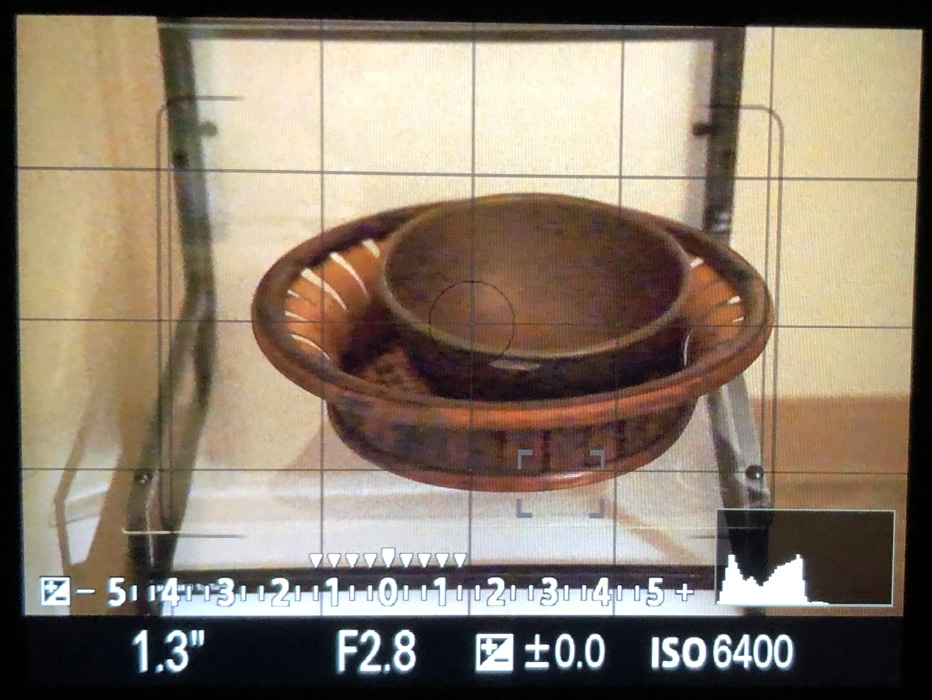
There have been reports that the Z7 finder image is dim in low light. I did a test. I went into my former darkroom, now a small-scale studio, and set the camera on the stand with an Otus 85/1.4 mounted to it with an FTN adapter. Here’s the setup, with the lights on:
I set the camera in A exposure mode and the metering to matrix. I set the aperture to f/2.8.
By the way, and this is important both in the context of this test and in that of focus shift with manual focusing, the camera previews the image with the aperture set to the taking aperture if that aperture is f/5.6 or narrower. If the taking aperture is narrower, the camera sets the aperture to f/5.6. This is quite different than what happens with an SLR, where the image is previewed wide open. This is a boon for those folks focusing with manual lenses with focus shift but may exacerbate the effect I’m going to tell you about in this post.
I set the setting effect of the finder to on so that the image would represent the brightness of the JPEG preview image of actual exposure. Or rather, that it should represent the brightness of that exposure. As you will see, there are some problems here. I turned off the light and partially closed the door to bring the light level down. Then I looked at the back of the camera.
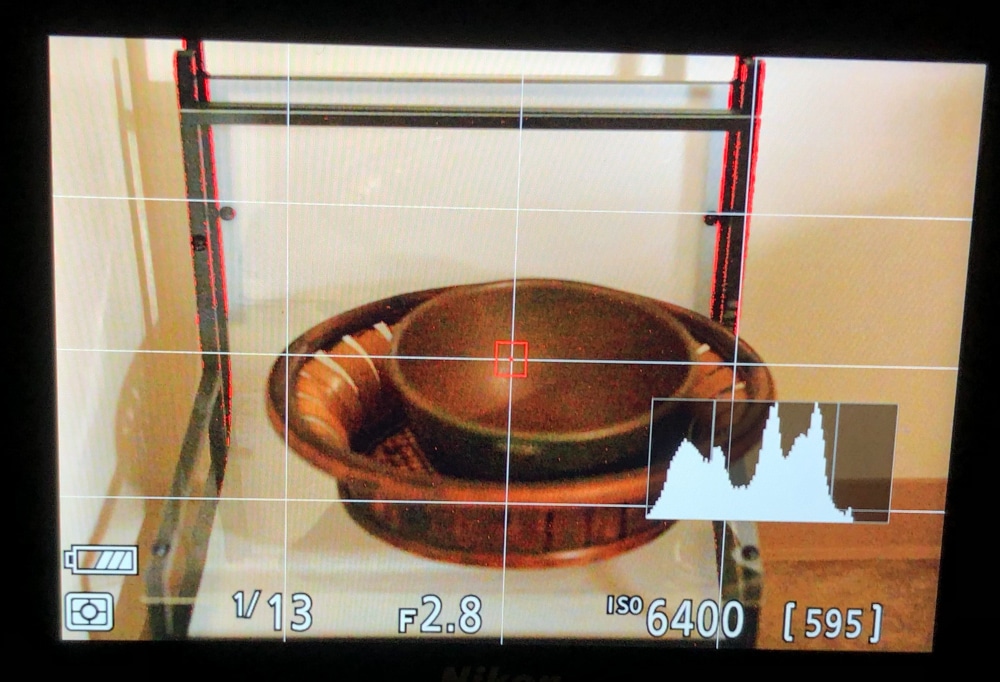
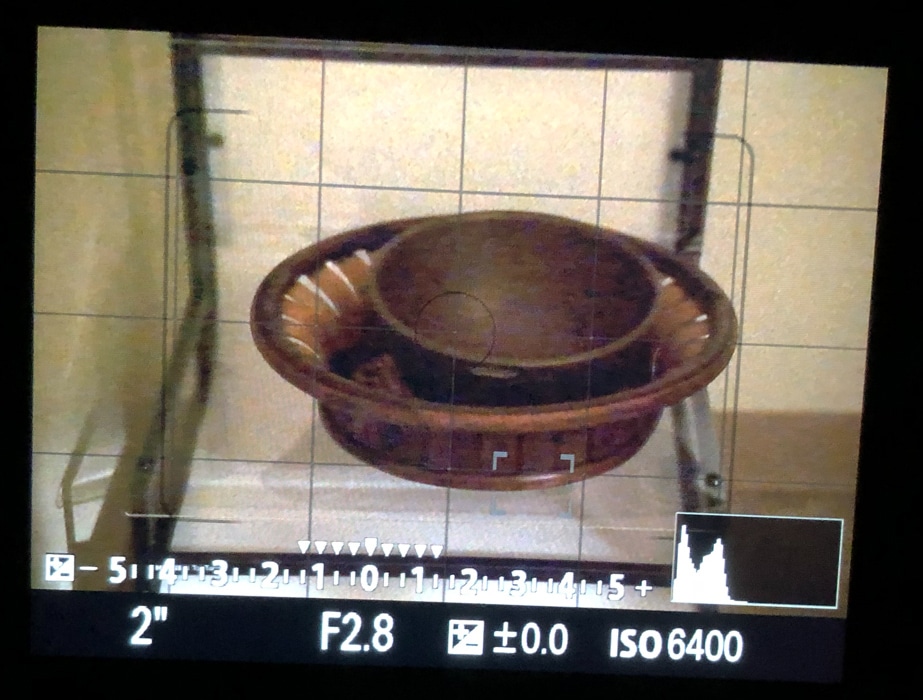
I closed the door a bit more, reducing the light level, and looked again.
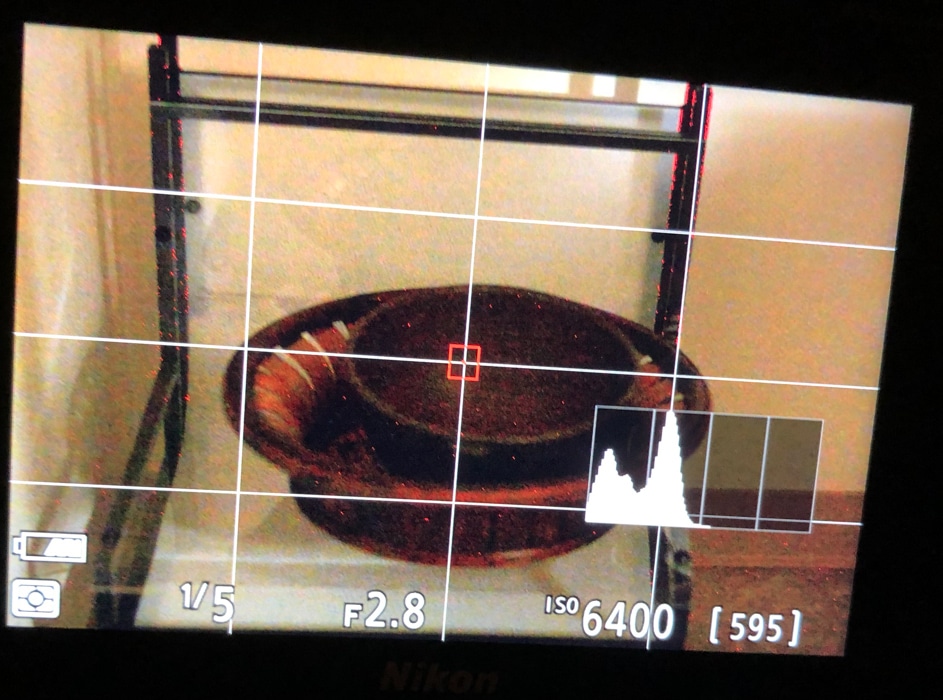
Housten, we have a problem. The finder is dimmer and the histogram has shifted to the left, even though the anticipated exposure is more than a stop longer. The finder and the histogram are no longer representing what the JPEG preview of the exposure will look like. By the way, at light levels higher than the ones I’m showing here, everything is fine. As you increase the light level, the camera makes the exposure shorter, and the finder image and the histogram don’t change much.
Dimming the light still further causes more of same:

Well, that is unpleasant. I pulled out an a7RIII, attached a Batis 85, set it to f/2.8, and checked to make sure that it stopped down to the taking aperture for the preview stage. It did.
I set the camera in A exposure mode and the metering to matrix, and turned setting effect on. The camera showed similar behavior, but at dimmer light levels.
I guess this has been with us for a long time. I don’t know why I never came across it before. I guess I haven’t done enough low light work up to now.
I hasten to point out that, even with the Nikon, these light levels are really low, and shooting wider helps. Here are Z7 finder shots with the same light level at f/2.8 and f/1.4:
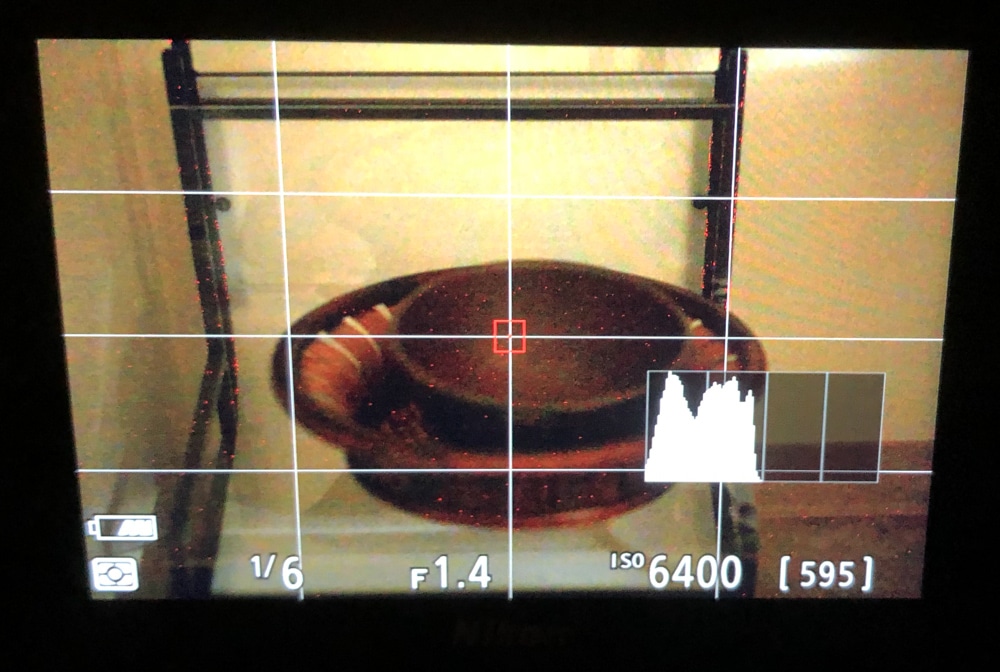
The reason why the meter isn’t reading 1/10 for the f/1.4 shot is that we’re using matrix metering and the Otus has a lot of corner falloff wide open.
Canon’s DSLRs, when they hit the limit of their gain in live view, will flash an Exp. Sim warning at you to indicate that it’s no longeor accurate.
From my perspective — i.e., one who photographs almost exclusively outdoors, late at night, and using long exposures at base ISO — I consider the effect you’ve described above to be a feature, even though many other photographers (such as yourself?) will likely find it to be problematic.
That’s because I can use all the signal amplification aka screen brightness I can get to compose and focus my photos. Even though I photograph in manual exposure mode, for composing and focusing, I switch my camera (a Sony A7R, because I find it performs better overall than the A7RII and III for this type of photography) to A mode, increase the ISO to 25,600, and then add the maximum +3 stops of exposure compensation in an effort to make the screen display as bright as I possibly can.
(As an aside, this was also the reason why I embraced the Sigma Art prime lenses for a time, because even though I always photographed with them stopped down to at least f8, focusing and composing with them wide-open increased the brightness of the image displayed on the LCD by approx. two stops compared to an f2.8 lens, which was very helpful. These days, I’m also using a 12.5″ external HDMI monitor, which I find helps quite a bit, too.)
Mind you, not all cameras behave this way. My Fuji X-Pro 1, for example, is pretty much unusable for this type of photography because no matter what I do, the image it displays on the LCD / EVF when I use it with an adapted lens (but not, strangely, a native Fuji lens) is effectively black when it’s pointed at a really dark scene. My Samsung NX1, on the other hand, behaves much like my A7R does and, apparently, so does the Z7.
Which, for me, is good news, not bad!
To determine the desired exposure, instead of looking at the image displayed on the LCD, I rely on a combination of experience — I’ve been doing this for nearly a decade and practice does make perfect! — evaluating the histogram, and evaluating a test photo or two before I take my final photo.
Speaking of test photos, I always take them at ISO 6400 because it’s easy to scale the exposure length to ISO 100 in my head once I convert seconds (or fractions thereof) into minutes. For instance, a one-second exposure at ISO 6400 converts to a one-minute exposure at ISO 100. And a quarter-second exposure at ISO 6400 converts to a quarter-minute (15-second) exposure at ISO 100 … easy-peasy, eh? Not only does this method speed up the process considerably, but it also helps prevent the sensor from heating up and getting really noisy as well.
Anyway, I’ll be curious to see where this line of exploration takes you, as I’m pondering a Z7 to replace my A7R and this effect is exactly the sort of information I need to know but which very few reviews ever mention.
JG
This was very useful – thank you!
Jim,
Do you think the light levels have reached the point where the designer felt that s/he had to make a trade-off between finder refresh rate and preview exposure? When you actually make the image, what do you get?
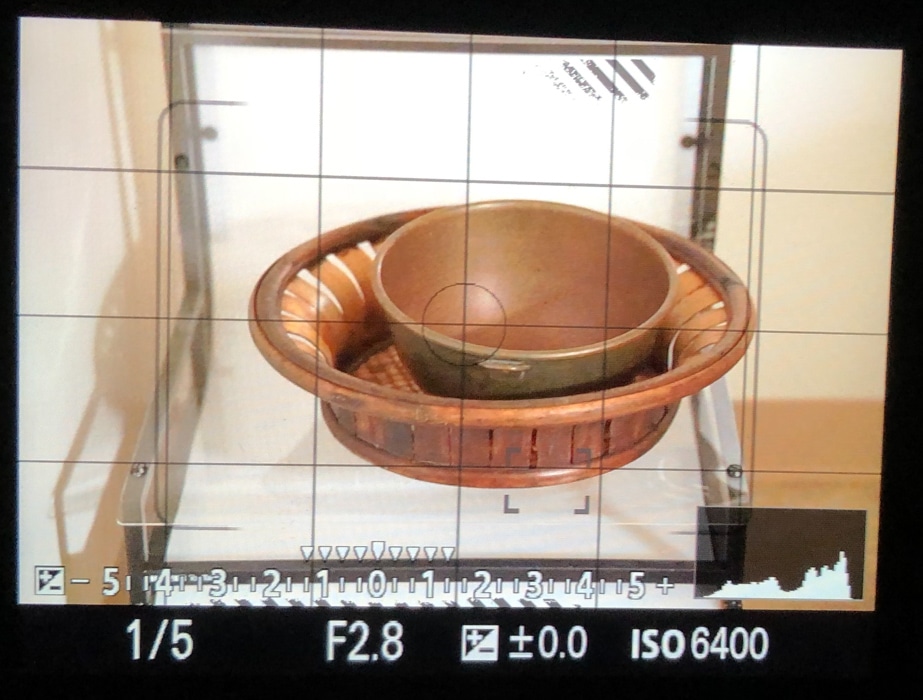
The JPEG preview of the image itself is correctly exposed, and not what the finder image predicts.
I never understood why on my A7Riii in A mode you are unable to preview more than 2 (or is it 3) stops of exposure adjustment, you have to be in manual for some reason to ‘see’ the actual exposure beyond that range.