• site home
  • blog home
  • galleries
  • contact
  • underwater
  • the bleeding edge

the last word

Photography meets digital computer technology. Photography wins -- most of the time.

You are here: Home / Nikon Z6/7 / Visual appearance of Z6 and Z7 noise near the PDR limit at ISO 100

Visual appearance of Z6 and Z7 noise near the PDR limit at ISO 100

April 9, 2019 JimK Leave a Comment

This is one in a series of posts on the Nikon Z6 and Z7. You should be able to find all the posts about that camera in the Category List on the right sidebar, below the Articles widget. There’s a drop-down menu there that you can use to get to all the posts in this series; just look for “Nikon Z6/7”.

There has recently been some controversy about the relative noise behavior of the Nikon Z6 and Z7 in deep shadows. I am in the process of addressing those differences in a series of posts which will include both quantitative results and visual ones. The series starts here.

In the previous post, I compared two images captured with the Nikon z6 and Z7 at ISO 8000. Now I’m going to do the same at ISO 100.

For reference, here is the normalized shadow noise graph for the two cameras at ISO 100 (If this makes no sense to y9ou, please go back to some of the previous posts):

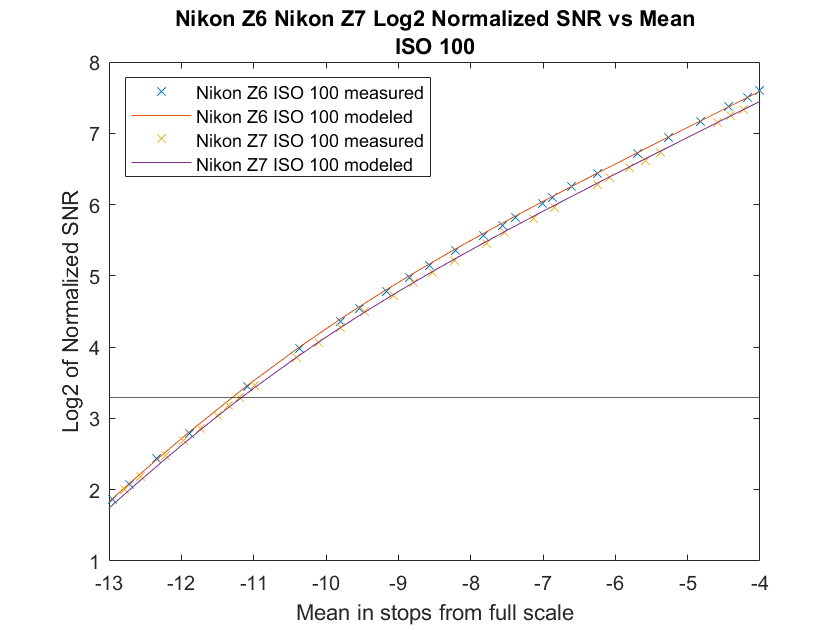
This says that, at the Claff SNR, the two cameras are almost in a dead heat, with the Z6 ahead by a nose.

Here are a pair of ISO 100 images made at f/11 and 1/2000 second. This is the same exposure as for the ISO 8000 images in the previous post. I developed the images in Lightroom, with Adobe Standard profile, sharpening set to the default except the amount was dialed back to 20. I turned off the noise reduction, white balanced each ISO/exposure pair to the eyedropper balance gotten by clicking on the number 20 patch on the Z6 image.

I had to do some extreme exposure moves to make these look other than black. I gave each a +5 using the Lightroom exposure tool, then another +4 using the Photoshop exposure tool.

Z6, ISO 100, Lr Exposure +5, Ps Exposure +4, Patch 19 -4 stops from FS, Patch 21 -11.5 stops from FS, Claff PDR = 11.5 stops


Z7 ISO 100, Lr Exposure +5, Ps Exposure +4, Patch 19 -4 stops from FS, Patch 21 -11.5 stops from FS, Claff PDR = 11.5 stops

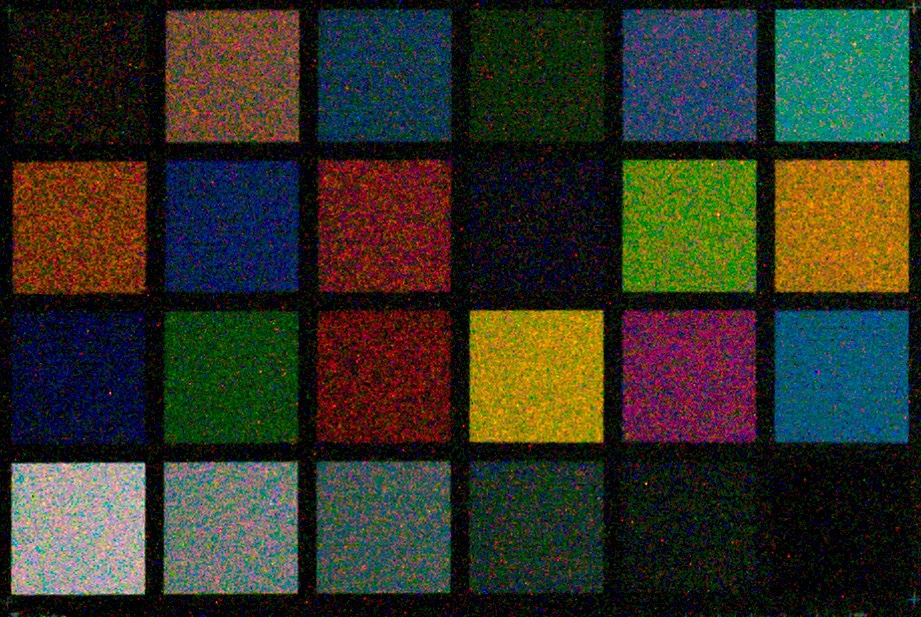
Even though the raw values are about the same, the Z7 image is substantially darker. I put this down to differences in the Lightroom color profiles. This did not occur at ISO 8000, so one or both of the profiles are likely nonlinear.

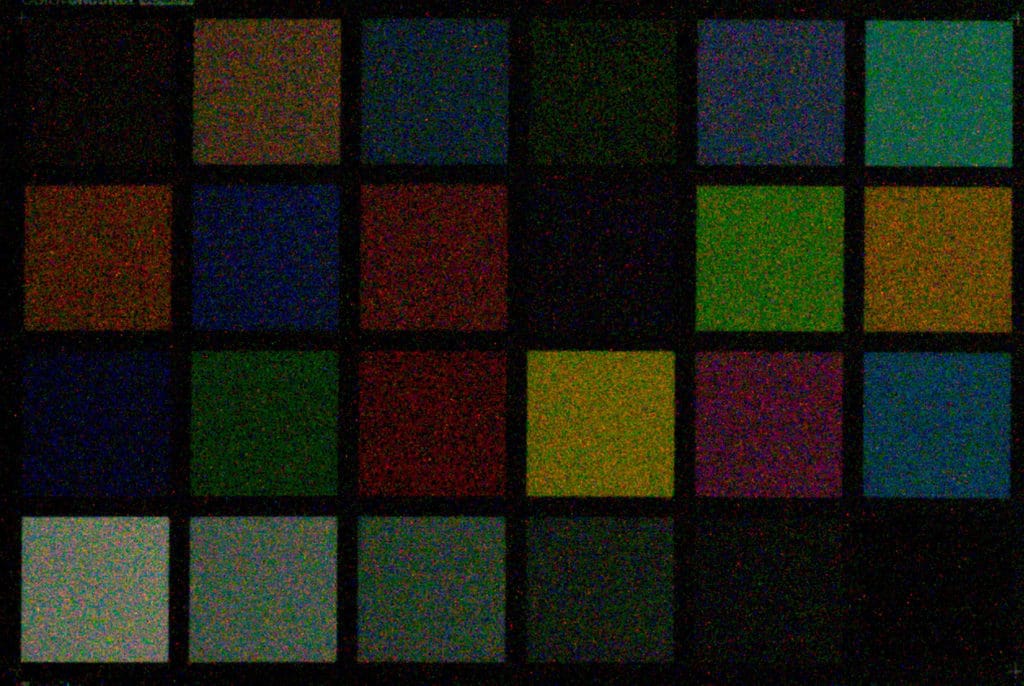
If I give the Z7 an additional +1.5 EV exposure boost in Lr, the images densities of the two cameras look closer:

Z7 ISO 100, Lr Exposure +5, Ps Exposure +5.5, Patch 19 -4 stops from FS, Patch 21 -11.5 stops from FS, Claff PDR = 11.5 stops

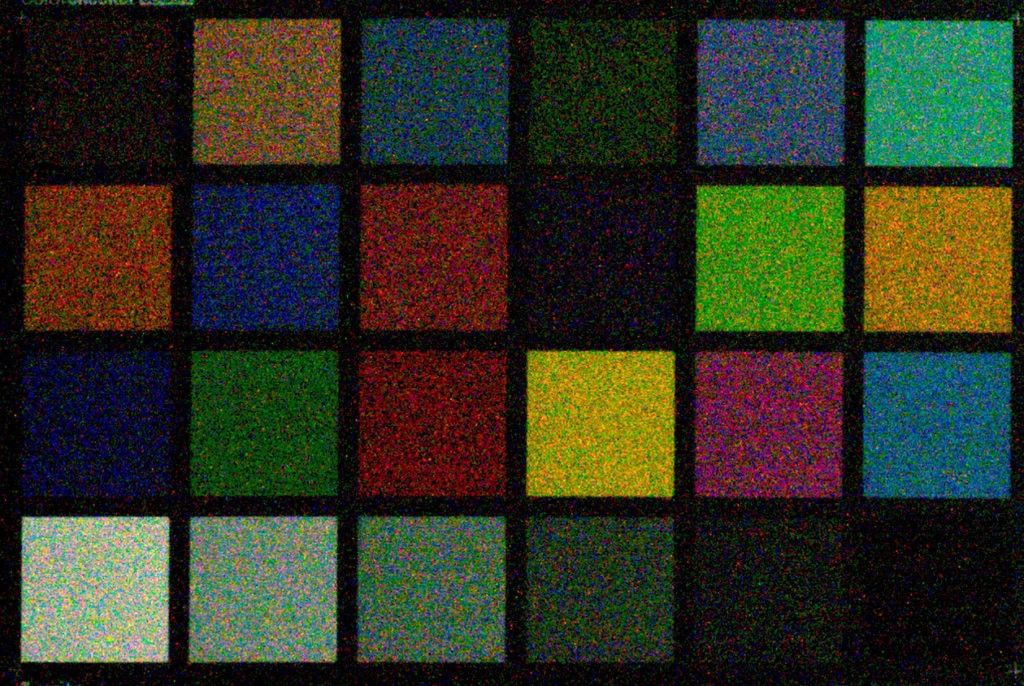
You are welcome to look at the above images at 1:1, but, since the cameras have different resolution, they are different in size. In order to map those images to the viewing conditions implied by the Claff PDR definition, I sized the entire captures from both cameras to 1600 pixels high, cropped to the chart. That left me with some small images (380×255 pixels), so I exported them from Lightroom resized to 1000×672, or a bit less than 300% magnification.

Here they are (this time I boosted the exposure as indicated witha second pass through Lioghtroom and the numbers are the total of the two boosts):

Z6 ISO 100, Lr Exposure +8.5, Patch 19 -4 stops from FS, Patch 21 -11.5 stops from FS, Claff PDR = 11.5 stops, 1600 px high


Z7 ISO 100, Lr Exposure +9.8, Patch 19 -4 stops from FS, Patch 21 -11.5 stops from FS, Claff PDR = 11.5 stops, 1600 px high

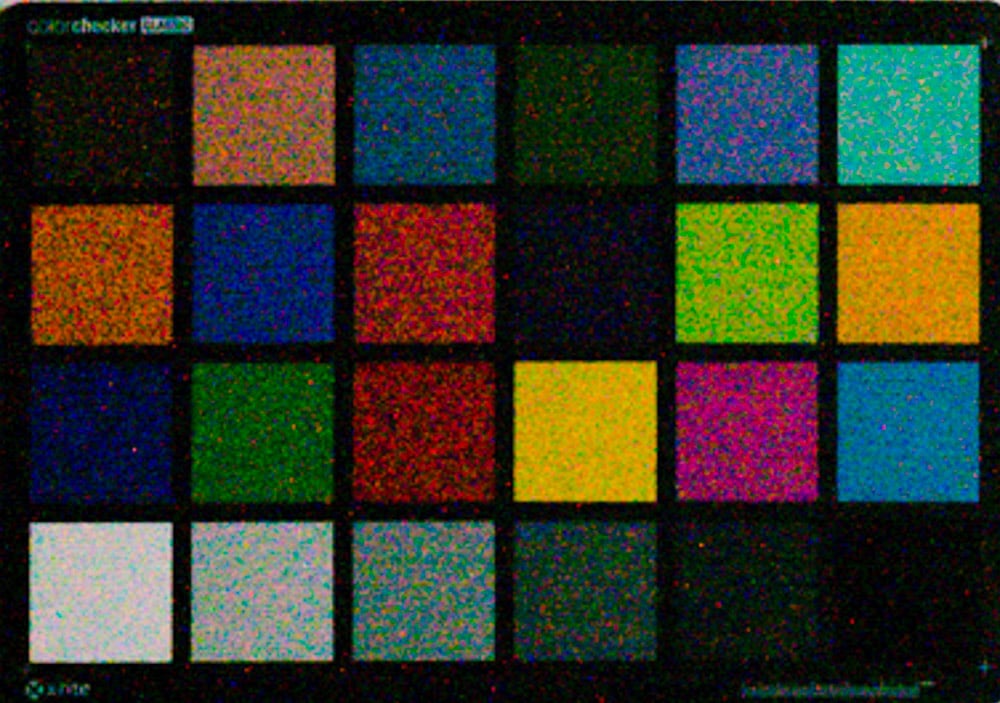
I find very little to choose between the two images other than the color balance. Both are pretty awful.

Next up: some conclusions from this testing.

Nikon Z6/7

← Visual appearance of Z6 and Z7 noise near the PDR limit at ISO 8000 Nikon Z6 and Z7 shadow noise — conclusions →

Leave a Reply Cancel reply

Your email address will not be published. Required fields are marked *

May 2025
S M T W T F S
 123
45678910
11121314151617
18192021222324
25262728293031
« Apr    

Articles

  • About
    • Patents and papers about color
    • Who am I?
  • How to…
    • Backing up photographic images
    • How to change email providers
    • How to shoot slanted edge images for me
  • Lens screening testing
    • Equipment and Software
    • Examples
      • Bad and OK 200-600 at 600
      • Excellent 180-400 zoom
      • Fair 14-30mm zoom
      • Good 100-200 mm MF zoom
      • Good 100-400 zoom
      • Good 100mm lens on P1 P45+
      • Good 120mm MF lens
      • Good 18mm FF lens
      • Good 24-105 mm FF lens
      • Good 24-70 FF zoom
      • Good 35 mm FF lens
      • Good 35-70 MF lens
      • Good 60 mm lens on IQ3-100
      • Good 63 mm MF lens
      • Good 65 mm FF lens
      • Good 85 mm FF lens
      • Good and bad 25mm FF lenses
      • Good zoom at 24 mm
      • Marginal 18mm lens
      • Marginal 35mm FF lens
      • Mildly problematic 55 mm FF lens
      • OK 16-35mm zoom
      • OK 60mm lens on P1 P45+
      • OK Sony 600mm f/4
      • Pretty good 16-35 FF zoom
      • Pretty good 90mm FF lens
      • Problematic 400 mm FF lens
      • Tilted 20 mm f/1.8 FF lens
      • Tilted 30 mm MF lens
      • Tilted 50 mm FF lens
      • Two 15mm FF lenses
    • Found a problem – now what?
    • Goals for this test
    • Minimum target distances
      • MFT
      • APS-C
      • Full frame
      • Small medium format
    • Printable Siemens Star targets
    • Target size on sensor
      • MFT
      • APS-C
      • Full frame
      • Small medium format
    • Test instructions — postproduction
    • Test instructions — reading the images
    • Test instructions – capture
    • Theory of the test
    • What’s wrong with conventional lens screening?
  • Previsualization heresy
  • Privacy Policy
  • Recommended photographic web sites
  • Using in-camera histograms for ETTR
    • Acknowledgments
    • Why ETTR?
    • Normal in-camera histograms
    • Image processing for in-camera histograms
    • Making the in-camera histogram closely represent the raw histogram
    • Shortcuts to UniWB
    • Preparing for monitor-based UniWB
    • A one-step UniWB procedure
    • The math behind the one-step method
    • Iteration using Newton’s Method

Category List

Recent Comments

  • JimK on Calculating reach for wildlife photography
  • Geofrey on Calculating reach for wildlife photography
  • JimK on Calculating reach for wildlife photography
  • Geofrey on Calculating reach for wildlife photography
  • Javier Sanchez on The 16-Bit Fallacy: Why More Isn’t Always Better in Medium Format Cameras
  • Mike MacDonald on Your photograph looks like a painting?
  • Mike MacDonald on Your photograph looks like a painting?
  • bob lozano on The 16-Bit Fallacy: Why More Isn’t Always Better in Medium Format Cameras
  • JimK on Goldilocks and the three flashes
  • DC Wedding Photographer on Goldilocks and the three flashes

Archives

Copyright © 2025 · Daily Dish Pro On Genesis Framework · WordPress · Log in

Unless otherwise noted, all images copyright Jim Kasson.