• site home
  • blog home
  • galleries
  • contact
  • underwater
  • the bleeding edge

the last word

Photography meets digital computer technology. Photography wins -- most of the time.

You are here: Home / Printers / Epson P800 — graphics at 720 ppi

Epson P800 — graphics at 720 ppi

September 12, 2019 JimK 6 Comments

This is a continuation of testing that I’ve been doing on the Epson P800 printer. I’ve created a category called “Printers”, and put this post in that category. I will go back and find all the previous posts in this series and put them in the same category. If you go to the Category List (on the right in the desktop formatting), find “Printers” and click on it, you’ll see all the posts in the series.

A reader asked if the 720 ppi mode of the P800 could  support a staircase with 1-pixel rises every 4 pixels at 720 ppi.

I created one and printed it out at varying levels for the dark part of the staircase, then scanned it with the Epson V850 Pro at 4800 ppi. Here are some crops. The ink blobs are roughly between 1/720 and 1/480 of an inch across.


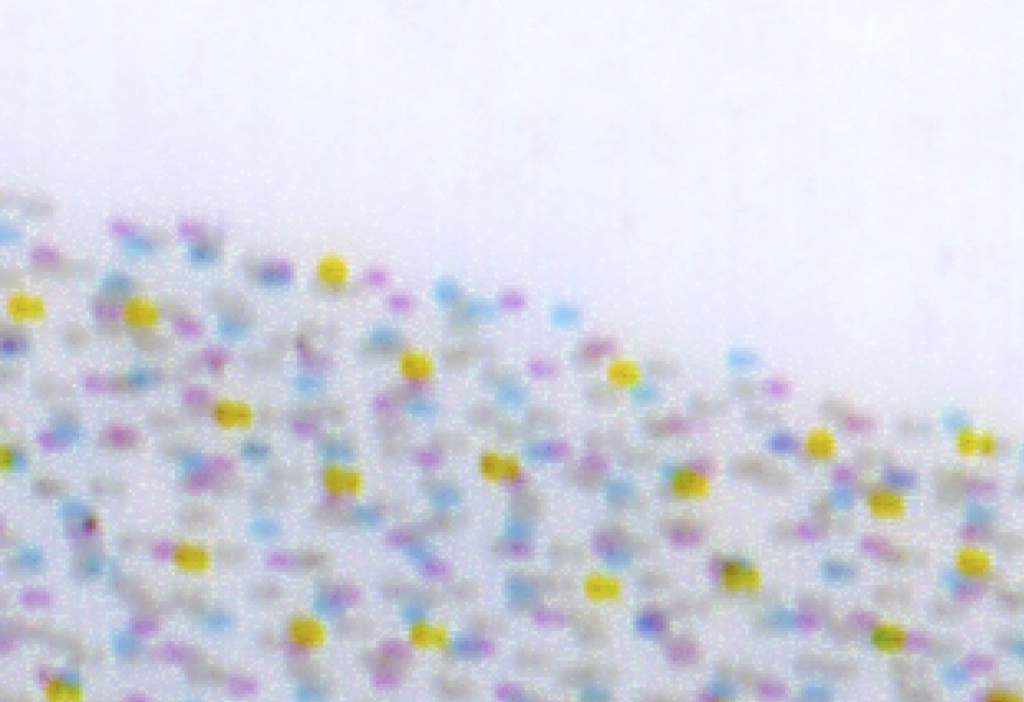
Can’t see it there. A little more ink:

Nope. Still more ink:

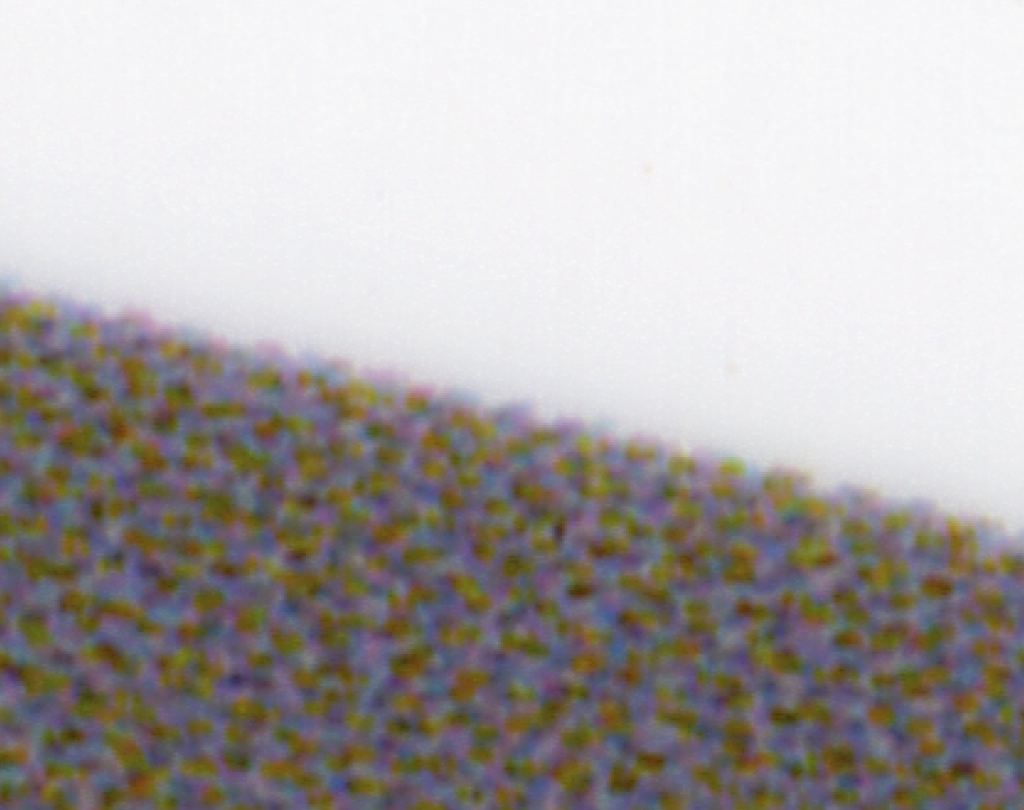
Nope. Let’s make that sucker black:

Finally! This is not an impressive performance to me. The fact that we can see the steps (sorta, kinda) in the darkest image indicates to me that the main culprit is the halftoning engine. This means that we might get better results with a RIP than with the Epson driver.

Printers

← Epson P800 drop size Epson P800 — high speed or not? →

Comments

  1. Anders Lundeby says

    September 12, 2019 at 11:59 pm

    Hi Jim

    Thanks again! These printer tests illustrate very well what is going on, and why I feel that 720 ppi printing is a little bit different from 360 ppi printing. There is hardly any more true resolution to be had, but at 720 ppi I feel that there is no trace of pixels left in the print. It is like the detail reproduction I see is just from the lens and from the ink dots. Maybe a different raster image processor could reproduce more true resolution, but anyway I like what I see at with the Epson driver. At 360 ppi printing there is a faint trace of the pixels, especially with sharp lines in the image. The difference is very small though and hardly visible without a loupe. For large prints I find 360 ppi printing to be very satisfactory.

    Best regards.
    Anders Lundeby

    Reply
  2. barry says

    September 13, 2019 at 2:33 pm

    Just out of curiosity why wouldn’t Epson themself’s get more out of the print with a better solution other than leaving us to buying a RIP.

    Consequentially as of late I have run into several situations requiring me to have a RIP to print longer images. I was looking at a few and seems if I were in the business (other than hobby and printing images for friends) I would get a RIP just for the DPI vs Length issues alone.

    Reply
    • JimK says

      September 15, 2019 at 7:31 am

      Just out of curiosity why wouldn’t Epson themself’s get more out of the print with a better solution other than leaving us to buying a RIP?

      You’d have to ask them that. I have no visibility to their internal processes. Could be computational cost. I do note that they have sold their printers bundled with RIPs. It seems that the RIP marketplace is not as robust as it once was.

      Reply
  3. Tony Arnerich says

    September 15, 2019 at 7:23 am

    I’m looking for a bit more context here in terms of the visibility of details at this level for “casual” or “critical” viewing situations. Do you see the stair steps of the black version by naked eye? If so, what conditions does it require in lighting and viewing distance?

    Here is some context of my own: When making my best efforts at producing high resolution prints from Lightroom I’ve often felt like blaming the printer (a P800 here too) for leaving some fine detail on the table. Then when I print the same image file via Qimage it was as if a blurring filter was switched off. There’s something to this that’s worth understanding at the software layer.

    Reply
    • JimK says

      September 15, 2019 at 7:27 am

      Do you see the stair steps of the black version by naked eye?

      No.

      Reply
    • JimK says

      September 15, 2019 at 7:29 am

      Here is some context of my own: When making my best efforts at producing high resolution prints from Lightroom I’ve often felt like blaming the printer (a P800 here too) for leaving some fine detail on the table. Then when I print the same image file via Qimage it was as if a blurring filter was switched off. There’s something to this that’s worth understanding at the software layer.

      In order to take resampling out of the picture for these synthetic-target tests, I generated the targets at the desired resolution, in this case 720 ppi.

      Reply

Leave a Reply Cancel reply

Your email address will not be published. Required fields are marked *

May 2025
S M T W T F S
 123
45678910
11121314151617
18192021222324
25262728293031
« Apr    

Articles

  • About
    • Patents and papers about color
    • Who am I?
  • How to…
    • Backing up photographic images
    • How to change email providers
    • How to shoot slanted edge images for me
  • Lens screening testing
    • Equipment and Software
    • Examples
      • Bad and OK 200-600 at 600
      • Excellent 180-400 zoom
      • Fair 14-30mm zoom
      • Good 100-200 mm MF zoom
      • Good 100-400 zoom
      • Good 100mm lens on P1 P45+
      • Good 120mm MF lens
      • Good 18mm FF lens
      • Good 24-105 mm FF lens
      • Good 24-70 FF zoom
      • Good 35 mm FF lens
      • Good 35-70 MF lens
      • Good 60 mm lens on IQ3-100
      • Good 63 mm MF lens
      • Good 65 mm FF lens
      • Good 85 mm FF lens
      • Good and bad 25mm FF lenses
      • Good zoom at 24 mm
      • Marginal 18mm lens
      • Marginal 35mm FF lens
      • Mildly problematic 55 mm FF lens
      • OK 16-35mm zoom
      • OK 60mm lens on P1 P45+
      • OK Sony 600mm f/4
      • Pretty good 16-35 FF zoom
      • Pretty good 90mm FF lens
      • Problematic 400 mm FF lens
      • Tilted 20 mm f/1.8 FF lens
      • Tilted 30 mm MF lens
      • Tilted 50 mm FF lens
      • Two 15mm FF lenses
    • Found a problem – now what?
    • Goals for this test
    • Minimum target distances
      • MFT
      • APS-C
      • Full frame
      • Small medium format
    • Printable Siemens Star targets
    • Target size on sensor
      • MFT
      • APS-C
      • Full frame
      • Small medium format
    • Test instructions — postproduction
    • Test instructions — reading the images
    • Test instructions – capture
    • Theory of the test
    • What’s wrong with conventional lens screening?
  • Previsualization heresy
  • Privacy Policy
  • Recommended photographic web sites
  • Using in-camera histograms for ETTR
    • Acknowledgments
    • Why ETTR?
    • Normal in-camera histograms
    • Image processing for in-camera histograms
    • Making the in-camera histogram closely represent the raw histogram
    • Shortcuts to UniWB
    • Preparing for monitor-based UniWB
    • A one-step UniWB procedure
    • The math behind the one-step method
    • Iteration using Newton’s Method

Category List

Recent Comments

  • JimK on Goldilocks and the three flashes
  • DC Wedding Photographer on Goldilocks and the three flashes
  • Wedding Photographer in DC on The 16-Bit Fallacy: Why More Isn’t Always Better in Medium Format Cameras
  • JimK on Fujifilm GFX 100S II precision
  • Renjie Zhu on Fujifilm GFX 100S II precision
  • JimK on Fuji 20-35/4 landscape field curvature at 23mm vs 23/4 GF
  • Ivo de Man on Fuji 20-35/4 landscape field curvature at 23mm vs 23/4 GF
  • JimK on Fuji 20-35/4 landscape field curvature at 23mm vs 23/4 GF
  • JimK on Fuji 20-35/4 landscape field curvature at 23mm vs 23/4 GF
  • Ivo de Man on Fuji 20-35/4 landscape field curvature at 23mm vs 23/4 GF

Archives

Copyright © 2025 · Daily Dish Pro On Genesis Framework · WordPress · Log in

Unless otherwise noted, all images copyright Jim Kasson.