• site home
  • blog home
  • galleries
  • contact
  • underwater
  • the bleeding edge

the last word

Photography meets digital computer technology. Photography wins -- most of the time.

You are here: Home / Technical / Resampling for printing in Lightroom

Resampling for printing in Lightroom

February 2, 2011 JimK 2 Comments

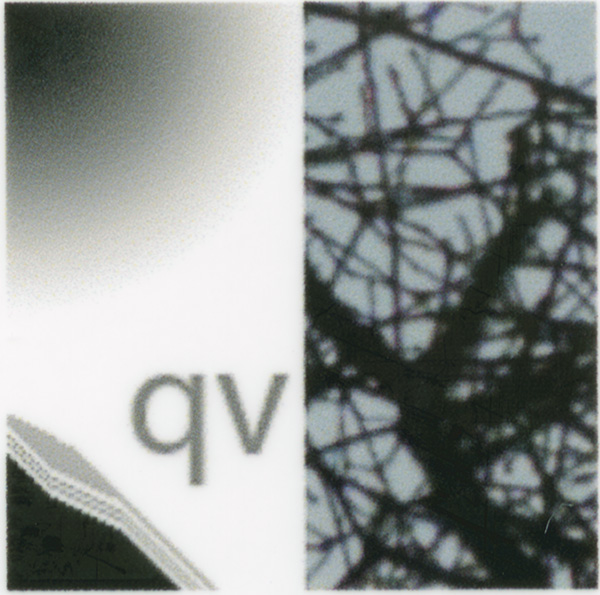
I imported the 240 ppi printing target from the previous post into Lightroom and printed it to the 3880, selecting 360 ppi as the print resolution.

Here’s what I got:

LR360NoSharp

The trees are fuzzier then the Photoshop bicubic example in the previous post. The letters are much fuzzier. The two lines with single pixel spacing actually blend together at some points. The Lightroom resampling actually looks closer to the Photoshop bilinear results. This is disappointing.

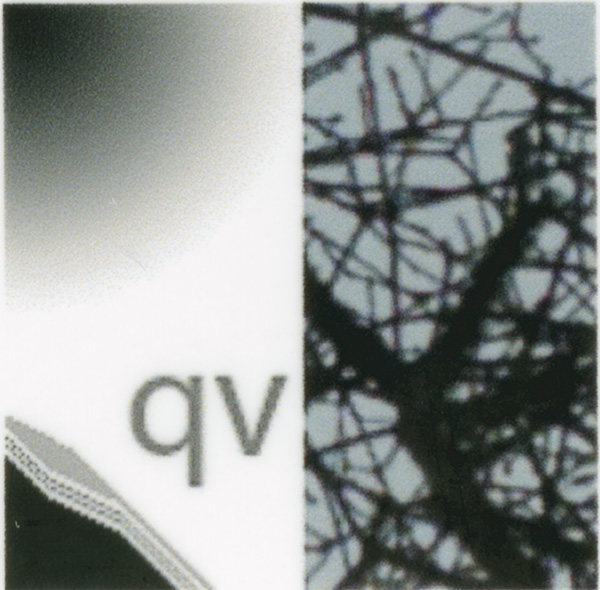
Since I was all set up for it, I went ahead and look at what happens if you let Lightroom sharpen. Here it is at the low setting:

LR360LoSharp

It’s still not very sharp; a big step down from Photoshop bicubic. The single pixels spaced lines are slightly better resolved. At least the sharpening doesn’t appear to have done any damage.

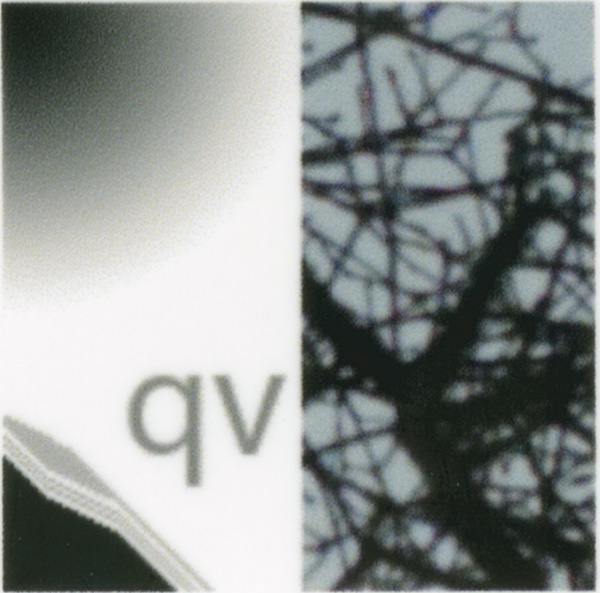
Here’s what it looks like at the standard sharpening setting:

LR360StdSharp

The letters aren’t as sharp as Photoshop bicubic, and the line edges have become a lot more jagged. The tree sharpness appears to be very close to Photoshop bicubic, but the sky between the branches is noticeably mottled.

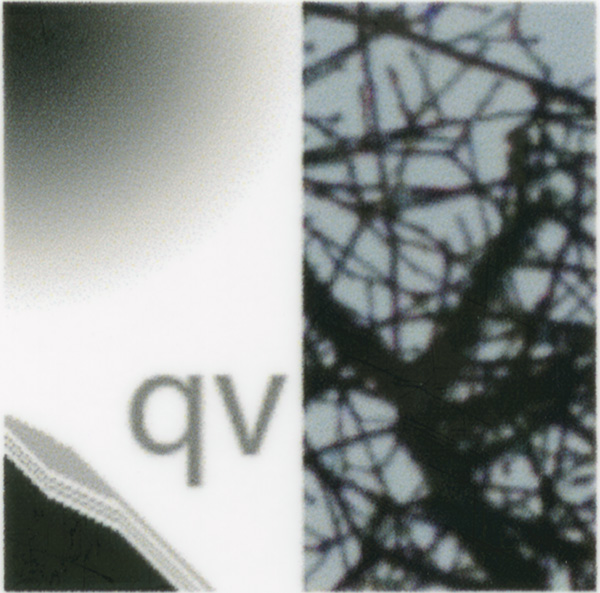
On the high sharpening setting, it looks like this:

LR360HiSharp

It looks like the standard setting result, but more so.

All in all, this is depressing news. It’s so convenient to print from Lightroom, but the results suffer over those obtainable by doing the resampling yourself in Photoshop.

Note: in these and the previous resampling tests, my comments are based on the full res files, not the smaller JPEG files I’ve included in the posts. I think most all of the effects are visible in the JPEGs, though.
Technical

← Resampling for printing — basic alternatives Resampling for printing with QImage →

Comments

  1. John Schwaller says

    February 2, 2011 at 6:08 pm

    Jim, thanks for this test. You are right….the results are disappointing from LR.

    As I use Qimage, I rarely print from LR and never print from PS….Qimage is just so much better. Due to the Pixel Genius sharpening in LR I had assumed it would produce better results that PS (without the PG sharpening). I wonder what interpolation LR is using…???

    Reply

Trackbacks

  1. Lightroom 4 printer resampling | The Last Word says:
    September 5, 2012 at 4:45 pm

    […] to QImage, Perfect Resize, or even Photoshop’s bicubic interpolation. You can see that post here. During a workshop last spring, Eric Chan said that Lightroom 4 had improved. I’ve finally […]

    Reply

Leave a Reply Cancel reply

Your email address will not be published. Required fields are marked *

May 2025
S M T W T F S
 123
45678910
11121314151617
18192021222324
25262728293031
« Apr    

Articles

  • About
    • Patents and papers about color
    • Who am I?
  • How to…
    • Backing up photographic images
    • How to change email providers
    • How to shoot slanted edge images for me
  • Lens screening testing
    • Equipment and Software
    • Examples
      • Bad and OK 200-600 at 600
      • Excellent 180-400 zoom
      • Fair 14-30mm zoom
      • Good 100-200 mm MF zoom
      • Good 100-400 zoom
      • Good 100mm lens on P1 P45+
      • Good 120mm MF lens
      • Good 18mm FF lens
      • Good 24-105 mm FF lens
      • Good 24-70 FF zoom
      • Good 35 mm FF lens
      • Good 35-70 MF lens
      • Good 60 mm lens on IQ3-100
      • Good 63 mm MF lens
      • Good 65 mm FF lens
      • Good 85 mm FF lens
      • Good and bad 25mm FF lenses
      • Good zoom at 24 mm
      • Marginal 18mm lens
      • Marginal 35mm FF lens
      • Mildly problematic 55 mm FF lens
      • OK 16-35mm zoom
      • OK 60mm lens on P1 P45+
      • OK Sony 600mm f/4
      • Pretty good 16-35 FF zoom
      • Pretty good 90mm FF lens
      • Problematic 400 mm FF lens
      • Tilted 20 mm f/1.8 FF lens
      • Tilted 30 mm MF lens
      • Tilted 50 mm FF lens
      • Two 15mm FF lenses
    • Found a problem – now what?
    • Goals for this test
    • Minimum target distances
      • MFT
      • APS-C
      • Full frame
      • Small medium format
    • Printable Siemens Star targets
    • Target size on sensor
      • MFT
      • APS-C
      • Full frame
      • Small medium format
    • Test instructions — postproduction
    • Test instructions — reading the images
    • Test instructions – capture
    • Theory of the test
    • What’s wrong with conventional lens screening?
  • Previsualization heresy
  • Privacy Policy
  • Recommended photographic web sites
  • Using in-camera histograms for ETTR
    • Acknowledgments
    • Why ETTR?
    • Normal in-camera histograms
    • Image processing for in-camera histograms
    • Making the in-camera histogram closely represent the raw histogram
    • Shortcuts to UniWB
    • Preparing for monitor-based UniWB
    • A one-step UniWB procedure
    • The math behind the one-step method
    • Iteration using Newton’s Method

Category List

Recent Comments

  • bob lozano on The 16-Bit Fallacy: Why More Isn’t Always Better in Medium Format Cameras
  • JimK on Goldilocks and the three flashes
  • DC Wedding Photographer on Goldilocks and the three flashes
  • Wedding Photographer in DC on The 16-Bit Fallacy: Why More Isn’t Always Better in Medium Format Cameras
  • JimK on Fujifilm GFX 100S II precision
  • Renjie Zhu on Fujifilm GFX 100S II precision
  • JimK on Fuji 20-35/4 landscape field curvature at 23mm vs 23/4 GF
  • Ivo de Man on Fuji 20-35/4 landscape field curvature at 23mm vs 23/4 GF
  • JimK on Fuji 20-35/4 landscape field curvature at 23mm vs 23/4 GF
  • JimK on Fuji 20-35/4 landscape field curvature at 23mm vs 23/4 GF

Archives

Copyright © 2025 · Daily Dish Pro On Genesis Framework · WordPress · Log in

Unless otherwise noted, all images copyright Jim Kasson.