• site home
  • blog home
  • galleries
  • contact
  • underwater
  • the bleeding edge

the last word

Photography meets digital computer technology. Photography wins -- most of the time.

You are here: Home / The Last Word / Flare from 3 UV filters

Flare from 3 UV filters

October 4, 2017 JimK 7 Comments

A few days ago, I posted a flare comparison of a Zeiss Otus 55 mm f/1.4 lens on a Sony a7RII with and without a 3-stop Hoya ND filter. 

Questions arose about the filter I used. 

Michael Demeyer said:

I would also expect the quality of the filter to matter. For example, the Zeiss filters, expensive as they are, use the same T* A/R coatings as the lens. So it seems they would be no worse than one more lens element. No?

Several people expressed a distaste for Hoya filters. 

I bought 3 77 mm UV filters:

  • Zeiss T* UV — $115
  • Hoya Digital HMC UV(C) — $23
  • B+W XS-Pro Digital UV-Haze MRC nano — $36

All prices are from Amazon US.

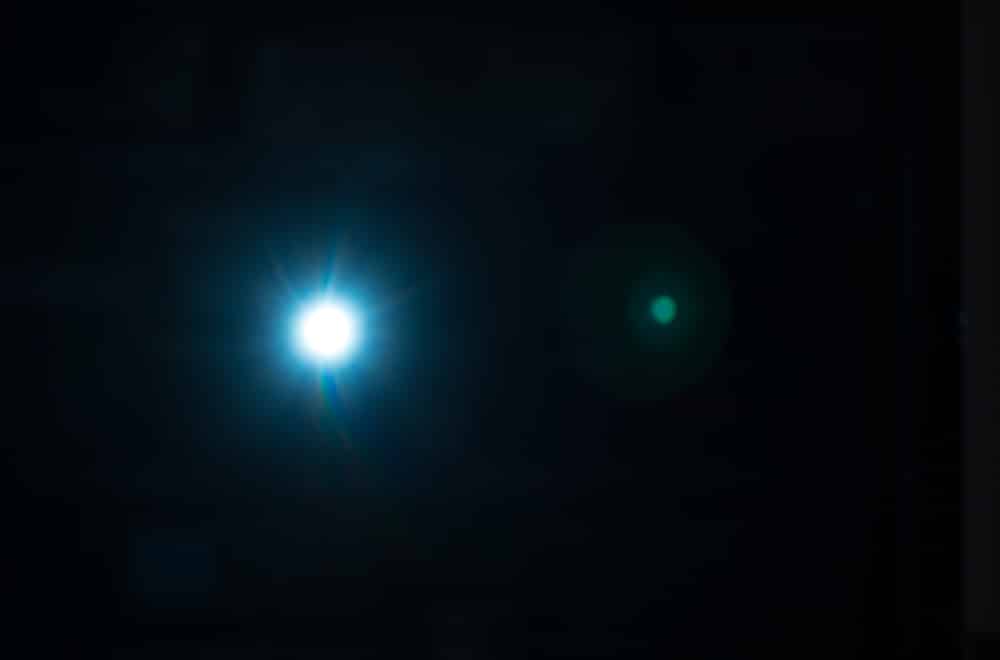
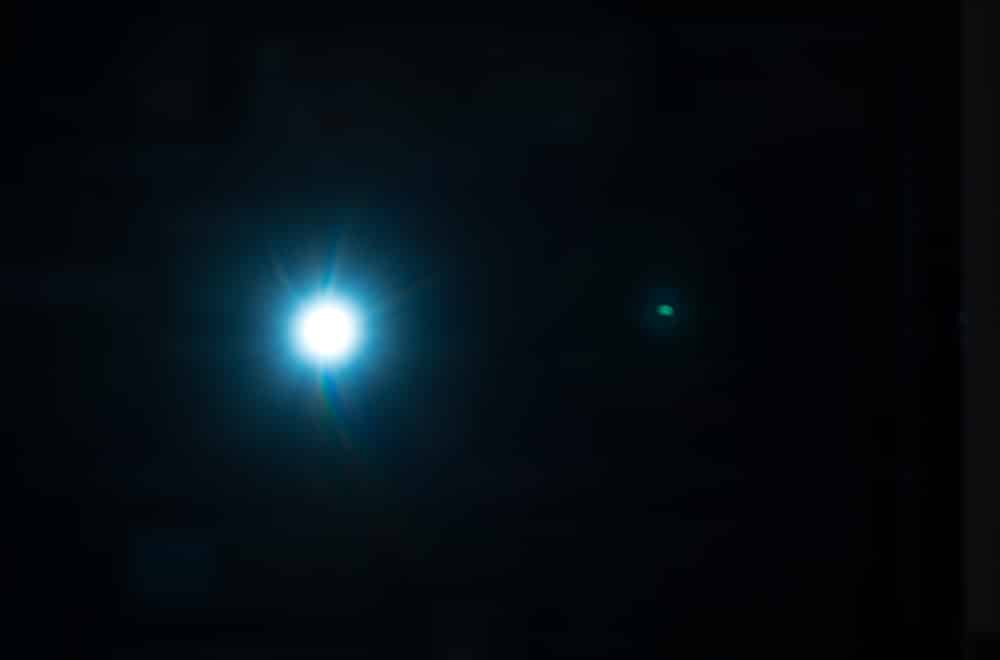
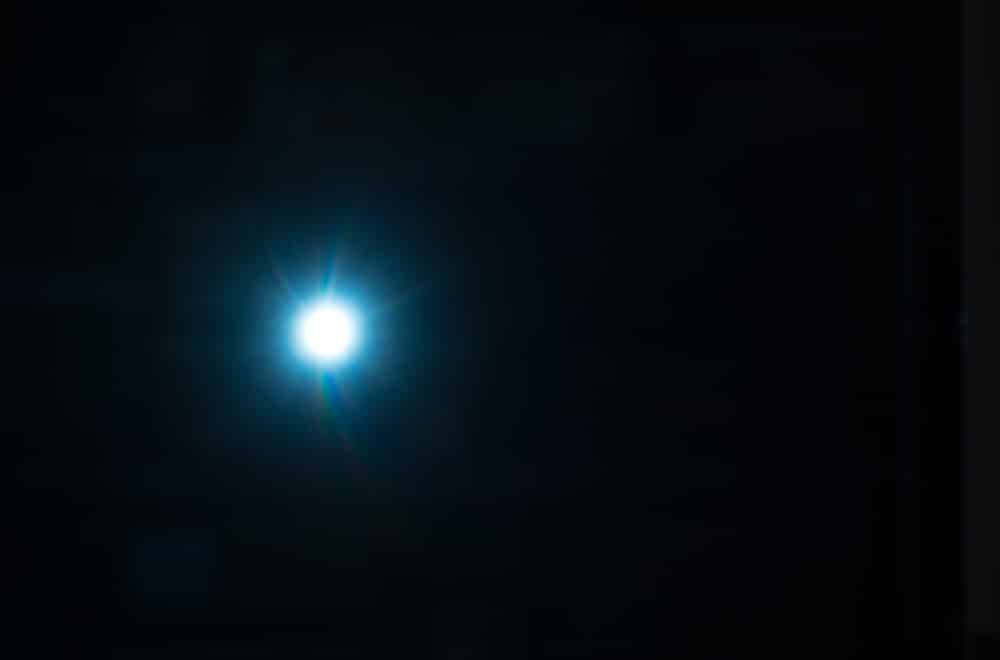
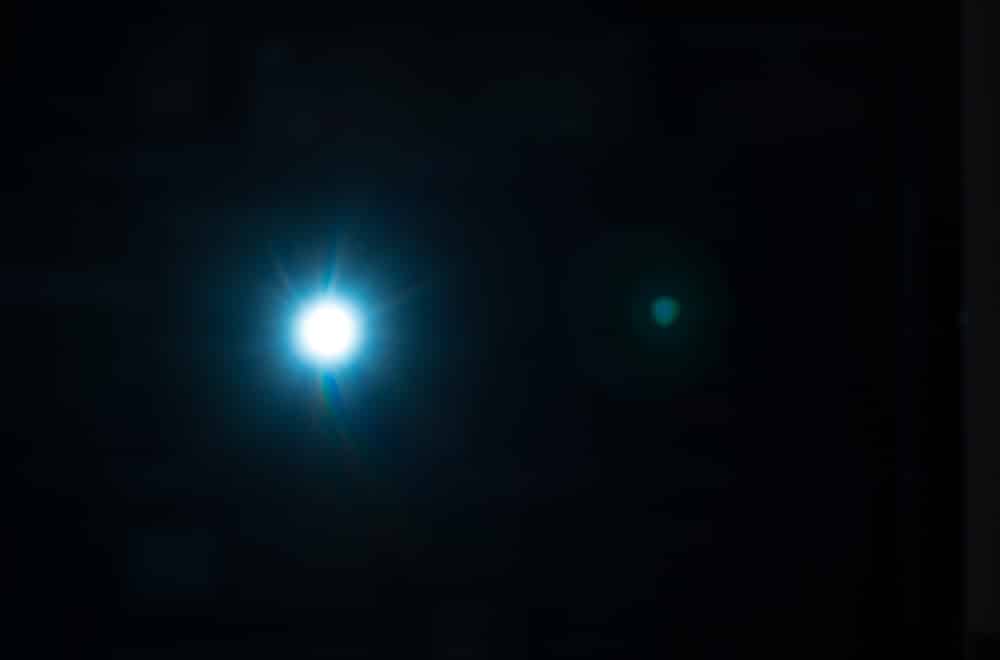
I set up the camera aiming at a LED flashlight a bit off-axis. The reflections from the filter that I saw were on the opposite side of the lens axis. I cropped the images to the central 9th of the image in area (central third in both height and width).
Zeiss T* UV


Hoya Digital HMC UV(C)


B+W XS-Pro Digital UV-Haze MRC nano


None


I have three conclusions:

  • We can say that adding the filter is not the same as adding one more lens element. The Otus has a flock of lens elements and no reflection like all of the filter images. 
  • The Hoya and Zeiss reflections are about the same size, but the Hoya one is stronger. Looks like the T* costing is buying something.
  • The B+W reflection is smaller in extent than the other two, but the brightest. I think the B+W reflection would be the easiest to deal with in postproduction.

I am not planning on running out and buying a bunch of T* filters.


The Last Word

← Flare and finger filters Filter reflections versus focus distance →

Comments

  1. Ron says

    October 5, 2017 at 7:30 am

    The previous post stated: “Since the filter’s main contribution to flare seems to results from reflections from lens elements, I would expect that different lenses would yield different results.”

    Could the reflections in the above images instead be caused by reflection off the sensor, rather than lens elements?

    In any case, the filters obviously cause the results we see above. Unlike any of the elements in the Otus, the filter introduces a perfectly flat surface into the light path, which reflects the reflected light back to the sensor.

    Reply
    • JimK says

      October 5, 2017 at 7:53 am

      Interesting question. I don’t know the answer.

      Reply
      • Brandon Dube says

        October 5, 2017 at 11:21 am

        The index of silicon is ~4, so fresnel reflections are very strong off of it. Surfaces parallel to the image surface are usually avoided in lens design because of a propensity for causing nasty flares upon interaction with the sensor.

        Reply
        • Ron says

          October 5, 2017 at 12:38 pm

          Thanks Brandon, that was my understanding about modern lens designs for digital sensor applications.

          My hunch is it’s light reflected off the sensor reflecting back off the filter.

          Reply
        • Jack Hogan says

          October 8, 2017 at 1:11 pm

          What about the index of microlenses+CFA?

          Reply
  2. Brandon Dube says

    October 5, 2017 at 11:22 am

    The distance from the filter to the lens element may be / will be of some consequence, a thin filter should perform differently to one that has thick threads separating it from the front element.

    Reply
    • JimK says

      October 5, 2017 at 12:45 pm

      Good point, and probably the reason for the B+W reflection size being different from the other two. BTW, I’ve done some tests on what happens to the reflection when the lens is focused at various distances. I’ll post them soon.

      Reply

Leave a Reply Cancel reply

Your email address will not be published. Required fields are marked *

May 2025
S M T W T F S
 123
45678910
11121314151617
18192021222324
25262728293031
« Apr    

Articles

  • About
    • Patents and papers about color
    • Who am I?
  • How to…
    • Backing up photographic images
    • How to change email providers
    • How to shoot slanted edge images for me
  • Lens screening testing
    • Equipment and Software
    • Examples
      • Bad and OK 200-600 at 600
      • Excellent 180-400 zoom
      • Fair 14-30mm zoom
      • Good 100-200 mm MF zoom
      • Good 100-400 zoom
      • Good 100mm lens on P1 P45+
      • Good 120mm MF lens
      • Good 18mm FF lens
      • Good 24-105 mm FF lens
      • Good 24-70 FF zoom
      • Good 35 mm FF lens
      • Good 35-70 MF lens
      • Good 60 mm lens on IQ3-100
      • Good 63 mm MF lens
      • Good 65 mm FF lens
      • Good 85 mm FF lens
      • Good and bad 25mm FF lenses
      • Good zoom at 24 mm
      • Marginal 18mm lens
      • Marginal 35mm FF lens
      • Mildly problematic 55 mm FF lens
      • OK 16-35mm zoom
      • OK 60mm lens on P1 P45+
      • OK Sony 600mm f/4
      • Pretty good 16-35 FF zoom
      • Pretty good 90mm FF lens
      • Problematic 400 mm FF lens
      • Tilted 20 mm f/1.8 FF lens
      • Tilted 30 mm MF lens
      • Tilted 50 mm FF lens
      • Two 15mm FF lenses
    • Found a problem – now what?
    • Goals for this test
    • Minimum target distances
      • MFT
      • APS-C
      • Full frame
      • Small medium format
    • Printable Siemens Star targets
    • Target size on sensor
      • MFT
      • APS-C
      • Full frame
      • Small medium format
    • Test instructions — postproduction
    • Test instructions — reading the images
    • Test instructions – capture
    • Theory of the test
    • What’s wrong with conventional lens screening?
  • Previsualization heresy
  • Privacy Policy
  • Recommended photographic web sites
  • Using in-camera histograms for ETTR
    • Acknowledgments
    • Why ETTR?
    • Normal in-camera histograms
    • Image processing for in-camera histograms
    • Making the in-camera histogram closely represent the raw histogram
    • Shortcuts to UniWB
    • Preparing for monitor-based UniWB
    • A one-step UniWB procedure
    • The math behind the one-step method
    • Iteration using Newton’s Method

Category List

Recent Comments

  • JimK on Goldilocks and the three flashes
  • DC Wedding Photographer on Goldilocks and the three flashes
  • Wedding Photographer in DC on The 16-Bit Fallacy: Why More Isn’t Always Better in Medium Format Cameras
  • JimK on Fujifilm GFX 100S II precision
  • Renjie Zhu on Fujifilm GFX 100S II precision
  • JimK on Fuji 20-35/4 landscape field curvature at 23mm vs 23/4 GF
  • Ivo de Man on Fuji 20-35/4 landscape field curvature at 23mm vs 23/4 GF
  • JimK on Fuji 20-35/4 landscape field curvature at 23mm vs 23/4 GF
  • JimK on Fuji 20-35/4 landscape field curvature at 23mm vs 23/4 GF
  • Ivo de Man on Fuji 20-35/4 landscape field curvature at 23mm vs 23/4 GF

Archives

Copyright © 2025 · Daily Dish Pro On Genesis Framework · WordPress · Log in

Unless otherwise noted, all images copyright Jim Kasson.