In the previous post I looked at lots of ways to display histograms. In this one, I’m going to take a scene with normal outdoor contrast, and look at the relevant histograms.
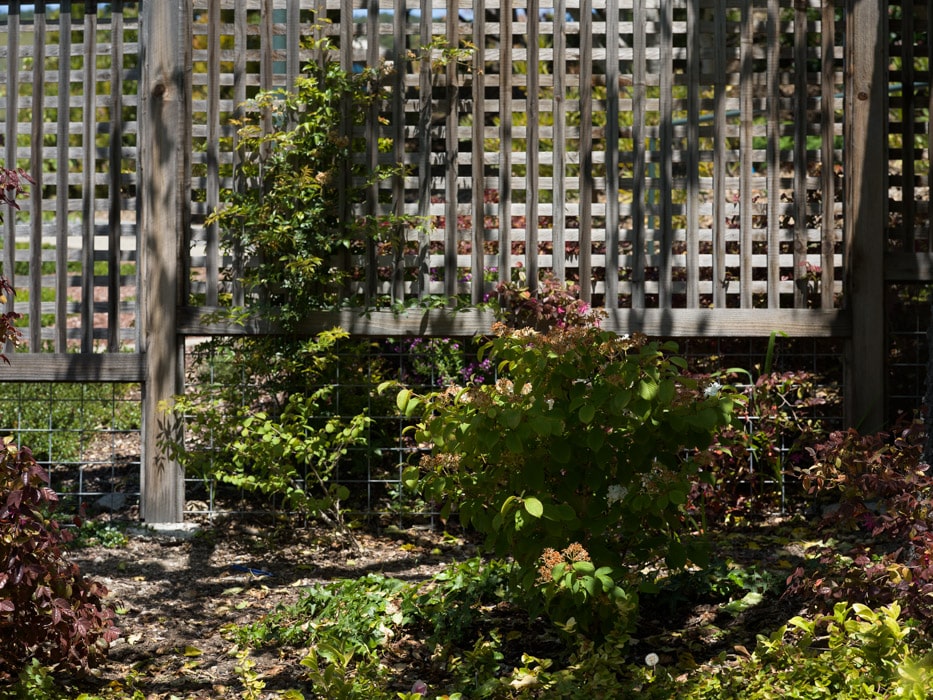
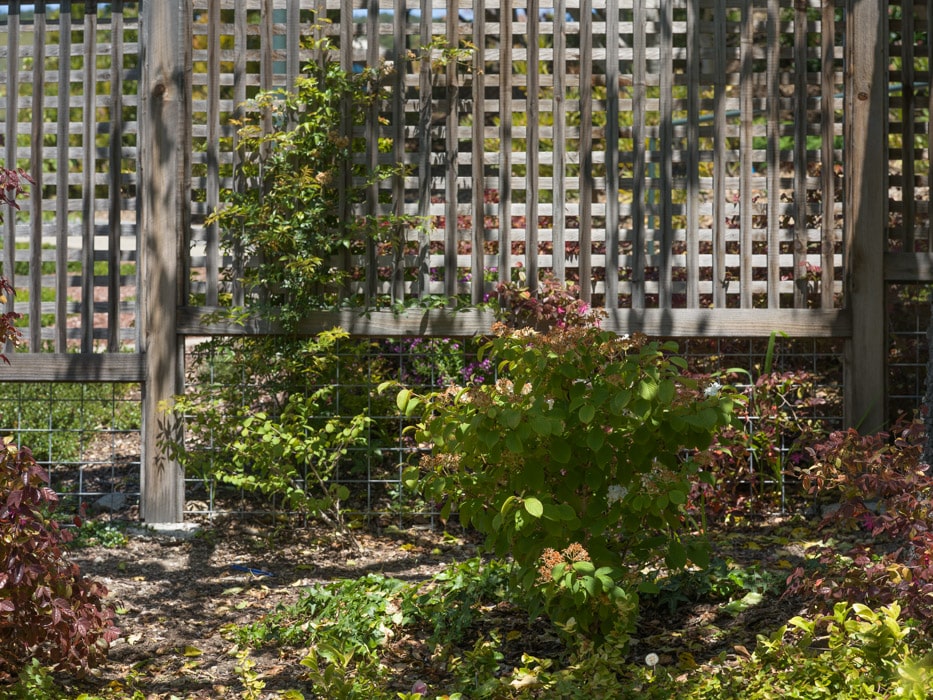
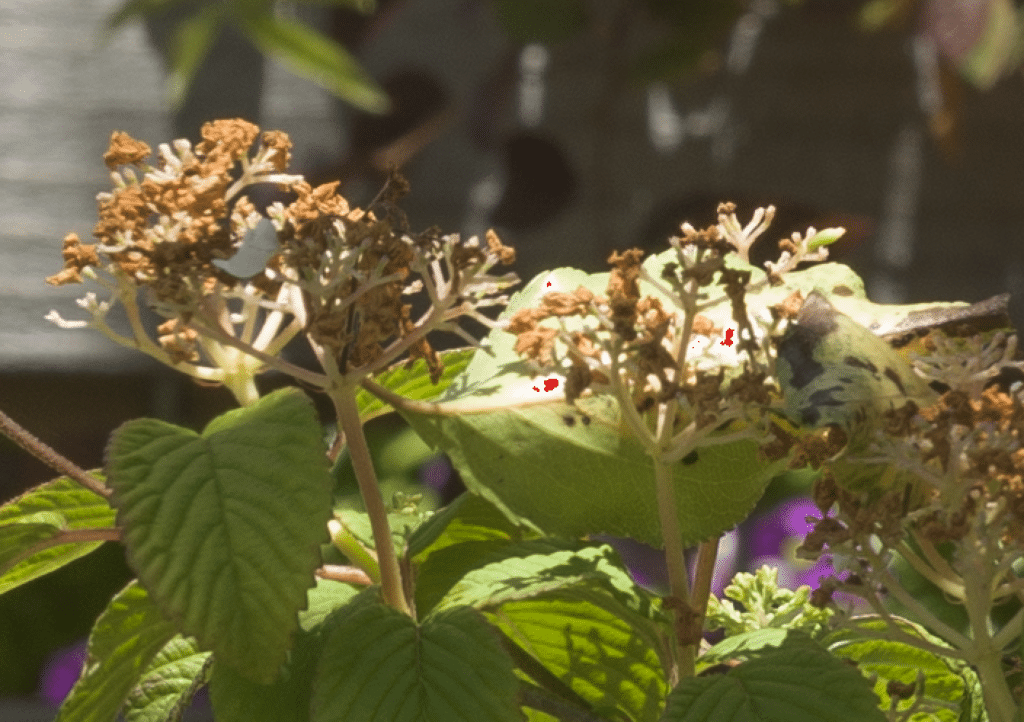
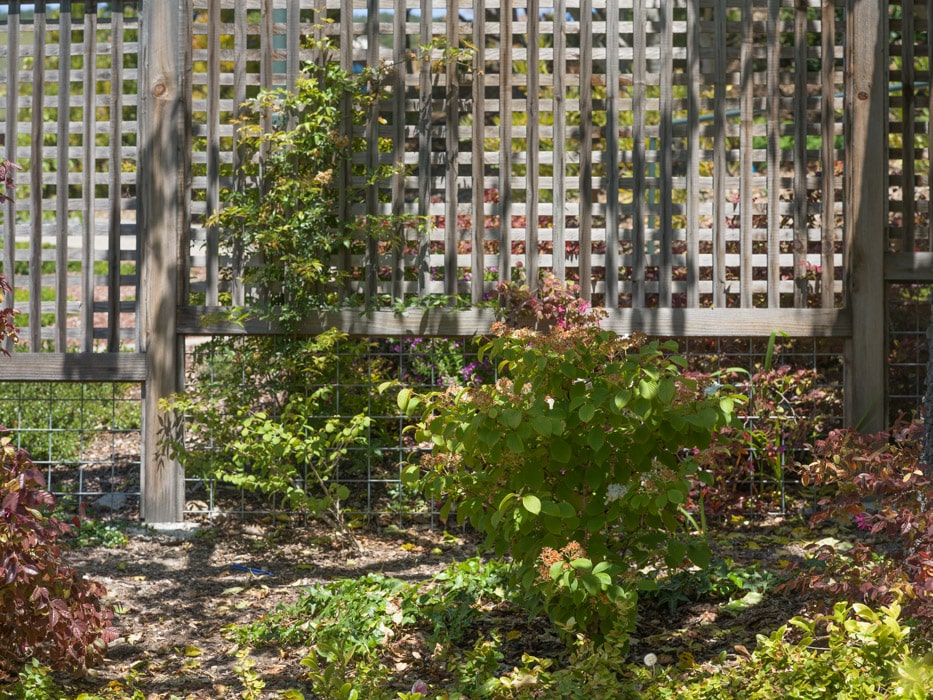
Here’s the scene, as captured by a Hasselblad X2D with a 90 mm XCD lens, at close to ETTR (more on that later), developed in Lightroom with default settings except for Daylight white balance.
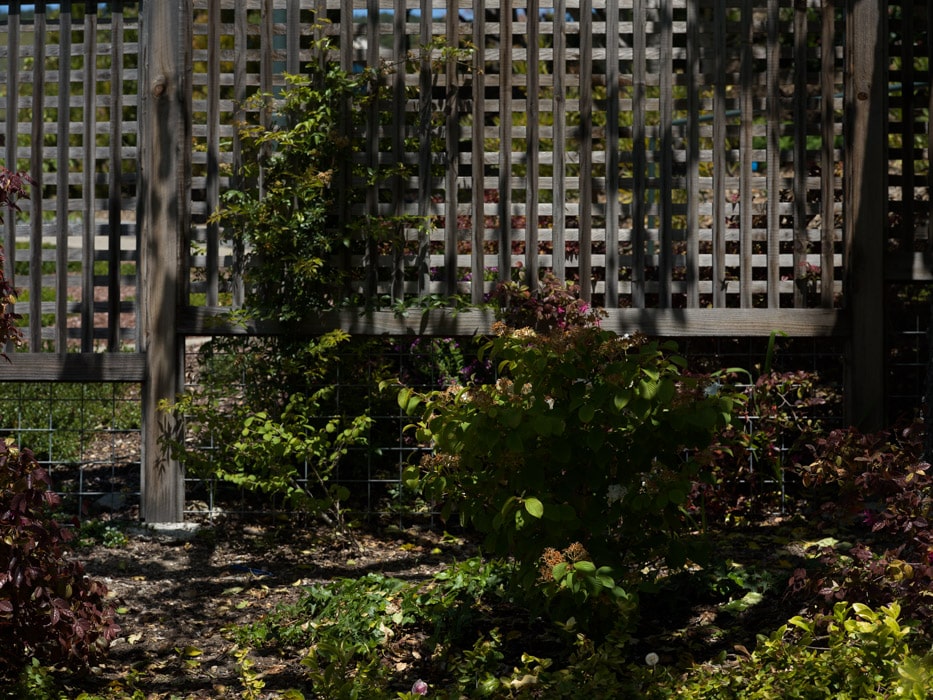
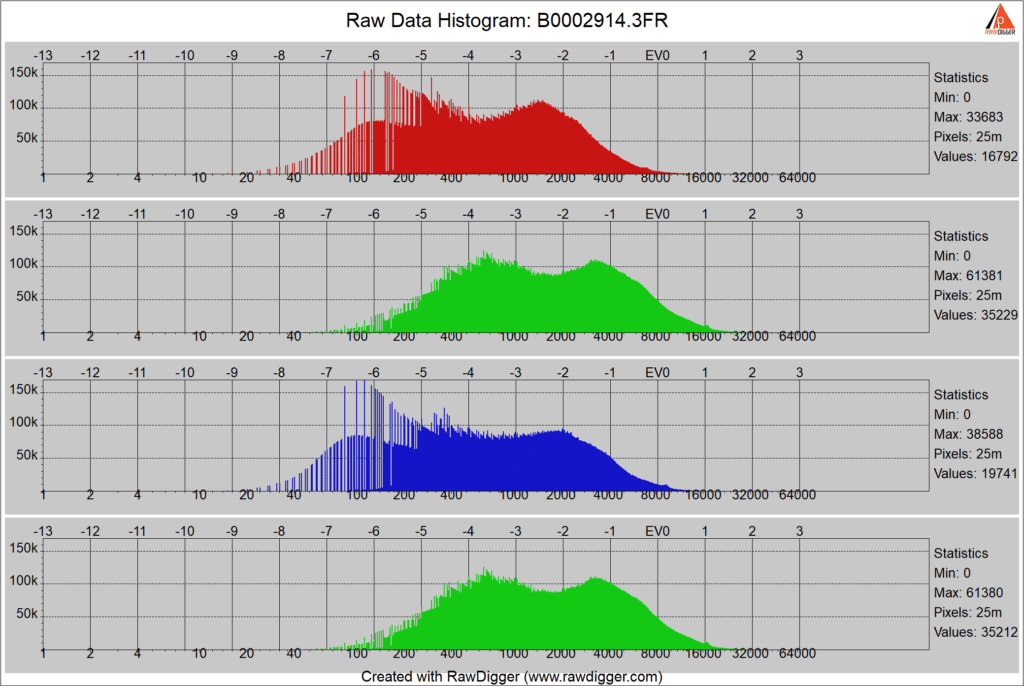
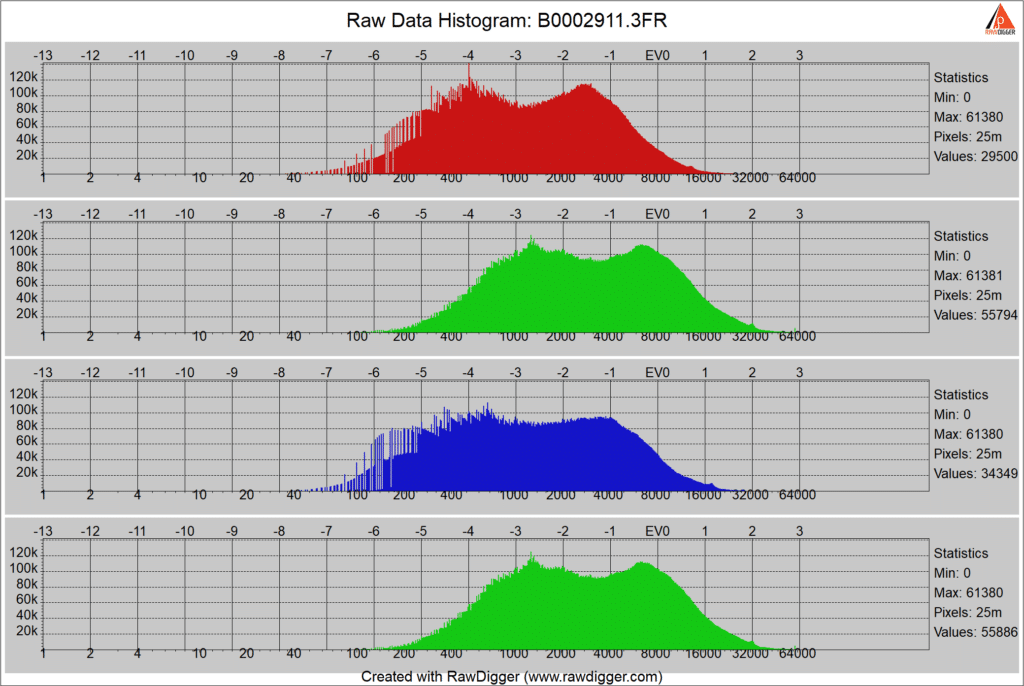
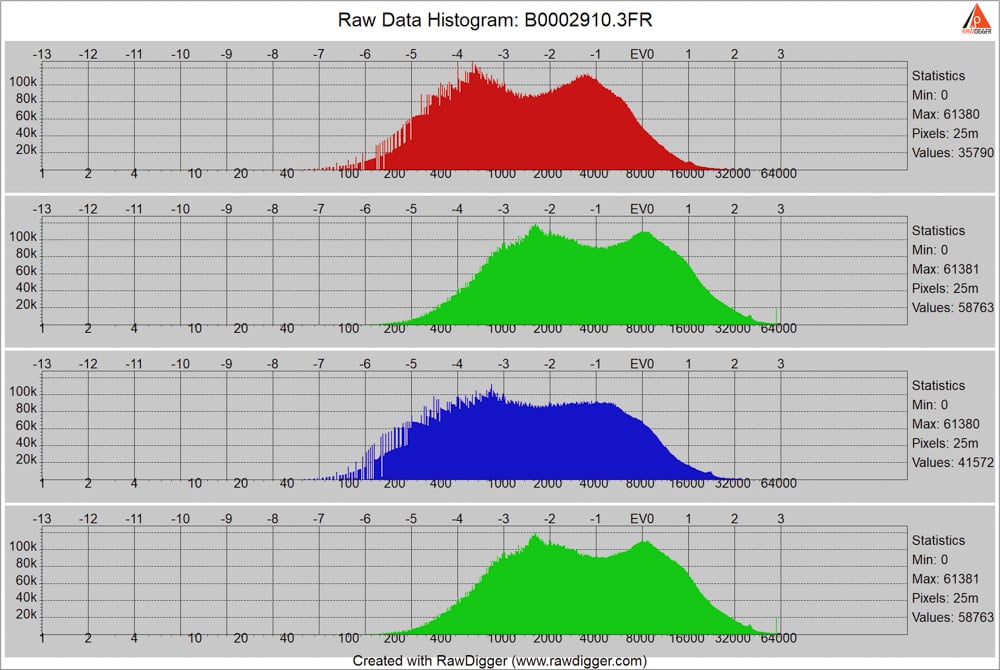
It looks dark because I was pretty strict about how many pixels I let get clipped. How strict? Let’s look at the raw histogram:

This is a log-log histogram. Both the x and y axes are logarithmic. The x-axis uses log base 2, and the y-axis uses log base 10. If you look at the green channels, on the far right, you can see that there are a few saturated pixels. How many? Hard to say exactly, but it looks like 40 pixels in each green channel, or about 80 pixels out of 100 million in total.
Why not reduce the exposure so that no pixels are clipped? Because that will mean that the signal to noise ratio in the shadow regions suffers. In fact, the exposure I used for this capture is less than I would use in the field. Scenes with foliage and metal like this one often have specular or quasi-specular highlights that can be quite bright and there is no visual benefit to keeping those highlights below the clipping level.
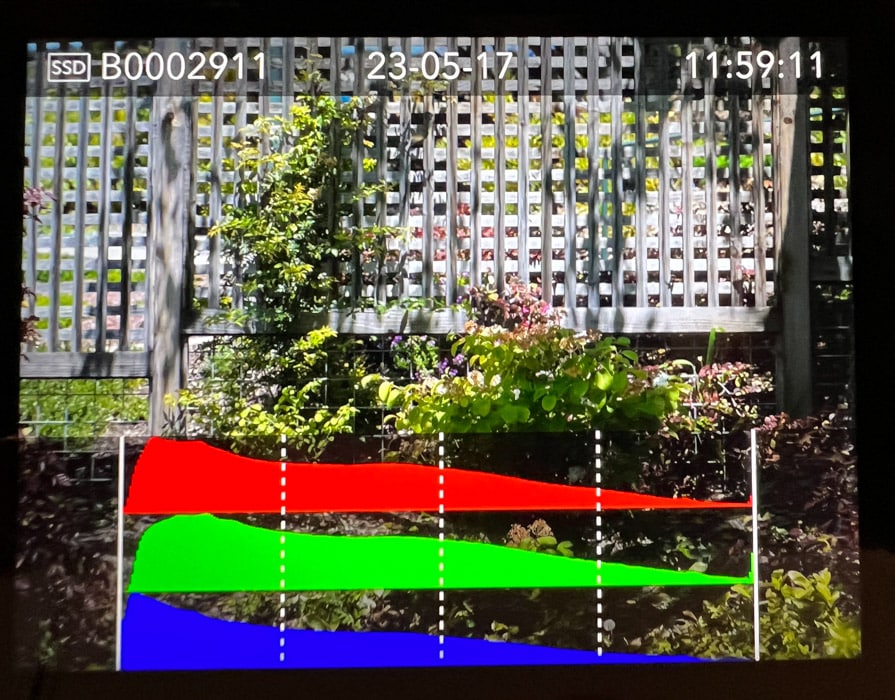
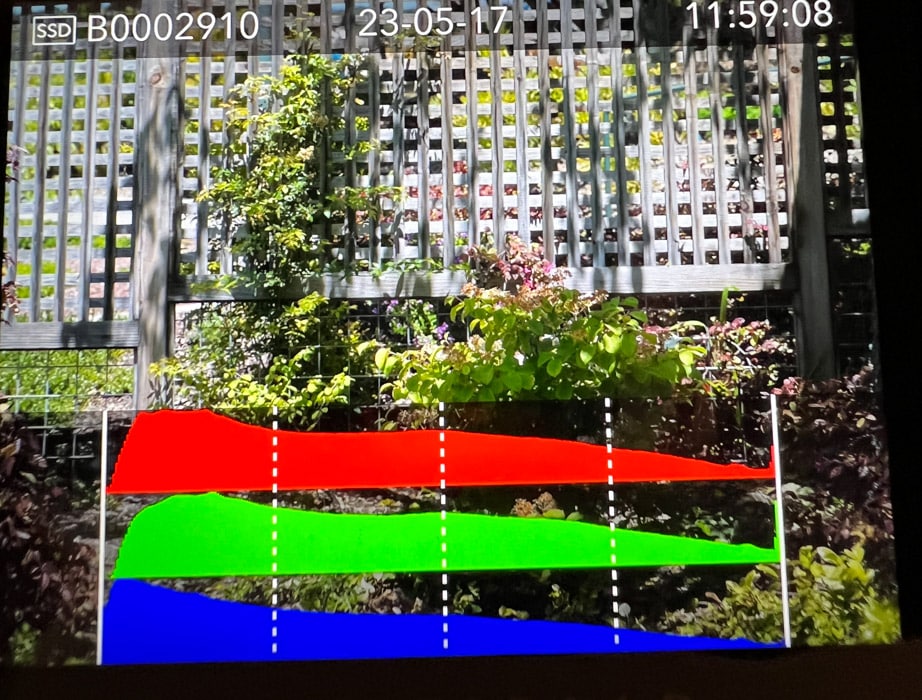
Here’s the in-camera histogram for that shot:
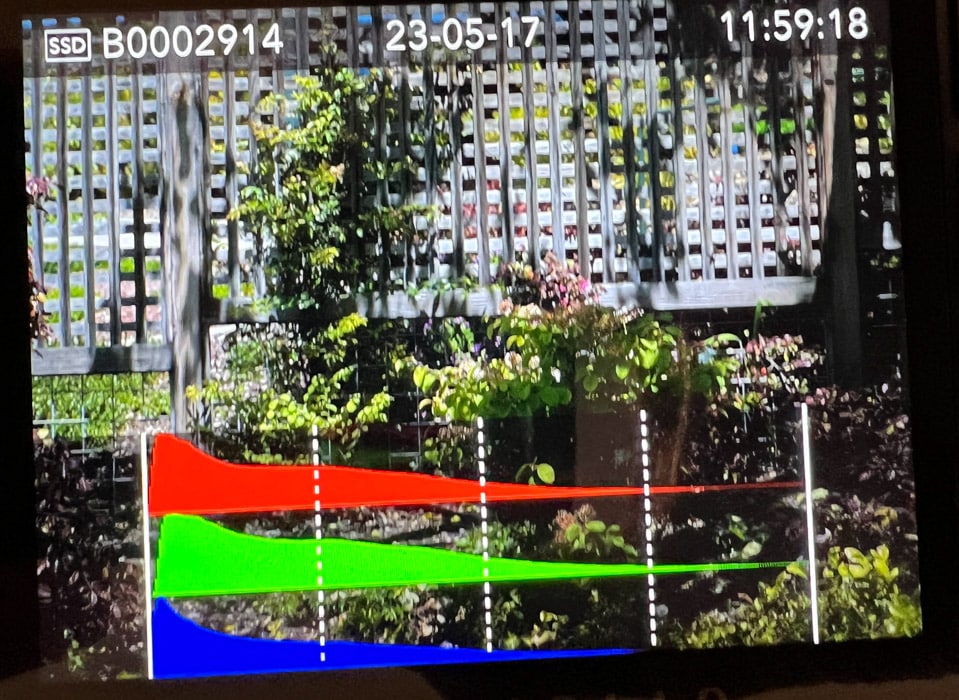
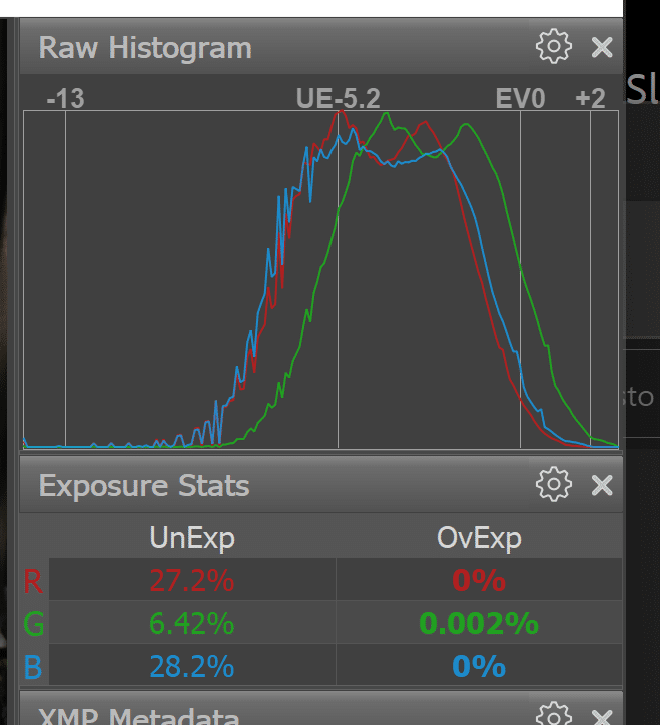
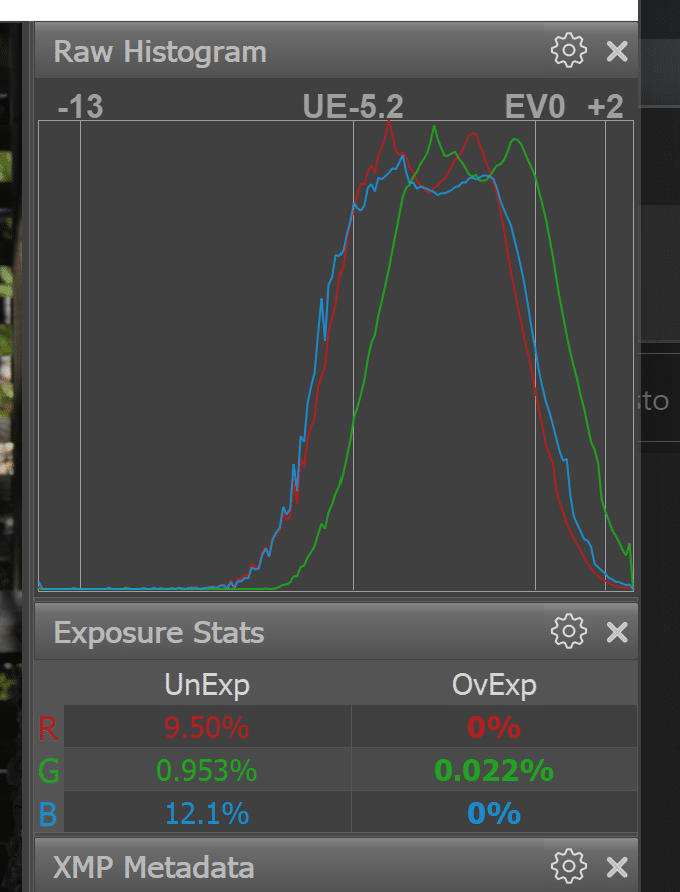
The camera is indicating that the green channel is close to clipping, which is correct. It is indicating that the red channel is close, too, but the raw red channel is a stop down from clipping. The vertical axis on the camera display is linear. When we set RawDigger into that mode, here’s what we see:
Now it looks like we have a stop and a half of headroom. What’s the truth? I’ll get there, but I warn you that the answer is squishy.
For completeness, here’s the Fast Raw Viewer histogram and clipping display:
It shows no headroom, but virtually no clipping.
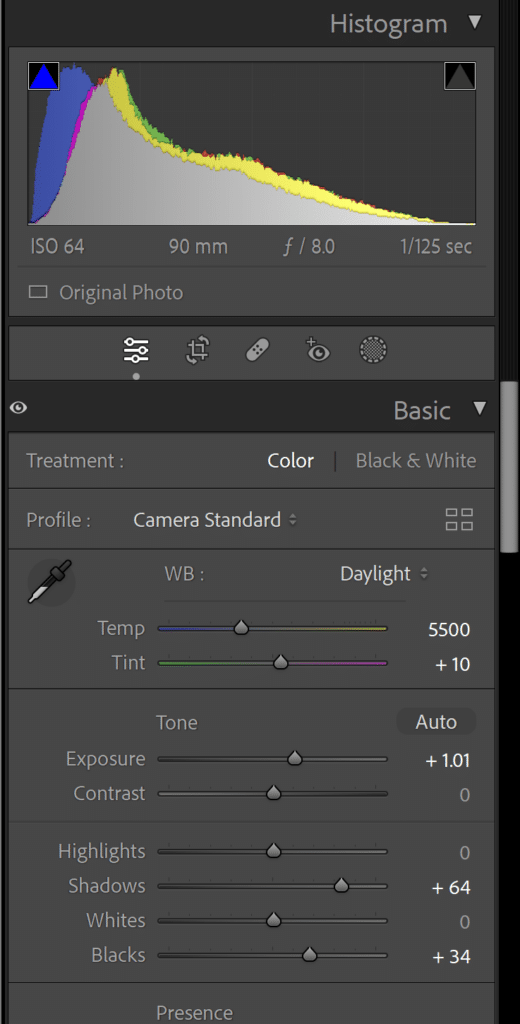
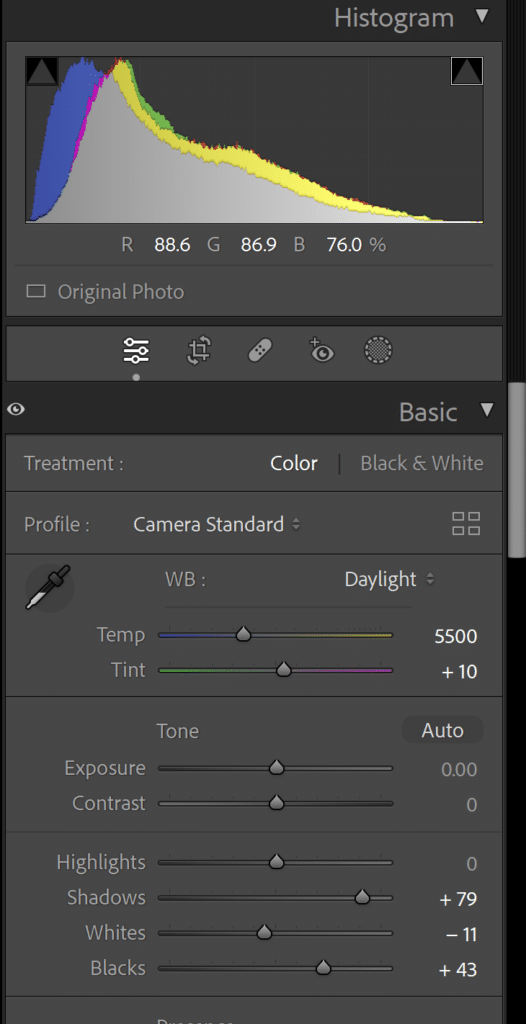
Here’s the image developed to my taste in Lightroom:

And here are the moves that got it to look like that:
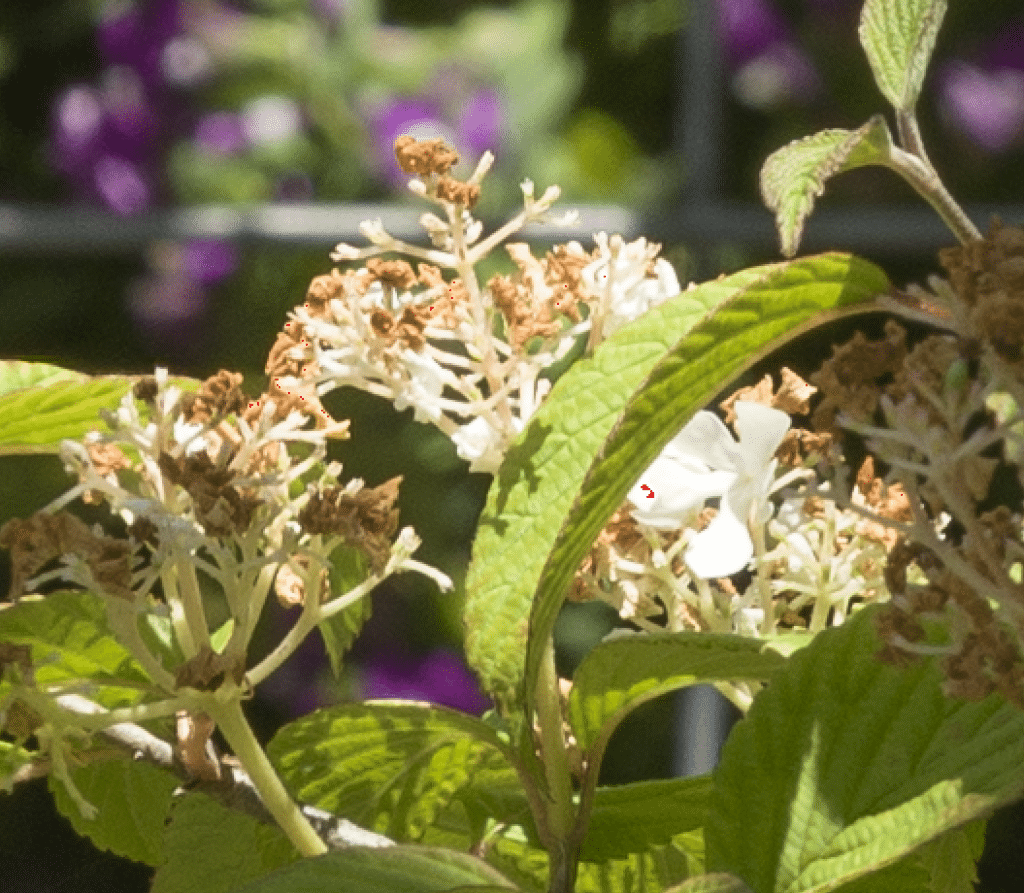
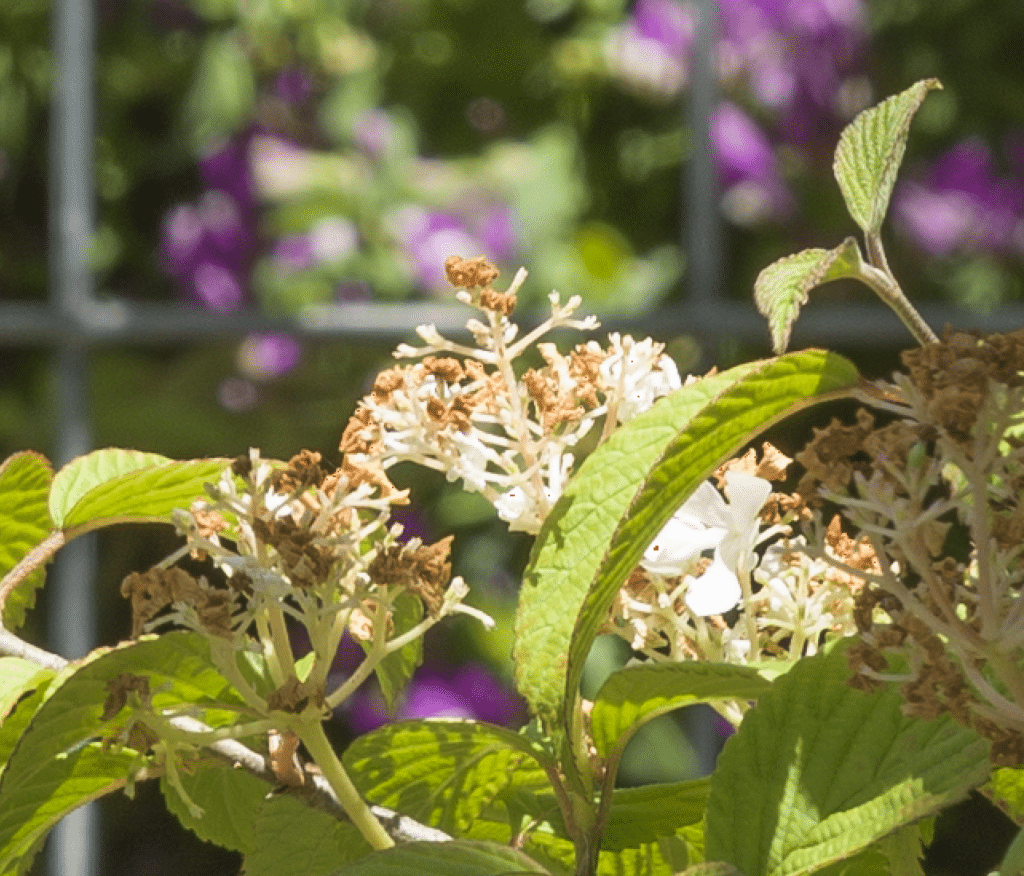
It would be instructive to see where the clipped pixels are in the image, but there are so few saturated pixels that they’re hard to find with any display I’d tried. Here I’ve thresholded the image so that you can see the places that are the brightest:

It’s mostly specular reflections from the foliage and semi-specular reflections from some white flowers.
Now let’s look at a one-stop more generous exposure with default Lightroom processing, except for Daylight white balance:
Here the linear y-axis raw histogram:
This or 1/3 stop more exposure is about where I’d put the exposure if this weren’t a test.
Here’s the histogram on the camera:
The camera is indicating some pretty serious overexposure in both the green and red channels.
Here’s what Fast Raw Viewer thinks of the image:
The histogram looks a bit hot, but the number of clipped pixels is still quite low.
Here’s the image developed to taste in Lightroom:
And here’s the recipe for that shot:
And here are some hot areas:
Now let’s see how much light we can put on the sensor and still not ruin the image.
A third of a stop more exposure shows clipping in RawDigger:
And the back of the camera looks pretty bad:
The image in Lightroom with default processing except for Daylight white balance:
Processed to taste:
The recipe:
A look at the clipping in the processed image:
This little demonstration shows that in normal-contrast scenes, deciding on how much clipping to allow is somewhat of an art. Being anal about avoiding clipping by using the log log presentation in RawDigger, like in the first image, is an invitation to shadow noise. Believing the in-camera display does much the same thing. A stop more exposure is a better choice in my opinion, and a third of a stop more than that isn’t bad either.
Looks like you are doing well. Pleased to see that. BTW interesting reading. What do you think of the Hassy lens, now that it has arrived.?
I like it. Can’t say anything more until it’s generally available.