• site home
  • blog home
  • galleries
  • contact
  • underwater
  • the bleeding edge

the last word

Photography meets digital computer technology. Photography wins -- most of the time.

You are here: Home / The Last Word / Sharpening and luminance

Sharpening and luminance

June 15, 2014 JimK 2 Comments

If you just fire up Photoshop and sharpen an image with, say, unsharp masking, the program will apply the sharpening kernel independently to each layer of the image. Occasionally that causes artifacts. Way back in the 80’s, canny scanner operators would sometimes convert the image to CIELab and sharpen only the luminance axis. In the early 90’s I submitted a patent application for a technique to perform luminance sharpening on an RGB image without the round trip to Lab. After a series of delays, the patent was granted in 1998.  Although I’m no legal expert, I believe it is now expired because of non-payment of maintenance fees by the assignee, IBM.

To illustrate the technique, consider the ray-traced RGB reference image that Bruce Lindbloom generated.

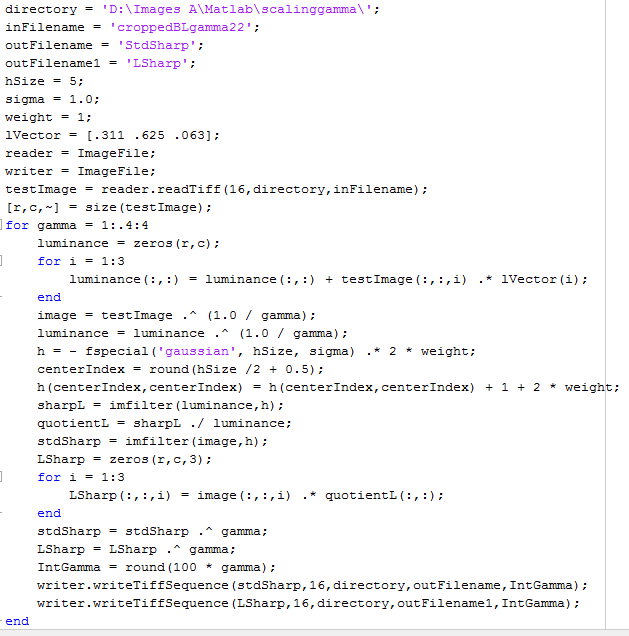
Here’s a Matlab script — written not for maximum efficiency, but so that it’s relatively easy to understand — to directly sharpen the luminance of an RGB image using unsharp masking:

LsharpCode

Here’s a tight crop of the result of performing the sharpening in the usual way:

stdsharp

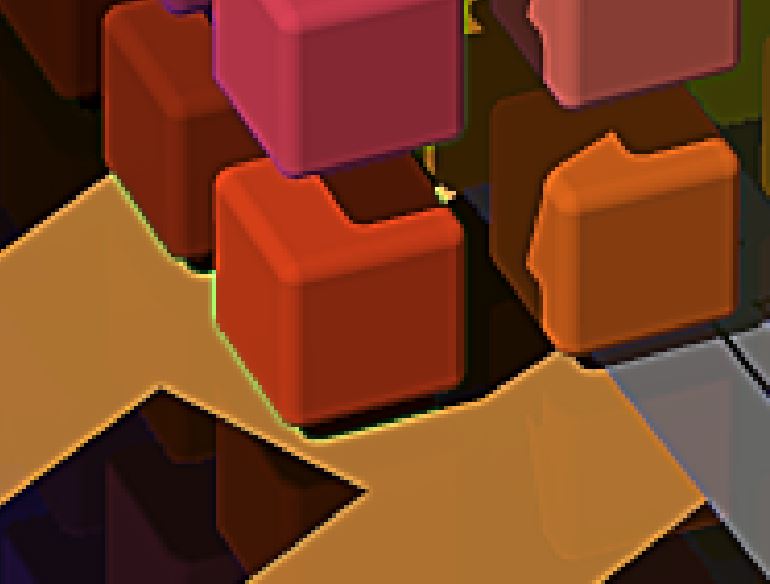
Note the lime-green fringes around the lower part of the red cube. Here’s a similar crop of the result of sharpening the luminance:

Lsharp

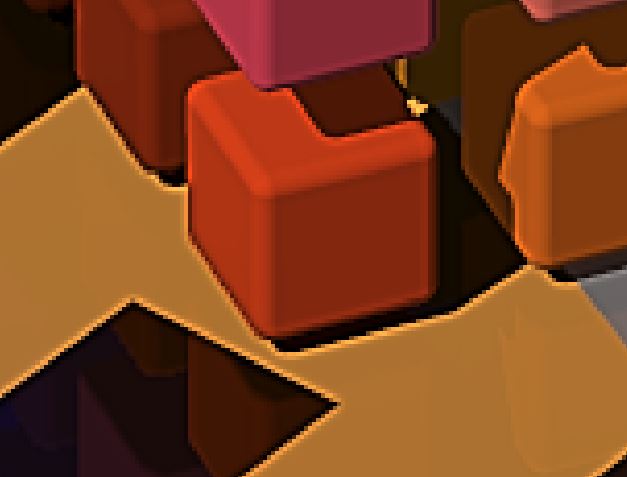
We still have the oversharpening halos, but at least they don’t have color casts.

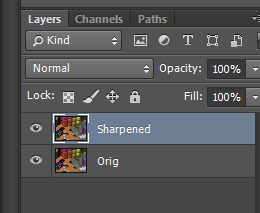
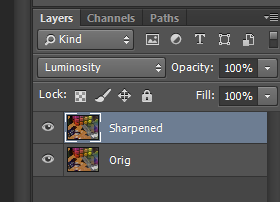
You can do pretty much the same thing in Photoshop by doing your sharpening on a duplicate layer and messing with the blending modes. Here’s what you get with Photoshop’s unsharp masking filter with the blending mode set to Normal:

layerssharpnorm

PSNormalsharp

Similar green artifacts, right?

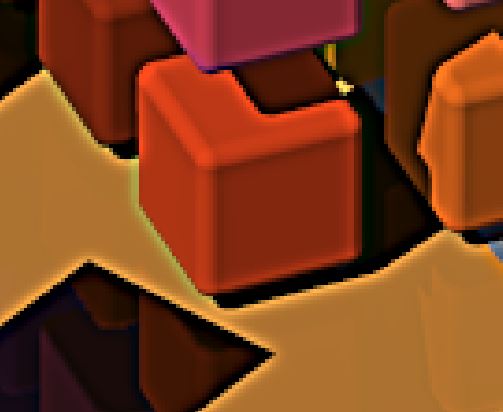
Here’s what it looks like with the blending mode of the sharpened layer set to Luminance:

layerssharpluma

PSLumasharp

Halos, but no color shifts.

Since the artifacts aren’t always readily apparent, it’s probably a good idea to do your sharpening on a duplicate layer and set the blending mode to Luminance. You can always change it back if there is some reason to do so. Or, if you’re new to this kind of thinking, you could leave it on Normal until you find an artifact, then change it to Luminance.

As we’ve seen before, sharpening at different gammas produces different results, but it’s a bit fiddlier to try that in Photoshop. One way the comes to mind is to copy the image to be sharpened into a new image, convert to a color space with a different gamma, sharpen, convert back to the original color space, copy and paste back into the original image as a new layer, and set the blending mode to Luminance. That’s probably too much trouble for most people, especially since any possible improvement is unknown until you go to all that work.

The Last Word

← Closer firehouse pictures More sharpening and luminance →

Comments

  1. Royi says

    June 15, 2014 at 2:43 pm

    I must say Photoshop’s USM is different:
    http://www.dpreview.com/forums/post/53571797

    Reply
    • Jim says

      June 16, 2014 at 1:58 pm

      So it is (different from the Matlab code), but the artifacts are similar. The Matlab code doesn’t clip until the images are converted to 16-bit integer precision, which occurs in the file-writing code.

      Jim

      Reply

Leave a Reply Cancel reply

Your email address will not be published. Required fields are marked *

May 2025
S M T W T F S
 123
45678910
11121314151617
18192021222324
25262728293031
« Apr    

Articles

  • About
    • Patents and papers about color
    • Who am I?
  • How to…
    • Backing up photographic images
    • How to change email providers
    • How to shoot slanted edge images for me
  • Lens screening testing
    • Equipment and Software
    • Examples
      • Bad and OK 200-600 at 600
      • Excellent 180-400 zoom
      • Fair 14-30mm zoom
      • Good 100-200 mm MF zoom
      • Good 100-400 zoom
      • Good 100mm lens on P1 P45+
      • Good 120mm MF lens
      • Good 18mm FF lens
      • Good 24-105 mm FF lens
      • Good 24-70 FF zoom
      • Good 35 mm FF lens
      • Good 35-70 MF lens
      • Good 60 mm lens on IQ3-100
      • Good 63 mm MF lens
      • Good 65 mm FF lens
      • Good 85 mm FF lens
      • Good and bad 25mm FF lenses
      • Good zoom at 24 mm
      • Marginal 18mm lens
      • Marginal 35mm FF lens
      • Mildly problematic 55 mm FF lens
      • OK 16-35mm zoom
      • OK 60mm lens on P1 P45+
      • OK Sony 600mm f/4
      • Pretty good 16-35 FF zoom
      • Pretty good 90mm FF lens
      • Problematic 400 mm FF lens
      • Tilted 20 mm f/1.8 FF lens
      • Tilted 30 mm MF lens
      • Tilted 50 mm FF lens
      • Two 15mm FF lenses
    • Found a problem – now what?
    • Goals for this test
    • Minimum target distances
      • MFT
      • APS-C
      • Full frame
      • Small medium format
    • Printable Siemens Star targets
    • Target size on sensor
      • MFT
      • APS-C
      • Full frame
      • Small medium format
    • Test instructions — postproduction
    • Test instructions — reading the images
    • Test instructions – capture
    • Theory of the test
    • What’s wrong with conventional lens screening?
  • Previsualization heresy
  • Privacy Policy
  • Recommended photographic web sites
  • Using in-camera histograms for ETTR
    • Acknowledgments
    • Why ETTR?
    • Normal in-camera histograms
    • Image processing for in-camera histograms
    • Making the in-camera histogram closely represent the raw histogram
    • Shortcuts to UniWB
    • Preparing for monitor-based UniWB
    • A one-step UniWB procedure
    • The math behind the one-step method
    • Iteration using Newton’s Method

Category List

Recent Comments

  • JimK on Goldilocks and the three flashes
  • DC Wedding Photographer on Goldilocks and the three flashes
  • Wedding Photographer in DC on The 16-Bit Fallacy: Why More Isn’t Always Better in Medium Format Cameras
  • JimK on Fujifilm GFX 100S II precision
  • Renjie Zhu on Fujifilm GFX 100S II precision
  • JimK on Fuji 20-35/4 landscape field curvature at 23mm vs 23/4 GF
  • Ivo de Man on Fuji 20-35/4 landscape field curvature at 23mm vs 23/4 GF
  • JimK on Fuji 20-35/4 landscape field curvature at 23mm vs 23/4 GF
  • JimK on Fuji 20-35/4 landscape field curvature at 23mm vs 23/4 GF
  • Ivo de Man on Fuji 20-35/4 landscape field curvature at 23mm vs 23/4 GF

Archives

Copyright © 2025 · Daily Dish Pro On Genesis Framework · WordPress · Log in

Unless otherwise noted, all images copyright Jim Kasson.