• site home
  • blog home
  • galleries
  • contact
  • underwater
  • the bleeding edge

the last word

Photography meets digital computer technology. Photography wins -- most of the time.

You are here: Home / The Last Word / Simulated foliage shots vs fill factor

Simulated foliage shots vs fill factor

August 23, 2017 JimK 3 Comments

I’m going to set aside the development of the lens test using the SIemens Star target to explore something that came up in the last few days while I was messing around with the camera simulator: the effect of fill factor on sharpness and aliasing. The reason why this is topical is the Fujifilm GFX 50S, which has smaller-then-usual microlenses, yielding a smaller-than-normal effective fill factor. When I did lens tests using the GFX, we saw that the results were much sharper than one would normally expect. In some cases, the MTF50 approached the Nyquist frequency. Yesterday, I showed simulation results with binary and raised-sinusoid Siemens Star targets that demonstrated visually that lower effective fill factors both increase contrast and cause more aliasing.

But what is the effect of that aliasing in the real world? Of course, it’s going to depend on the particular subject chosen for the experiment. I have been doing a lot of visual lens testing that used foliage, so it was only natural that I turned to the same kind of subject for a test of the visual effect of fill factor. 

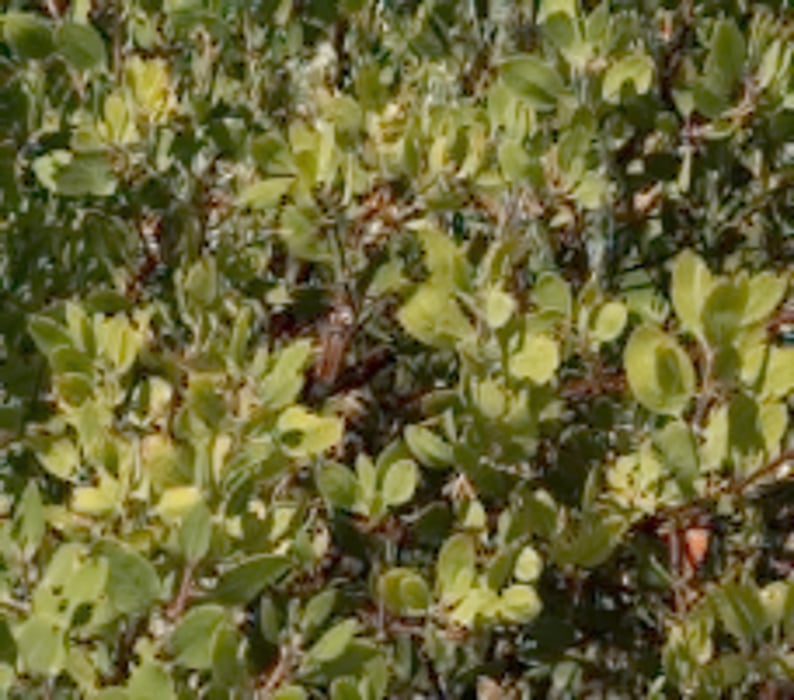
I set the simulator for a 5.3 um pitch, camera with a diffraction-limited lens, and used AHD demosaicing. Here’s what I got, at a very small part at the center of the simulated sensor, at f/2 for both 100% and 60% fill factor, enlarged to 400%:

Fill Factor 100%, f/2


Fill Factor 60%, f/2


Well, OK. The 60% fill factor image is marginally sharper, and I can’t see that the increased aliasing is a visual problem.

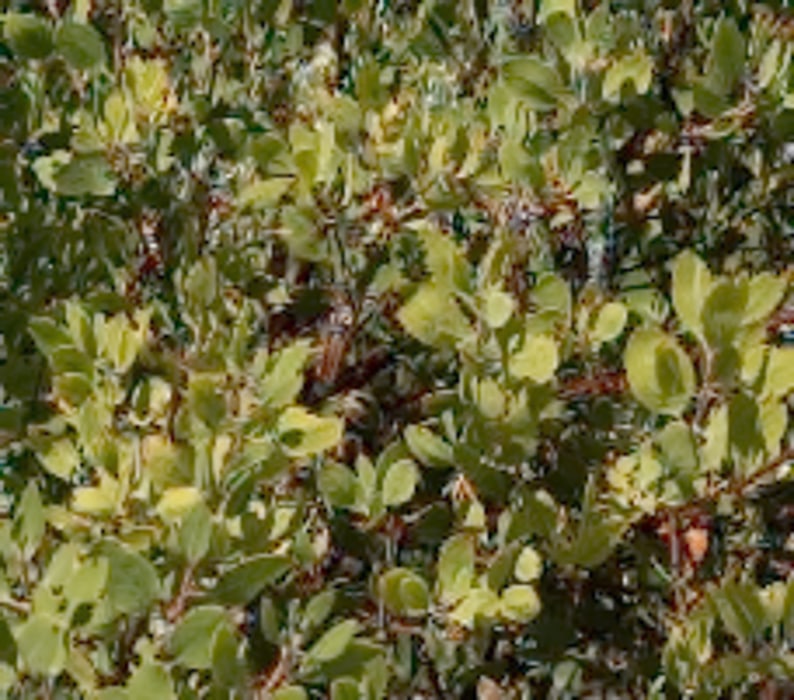
What if we drop the fill factor to 10%:

Fill Factor 10%, f/2

Sharper yet, and the aliasing — and there has to be a lot of it by now — is not apparent to me.

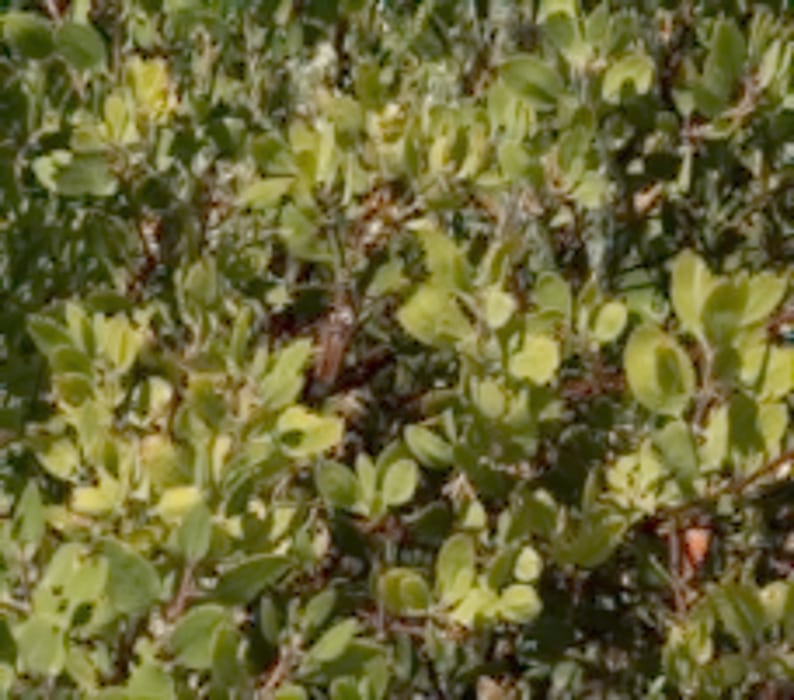
Let’s be ridiculous and go to a 1% fill factor:

Fill Factor 1%, f/2

The image continues to get sharper. That’s because a diffraction-limited f/2 lens presents the sensor with a heck of a lot of detail. The thing that is most surprising to me is that lowering the fill factor to silly levels doesn’t make the aliasing a lot worse, at least with this subject. The next most surprising thing is that it doesn’t make the image that much sharper, either.

Let’s stop the lens down to f/4. Some very good lenses can be expected to be close to diffraction-limited by then.

Fill Factor 100%, f/4


Fill Factor 60%, f/4


Fill Factor 10%, f/4


Fill Factor 1%, f/4

The trend is the same, but the effects are even smaller because of the lens diffraction.

If we go to f/8:

Fill Factor 100%, f/8


Fill Factor 60%, f/8


Fill Factor 10%, f/8


Fill Factor 1%, f/8


We can see that the fill factor makes very little difference.

So, although lowering effective fill factor is a great way to increase MTF50 scores, it doesn’t seem to make that much difference with landscapes — or at least with foliage. Fabrics and architecture are likely to be a different story.

The Last Word

← Siemens Star diffraction & fill-factor effects Simulated architectural shots vs fill factor →

Comments

  1. Frans van den Bergh says

    August 23, 2017 at 10:55 pm

    Hi Jim,

    Although I agree that overall the lower fill-factor images show far fewer artifacts than one would expect (given the MTF curve), I did notice a rather obvious artifact in the lower right corner of the images. Look at the bright red-brown patch (I think it is a branch), and the stark shadow cast over it. In your second image (f/2, 60% fill-factor) I see some severe jaggies along that shadow.

    Perhaps the rest of the scene is less affected by the aliasing because the contrast over the other edges is rather low? I wonder if something as simple as an image gradient histogram will be sufficient to measure this property of a natural scene?

    -F

    Reply
  2. Jack Hogan says

    August 24, 2017 at 9:46 am

    Interesting Jim. Qualitatively, the lower fill factor images appear to me to have an ‘oversharpened’ look . Curious: where did the underlying image come from?
    Jack

    Reply
    • JimK says

      August 24, 2017 at 9:55 am

      The starting image was an almost-full-frame crop from a shot with the GFX and a 120/4 Fuji lens. My sim needs (about a thousand times as many, here) way more pixels in the input image than those in the sensor being simulated.

      Reply

Leave a Reply Cancel reply

Your email address will not be published. Required fields are marked *

May 2025
S M T W T F S
 123
45678910
11121314151617
18192021222324
25262728293031
« Apr    

Articles

  • About
    • Patents and papers about color
    • Who am I?
  • How to…
    • Backing up photographic images
    • How to change email providers
    • How to shoot slanted edge images for me
  • Lens screening testing
    • Equipment and Software
    • Examples
      • Bad and OK 200-600 at 600
      • Excellent 180-400 zoom
      • Fair 14-30mm zoom
      • Good 100-200 mm MF zoom
      • Good 100-400 zoom
      • Good 100mm lens on P1 P45+
      • Good 120mm MF lens
      • Good 18mm FF lens
      • Good 24-105 mm FF lens
      • Good 24-70 FF zoom
      • Good 35 mm FF lens
      • Good 35-70 MF lens
      • Good 60 mm lens on IQ3-100
      • Good 63 mm MF lens
      • Good 65 mm FF lens
      • Good 85 mm FF lens
      • Good and bad 25mm FF lenses
      • Good zoom at 24 mm
      • Marginal 18mm lens
      • Marginal 35mm FF lens
      • Mildly problematic 55 mm FF lens
      • OK 16-35mm zoom
      • OK 60mm lens on P1 P45+
      • OK Sony 600mm f/4
      • Pretty good 16-35 FF zoom
      • Pretty good 90mm FF lens
      • Problematic 400 mm FF lens
      • Tilted 20 mm f/1.8 FF lens
      • Tilted 30 mm MF lens
      • Tilted 50 mm FF lens
      • Two 15mm FF lenses
    • Found a problem – now what?
    • Goals for this test
    • Minimum target distances
      • MFT
      • APS-C
      • Full frame
      • Small medium format
    • Printable Siemens Star targets
    • Target size on sensor
      • MFT
      • APS-C
      • Full frame
      • Small medium format
    • Test instructions — postproduction
    • Test instructions — reading the images
    • Test instructions – capture
    • Theory of the test
    • What’s wrong with conventional lens screening?
  • Previsualization heresy
  • Privacy Policy
  • Recommended photographic web sites
  • Using in-camera histograms for ETTR
    • Acknowledgments
    • Why ETTR?
    • Normal in-camera histograms
    • Image processing for in-camera histograms
    • Making the in-camera histogram closely represent the raw histogram
    • Shortcuts to UniWB
    • Preparing for monitor-based UniWB
    • A one-step UniWB procedure
    • The math behind the one-step method
    • Iteration using Newton’s Method

Category List

Recent Comments

  • bob lozano on The 16-Bit Fallacy: Why More Isn’t Always Better in Medium Format Cameras
  • JimK on Goldilocks and the three flashes
  • DC Wedding Photographer on Goldilocks and the three flashes
  • Wedding Photographer in DC on The 16-Bit Fallacy: Why More Isn’t Always Better in Medium Format Cameras
  • JimK on Fujifilm GFX 100S II precision
  • Renjie Zhu on Fujifilm GFX 100S II precision
  • JimK on Fuji 20-35/4 landscape field curvature at 23mm vs 23/4 GF
  • Ivo de Man on Fuji 20-35/4 landscape field curvature at 23mm vs 23/4 GF
  • JimK on Fuji 20-35/4 landscape field curvature at 23mm vs 23/4 GF
  • JimK on Fuji 20-35/4 landscape field curvature at 23mm vs 23/4 GF

Archives

Copyright © 2025 · Daily Dish Pro On Genesis Framework · WordPress · Log in

Unless otherwise noted, all images copyright Jim Kasson.