I’ve been participating in a discussion about gear for street photography. My position has been, and is, that you can do street photography with just about any gear, though some kinds of street work favor some kinds of gear. The discussion has broadened a bit beyond the – for me, not particularly interesting – subject of gear to a subject that I think is much more important: just how do you do street photography successfully?
This post is going to be about how I do street photography, or rather, how I used to do it. I think that street work is a young person’s game, and I am definitely on the creaky side of life. I did most of my street work in the 1970s through the 1990s, which was an era in which cameras were not met with the hostility, fear, and suspicion that seems to accompany them in cities today, and one in which law enforcement and private guard services were not so quick to bar photographers from making images, regardless of what the law actually says.

Before I get started, I’ll need to define street photography. You could just say it’s photography done in the street, and I’d have a hard time arguing with you, but I’m going to use a narrower definition here. What I’m talking about is people-centric work. The people are strangers to the photographer, and they are not posing, and certainly not posed by, and often unaware of, the photographer. The places are outdoor public spaces, or occasionally large covered spaces. If photographer-controlled light is involved, and it usually isn’t, it is minimal, like an on-camera fill flash. Street photography also has a traditional feel to it. Technical quality is not as important as in, say, landscapes. Tilted horizons, blown highlights, grain/noise, out-of-focus blobs, and awkward framing are all acceptable, even desirable to some.
Henri Cartier-Bresson is probably the archetypal street photographer, but there are many who plowed that field. Robert Frank, Garry Winogrand, and Lee Friedlander are also exemplars of the genre. You could argue that much of Weegee’s work was street photography, but it is atypical, and seems to me to be more reportage (there is a broad overlap; much of Cartier-Bresson’s early work was straight reportage). Walker Evans is not a dead-center street photographer, either, opting for more distance and a more formal quality than is typical.
In the 1970s and 80s, I attempted traditional street photography with some little success. Towards the end of the 80s that evolved to the work in Alone in a Crowd, which started within the street photography tent, evolved into something more formal, and at the end, returned in some, if not most, respects.
How did I go about making street photographs? First off, I’m going to tell you how I didn’t operate. There is a widely-held belief that, in order to be a good street photographer, you have to react rapidly. Maybe that’s true for some, but not for me. For me, the key thing was that you have to be ready to make the exposure all the time. Then, when something happens, it’s just a matter of raising your camera to your eye and tripping the shutter. You don’t have to do that especially quickly. In fact, you don’t want to do it fast, because rapid motion sets off alarm bells in people.
Okay, how do you make sure you’re ready to make an image?
The zeroth thing is that you need to be paying attention all the time. There’s a mental state that I used to get myself into when I was doing street work. It involved trying to be open to everything going on around me. It was difficult to get there immediately, but after half an hour or so, I could feel it happening. And here’s a bonus. It’s quite a pleasant state of mind – calm, clear, and centered.
The first thing is that your camera needs to be in your hands. Not in a case. Not slung over your shoulder. Not hanging around your neck like a necklace. Ready.
The second thing is focusing. Your camera needs to be preset to the right distance. That means that you’re always thinking about what might happen and adjusting the focus distance. This is best done with lenses that have clear distance markings and short focus throws, like the lenses made for rangefinder cameras.
In addition, you want to think not just in terms of the point of best focus, but of a range of acceptable focus. This is facilitated by using a lens that has large, clear depth of field markings on the barrel. Most lenses made for rangefinder cameras qualify. Leica R-mount lenses are often good, too. The DOF markings on the ring are mostly likely computed for a circle fo confusion (CoC) of 30 micrometers (um). That’s a lot of blur by modern standards If you want to be really conservative, to get a CoC of 1.5 pixels with a 42 MP camera, or about 7.5 um, we need to use the ticks four stops wider than the aperture we’ve set. If we set f/16, we use the f/4 ticks. If we set f/11, we’d use the f/2.8 ticks. Probably, you’re better off with something in between. I generally used 2 or three stop DOF derating in the street.
You’re always fiddling with your camera. It soon becomes second nature to think about what might be happening next and adjusting your focus accordingly.

The third thing is exposure. You don’t want to be messing with the aperture, since you picked something that would give you the DOF you want when you figured out where to set the focus. That leaves shutter speed, and here the digital and chemical photography worlds diverge, at least as of 2016. In the film world, you were always worried about camera or subject motion if the light weren’t bright. In the digital world, with a camera that’s quasi-ISOless, you pick a shutter speed that won’t clip the highlights in the brightest conditions that you expect to encounter, and leave the camera set to the same shutter speed as the light drops by as much as four or five stops. Then you change the ISO by four or five stops, and start over. When I’m operating in this mode, I often set the ISO knob of the a7RII to either 100 or 640, which are the two minimum-analog-gain settings for each of the camera’s conversion gain.
You can also put the camera in aperture auto-exposure mode, and use the exposure compensation knob. That’s more like the film situation, and I find it less satisfying, and more likely to get you into a situation where, because the shutter speeds are dropping, you need to rethink your chosen DOF strategy.
That’s it for the technical side of street photography, at least as practiced by me. Next, the where and when.
Your street work is great but it was a good to move on. You have a niche now which very few do. Street Photography is done by so many that one’s work can be overlooked.
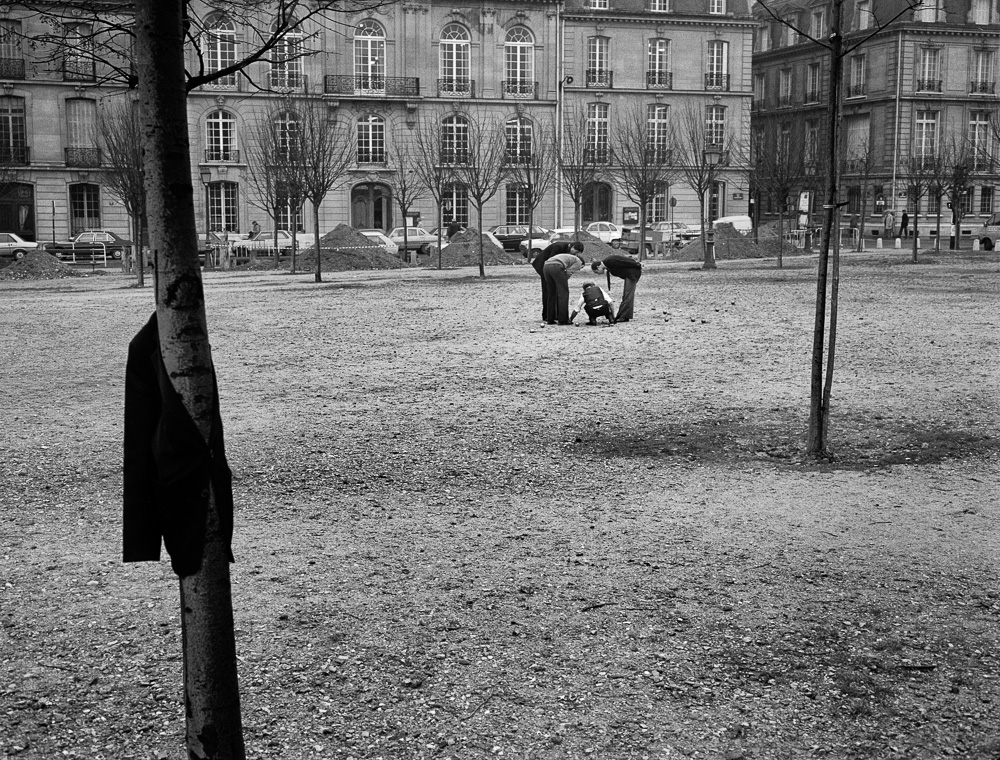
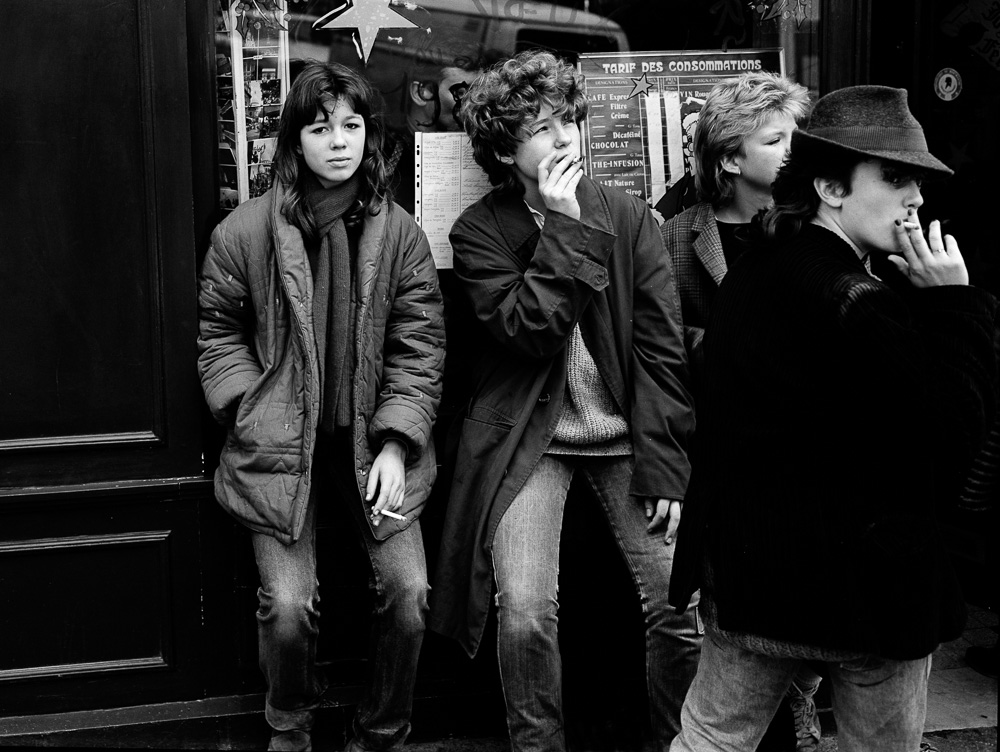
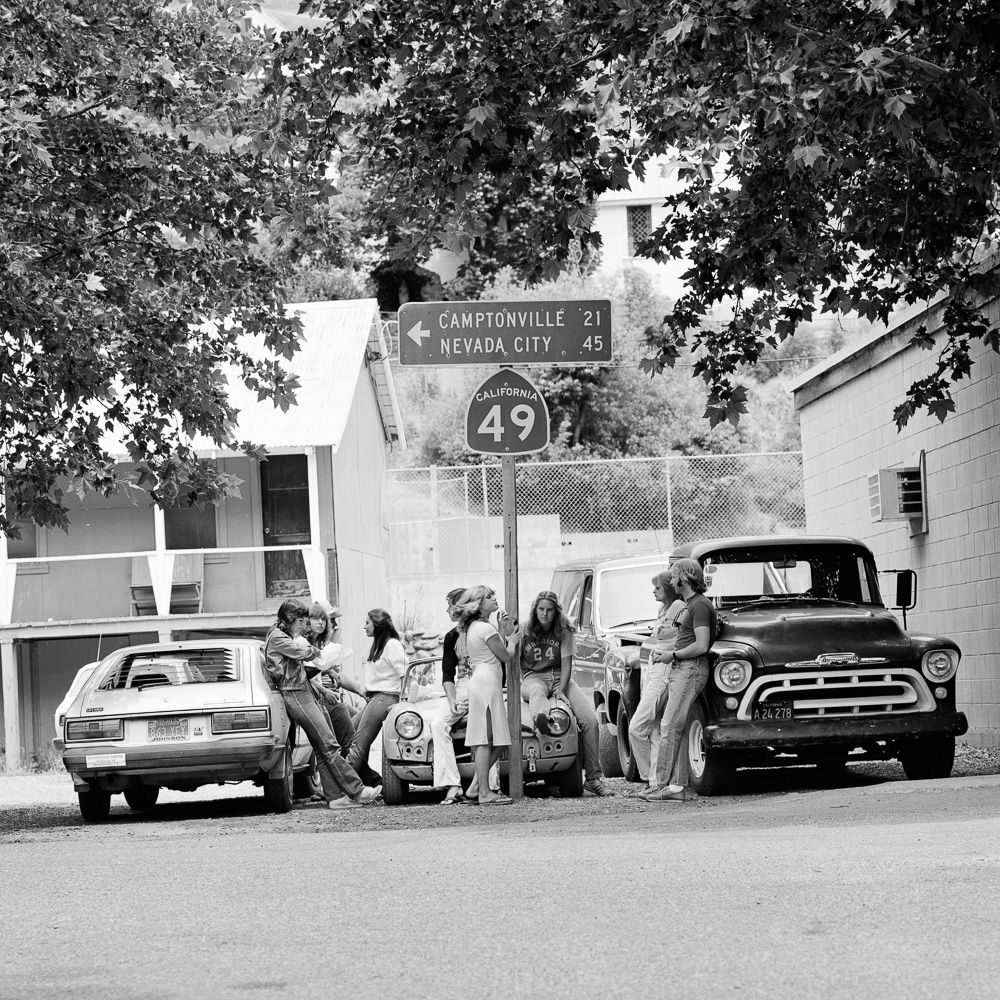
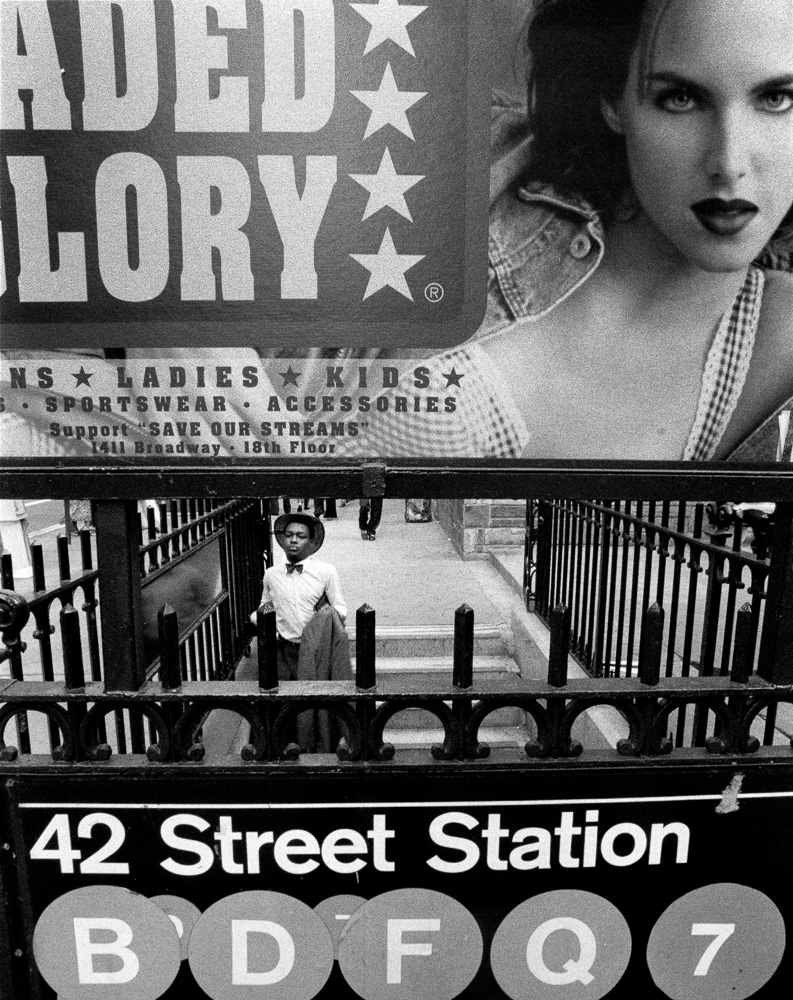
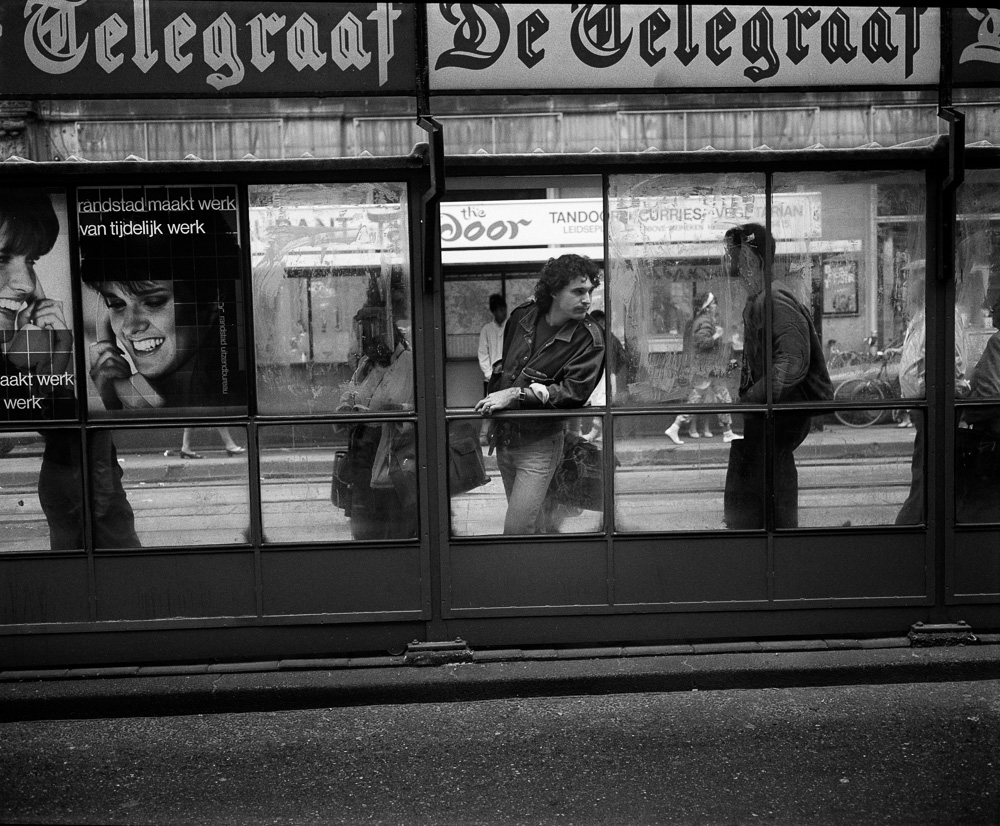
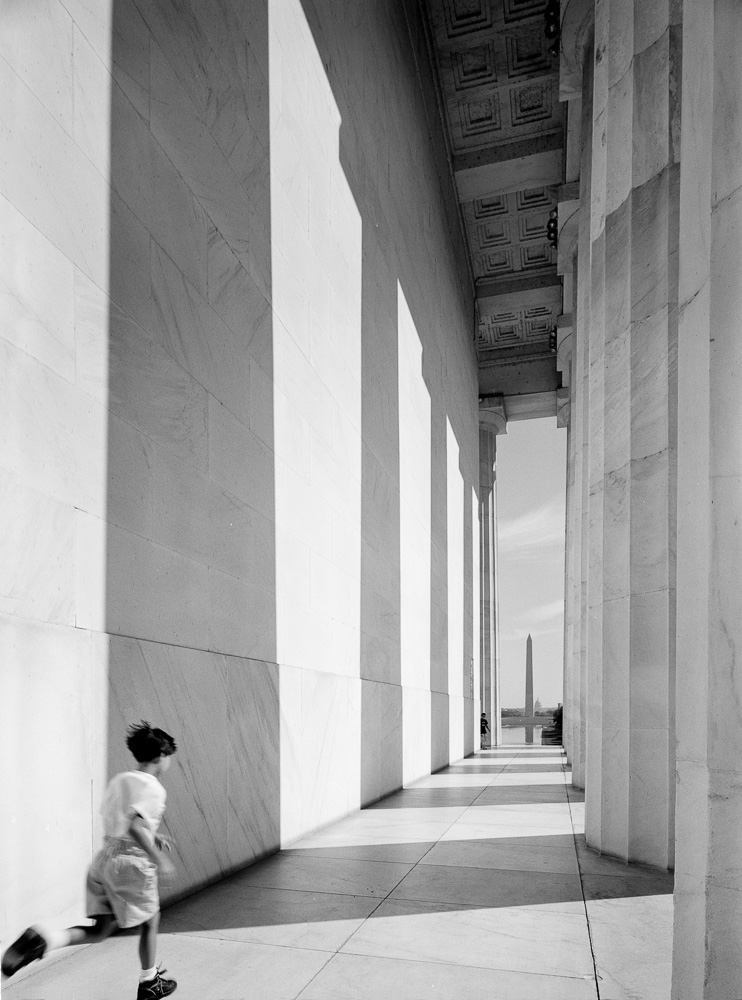
I like everyone of these images in which a human subject can be clearly seen. The child, the girl smoking, the California kids.