This is one in a series of posts on the Sony alpha 7 R Mark IV (aka a7RIV). You should be able to find all the posts about that camera in the Category List on the right sidebar, below the Articles widget. There’s a drop-down menu there that you can use to get to all the posts in this series; just look for “A7RIV”. This post is also about the GFX 100, and you can find more articles about that camera in a similar fashion.
The a7RIV 16-shot pixel shift feature, which uses half-pixel shifts, should in theory allow a big step up in resolution and freedom from aliasing. The resolution gains will be limited by the fact that the a7RIV microlenses have almost 100% coverage. With the addition of this new feature, how does the a7RIV compare with the 100 MP Fuji GFX 100?
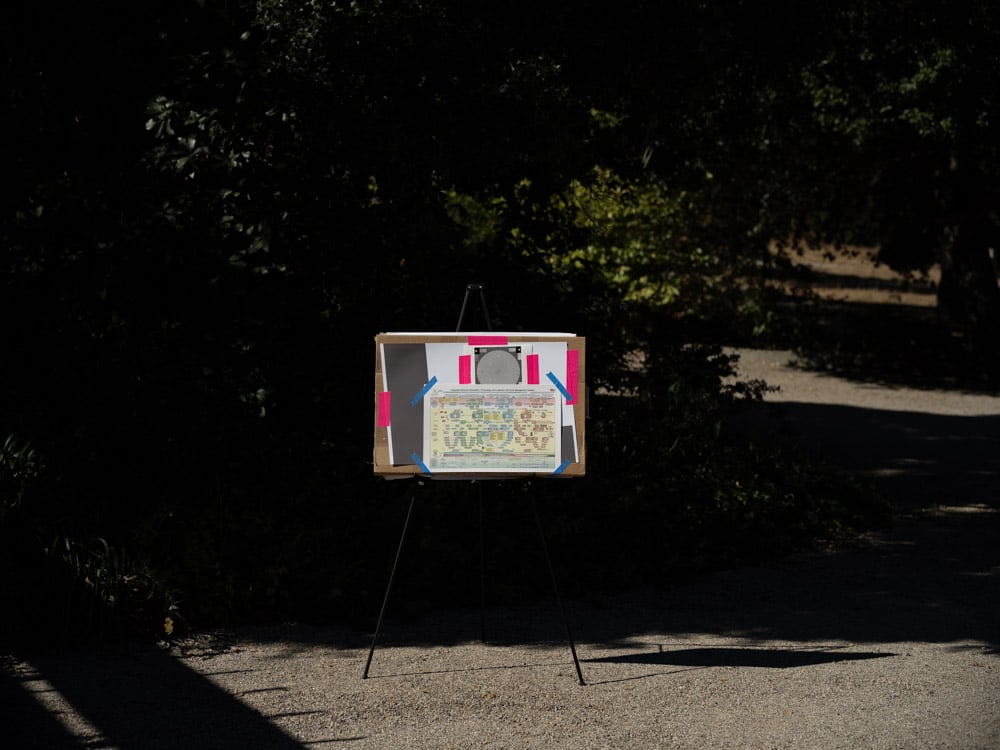
I mounted an Otus 55/1.4 on the a7RIV, and an Otus 84/1.8 on the GFX 100. I set the 55 to f/2.8 and the 85 to f/4, which are approximately equivalent f-stops at the same picture height. I set up on a Siemens Star target with a mostly-text chart underneath it. Here is the scene with the GFX 100:
Here it is with the a7RIV, cropped to a 4:3 aspect ratio:
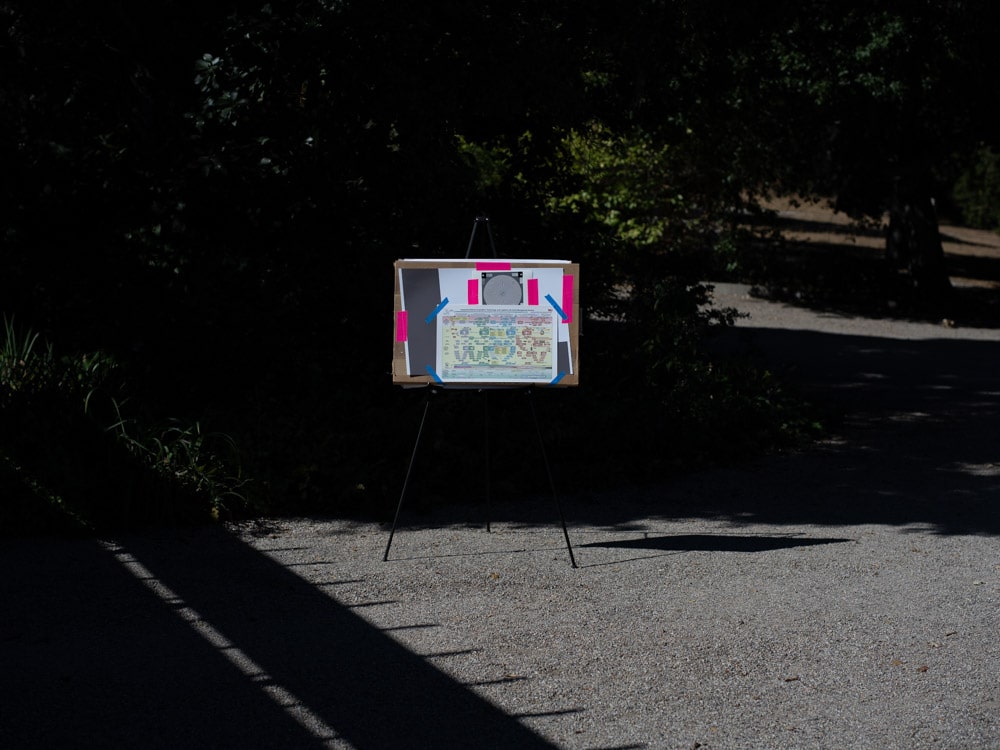
The 85 is a bit longer than would be perfect equivalence.
Using a 2-second self-timer with RRS legs and a C1 head for support, I made three sets of exposures with each camera, manually focusing for each set. ISO was 100. I used electronic shutter on the GFX, and the pixel-shift feature in the a7RIV automatically invokes the electronic shutter. I developed the GFX 100 images in Lightroom with default settings except a minor exposure tweak and white balancing to the dark gray in the periphery of the Siemens Star. I developed the a7RIV 16-shot sets in Imaging Edge with defaults settings, exported them as TIFFs, and brought them back into Lightroom where they received the same white balance move. I took the sharpest of each of the three sets. They were all about the same, though.
Approximately same FOV 200ish% looks at the star:
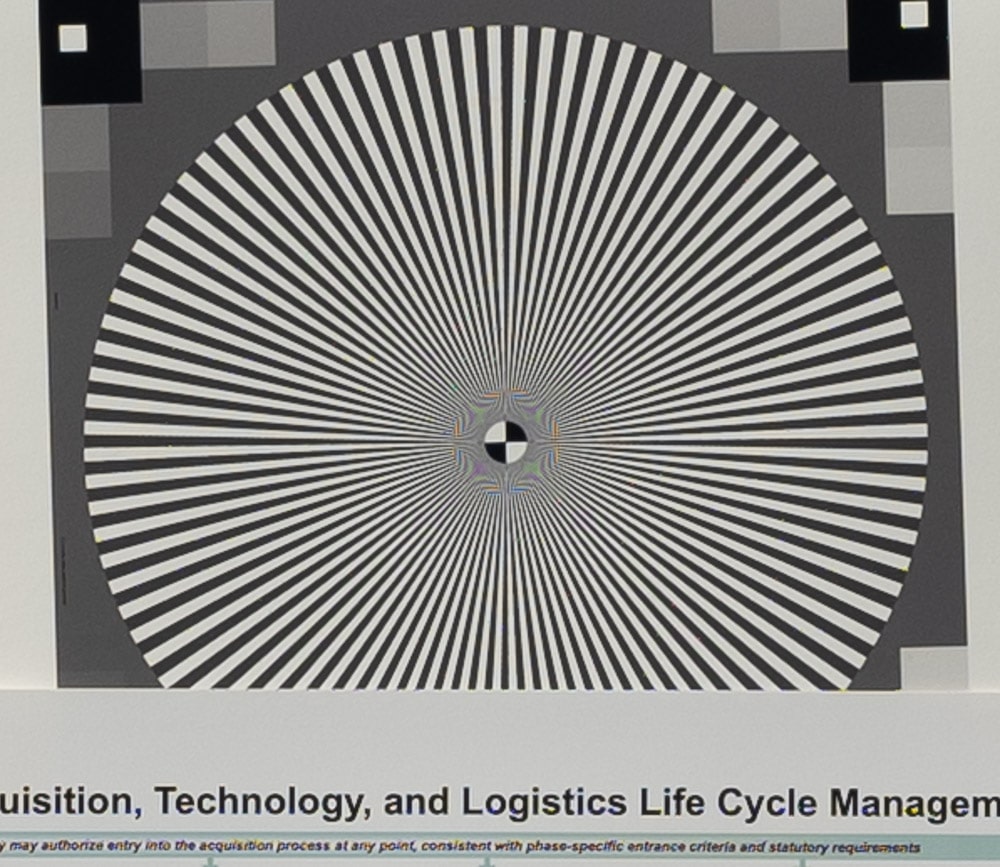
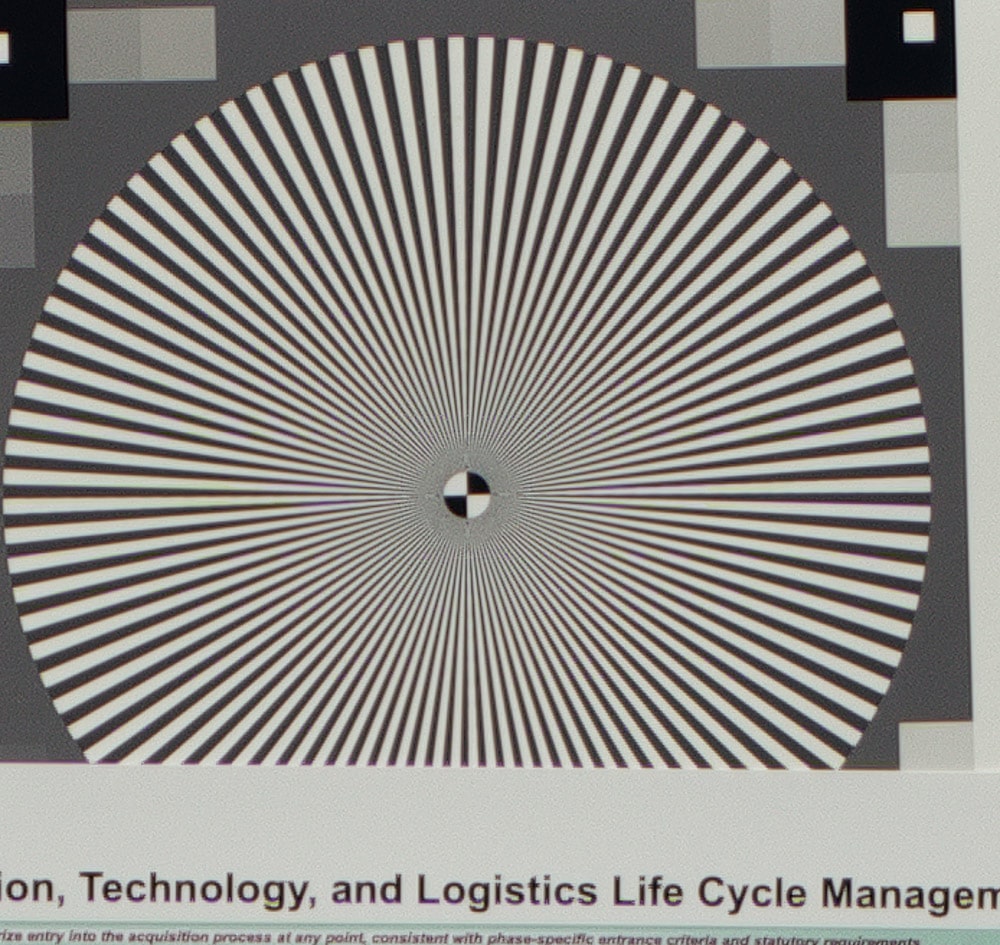
The GFX 100 has received more sharpening. Imaging Edge used to brutally oversharpen the a7RIII 4-shot pixel-shift images, but not anymore. The Sony image has about the same resolution. The big difference is the impressive reduction in aliasing provided by the pixel-shift technology.
Here’s a look at the chart:
There are differences, but it’s pretty close. Of course, you need a static subject and a solid camera support to use pixel-shift.
There are adjustments to the a7RIV 16-shot compositing. I will experiment with those.
From DPReview’s testing, generally I think the a7r4 16 image composite was a little worse than GFX 100. Some speculate it may be due to the lens (85mm GM @ f5.6) not being sharp enough.
Can you elaborate on what microlenses are and what that has to do with pixel-shift? Thanks
Microlenses are tiny plastic lenses (3.8 um across in the case of the a7RIV) that are located above the color filter array on the sensor. They serve to direct light downwards through the CFA and onto the sensor photodiodes where the photons will knock electrons free so that they can be counted. They effectively define the light-sensitive portion of each pixel on the sensor. Normally, microlenses are about as big as the sensor pitch. The 16-way pixel-shift mode allows the Sony Imaging Edge software to simulate a camera with a 1.9 um pixel pitch. But the pixels that contribute to this simulation have a light-sensitive region about 3.8 um across. If we were to express this as fill factor, we’d say the effective fill factor is 400%. That’s really biger than you’d like for a camera with a 1.9 um pitch, and it limits sharpness.
Erica, DPR had a special NEED: consistency with the pipelines used for other cameras. So they were forced to use a broken software — which could not deal with these files correctly.
Jim used a proper solution — and he shows that as far as hardware goes, Otus+α7rIV gives “an honest 250MPix experience”. (Provided you accept that these 250MPix “behave as” having a strong AAF: pixel-shift on N MPix without AAF is equivalent to a shot on 4N MPix with a strong AAF. — And above, Jim calls this “the 400% fill factor”.)
My (old) investigations of scans of 8×10in negatives showed that they have resolution comparable to (then unavailable) digital 180–200MPix without AAF. (The negatives were not mine. So maybe there are other situation when 8×10in can perform better. But I think this is a good estimate for “average” usage scenario.) So Hasselblad in pixel-shift mode (200MPix) is nearby, and α7rIV’s pixel-shift should be also close to this resolution.
I am always very well impressed with the computer solutions you use in your tests. However I find some gaps in the test setup. This is a case: the field of view should be strictly the same for such comparison. It is really impressive how the Sony A7R4 already beats the 100 Mp medium format with a handicap of 10 to 20 percent in linear magnification. It is a pity that we cannot have a true visual comparison after all your efforts.
Anyway, thanks for sharing this… And, btw, I love your images.
If I’d had the right focal length lenses, I would have matched the FOV better. Unfortunately, I did not.
It’s good to see the technology to this thing continue to move forward, both with what the camera is able to do and what the attending software is able to do.
I was trying to think of a moment when Andre Kertesz or Dorothy Lange or Boris Spremo set up in pixel shift mode? With all the effort to take this single shot and then to view it on a screen to pixel peep, I wonder. Where does it go? A print, the web? Is there a print technology that can produce the difference at 16 x 20? Perhaps the differences are more than sheer resolution, but more to do with colour and dynamic range? Or resolving power of available lenses? But even then… I get it, in terms of an exercise, but where does it end?
Hi,
I think that Jim’s article explains the benefits of using pixel shift very well, the main advantage is that it will eliminate most aliasing artifacts.
On the A7rIV it is a feature, that comes free. Hasselblad charges 15000 $US extra for essentially the same feature, I guess there may be some reason for that.
But, having a feature doesn’t mean that we need to use it. But, if the camera has that feature, it can be used when it would make sense.
Pixel shift is not a good way to make an image much sharper, IMO, but it is a good way to reduce aliasing in an image. Unfortunately, it only works in limited circumstances. None of the photographers that you mentioned had to deal with aliasing, so none of them would have a need for pixel shift. There are many photographers of the 1920s, 30, and 40s who prized detail, and used 8×10 and larger cameras to get it. I have some 8×10 and one 8×20 silver gelatin contact prints that are exquisite. Unfortunately, we don’t have output devices that can match the resolution of those prints. But it is certainly possible to see ugly aliasing artifacts on a C-sized 2880 dpi F-finish print.
You can increase dynamic range with pixel shift, but you can do the same thing just by taking the same number of unshifted shots and blending in post. Pixel shift’s effect on color is in the elimination of demosaicing artifacts.
But let’s remember one of Ansel’s observations: “There is nothing worse than a sharp image of a fuzzy concept.”
Hi, I’m a big fan of your blog and I think I read almost all the articles.
I’d love your opinion regarding the pixel-shift on GFX100.
Keep in mind I used to have the Sony A7RIII so i’m familiar with pixel-shift.
So today I updated my GFX100 and tried for the first time the pixel-shift. (mounted on studio column, one strobe, f/8, 1/5s)
notably the composite image was worse than the single image. shocking.
enlarging the single image RAF, resampling twice the size on photoshop produced results way better than the DNG generated with the FUJi software.
In my forum people are starting to have the same issue I have. so i don’t think i represent an isolated problem.
i’m just curious of what you think. some users lamented my problem even with natural light. so I don’t think it’s a strobe problem
Thanks
To me the single most compelling use is actually as a replacement for a large format scanner which is typically extremely expensive. I manage an archive of photography and see this as the best solution for scanning prints which are too big for conventional flat bed scanners like Epson 10000XL. I recognise that the shooting setup needs careful thought but nothing too onerous there.
That’s a great use. Not coincidentally, that turned out to be the main use of scanning backs in the later years.