• site home
  • blog home
  • galleries
  • contact
  • underwater
  • the bleeding edge

the last word

Photography meets digital computer technology. Photography wins -- most of the time.

You are here: Home / GFX 100 / Fuji 120/4 GF with and without tubes — visuals

Fuji 120/4 GF with and without tubes — visuals

September 3, 2021 JimK 1 Comment

This is one in a series of posts on the Fujifilm GFX 100. You should be able to find all the posts about that camera in the Category List on the right sidebar, below the Articles widget. There’s a drop-down menu there that you can use to get to all the posts in this series; just look for “GFX 100”. Since it’s more about the lenses than the camera, I’m also tagging it with the other Fuji GFX tags.

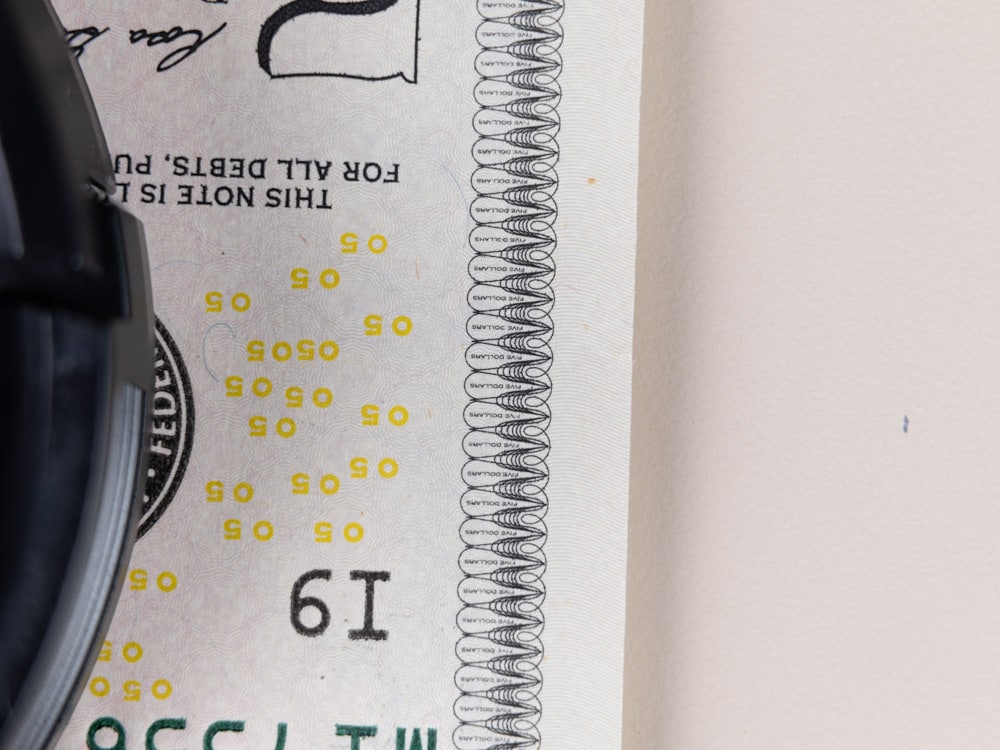
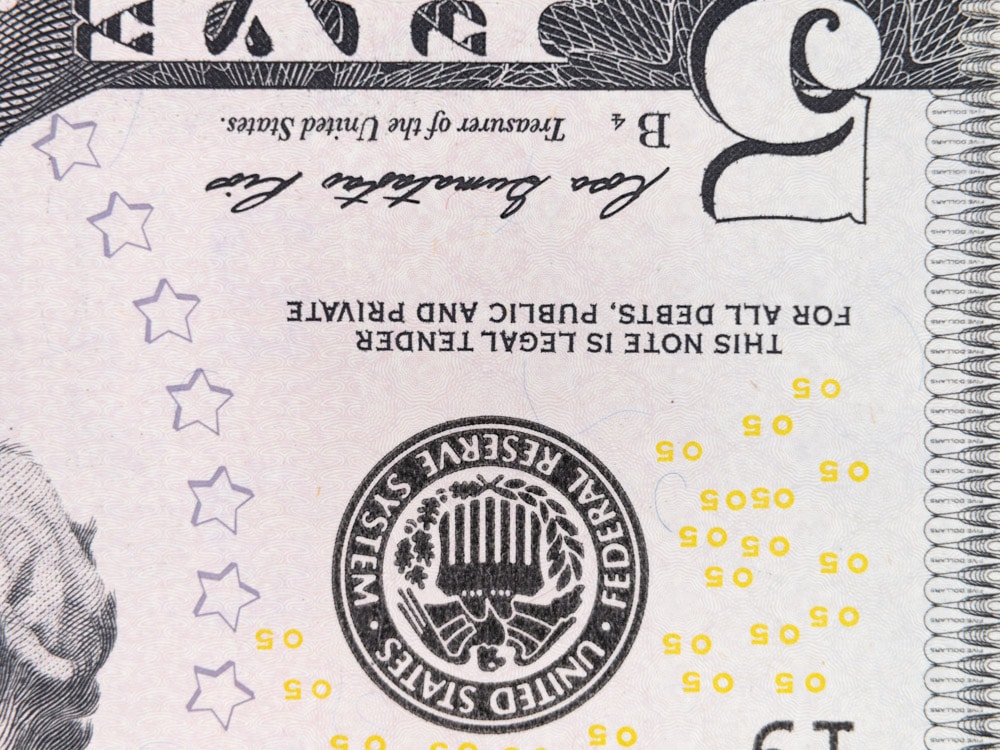
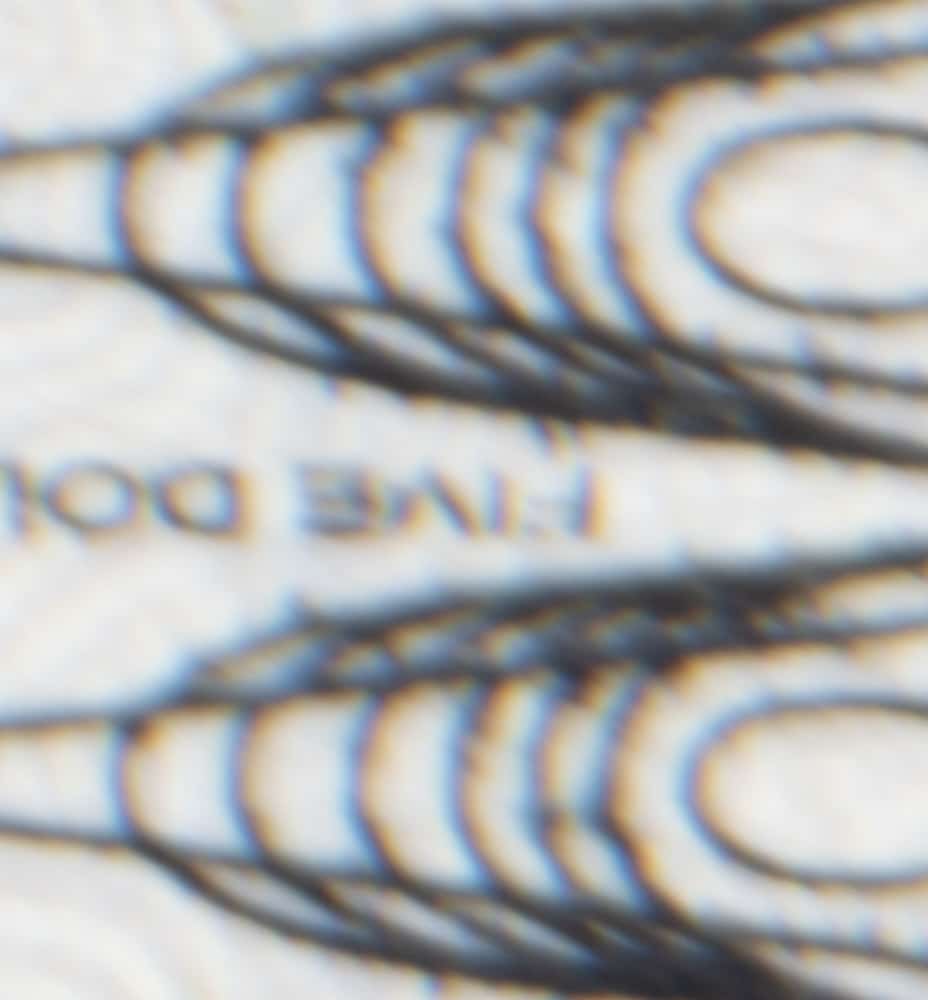
I’ve been posting a lot recently about the 120 mm f/4 GF macro lens for the GFX. I found it a good performer at 1:2, at minimum focusing distance (MFD) with no extension tubes, but that it had really soft edges and a lot of focus curvature at MFD with 36 mm of tubes. In this post, I tested it at 1:1 with a 45 mm tube,a and found it credible on-axis but soft on the right edge of the frame.  I reported those results numerically. I know that some people like images better than charts, so here is a visual look at the phenonium, using the time honored sharpness target of a banknote.

I tested 4 setups, all at an indicated f/4:

  • 45mm tube at minimum focusing distance(MFD), which gives 1:1 magnification.
  • Two 18mm tubes at MFD
  • One 18 mm tube at MFD
  • No tubes at MFD, which gives 1:2 magnification

Here are full-frame images of the 1:1 shots for navigation purposes. The images were created by Helicon from 150-capture sequences:

Used for center crop


Used for right edge and lower right corner crop

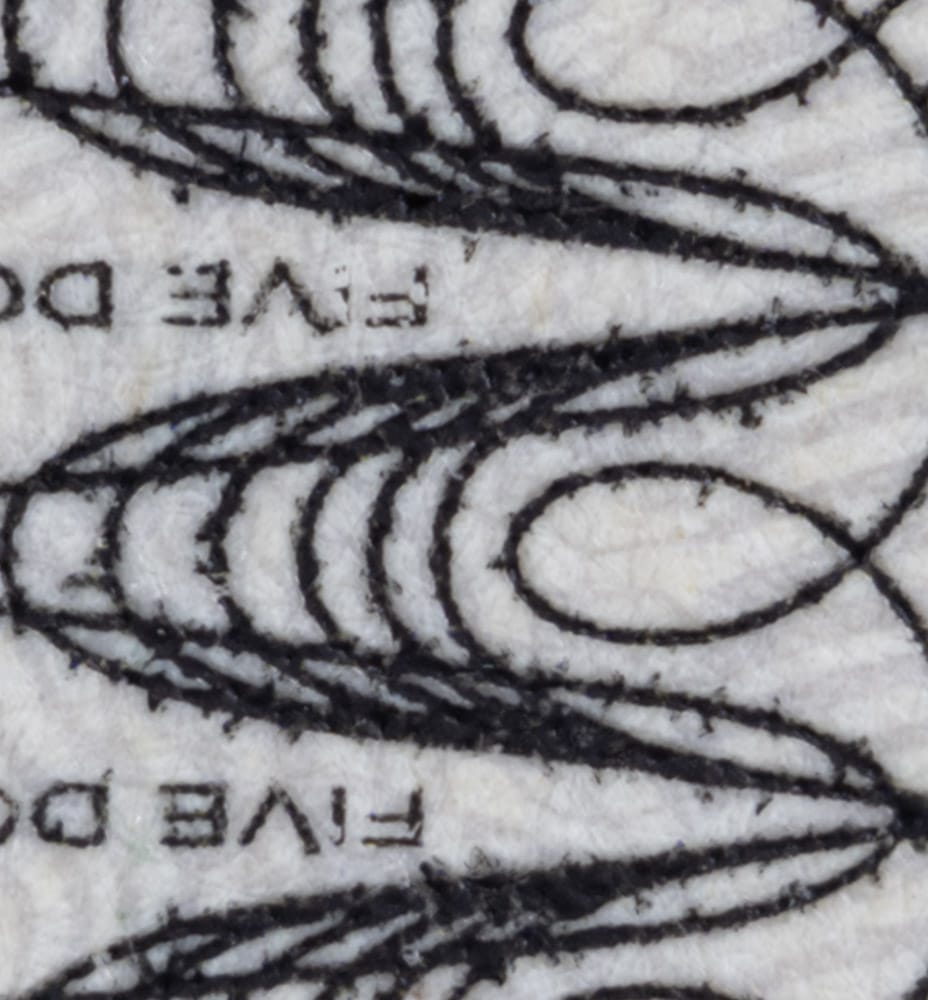
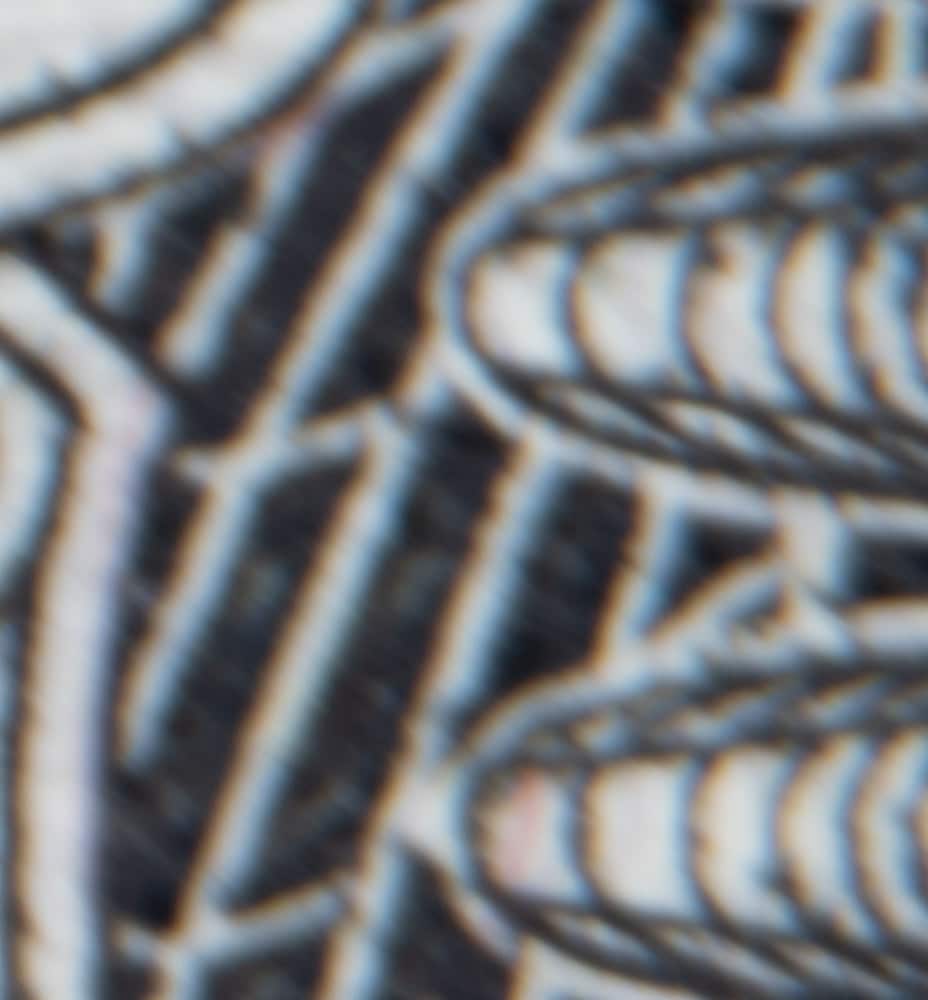
Here are center crops for all 4 cases, at about 150% magnification

45mm tube, center


36mm tube, center


18mm tube, center


No tubes, center

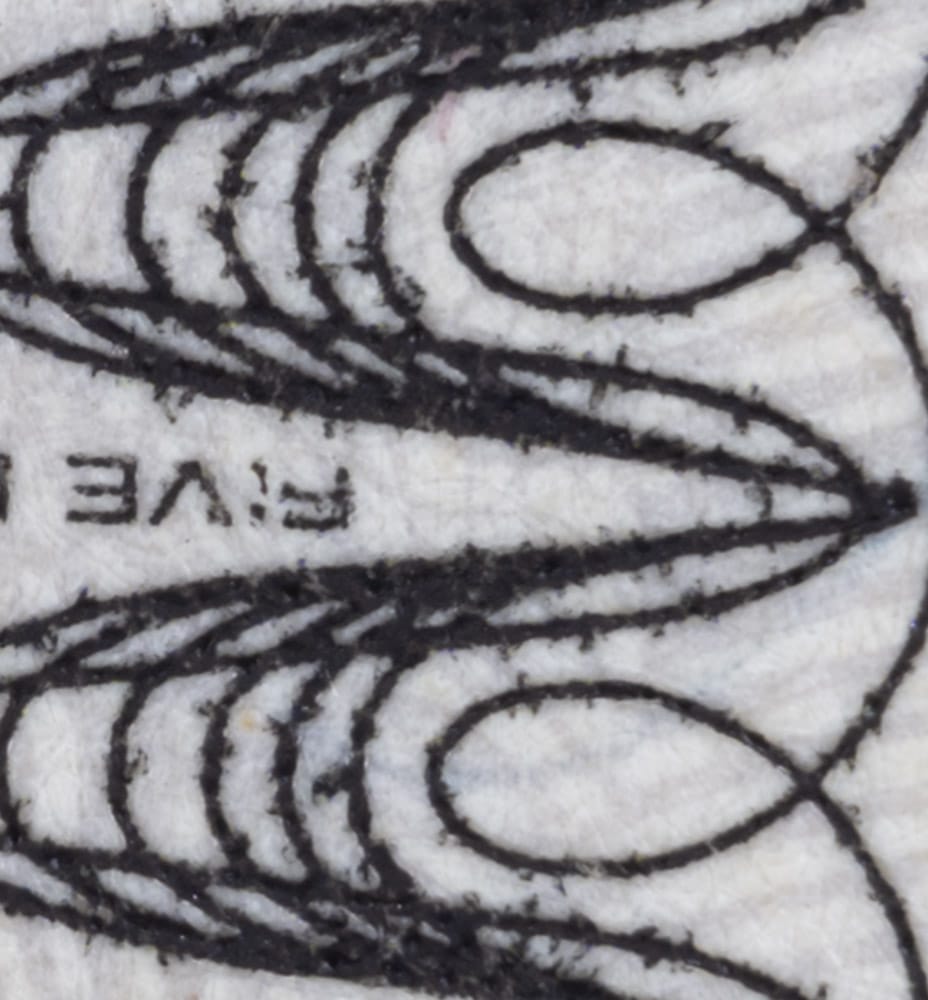
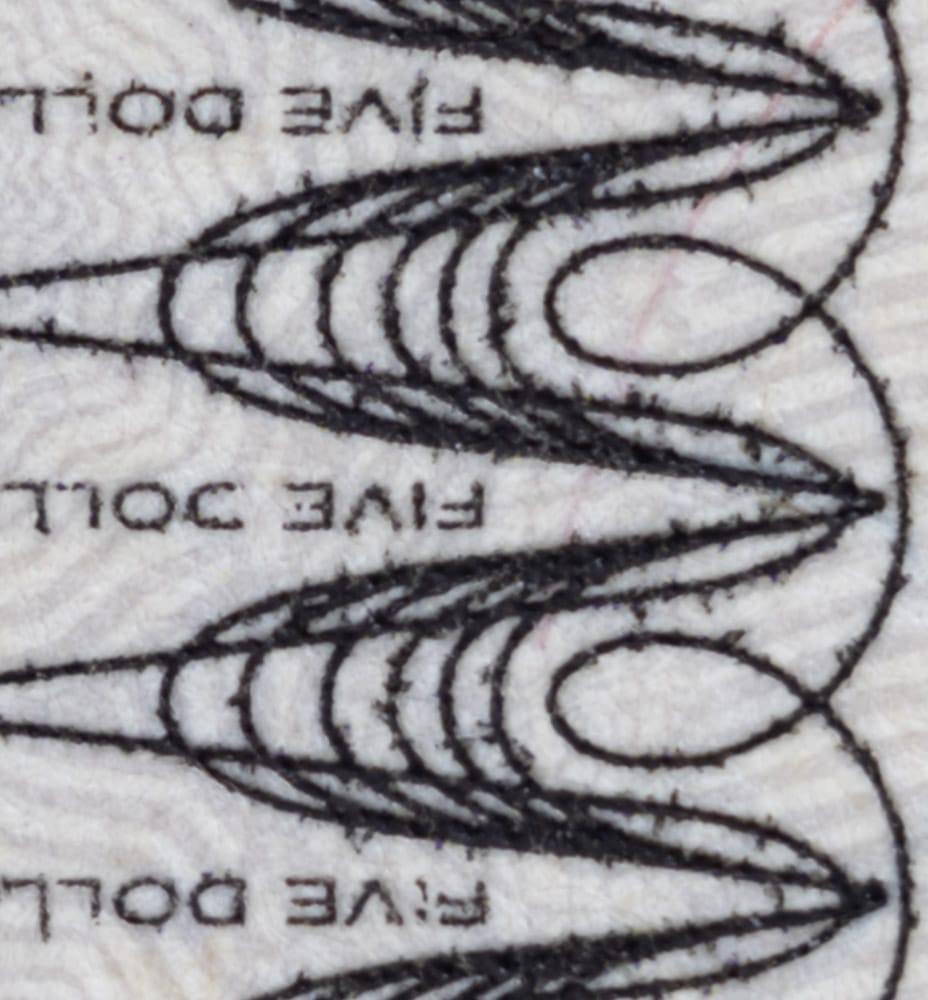
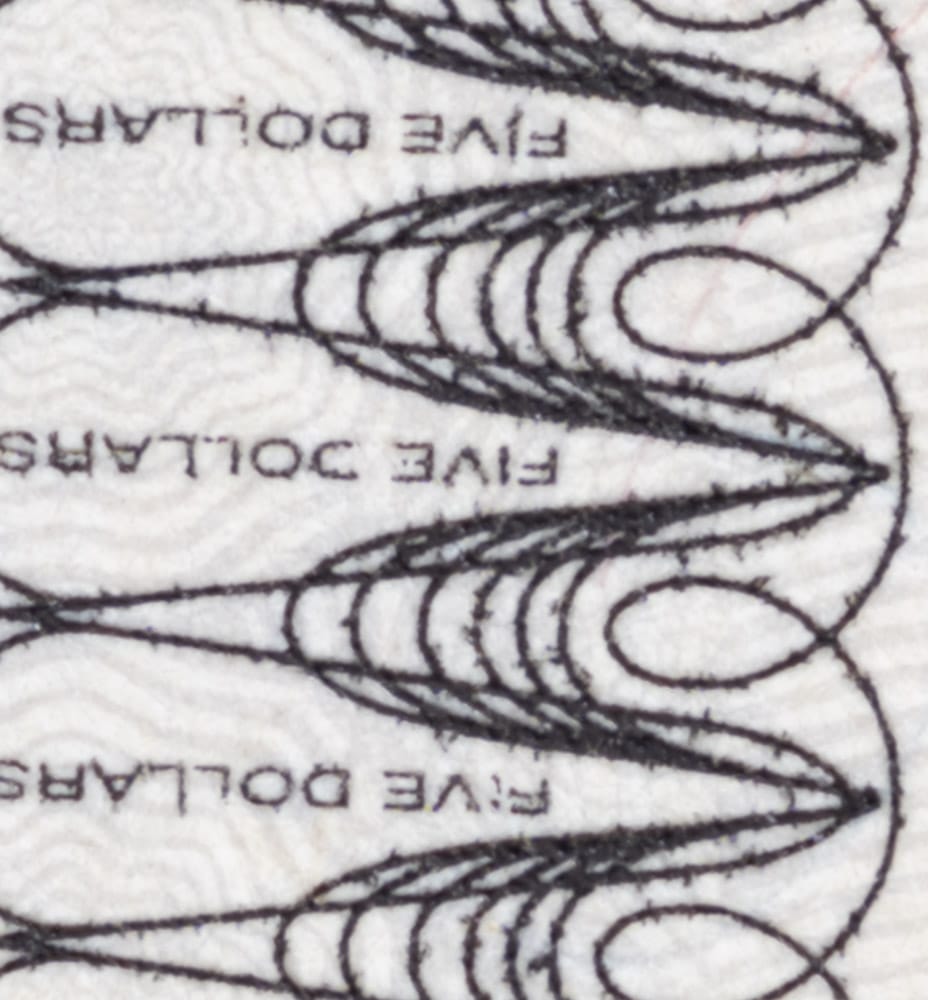
Conclusion: in the center you don’t lose much image-field sharpness as you add the tubes, and you gain object-field sharpness.

On the center right edge:

45mm tube, Right Edge


36mm tube, edge


18mm tube, edge


No tubes, edge

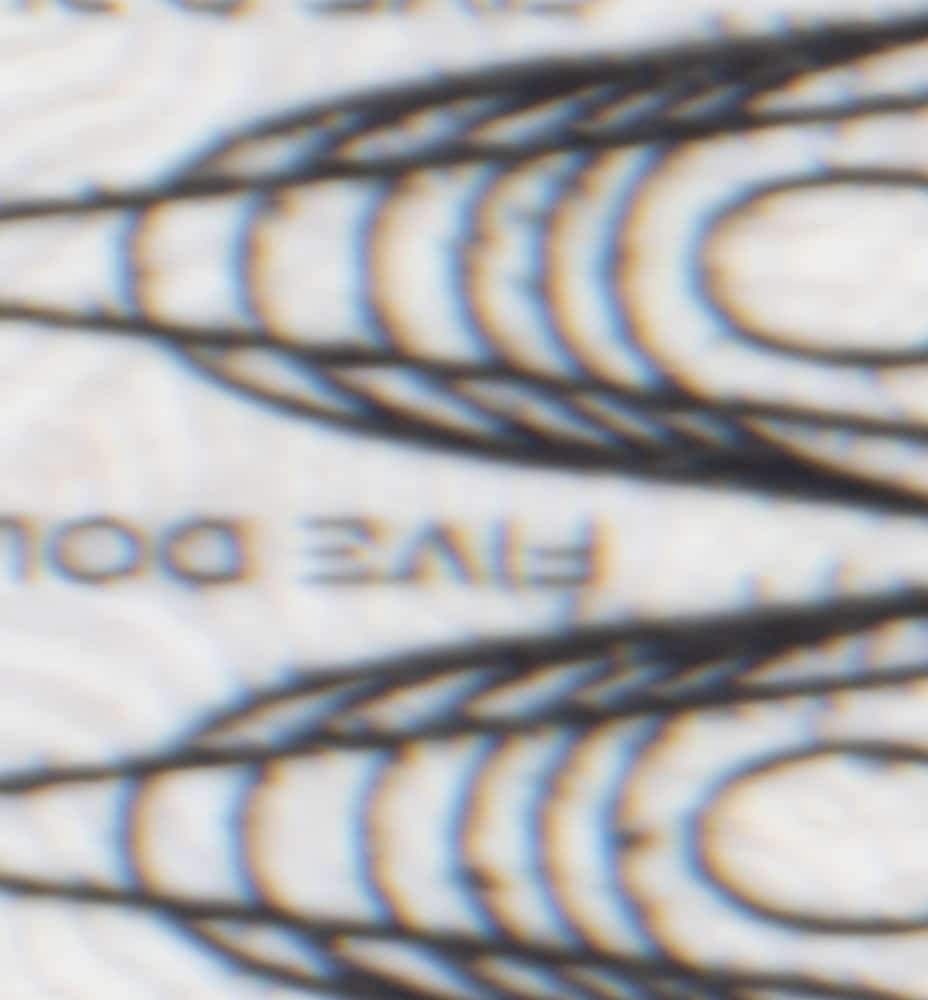
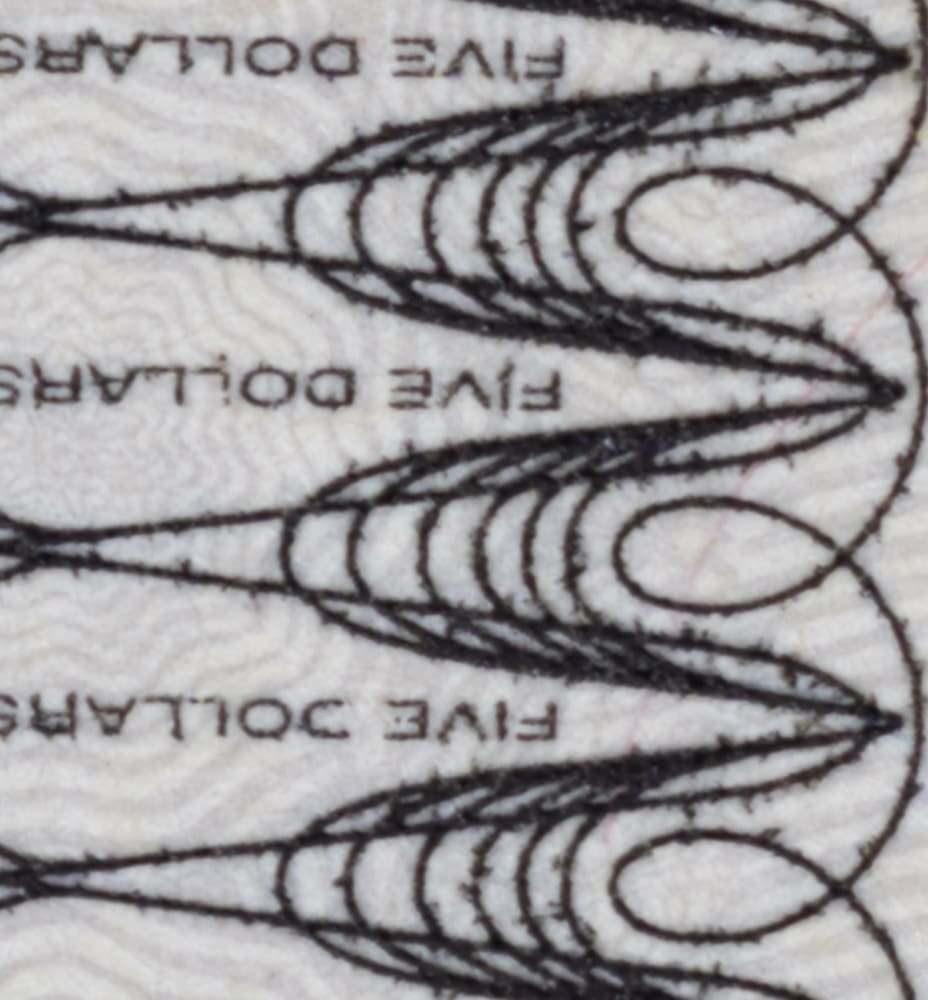
Conclusion: on the right edge you lose a lot image-field sharpness as you add the tubes, and you appear to lose object-field sharpness.

In the corner:

45mm tube, Lower Right Corner


36mm tube, corner


18mm tube, corner


No tubes, corner

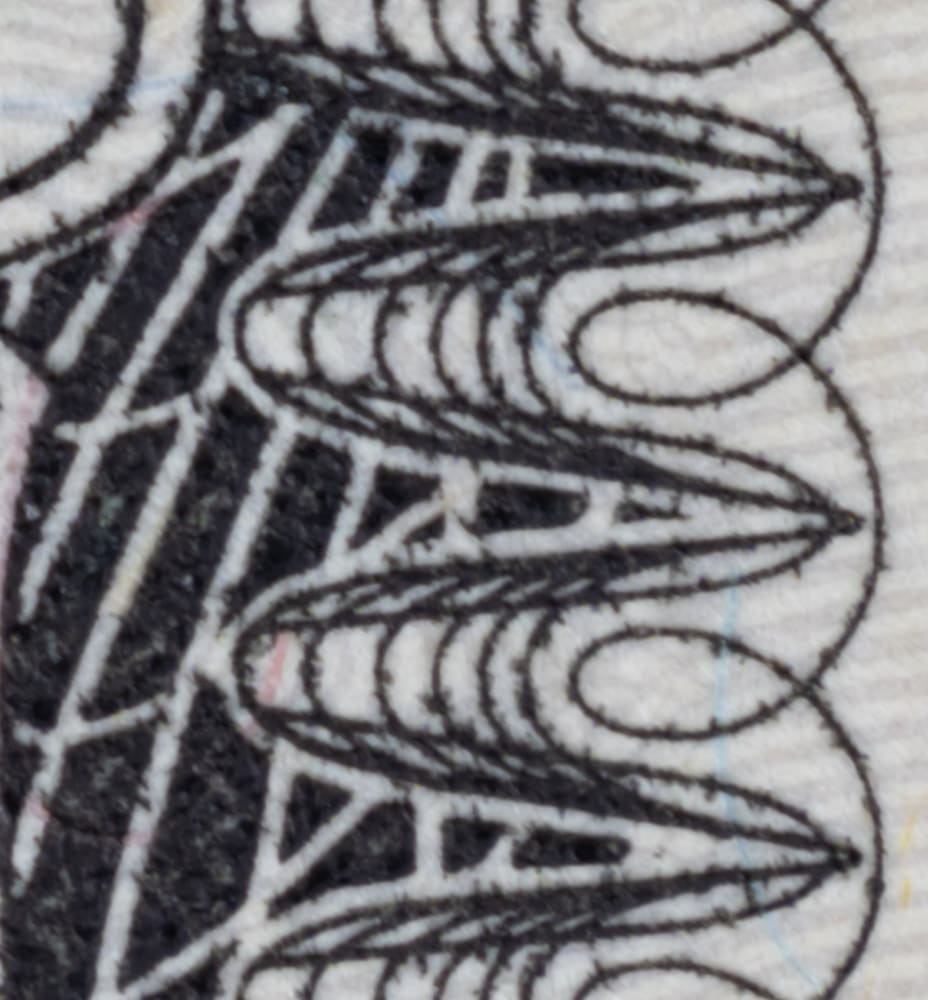
Conclusion: same as for the edge: you lose a lot image-field sharpness as you add the tubes, and you appear to lose object-field sharpness.


GFX 100, GFX 100S, GFX 50S

← Fuji 120/4 GF at 1:1 with tubes — visuals CV 125/2.5 on GFX 100 at 1:1 and beyond →

Comments

  1. Zé De Boni says

    September 3, 2021 at 9:46 pm

    “… some people like images better than charts. ” Maybe one image is worth a thousand bars 😉
    I do appreciate your graphs, but the impressive result at the edge without tube at 1:2 shown in images here changed my mind and made me go back to the charts from your August 27 post (https://blog.kasson.com/the-last-word/two-ways-to-get-to-12-with-the-gfx/).
    So I retreat from one point in my previous comment and admit that the 120/4 GF is really a great performer in the full range without tube.
    Otherwise, my explanation about image degradation using bare tubes for macro work still holds, as it is clearly demonstrated here and was in the conclusions of that referred post: “the edges are poor with the 110 and the tubes”.
    I have a special interest in this as I am doing digital copies from 35mm slides (hence 1:1) with an A7R4. For convenience I use one of the five 1:1 reaching macro lenses I own (not counting many enlarging lenses). My choice is an old Sigma 70/2.8 A-mount, which can resolve Kodachrome grain with no perceived CA. I just need to correct a minimal distortion (-3) in ACR, but it is great that I can have zero CA correction, because that would affect the aberration present in the original (which must be reproduced for fidelity).
    Being presently limited at 1:2 (image field 66x44mm), Fuji GFX 100 can be used for the same “scanning” purposes from 6×9, 6×7 and even 6×6 chromes or negs. But closer than that up to 1:1 I would try the Voigtlander Macro Apo-Lanthar 110mm. Image circle at this ratio is surely enough for MF, one should just check its edges/corners behavior.

    Reply

Leave a Reply Cancel reply

Your email address will not be published. Required fields are marked *

May 2025
S M T W T F S
 123
45678910
11121314151617
18192021222324
25262728293031
« Apr    

Articles

  • About
    • Patents and papers about color
    • Who am I?
  • How to…
    • Backing up photographic images
    • How to change email providers
    • How to shoot slanted edge images for me
  • Lens screening testing
    • Equipment and Software
    • Examples
      • Bad and OK 200-600 at 600
      • Excellent 180-400 zoom
      • Fair 14-30mm zoom
      • Good 100-200 mm MF zoom
      • Good 100-400 zoom
      • Good 100mm lens on P1 P45+
      • Good 120mm MF lens
      • Good 18mm FF lens
      • Good 24-105 mm FF lens
      • Good 24-70 FF zoom
      • Good 35 mm FF lens
      • Good 35-70 MF lens
      • Good 60 mm lens on IQ3-100
      • Good 63 mm MF lens
      • Good 65 mm FF lens
      • Good 85 mm FF lens
      • Good and bad 25mm FF lenses
      • Good zoom at 24 mm
      • Marginal 18mm lens
      • Marginal 35mm FF lens
      • Mildly problematic 55 mm FF lens
      • OK 16-35mm zoom
      • OK 60mm lens on P1 P45+
      • OK Sony 600mm f/4
      • Pretty good 16-35 FF zoom
      • Pretty good 90mm FF lens
      • Problematic 400 mm FF lens
      • Tilted 20 mm f/1.8 FF lens
      • Tilted 30 mm MF lens
      • Tilted 50 mm FF lens
      • Two 15mm FF lenses
    • Found a problem – now what?
    • Goals for this test
    • Minimum target distances
      • MFT
      • APS-C
      • Full frame
      • Small medium format
    • Printable Siemens Star targets
    • Target size on sensor
      • MFT
      • APS-C
      • Full frame
      • Small medium format
    • Test instructions — postproduction
    • Test instructions — reading the images
    • Test instructions – capture
    • Theory of the test
    • What’s wrong with conventional lens screening?
  • Previsualization heresy
  • Privacy Policy
  • Recommended photographic web sites
  • Using in-camera histograms for ETTR
    • Acknowledgments
    • Why ETTR?
    • Normal in-camera histograms
    • Image processing for in-camera histograms
    • Making the in-camera histogram closely represent the raw histogram
    • Shortcuts to UniWB
    • Preparing for monitor-based UniWB
    • A one-step UniWB procedure
    • The math behind the one-step method
    • Iteration using Newton’s Method

Category List

Recent Comments

  • bob lozano on The 16-Bit Fallacy: Why More Isn’t Always Better in Medium Format Cameras
  • JimK on Goldilocks and the three flashes
  • DC Wedding Photographer on Goldilocks and the three flashes
  • Wedding Photographer in DC on The 16-Bit Fallacy: Why More Isn’t Always Better in Medium Format Cameras
  • JimK on Fujifilm GFX 100S II precision
  • Renjie Zhu on Fujifilm GFX 100S II precision
  • JimK on Fuji 20-35/4 landscape field curvature at 23mm vs 23/4 GF
  • Ivo de Man on Fuji 20-35/4 landscape field curvature at 23mm vs 23/4 GF
  • JimK on Fuji 20-35/4 landscape field curvature at 23mm vs 23/4 GF
  • JimK on Fuji 20-35/4 landscape field curvature at 23mm vs 23/4 GF

Archives

Copyright © 2025 · Daily Dish Pro On Genesis Framework · WordPress · Log in

Unless otherwise noted, all images copyright Jim Kasson.