the last word

Photography meets digital computer technology. Photography wins -- most of the time.

  • site home
  • blog home
  • galleries
  • contact
  • underwater
  • the bleeding edge
You are here: Home / The Last Word / A new web site — installing Imagely themes

A new web site — installing Imagely themes

September 21, 2016 JimK Leave a Comment

This is a continuation of a series of posts about reworking my website into one that is entirely WordPress based. The series starts here:

A new web site – general requirements

Rather than push on and explore the finer points of the Photocrati uber-theme, I thought it would be instructive to see what the Imagely themes looked like. I went to their site, and signed up for the whole theme collection at the bargain rate of 80 bucks for the first year, and $100 a year thereafter. I picked a theme more or less at random, downloaded it, and tried to install in in my sandbox blog at http://www.kasson.name. The installer complained that the theme needed a framework theme called Genesis. That had escaped me initially. I found it, paid another $60, downloaded and installed it.

Then I changed to my Imagely theme, which is called Simplicity. The user interface for customization is much simpler with this Imagely/Genesis theme  than the Photocrati uber-theme. I rapidly had a site splash screen setup.  But there was no menu. That turned out to be a good thing, because I was able to create a custom menu very easily. All in all, it took me about 10 minutes to get the site that I'[d prepared earlier for Photocrati up and running with Imagely/Genesis. It looks like I’ll be able to create other custom menus. Whether or not I can get then assigned to the pages that way I want is another thing.

As an aside, I now know that the only way to exclude pages from Photocrati’s/WordPress’s default menu system is to use a plug-in called, unsurprisingly, “Exclude Pages.” However, you can use custom menus there, too. Here’s what Photocrati has to say about that:

How to Create Custom Menus. We recommend photographers use Custom Menus. With Custom Menus, you can add any page or external link to your menu, and only those pages or links you specify will appear. You can also easily drag and drop menu items to rearrange them. Photocrati allows you to create two custom menus in the header and footer. To create a custom menu, simply go to Appearance > Menus from your dashboard.

It looks like that’s my answer to seamless transport between WordPress instances. This also gets around the problem that Photocrati had with two different page presentations depending on how the page was accessed, albeit at the expense of defeating dropdown menus. That’s not a serious loss as far as I’m concerned.

But there was a problem. You knew there was going to be a problem, didn’t you?

The background to all of the galleries and albums was white. I wanted it dark gray:

white-galllery-bg

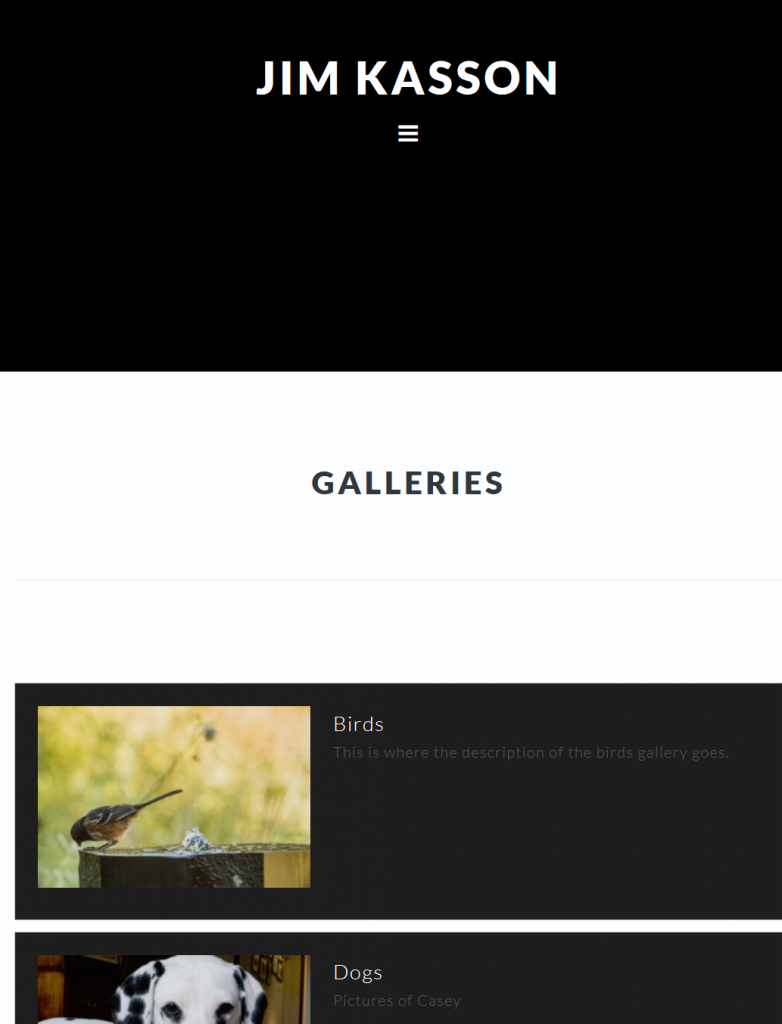
Pretty ugly, huh? There are a few niggles: I’d like the menu expanded if it fits the page, rather than showing the hamburger, the header is too tall, and there’s too much space between the heading “Galleries” and the Descriptions of the galleries are MIA (is that because the text color is black? It was light with the Photocrati theme.)

There is a section in the Simplicity customization part of the WordPress Dashboard labeled

Customizing ▸ Customize Colors ▸ Content Area Colors

but it’s just link and button colors.

I may have to break down and go through the documentation, rather than just hitting the highlights like I just did.

The Last Word

← A new web site — working with Photocrati A new web site — blog template decision →

Leave a Reply Cancel reply

Your email address will not be published. Required fields are marked *

March 2023
S M T W T F S
 1234
567891011
12131415161718
19202122232425
262728293031  
« Jan    

Articles

  • About
    • Patents and papers about color
    • Who am I?
  • Good 35-70 MF lens
  • How to…
    • Backing up photographic images
    • How to change email providers
  • Lens screening testing
    • Equipment and Software
    • Examples
      • Bad and OK 200-600 at 600
      • Excellent 180-400 zoom
      • Fair 14-30mm zoom
      • Good 100-200 mm MF zoom
      • Good 100-400 zoom
      • Good 100mm lens on P1 P45+
      • Good 120mm MF lens
      • Good 18mm FF lens
      • Good 24-105 mm FF lens
      • Good 24-70 FF zoom
      • Good 35 mm FF lens
      • Good 60 mm lens on IQ3-100
      • Good 63 mm MF lens
      • Good 65 mm FF lens
      • Good 85 mm FF lens
      • Good and bad 25mm FF lenses
      • Good zoom at 24 mm
      • Marginal 18mm lens
      • Marginal 35mm FF lens
      • Mildly problematic 55 mm FF lens
      • OK 16-35mm zoom
      • OK 60mm lens on P1 P45+
      • OK Sony 600mm f/4
      • Pretty good 16-35 FF zoom
      • Pretty good 90mm FF lens
      • Problematic 400 mm FF lens
      • Tilted 20 mm f/1.8 FF lens
      • Tilted 30 mm MF lens
      • Tilted 50 mm FF lens
      • Two 15mm FF lenses
    • Found a problem – now what?
    • Goals for this test
    • Minimum target distances
      • MFT
      • APS-C
      • Full frame
      • Small medium format
    • Printable Siemens Star targets
    • Target size on sensor
      • MFT
      • APS-C
      • Full frame
      • Small medium format
    • Test instructions — postproduction
    • Test instructions — reading the images
    • Test instructions – capture
    • Theory of the test
    • What’s wrong with conventional lens screening?
  • Previsualization heresy
  • Privacy Policy
  • Recommended photographic web sites
  • Using in-camera histograms for ETTR
    • Acknowledgments
    • Why ETTR?
    • Normal in-camera histograms
    • Image processing for in-camera histograms
    • Making the in-camera histogram closely represent the raw histogram
    • Shortcuts to UniWB
    • Preparing for monitor-based UniWB
    • A one-step UniWB procedure
    • The math behind the one-step method
    • Iteration using Newton’s Method

Category List

Recent Comments

  • JimK on Fujifilm GFX 100S pixel shift, visuals
  • Sarmed Mirza on Fujifilm GFX 100S pixel shift, visuals
  • lancej on Two ways to improve the Q2 handling
  • JimK on Sony 135 STF on GFX-50R, sharpness
  • K on Sony 135 STF on GFX-50R, sharpness
  • Mal Paso on Christmas tree light bokeh with the XCD 38V on the X2D
  • Sebastian on More on tilted adapters
  • JimK on On microlens size in the GFX 100 and GFX 50R/S
  • Kyle Krug on On microlens size in the GFX 100 and GFX 50R/S
  • JimK on Hasselblad X2D electronic shutter scan time

Archives

Copyright © 2023 · Daily Dish Pro On Genesis Framework · WordPress · Log in

Unless otherwise noted, all images copyright Jim Kasson.