This is a continuation of a report on a trip with the Sony a7RII. The series starts here.
I made six or seven thousand exposures on the trip. Close to 90% of those were destined to be components of panoramas that I planned to stitch once I got back home. I made images for panoramas with all of the lenses that I brought on the trip: the Zony 35 and Zony 55, the Sony 70-200/4 and 90/2.8 macro, and, before it spontaneously disassembled, the Leica WATE. The two zooms, the Leica and the Sony, being zooms, are not particularly good in the corners. I made sure to stop both of them down to f/8 when I could, and f/5.6 in a pinch.
![[Group 63]-_DSC8109__DSC8118-10 images_0000](https://blog.kasson.com/wp-content/uploads/2015/09/Group-63-_DSC8109__DSC8118-10-images_0000.jpg)
With a 42 megapixel camera, doing captures for stitching can use a lot of disk space. I’m not entirely comfortable with the mechanisms that I’ve developed for mitigating that, but I’ll share with you what I do, and where I think there’s room for improvement.
![[Group 34]-_DSC4671__DSC4676-5 images_0000](https://blog.kasson.com/wp-content/uploads/2015/09/Group-34-_DSC4671__DSC4676-5-images_0000.jpg)
When making the images, I don’t use a separate folder for those I plan to stitch. Instead, before and after I start capturing a series of images for a panorama, I take a picture of the palm of my hand:
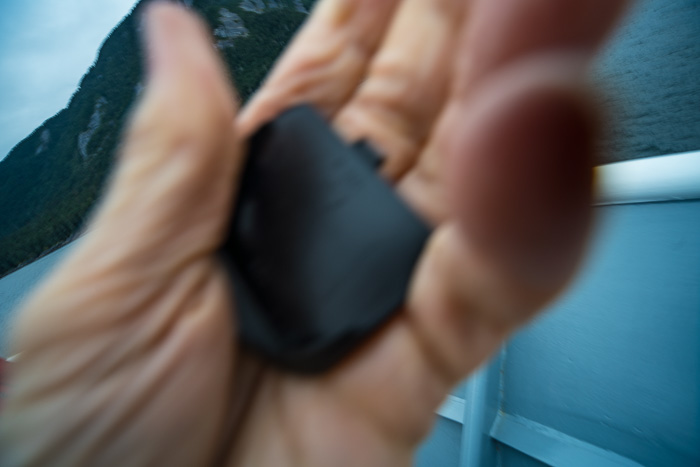
Those serve as demarcations when I’m looking at the images in Lightroom’s Gallery view. On this trip, most of the non-panorama images that I made were in landscape orientation, and most of the images destined for panoramas were in portrait orientation, which also helped in the sorting out process.
![[Group 28]-_DSC4295__DSC4315-21 images_0000](https://blog.kasson.com/wp-content/uploads/2015/09/Group-28-_DSC4295__DSC4315-21-images_0000.jpg)
When I get home, I transferred all of the images from the flashcards to a folder on a hard drive in my main workstation. Using the pictures of the palm of my hand as references, I assigned a color to each of the images that will be part of a panorama. It’s really hard to tell from looking at the component pictures how a panorama is going to turn out, so I didn’t look for winners and losers at that stage. I just told Lightroom to show me just images with the color that I previously assigned, and exported all of them as TIFFs to a folder called “To do” on a drive where I keep all of my stitched images.
![[Group 29]-_DSC4465__DSC4472-8 images_0000](https://blog.kasson.com/wp-content/uploads/2015/09/Group-29-_DSC4465__DSC4472-8-images_0000.jpg)
When I was doing the “Los Robles” series using the 24 megapixel Sony alpha 7 Mark II, where most of the stitches involved 50 or more images, I got into the habit of using a Lightroom preset that exported all of the images at half size. This made the stitching much more manageable, and still provided me with stitches that have enough resolution for almost any use that I can conceive. I used that same preset to export the 42 megapixel images from the a7RII; even though the number of images in each stitch was usually smaller, the increased camera resolution meant that I would have had an embarrassment of riches had I exported the files at full size.
![[Group 26]-_DSC4092__DSC4102-11 images_0000](https://blog.kasson.com/wp-content/uploads/2015/09/Group-26-_DSC4092__DSC4102-11-images_0000.jpg)
After the Lightroom export, I fired up on AutoPano Giga 4.2 and imported all of the images. Using the photographs of my palm, I picked out each series and moved the images contained therein to a new window. When that was done, I told the program to find all the panos, and went to have dinner. Then over a day or so, I looked at each of the 70 or 80 panoramas and made rough edits, picking the projection that I wanted, and occasionally leaving some images out. I didn’t go to all the trouble of getting the horizons perfectly straight and all of the panos, since at this point I didn’t know which ones I was going to want to keep, and achieving ruler-flat horizons in our AutoPano is a tedious operation, at least for me.
![[Group 10]-_DSC2584__DSC2591-8 images_0000](https://blog.kasson.com/wp-content/uploads/2015/09/Group-10-_DSC2584__DSC2591-8-images_0000.jpg)
When I was all done I told AutoPano to render all images into a folder called “Done”, and went to bed while it did so. The next morning it was finished, and I moved all of their rendered images into a folder named “Alaska”. I opened Lightroom, imported all of the rendered images in place, and began to edit them.
![[Group 11]-_DSC3160__DSC3171-12 images_0000](https://blog.kasson.com/wp-content/uploads/2015/09/Group-11-_DSC3160__DSC3171-12-images_0000.jpg)
During the editing process, I found some panoramas that I wasn’t entirely happy with. I wanted to get rid of the panoramas themselves, and also the raw files that were their source. Now comes the part of this workflow bothers me the most. The only way that I know how to do this is to identify the range of filenames in the panoramas that I want to discard – it’s nice that AutoPano puts that information right into the file names – and then go into Lightroom, Mark all of those images as rejected using the “X” key, and then tell Lightroom to delete all rejected images. Ugh.
![[Group 12]-_DSC3173__DSC3185-13 images_0000](https://blog.kasson.com/wp-content/uploads/2015/09/Group-12-_DSC3173__DSC3185-13-images_0000.jpg)
Surprisingly, Lightroom’s own panorama capability, which I find inferior to AutoPano, doesn’t make the process of deleting rejected raw files any easier. You’d think that, once you created a panorama in Lightroom, when you deleted the panorama the program would give you the option of deleting the source files. Not so. Seems like an oversight to me.
![[Group 62]-_DSC7875__DSC7883-9 images_0000](https://blog.kasson.com/wp-content/uploads/2015/09/Group-62-_DSC7875__DSC7883-9-images_0000.jpg)
I can feel your pain when it comes to Lr, Autopano and panoramas. I also use my hand or finger or a shot of the ground to bracket images for panos. After importing into Lr I go through, shift-select groups of images and use Ctrl-G to stack them together in case I don’t get to them right away. Stacking them means I can also do lens corrections, etc. as a batch using the Sync button.
When rendering images in Autopano I rename the output files with the filename of the last image in the set, followed by -PAP (for panorama, Autopano). The image name becomes something like DSCF43279-PAP. This way when I import them back into Lr it puts them at the end of the stack when sorting by file name. I often add a label colour to panos so I can find them easily until I decide what to do with them, and I’ll add a ‘panorama’ keyword on import.
Like you, I don’t know of any other way to deal with individual images after rendering the panos. One of my pet peeves with Lr is that images in collapsed stacks are invisible to the database, so for example if you have a collapsed stack and ‘X’ the top one, it only affects the image shown. You can use the Painter tool to paint flags, or shift-select, but it’s still a slow process.
I’ve tried the pano tool in Lr 6.x but I find two major problems with it (aside from it’s basic interface/capabilities). One is it’s VERY slow by comparison when rendering. The other is that if you disable the ‘autocrop’ function when rendering a pano in Lr, it considers the white space around the joined images to not be part of the frame. Try it. Create a pano, turn off autocrop and render an image. You’ll have jagged bits around the edges. Try using the vignette tool, the brush tool, whatever you want on those white spaces, and they essentially don’t exist as far as Lr is concerned.
Mike.