I set up this gear: Zeiss 135mm f/2 APO Sonnar ZF.2 on a Nikon D800E, RRS D800 L-bracket, Arca Swiss C1 Cube, RRS TVC-44 legs. Release with electrical contact closure from Cognisys rail controller. ISO 100, lens set halfway between f5/6 and f/8. The resultant images were processed in Lightroom with default settings except for increased Exposure, exported to Photoshop where they were flipped, cropped, and magnified by increasing the resolution in two ways.
- Using nearest neighbor interpolation with an enlargement factor of 400% for both the vertical and the horizontal directions.
- Using the Photoshop preserve details interpolation option, and enlarging the raster image columns more than the rows.
Subject was an oscilloscope with a grounded vertical input at an optical distance of 55 feet, using a mirror to fold the optical path. I tested both landscape and vertical orientation, and made images with the time base set to 5 milliseconds/division at f/6.3 and 1/25 second, and with the time base set to 20 milliseconds/division at f/9 and 1/8 second. I made sets of images using the S mode, which releases the mirror just before the exposure, and using Mup mode, in which the first contact closure at the remote release port releases the mirror, and the second contact closure fires the shutter. I set the Cognisys timer to allow five seconds to pass between the mirror rising and the shutter releasing.
The lens was focused wide open using live view, and stopped down by the camera prior to the exposure, as in normal in single lens reflex cameras. I hadn’t used the D800 live view for a couple of weeks, and I’d forgotten what a pain it is. The Sony a7R has totally spoiled me.
The camera was not perfectly lined up with the scope trace. I prefer this, although it makes it a little harder to read out the peak to peak vibrations in sensels, because it allows me to interpolate between the sensels in the vertical direction. Time runs from left to right; the leftmost part of the green trace marks the time when the first curtain reveals the oscilloscope, which is about 2 milliseconds after it starts to open.
First up, landscape with S mode at 20 milliseconds per division and 1/8 second using nearest neighbor:

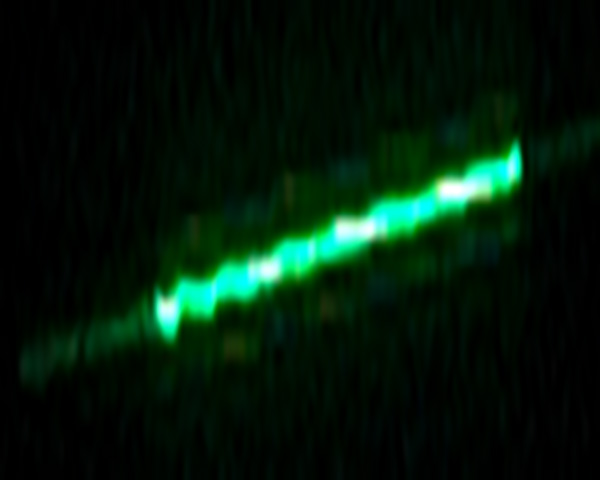
And using preserve details:
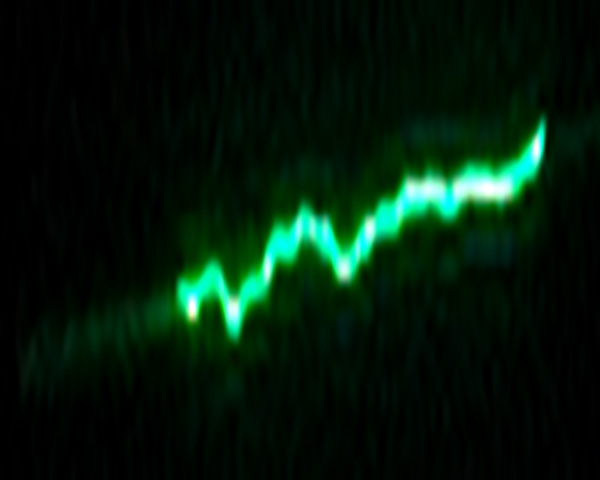
About a 5 pixel peak to peak vibration is visible with about a 40 millisecond period, or 25 Hz. On the D800E, the first curtain finishes opening 1/250 second, or 4 milliseconds, after it starts to open, or 2 milliseconds after the trace starts. At this time resolution, 4 milliseconds is about 1 sensel, and therefore you can’t see the first curtain closing slap. You can see a 100 Hz vibration right after the shutter opens, which damps out fairly quickly.
With the mirror up, it’s difficult to see much vibration on the nearest neighbor plot:

But you can see something on the preserve details image:
There’s a rapidly damped 100 Hz vibration followed by a little 50 Hz ringing. The peak to peak amplitude is on the order of one sensel.
Looking at the landscape orientation and S shutter mode at 5 milliseconds per division and a shutter speed of 1/25 and nearest neighbor interpolation:

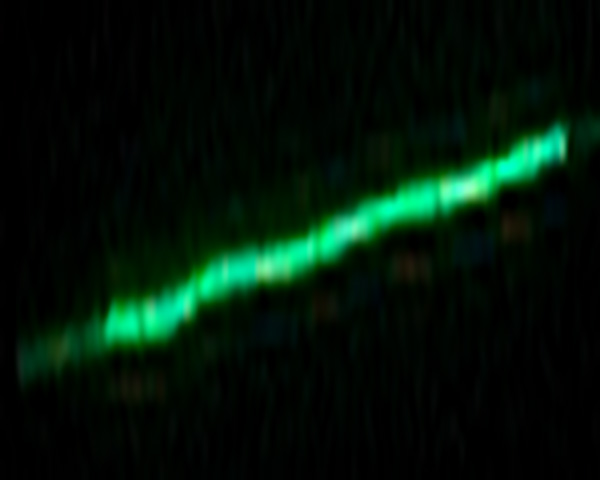
And with preserve details interpolation:
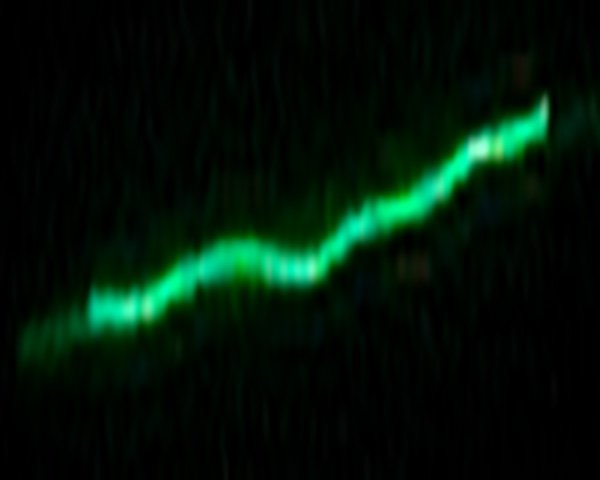
The regularly spaced vertical dark lines on the preserve details image are the time base divisions. It’s impossible to see on the nearest neighbor picture, and hard to see on the preserve details one, but it looks like the first curtain slap is less than half a sensel. The fact that the first 5 milliseconds of the trace is almost perfectly flat is happenstance; because of the tilt of the camera, a horizontal line indicates one that is actually descending..
With the mirror up, and nearest neighbor:

And with preserve details:
There’s a one-and-a-half to two-pixel vibration at about 100 Hz that damps out quickly. You can’t see any shutter slap.
Next up: portrait mode.
Leave a Reply