This is the thirteenth in a series of posts on the Fujifilm GFX-50S. The series starts here.
In the last two a7RII/GFX tests, we found that the 120mm Fuji macro is a pretty special lens, and that the 63mm Fuji normal lens is no slouch either. It wasn’t much of a contest with the Zony 55 and the Sony macro — both good lenses — on the a7RII. What if we pull out all the stops and mount the Zeiss Otus 85mm 1/1.4 on the a7RII, and leave the 120 macro on the GFX. In one sense, that sounds like we’re being unfair to the GFX. But in terms of dollars, the Fuji GFX and the 120 macro cost more that the a7RII and the Otus.
Here’s the setup.
Shutter set to EFCS for both cameras, which meant it really was EFCS for all the pictures with the Sony, and was EFCS at the narrower apertures for the GFX. Exposure compensation set to zero. AF-S used for the Fuji, and manual focusing for the Otus. I focused five times at each aperture with the Otus, and picked the sharpest images. 2-second self-timer used in both cases. Arca-Swiss C1 cube on RRS sticks. The Fuji images were about 1/3 of a stop darker than the Sony ones at the same exposures. I don’t think this is due to lens transmission; I think it’s actually the result of the way that Fuji set up the GFX. I think that, set up the same way the a7RII is, the GFX base ISO would be 80. Focus was in the center of the image, and all images were refocused at each aperture. Tripod and head were not moved between series.
I developed all the images in Lightroom with default settings, including exposure. For some reason, this time the brightnesses were very close. I dispensed with Iridient X=Transformer, since it seems to be the case that Lightroom’s default sharpening isn’t tilting the playing field.
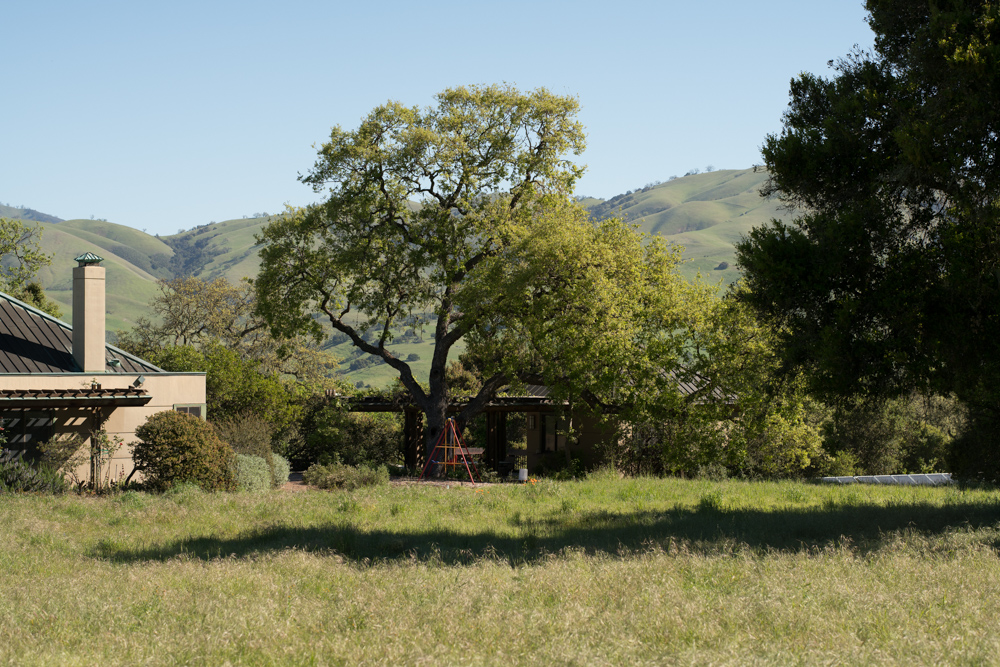
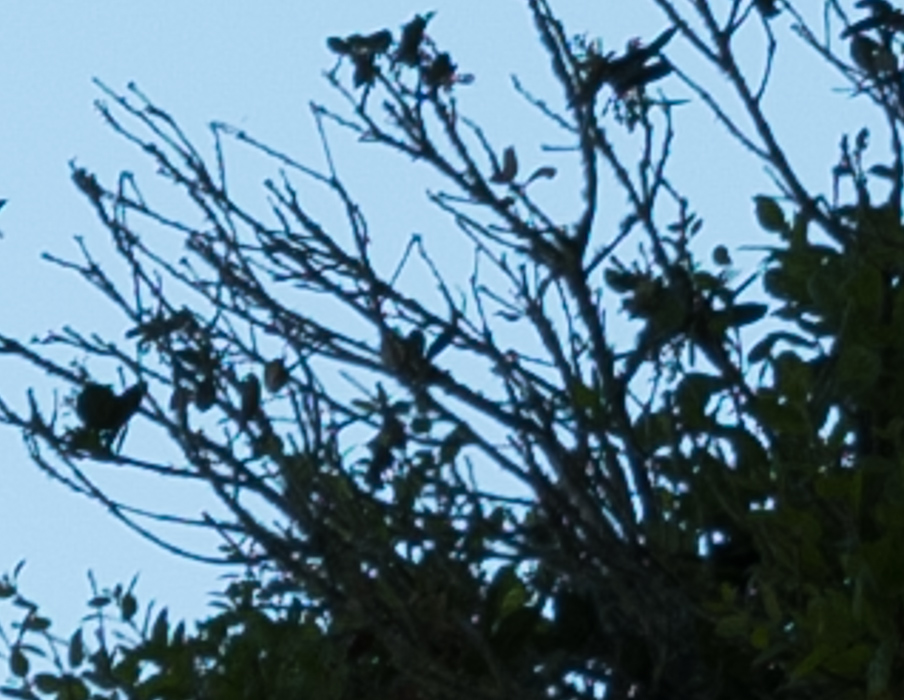
The overall scene with both setups:

In the center, at roughly 250% magnification for the GFX, and the same vertical sensor extent for the lower-resolution a7RII. This would give the same vertical field of view if the lenses were vertically equivalent focal lengths. Details: the GFX crops are 357×277 pixels, and the Sony crops are 306×237 pixels. All are enlarged to 700 pixels high on export from Lightroom.
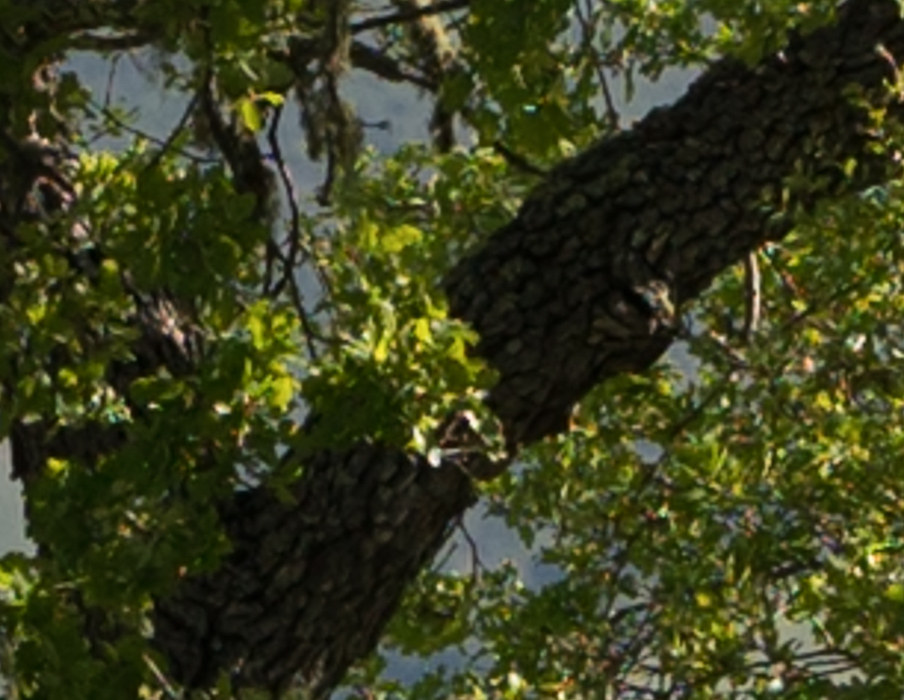


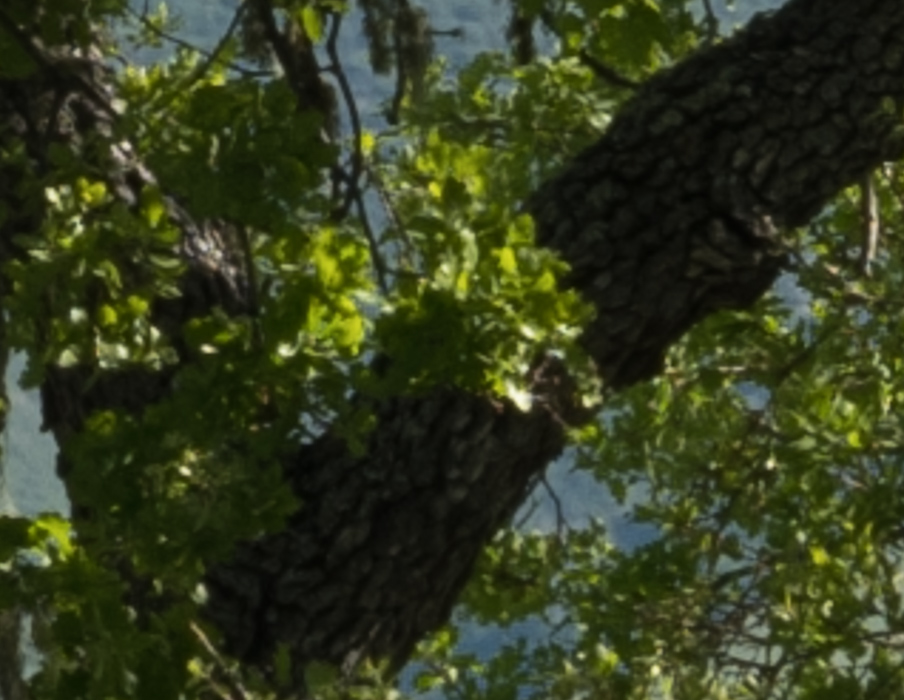
It looks like resolution is mostly limited by the sensors, and the sensor resolutions in pixels aren’t that far apart, so the images look very similar.
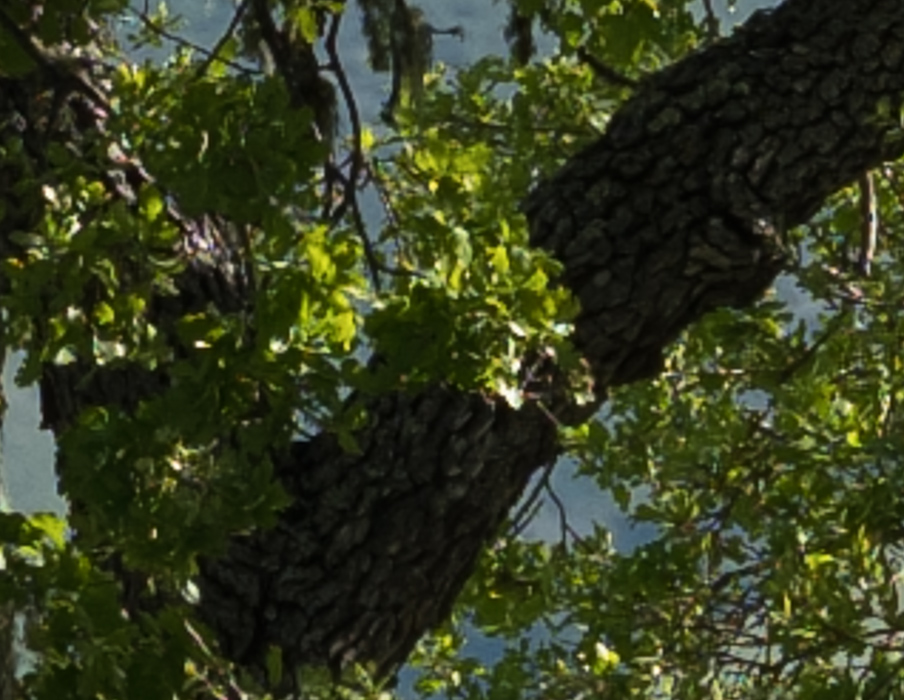
Near the left-center edge:


The Otus has a little difficulty at f/2.8, but is good at f/4.


Pretty much a wash.


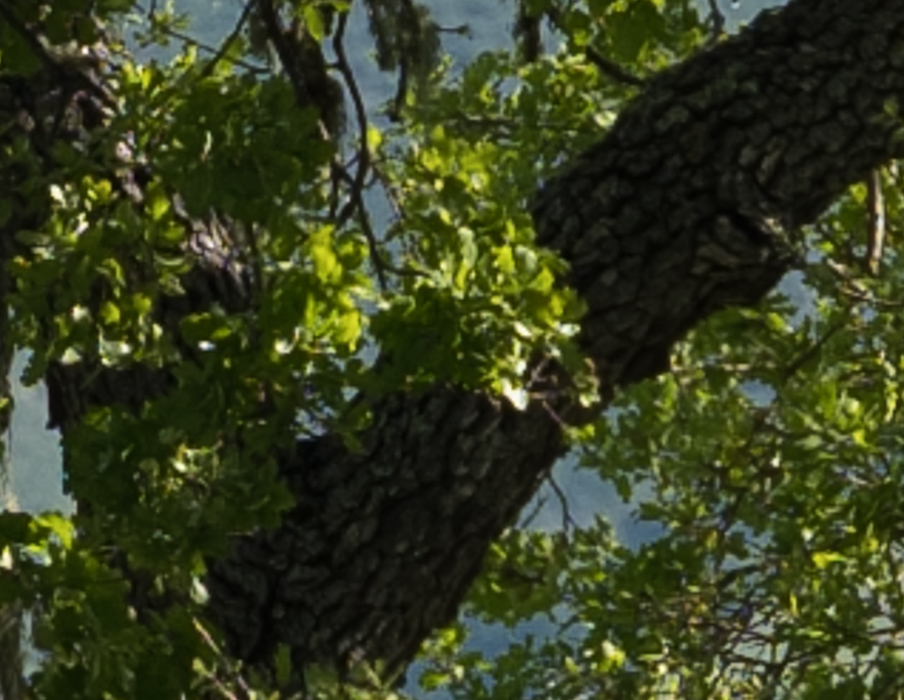
Now that diffraction is starting to dominate, the GFX, with its bigger sensor, looks better.

With even more diffraction, the differences are greater. Feel free to compare the 120 macro images with the Otus ones that are made a stop wider; that will equalize diffraction.
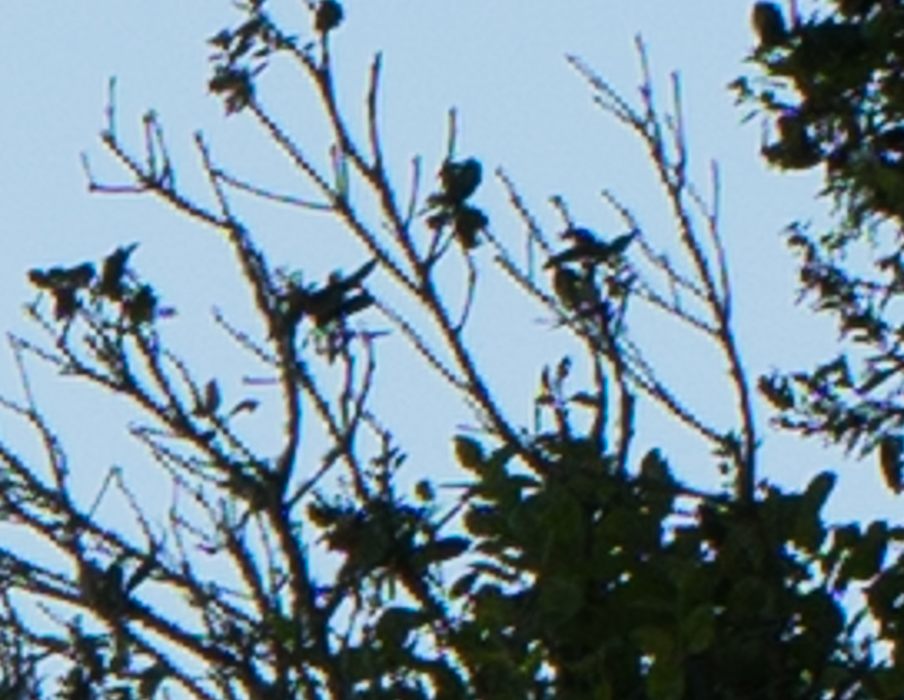
In the upper right corner:


The Fuji lens is very slightly softer.
Same.


GFX maybe a little softer.


Now we’re diffraction-limited, and thus the Fuji looks better.
Diffraction definitely kills the FF quicker than MF.
Those UPRH corners are awful. Just terrible. (and why shouldn’t they be, they’re easily 50% nearer than the focal plane)
I am still taking my 85mm and 810 out for a walk today. See if I can find an 80 ft brick wall somewhere nearby.
Max, I don’t know what you’re talking about. The UR corners are sharp enough that even with the Otus at f/2.8, you can see the sampling grid in the aliasing of the branches.
JK,
I don’t think the UPRH corner is in focus (or in the focal plane). I didn’t get the chance to go out yesterday but I will this AM. My goal is to find either a large enough planar surface or recompose and focus in the UPRH corner.
#1 theory is that you should be getting better results (at least with the Otus) because I know what it can do (or least believe).
Max, in the Otus UR photos, you can see stairstepping in the tree branches. I took that as an indication of focus accuracy. But I don’t see it in the Fuji images. So now I’m gong to have to go back and look at the possibility that it’s an artifact of the Lr resizing algorithm.
Stay tuned.
OK, I went back and checked. The stairstepping on the Otus UR images in there before export from Lr. So they are in focus.
Here’s the argument:
1) Stairstepping is an indication of aliasing
2) You can’t have aliasing unless there are frequency components in the image projected by the lens that are beyond the Nyquist frequency.
3) OOF images don’t have components beyond the Nyquist frequency.
4) QED
Actually, it’s more complicated than that, since OOF is not a binary thing, and demosaicing is involved, but you get the idea.
Jim, agreed on the stair step – alias – etc.
For me it was more about the detail one would expect to see. (It doesn’t help that those leaves and branches are on the dark side of the moon.)
My sense of it is that an Otus and a good sensor can do better than that.
The photos I took this AM show the above is true.
RRS, D810, Mup, Otus 85mm, 3x loupe, live view at max multiplication, and exposure preview activated*.
You have all of those things (plus the setting). See if I am not right.
*I know in the past you’ve been in the habit of not using exposure preview but in this case, we’re only talking about 3 or 4 shots.
I do, but I don’t like to use the D810 to make test manual focus images anymore because the focusing aids are so weak compared to those in the a7RII (or, for that matter, the GFX). I can’t get consistently foocused images with the D810 without an external HDMI monitor that has focus peaking. Don’t get me wrong, the D810 focusing is good enough for most field usage, but not what I like to use for testing. The D810 is also lower res than the a7RII. Not by much, but if I’m gonna comapre it to the GFX, the gap between 36 MP and 51 MP starts to look pretty big.
I’ll be doing some more shots when the fog burns off this morning, and, if I time it right, they’ll be lower in contrast (although I am fond of the ole AA branches against the sky as a lens test).
I opened up a Flickr acct and loaded my morning up here.
I’ve never been too good at estimating distances but tried to appx your scene.
https://www.flickr.com/photos/153475477@N06/albums/72157681921278456
With a 3x loupe and Nikon’s magnification, I got more certainty than I did with the A7r’s best. I tested this at Sony v Nikon.
I do think that Sony’s implementation worked better in low light. Nikon goes to hell at night.
Max, we’re at maximum nesting depth, so it looks like this is a reply to myself, but it’s really to you. Which image is which aperture? Can you post blown-up crops?
I’ve also just discovered that the images were scaled to a bit less than 300% for the GFX, and a bit more for the a7RII. They are 700 pixels high, not 700 pixels wide. My face is red. Since the a7RII crops were 237 pixels high, they are scaled to 295%. The GFX images are scaled to 253%.
Knowing that, does that change your opinion?
Jim
” you can see the sampling grid in the aliasing of the branches.”
Jim, these are not the sampling grid but 2X2 blocks coming from not perfect demosaicing ..
A sample with RawTherapee DCB demosaicer before recent corrections which improved diagonals a bit .. BTW Amaze is even better
https://pixls-discuss.s3.amazonaws.com/original/2X/f/f4c8b802b735e13ad8f1dd9888114c301bccb023.png
If it’s possible to upload some RAW pairs .. I’d like to play with them a bit with Rawtherapee ..
Yes, I understand. I was sloppy in my phrasing.
I set up a Dropbox folder for you and populated it with and f/5.6 120 macro GFX raw and an f/5.6 Otus 85 a7RII image.
Jim, find a jpeg and it’s settings file (pp3) in the Dropbox coming from the A7RII raw.. the thin branches look like gfx-50s 😉
I think the reason for the artefacts in your sample come not only from the demosaic but the combination of demosaic-sharpening-CAcorrection-upsample
It’s certainly possible. I’ll take a look. Thanks.
The stairstepping is much reduced in your raw conversion. I still see it some places in your image. I don’t think it has anything to do with the upsampling, since it looks the same in Lr before exporting.
Just like theory says it should. Love it when that happens.
Hi,
I don’t really agree. Why do you stop down on a perfectly good lens? There are two probable reasons.
The first is that you need to more depth of field. In that case you need to stop down a bit more on the larger format and diffraction effect would be the same.
The other case is need of long shutter speed, in that case I would use an ND-filter.
All that said the Fuji macro looks like a very good lens to me!
Best regards
Erik
Erik, I meant I love it when the theory and reality are congruent.
Can you explain what you mean Jim?
Jack, the Airy disk dimensions, say, in um, are a function of wavelength and f-stop, right? So an f/8 lens on a big sensor gives the same sized disk as an f/8 lens on a small sensor. But when you print the images at the same size, the size of the Airy disk on the print from the small sensor will be larger than the disk on the print from the big sensor. So you need to open up the lens used on the small sensor to get the same diffraction in the print.
An f/8 lens on a FF camera will produce about the same diffraction as an f/4 lens on a MFT camera. An f/11 lens on a GFX should have about the same diffraction in the print.
And it does. That’s the neat thing.
Jim
Got it now, thanks.
Thank you Jim,
Jim,
No change in opinion. I’ve been looking at my images at 400% and they appear better across the board. You (or anyone ) can see the exifs and or download the files in full size.
I can see if I can go in and rename them by f-stop to make it a little easier.
Apart from sharpness I see a lot of CA in the Otus images even stopped down.
LoCA or LaCA?