[Edit. Although I’m leaving this post up because several people have linked to it, I now recommend a different method as quicker, easier, and less prone to false positives:
And now back to the original post:]
You hear complaints all the time about the quality control of various lens manufacturers, and horror stories of lenses being sent back over and over before a “good copy” is finally obtained. But the testing techniques that people seem to employ often are ad hoc, not reproducible, subjective, or all three.
If you’ve got an optical bench, and know how to use it, such testing is a reportedly snap. I say reportedly because I don’t have such an instrument, and wouldn’t know how to operate one if it magically showed up in my basement.
If you’ve got Imatest and know how to use it, testing for decentering isn’t any harder than any other tests that require precise alignment of target and camera. I do have Imatest. I do know how to use it. However, finding a big enough test range for a large enough target and managing the alignment issues has kept me from doing full frame tests.
Roger Cicala has posted a quick and dirty way to test o for decentering. Get the Zeiss Siemens star chart from B&H for thirty bucks. Get square on to it (or close, it’s not critical, unlike full fram Imatest work). Defocus slightly. Look at the central “doughnut”. Is it symmetric? If so, you’re good to go.
I happened to have the requisite chart, and I tried Roger’s test on the five medium teles that I tested a couple of weeks ago.
- Zeiss 85mm f/1.8 Batis.
- Zeiss 85mm f/1.4 Otus.
- Leica 90mm f/2 Apo Summicron-M ASPH.
- AF-S Nikkor 85mm f/1.4 G.
- Sony 90mm f/2.8 FE Macro.
All of the lenses did fine, although the test really made the LoCA in the Nikon obvious.
I asked myself if all of my five lenses were perfect, or was the test not very sensitive. Now, let me say upfront that you don’t want a test that’s overly sensitive. No lens is perfectly centered, and most lenses as capable of doing most photographic jobs just fine, and you don’t want to send perfectly good lenses back over and over in the hopes of finding a unicorn.
So I took the lens that maybe, just maybe, if you were being super perfectionistic and had a good imagination, failed Roger’s test and tried something else. My goal here was to develop a technique that was not only sensitive, but in some sense quantitative, and could be used by anyone which the desire, the patience, and the time. As it turns out, the target I chose allows slanted edge MTF results, but I’m not going to get into that today. Today the goal is to let you judge the results by eyeball.
I also wanted a test that related decentering loss of sharpness to what photographers are used to seeing in the real world, so that they could decide if what they saw would affect the photography that they want to do.
I turned to the old reliable ISO 12233 chart.
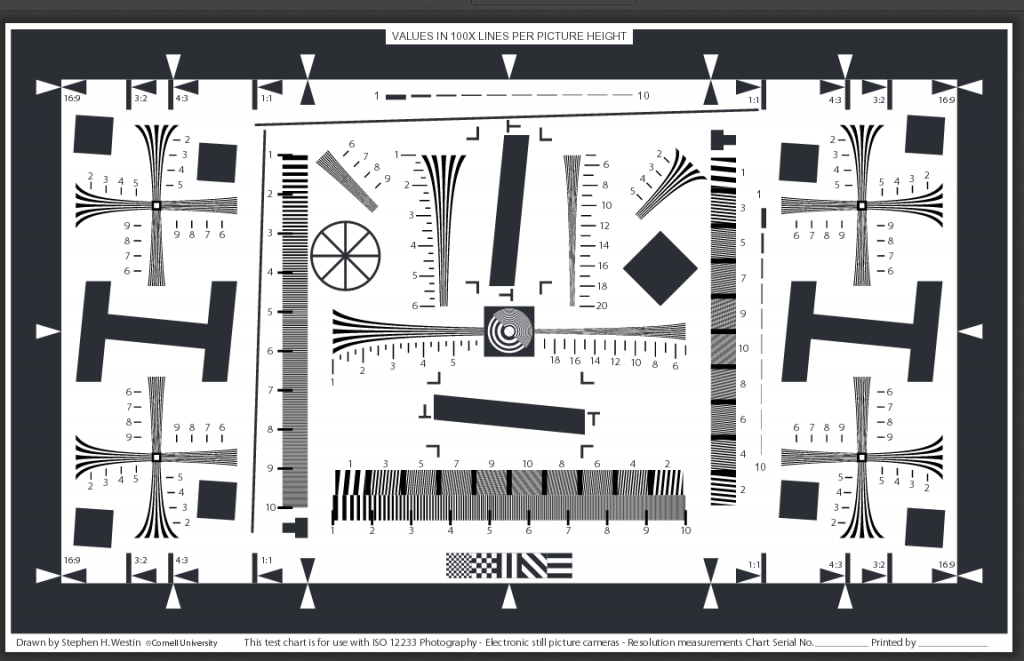
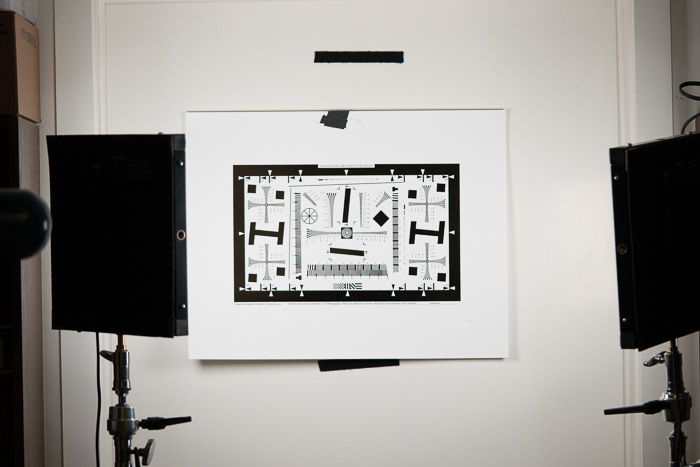
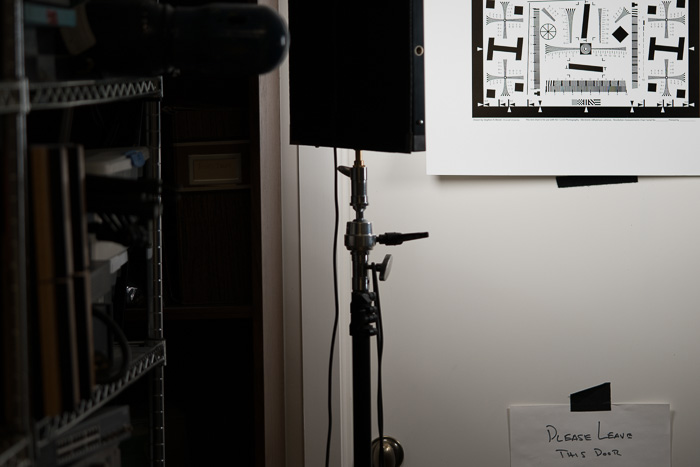
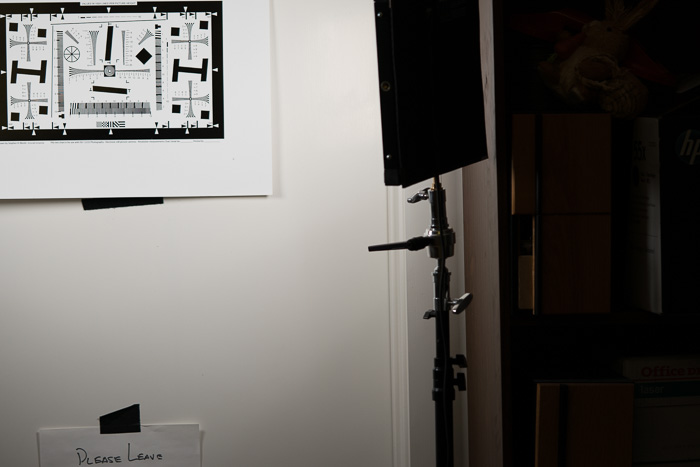
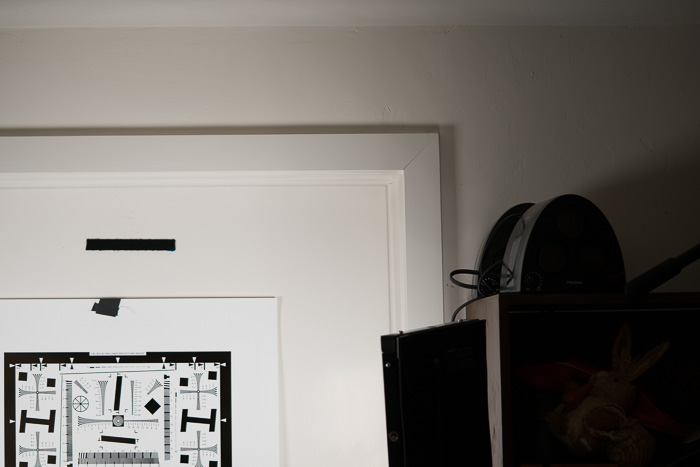
I mounted it about 20 feet from a tripod-mounted Sony a7RII with the Sony 90mm f/2.8 macro lens on it. I lit it with two Westcott LED panels set to 5000K. I set the ISO to 100, the f-stop to f/2.8, the exposure to manual, and centered the target. I manually focused on the center.
I made an image:
Then I adjusted the tripod head to place the target in each of the four corners and made another image at each.

Then I cropped to the a random center rosette, and the outside corner rosettes and enlarged the images by a factor of two.
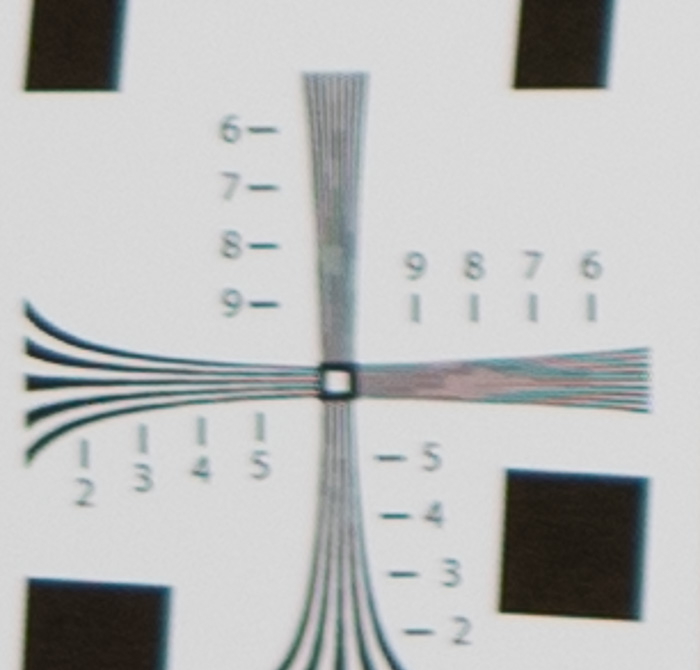
Here’s the centercrop :
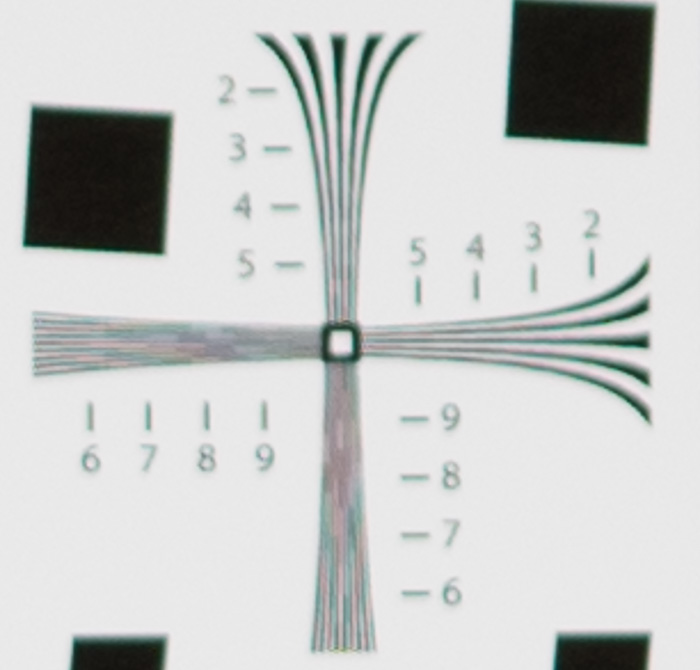
Note that the lens is sharp enough wide open to bring visible false color aliasing, even with a high-res camera like the a7RII. Note further that the false colors don’t disappear until about 9 on the rosette line distance markers.
Now the four corners. You can tell which is which by noting that the coarse parts of the rosettes are on the outside:
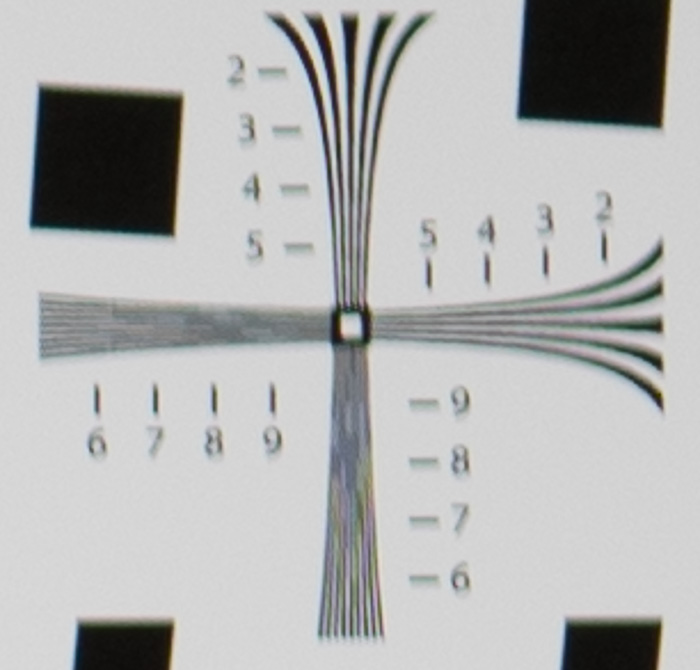
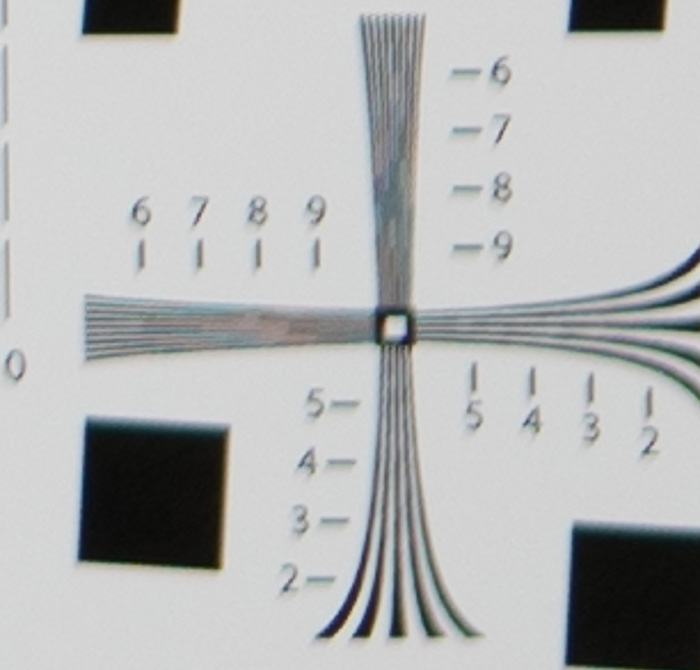
At all four corners we see about the same sharpness, and the sharpness is about the same as the center. You will recognizethe focusing regime that I employed as a varmint of the focus-and-recompose method known to rangefinder photographers since the cameras were invented. It is not accurate if the lens has anywhere near a flat field. However, for a centered lens, the corners should all be equally sharp, if not as sharp as the center. In this case, depth of field — or maybe a lucky focusing error — saved us and the corners are approximately as sharp as the center.
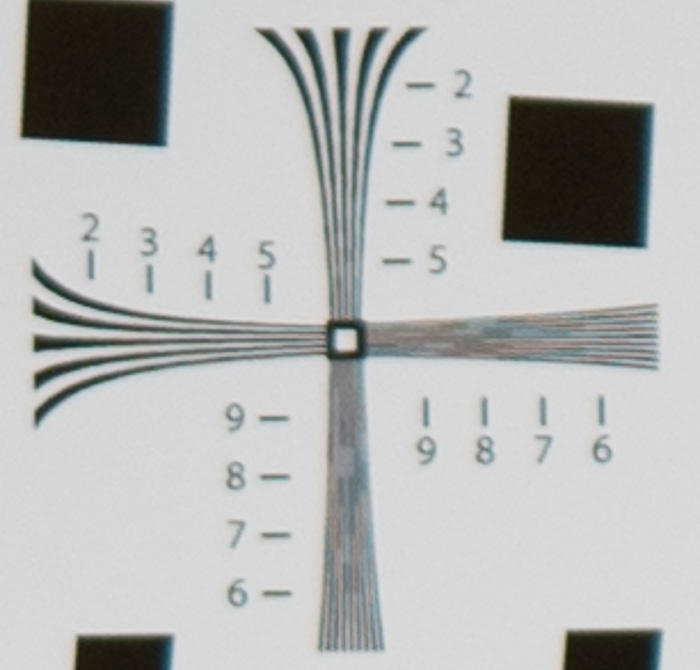
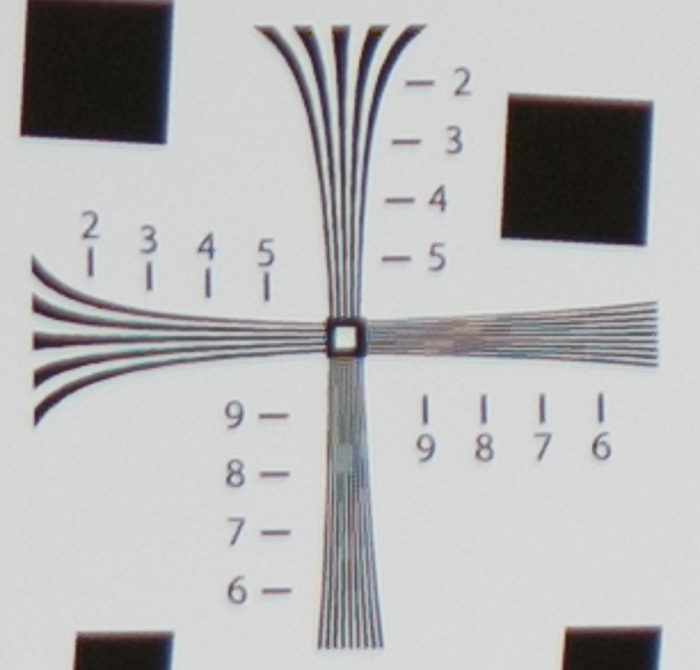
Here’s what you get when you focus on a corner:
Another way to do this test would be to refocus on all four corners. With manual focus, that would introduce a degree of statistical variation that would take many shots per corner to sort out. It might be a good plan with autofocus. I’ll do some testing of that.
I won’t be able to really test this method and Roger’s method until I can get my hands on a lens that’s decentered enough that it would affect normal photography a little, but not much. I can do some more testing, but I may not have a lens like that. Maybe a zoom would be a good candidate.
I should note that to do this really precisely, you should mount the camera in a rig that lets you pivot it about the lens node, like you do when you’re making captures for stitching. I did not do that for this test, and, if you’re far enough away from the target, you should be able to finesse it.
Christer Almqvist says
I do some testing from time to time. The setup is always the same to ensure that results are comparable. The camera is absolutely parallel to the wall with the test charts, and the distance is always 40x focal length, again to enable comparisons.
I have downloaded the ISO 12233 chart and have had it printed by a professional printer on 50x75cm paper, that is about 20×30 inches. Very good. I have also downloaded the ASAF chart and printed it on my Epson R 3000 but it is not good enough for serious testing.
Test results using charts are interesting, but I always do real life test shots too (not bookshelves and not flower pots). Chart and real life test shot results are not always identical; 35mm lens decentering, as an example, slightly noticeable on test charts is irrelevant in real life. But I had to return one 35mm as a result of my test chart review. (The dealer agreed at once when he saw the prints (he knows my test set up).)
On the other hand, my copy of the Zony 16-35mm is (almost) as good as my fixed focal length 35mms. This is not was one reads on the internet. I am glad I did test it.
Brian says
Why not fill the frame with the test chart and look for corner to corner variation? Would that not be easier?
Thanks!
Jim says
That requires precise alignment, which is not easy to get right, and produces false positives (if you define a bad result as a positive, like in medicine) if gotten wrong. Filed curvature also makes interpreting the results difficult sometimes.
What you’re suggesting is a classic technique, and one that, IMHO, results in good lenses being returned. It also requires immense targets if you’re going to test short lenses without being right on top of them.
Jim