I’ve heard a lot about Lightroom’s ability to recover blown highlights, but I’d never looked at it much, preferring to avoid blowing the highlights in the first place. However, resent discussions of the Z9 dual conversion gain behavior and the best ways to exploit it have led me to conduct a few experiments.
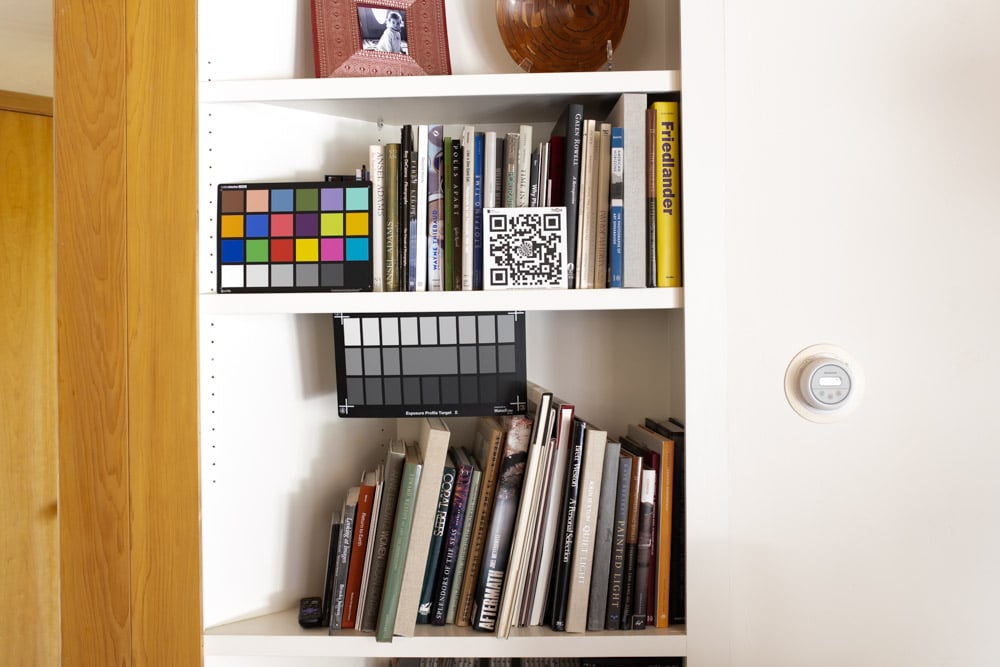
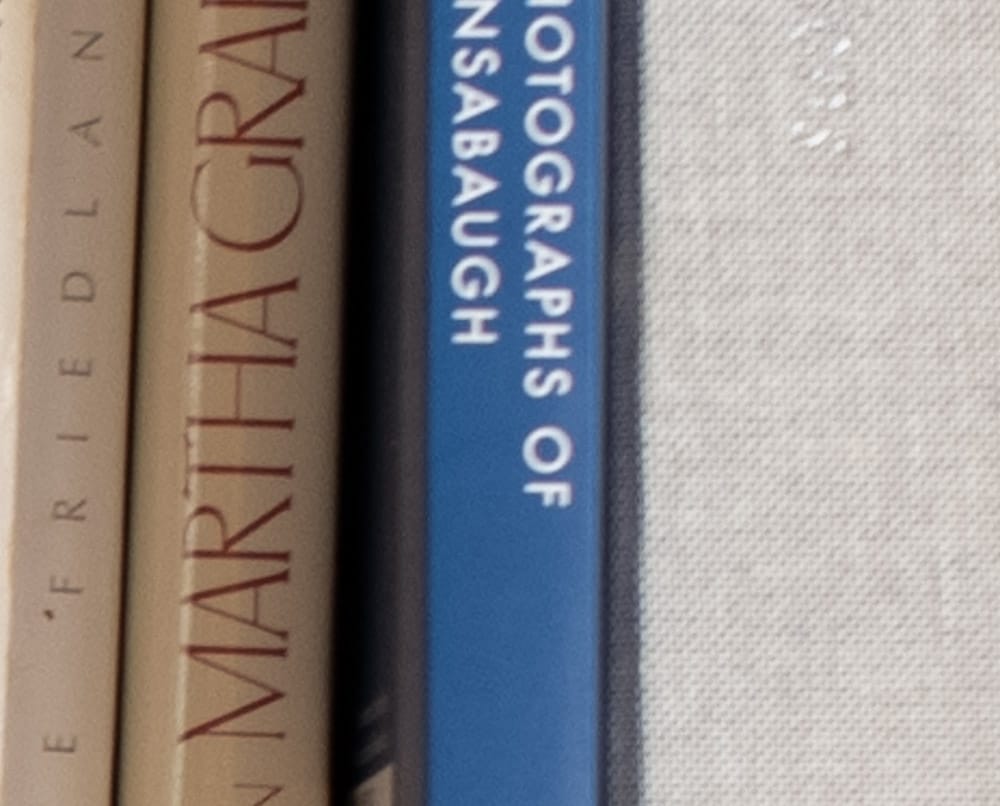
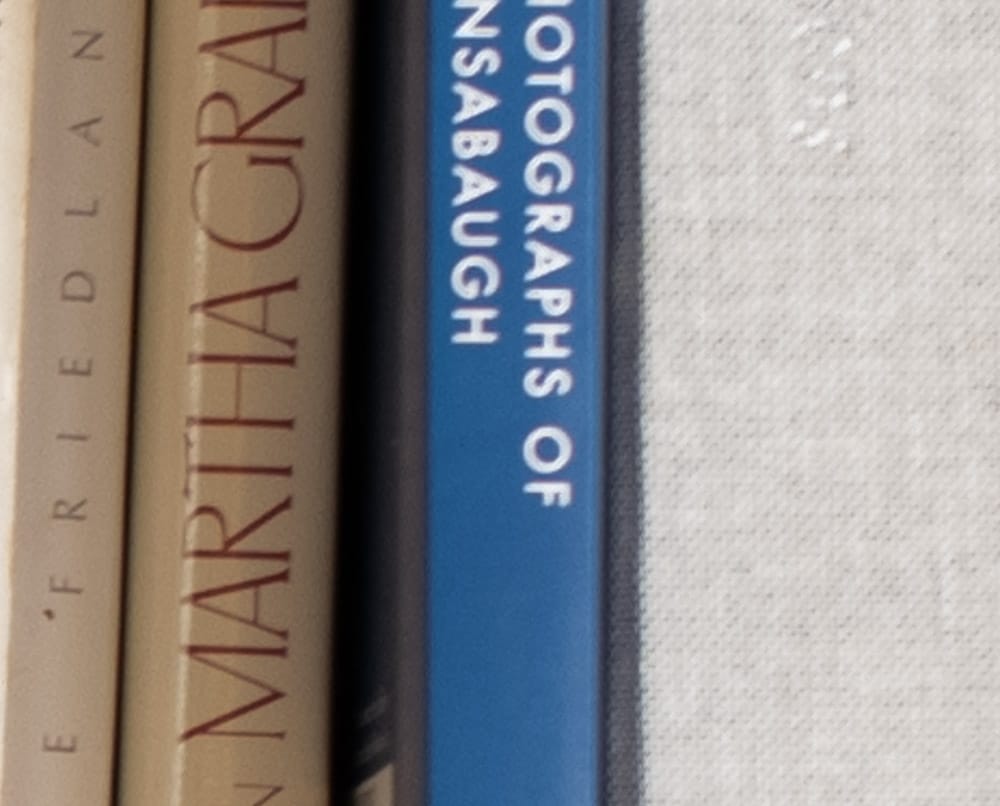
Here’s the usual scene, with the Z9 at ISO 500 and a Sigma 35 mm f/1.4 ART lens on the camera set to f/5.6.
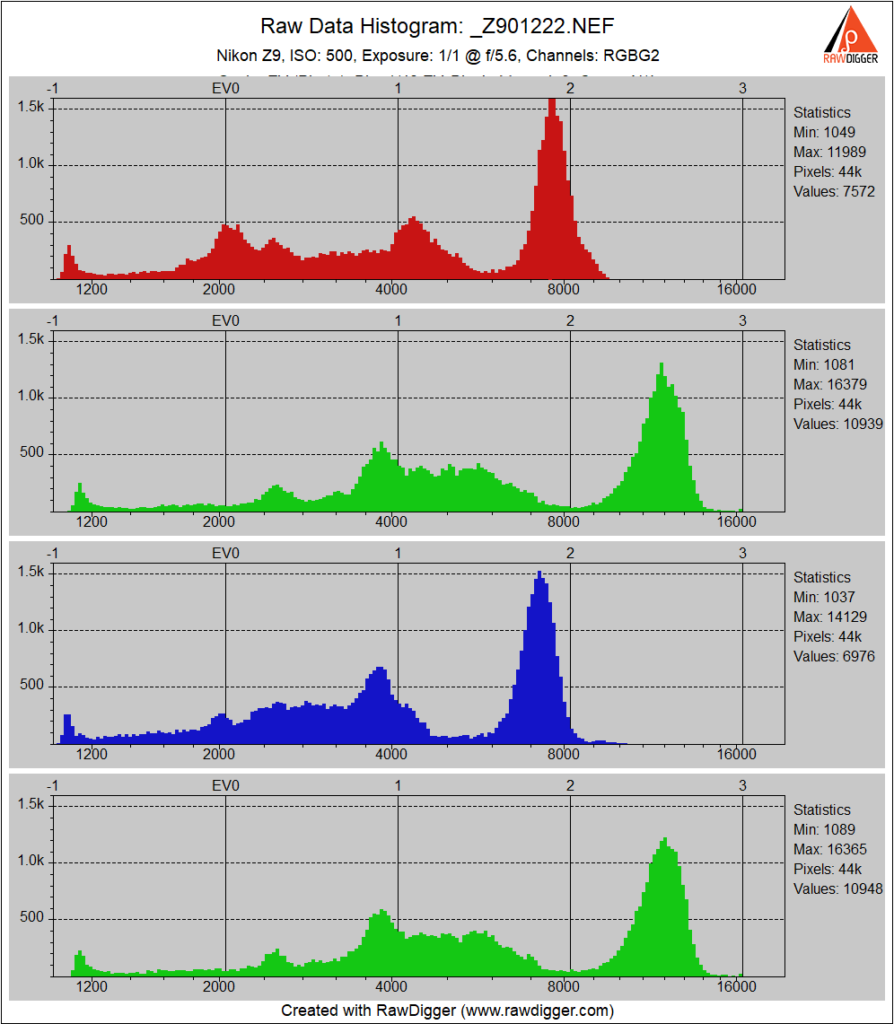
Varying the shutter speed, I made a series of exposures 1/3 stop apart, brought the images into Lightroom, and used default settings with two exceptions:
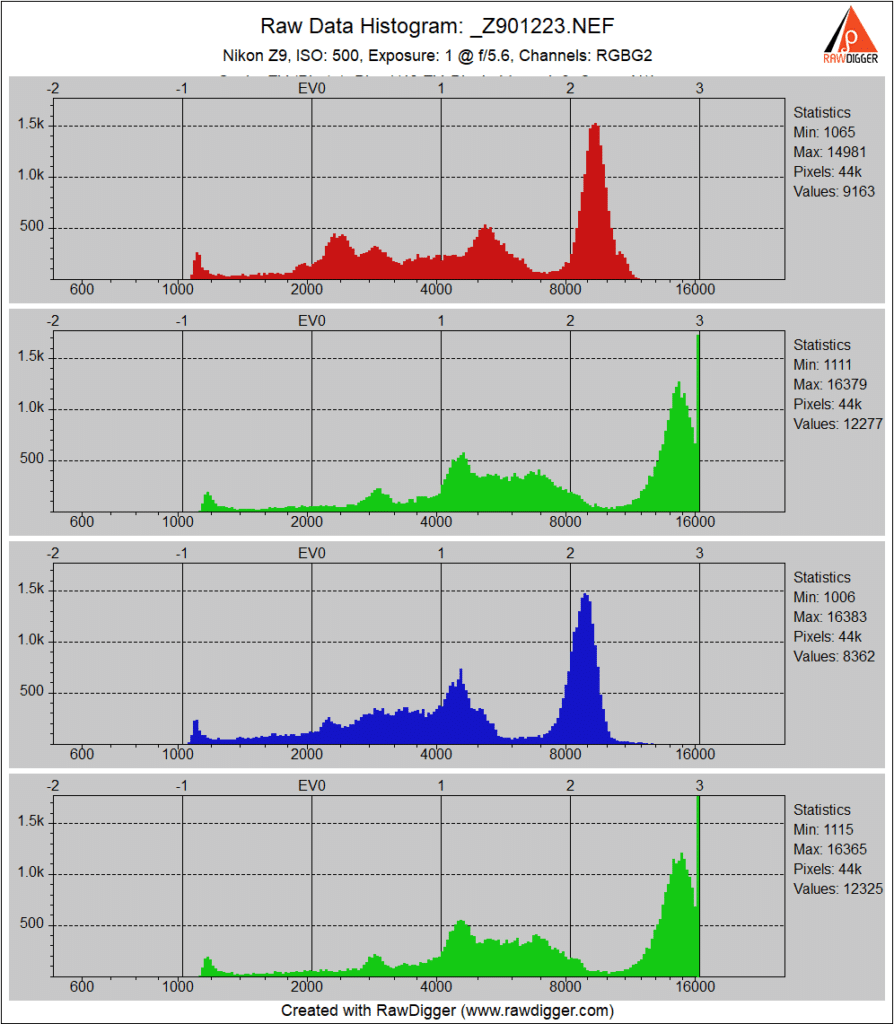
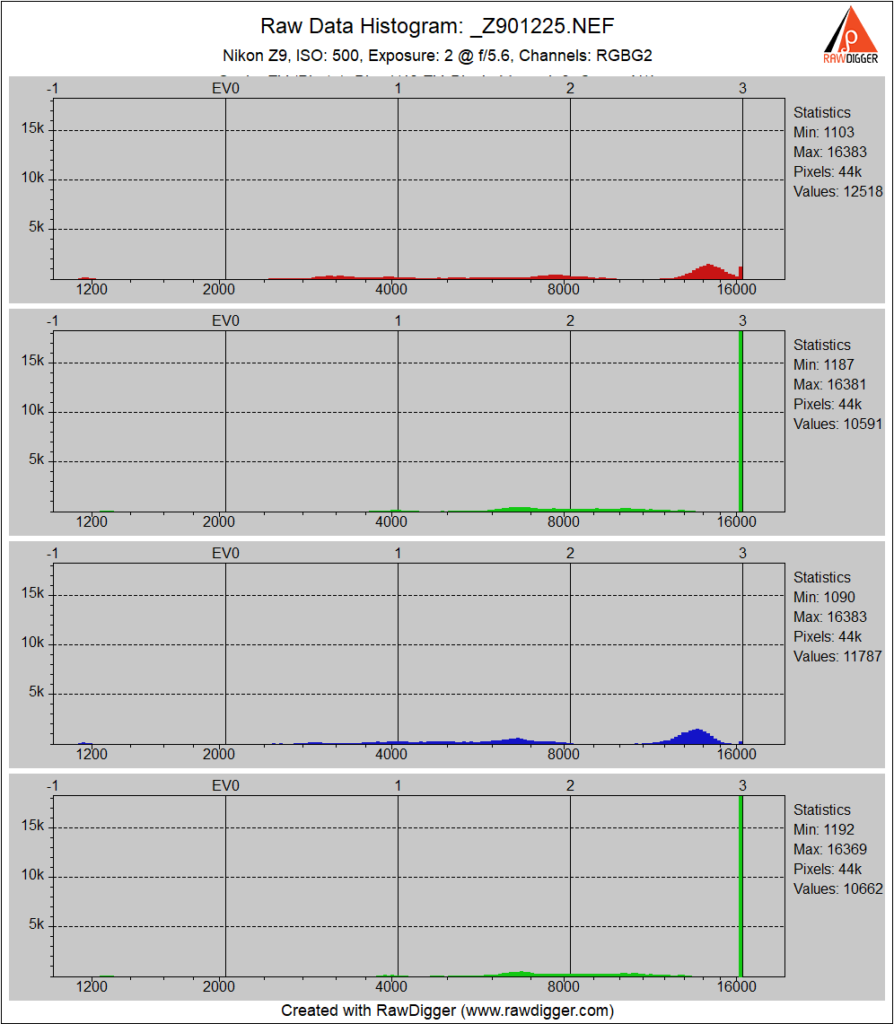
I picked out one area of the captures with some highlight detail and specular reflections. This is the raw histogram of that region:
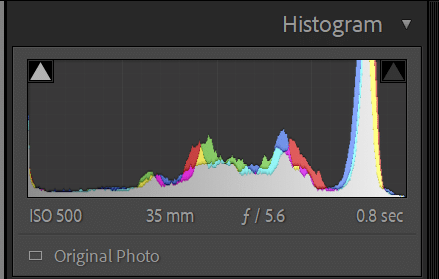
Here’s the Lightroom histogram at default settings except for white balancing to the second gray patch from the left on the Macbeth CC.
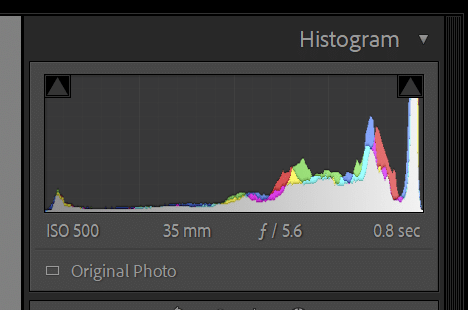
And the image looks like this:

So here we have a perfectly well exposed raw file that, at a casual glance in Lightroom, looks overexposed.
If you back the Exposure slider down 1 EV, the histogram looks like this.
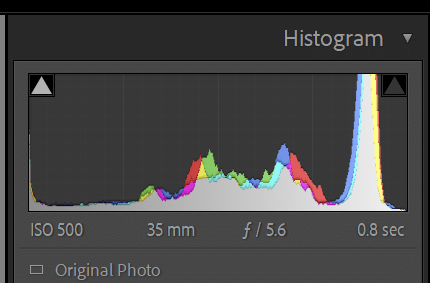
And the image looks like this:
If you don’t know what the raw file looks like, you might think that Lightroom is doing a great job of recovering blown highlights. But in actuality, there aren’t any blown highlights.
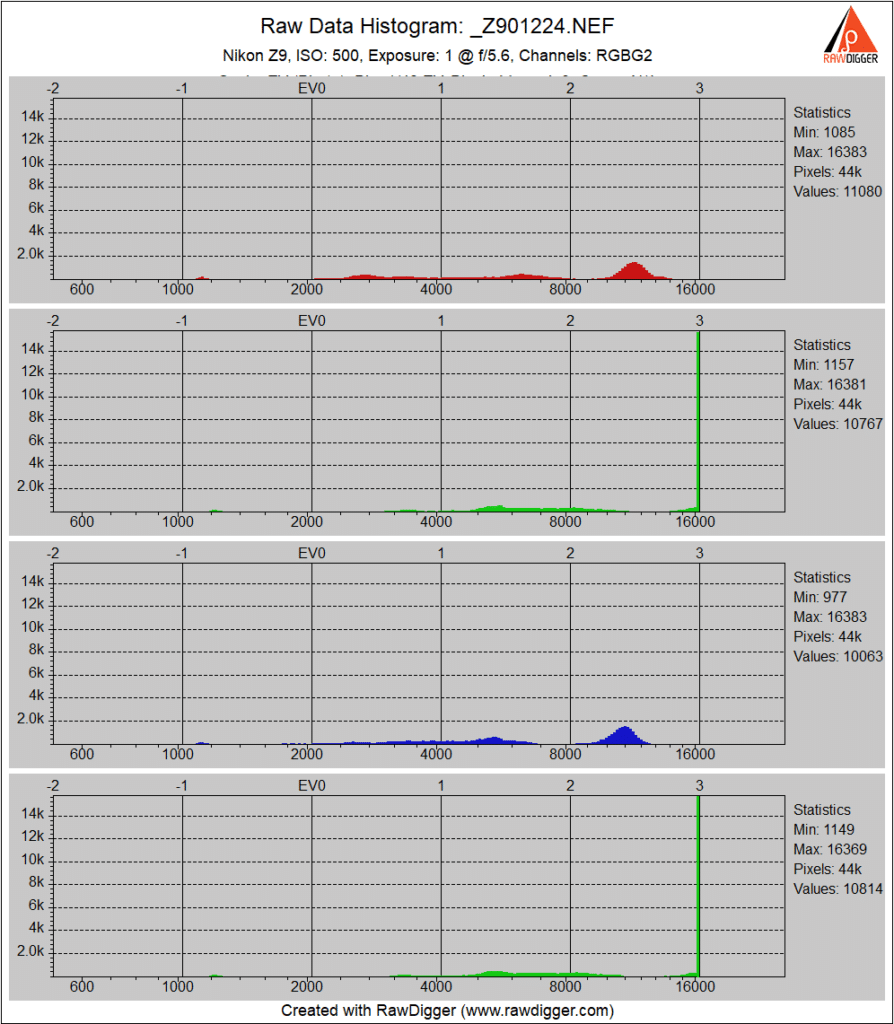
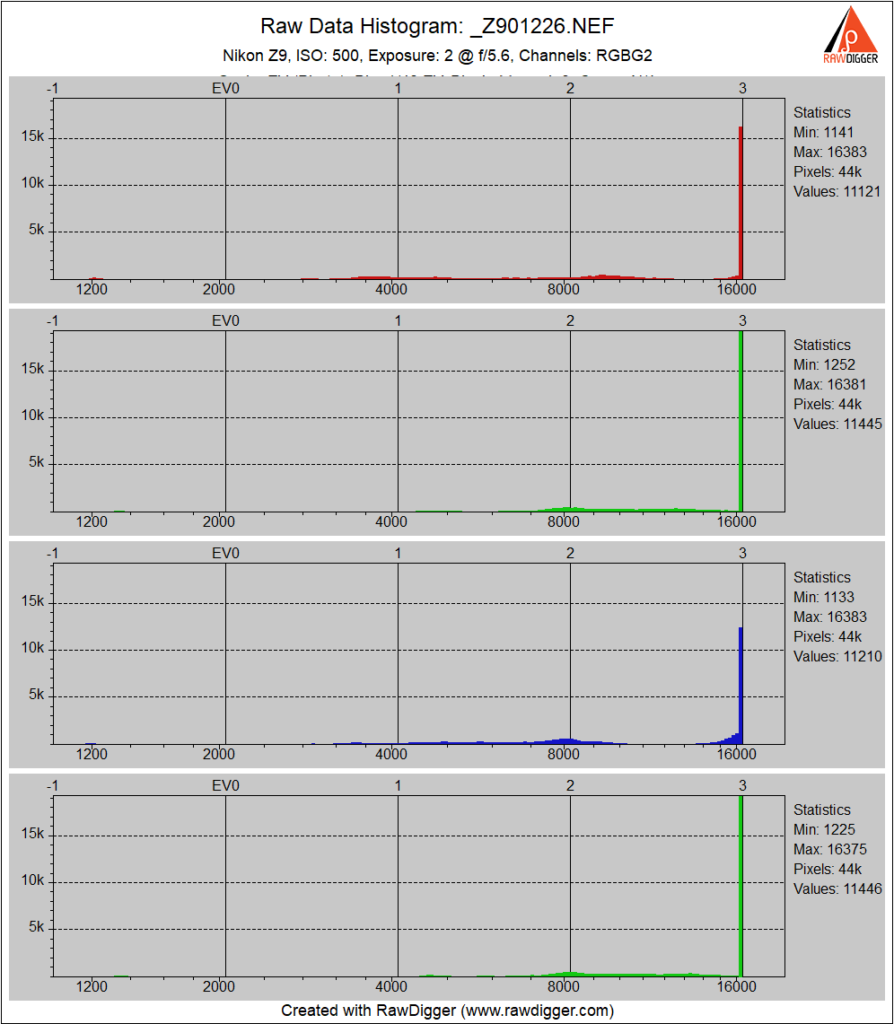
Here’s the histogram of an exposure 1/3 stop more generous:
There are some blown highlights in the green channels.
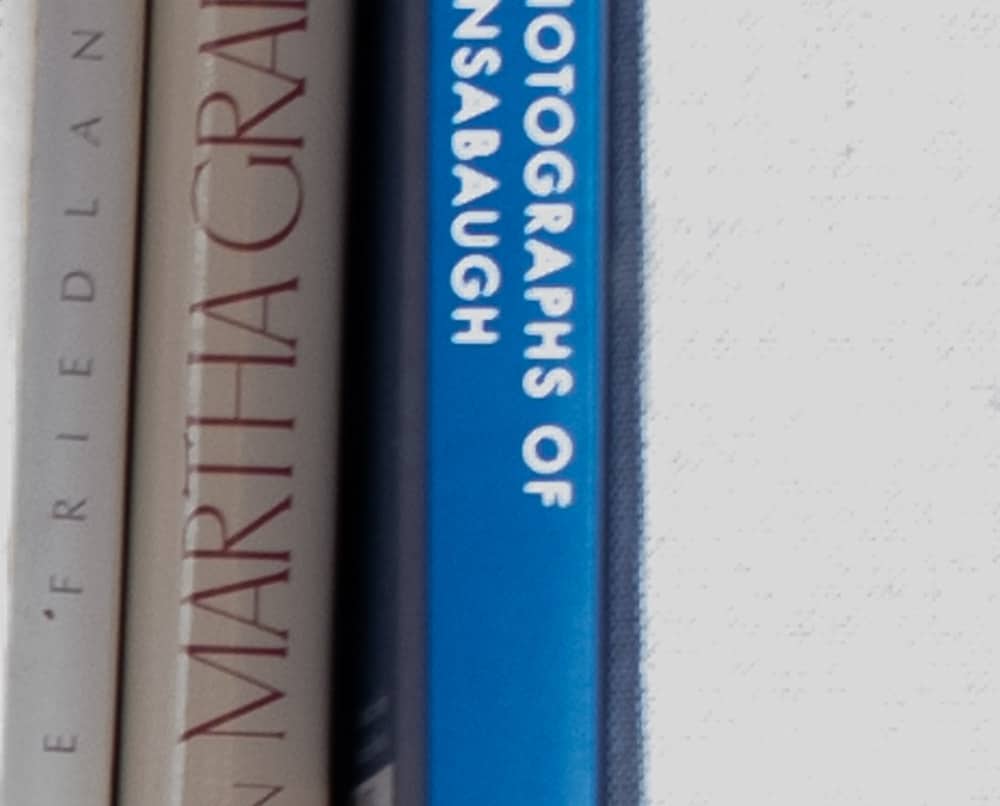
If we dial the Exposure slider back 1.33 stops, we get this histogram:
And this image:

This is pretty credible. We have lost some highlight separation because the tone curve has become flatter in the highlights, but the texture on the presentation case on the right looks good.
One more 1/3 stop higher in exposure, and dialing back Exposure the same amount to compensate:
Now we’re losing the texture. And we are loosing it even though the red and blue raw channels aren’t blown. I thought the Lightroom was supposed to be able in infer blown information by looking at the unblown channels.
Another third of a stop more in the camera and the same amount less in Lightroom:

We’ve lost more texture.
One more step:
Yuk.
LR is terrible at recovering highlights. Capture one blows it away in highlight and shadow recovery. In fact, that’s the main reason to use Capture one. Please test, difference is night and day.
Adobe has an article about Highlight Recovery: https://www.adobe.com/digitalimag/pdfs/highlight_recovery.pdf
I did a similar analysis for Leica M10 and M11 cameras, but I used highlight recovery on a slightly yellow wall. There is a point at which Lightroom can still recover detail, but the color changes noticeably.
For M11:
clipping starts at ETTR + 1/2 EV
detail fully recoverable up to ETTR+ 1 1/2 EV, but color changes
no detail recoverable at ETTR + 2
I also noticed that the number of stops that can be recovered after blowing highlights depends on the scene and light.
Good one Jim. Assuming a single channel is clipped after white balance, typically green, a highlight recovery algorithm is only going to be able to ‘recover’ from zero to log2(peak unclipped times wb multiplier divided by clipping)
For instance in frame 1224, assuming that the blown information is white and a 2x red wb multiplier, it would be able to recover at most, eyeballing it, log2(14*2/16) = 0.8EV
For instance in the image
that was ‘before’ white balance
RawTherapee has some pretty serious highlight reconstruction capabilities. For some reason though it doesn’t always do as well as in my photo editor Filmulator, even though I straight up copied the algorithm (open-source woo).
Might want to try it out, though it likely doesn’t have Z9 support yet.
Exceptionally we had some sunshine here in Hamburg yesterday so I took the opportunity to see if shooting at IS0 200 underexposed by two stops would give a larger dynamic range than shooting at 1600. In theory it should.
We have a white marble hand basin in the garden and I turned it upside down because the bottom side is not polished and has a lot of structure while still being quite white. The dark portion of the image was the soil and some dark green leaves. I put the display brightness to “Sunshine” so it was usable even with the 2 EV underexposure.
I liked the dynamic range of the post processed 200 exposures better than the 1600s, but I am biased as I generally underexpose, i.e. to avoid blown highlights especially when shooting portraits. But if we get some snow I will make an exception and refrain from underexposing.
What is your take on dynamic range improvement from underexposure?
It works, but you’ll give up on read noise if you drop below the ISO where the camera switches conversion gain and then push hard enough that the brightness is the same as if you’d used an ISO above where the conversion gain changes.
Thanks for the test, Jim. What’s the conclusion here? Should we be adjusting the White slider, or the tone curve, or the Highlights slider, rather than the Exposure slider? I should probably set up a step wedge and see what difference these alternatives make.
I like the way the Exposure slider works in general. It sort of simulates the shoulder of a film curve.